Key Takeaways
- Make authentic Thai peanut sauce in just 15 minutes with simple pantry ingredients
- Perfect balance of sweet, savory, and spicy flavors that works on everything from noodles to chicken
- Stores for up to 2 weeks in the fridge – make once, enjoy multiple meals
- Customizable heat level makes it family-friendly for all taste preferences
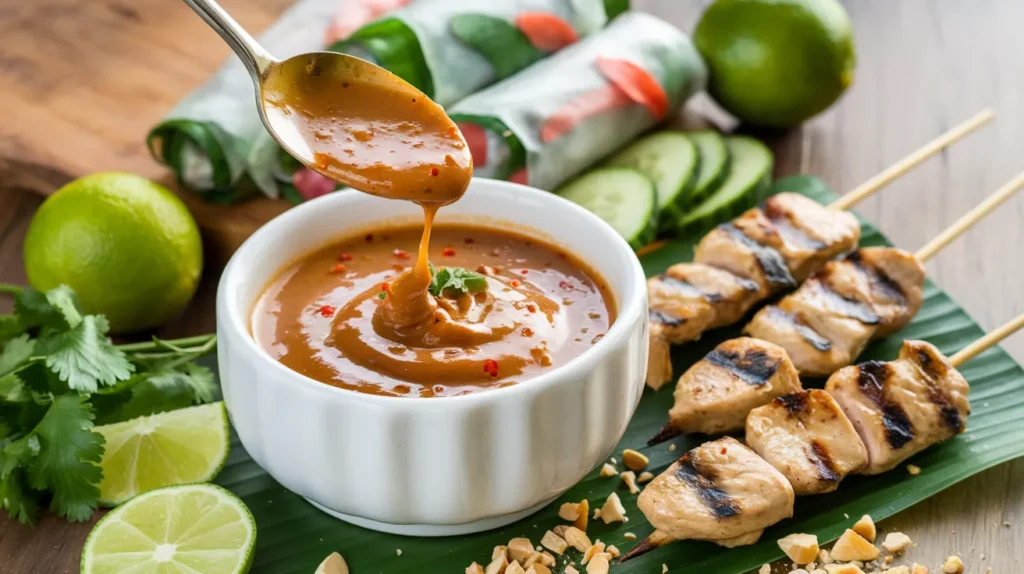
The Perfect Thai Peanut Sauce for Every Meal
Ever grabbed takeout just for that amazing peanut sauce? You’re not alone.
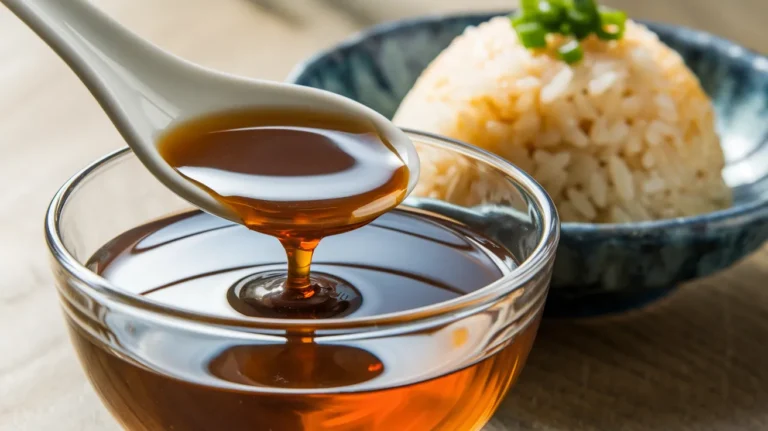
But here’s the good news: you can make restaurant-quality Thai peanut sauce at home in less time than it takes to order delivery. This recipe creates the perfect balance of creamy, sweet, tangy and spicy flavors that will turn even basic ingredients into something special. This sauce is one of my favorite Simple Asian Sauces to Elevate Your Dishes to keep in my refrigerator for quick meals.
With just 15 minutes and some basic pantry items, you’ll have a versatile sauce that works on everything from noodles to spring rolls to grilled chicken. And unlike store-bought versions, you control exactly what goes in – no preservatives or mystery ingredients.
Let’s make this Thai peanut sauce recipe together step by step, with all the measurements and instructions you need for perfect results every time.
Nutrition Comparison
| Nutrient | Homemade Thai Peanut Sauce (2 Tbsp) | Store-Bought Brand (2 Tbsp) |
|---|---|---|
| Calories | 120 | 160 |
| Fat | 9g | 13g |
| Sodium | 230mg | 350mg |
| Sugar | 4g | 7g |
| Protein | 5g | 3g |
| Cost | $0.60 per serving | $1.50 per serving |
What You’ll Need
Ingredients (Makes About 1 Cup – Perfect for 4 Servings)
| Ingredient | Amount | Notes |
|---|---|---|
| Creamy peanut butter | ½ cup | Natural, unsweetened works best |
| Coconut milk | ¼ cup | Full-fat provides the best texture |
| Soy sauce | 2 tablespoons | Low-sodium option available |
| Rice vinegar | 1 tablespoon | Adds tang without overpowering |
| Honey | 2 tablespoons | Adjust to taste for sweetness |
| Lime juice | 1 tablespoon | Fresh is always best |
| Garlic | 2 cloves, minced | About 1 teaspoon |
| Ginger | 1 teaspoon, grated | Fresh provides the best flavor |
| Red pepper flakes | ¼-½ teaspoon | Adjust based on heat preference |
| Warm water | 2-4 tablespoons | For adjusting consistency |
Kitchen Tools
| Tool | Purpose |
|---|---|
| Medium mixing bowl | Main mixing container |
| Whisk | For smooth blending |
| Measuring cups and spoons | For accurate measurements |
| Microplane or grater | For fresh ginger |
| Garlic press (optional) | For mincing garlic |
| Airtight container | For storage |
Possible Substitutions
- Peanut butter: Almond butter or sunbutter for peanut allergies (flavor will change slightly)
- Coconut milk: Heavy cream or plain yogurt thinned with a bit of water
- Soy sauce: Tamari (gluten-free) or coconut aminos (lower sodium)
- Honey: Maple syrup, brown sugar, or agave nectar
- Rice vinegar: Apple cider vinegar or white vinegar (use slightly less)
Super Detailed Step-by-Step Instructions for Beginners
Prep Time: 5 minutes
Cook Time: 10 minutes (if heating)
Total Time: 15 minutes
Serves: 4 people
Preparation Phase
- Gather all ingredients and tools
- Open your cupboards and refrigerator and take out all the ingredients listed above
- Place them on your counter in the order you’ll use them (liquids together, dry ingredients together)
- Find your measuring cups and spoons – you’ll need a ½ cup, ¼ cup, tablespoon, and teaspoon
- Get out a medium mixing bowl and a whisk
- Make sure you have a clean jar or container ready for storing the finished sauce
- Prepare fresh ingredients
- For the garlic: Peel 2 cloves of garlic
- To peel easily, place the flat side of a knife on the clove and press down firmly with your palm
- The skin will crack and you can remove it
- If you have a garlic press, press the peeled cloves
- If not, mince the garlic with a knife by cutting it into tiny pieces (about the size of grains of rice)
- For the ginger: Peel a small piece of fresh ginger
- Use the edge of a spoon to scrape off the skin (it’s easier than using a knife)
- Once peeled, use a microplane or the small holes of a box grater to grate 1 teaspoon
- If you don’t have a grater, mince the ginger as finely as possible with a knife
- For the lime: Roll a lime on the counter with your palm to make it juicier
- Cut it in half and squeeze 1 tablespoon of juice
- Remove any seeds that fall into the juice
- For the garlic: Peel 2 cloves of garlic
- Prepare your workspace
- Clear enough counter space to work comfortably
- If you plan to heat the sauce, make sure you have a small saucepan ready
- Have a rubber spatula handy for scraping the bowl
Mixing Phase
- Start with peanut butter base
- Measure ½ cup of peanut butter and add it to your mixing bowl
- Tip: Spray your measuring cup with cooking spray first so the peanut butter slides out easily
- Examine the peanut butter – if it’s very stiff, microwave it for 10-15 seconds to soften
- Measure ½ cup of peanut butter and add it to your mixing bowl
- Add coconut milk
- Shake the can of coconut milk vigorously before opening (coconut milk separates in the can)
- Open the can and measure ¼ cup of coconut milk
- Add it to the peanut butter in the bowl
- Take your whisk and begin mixing them together with firm, circular motions
- Keep whisking until the mixture is smooth and no streaks of peanut butter remain (this may take 1-2 minutes)
- The mixture should look pale brown and be somewhat thick
- Add liquid ingredients one by one
- Measure 2 tablespoons of soy sauce
- Pour it slowly into the bowl while whisking gently
- The mixture will darken slightly
- Measure 1 tablespoon of rice vinegar
- Add it to the bowl and whisk to incorporate
- Measure 2 tablespoons of honey
- If your honey is crystallized or thick, warm the measuring spoon under hot water first
- Add the honey to the bowl and whisk thoroughly
- Add the 1 tablespoon of fresh lime juice you prepared earlier
- Whisk after adding each ingredient until everything is well combined
- The sauce should now be glossy and smooth
- Measure 2 tablespoons of soy sauce
- Add aromatics and spices
- Add your 2 minced garlic cloves to the bowl
- Use a rubber spatula to scrape all the garlic from your cutting board
- Add the 1 teaspoon of grated ginger
- Again, scrape everything from your grater or cutting board into the bowl
- Measure ¼ teaspoon red pepper flakes
- For mild sauce, use just ¼ teaspoon
- For medium heat, use ⅜ teaspoon
- For spicy sauce, use ½ teaspoon
- Beginners tip: Start with less – you can always add more later!
- Whisk everything thoroughly for a full 30 seconds, making sure to reach all parts of the bowl
- The sauce should now be well-blended with tiny specks of garlic, ginger, and red pepper flakes visible throughout
- Add your 2 minced garlic cloves to the bowl
- Check and adjust consistency
- Look at your sauce – it should be thick but still able to drip slowly from the whisk
- If it’s too thick (like cookie dough or thick frosting):
- Add 1 tablespoon of warm water (not hot, just warm from the tap)
- Whisk well to incorporate
- Check consistency again
- Continue adding water 1 tablespoon at a time until the sauce reaches the right consistency
- The perfect consistency is like pancake batter or chocolate syrup – it should pour slowly but not be watery
- Tip: The sauce will thicken slightly as it cools, so it’s okay if it’s a tiny bit thinner than you want
Optional Heating Phase (Recommended for Beginners)
- Transfer and heat the sauce
- Find a small saucepan
- Use your rubber spatula to transfer all the sauce from the bowl to the saucepan
- Scrape the sides and bottom of the bowl to get everything
- Place the saucepan on your stove
- Turn the heat to medium-low (about 3-4 on a dial that goes to 10)
- Set a timer for 5 minutes
- While heating:
- Stir constantly with a wooden spoon or heat-safe spatula
- Move the spoon in a figure-8 pattern to prevent burning
- Watch for small bubbles forming around the edges – this is good!
- If large bubbles form in the middle, turn down the heat
- Important warning for beginners: Peanut butter burns easily and can go from perfect to ruined in seconds. Never stop stirring and never turn up the heat to rush the process.
- After 3-5 minutes, the sauce should be warm and fragrant with the garlic and ginger smells becoming stronger
- Remove from heat immediately once it’s warm and fragrant
- Cool the sauce slightly
- Let the sauce cool in the pan for 2-3 minutes, stirring occasionally
- The sauce will thicken slightly as it cools
Final Adjustments
- Taste and adjust seasonings
- Take a clean spoon and taste a small amount of the sauce
- Consider the following adjustments:
- Too bland? Add ½ teaspoon more soy sauce and stir
- Not sweet enough? Add ½ teaspoon more honey and stir
- Not tangy enough? Add a few more drops of lime juice
- Not spicy enough? Add a pinch more red pepper flakes
- Too thick? Add another tablespoon of warm water
- Too thin? If you heated the sauce, return it to low heat for 1-2 minutes to reduce
- Taste again after each adjustment before making another change
- Remember: It’s easier to add more of something than to fix an overpowering flavor!
- Transfer to storage container
- Let the sauce cool for 5-10 minutes if you heated it
- Use your rubber spatula to transfer the sauce to your clean storage container
- Put the lid on tightly
- Label with the date if you plan to store it for more than a few days
- Use immediately or refrigerate
- The sauce is ready to use right away as a dip, sauce, or marinade
- If not using immediately, refrigerate within 2 hours of making
How to Use Your Thai Peanut Sauce
- As a dipping sauce:
- Simply pour into a small bowl and serve alongside:
- Fresh spring rolls
- Grilled chicken skewers
- Raw vegetables
- Fried tofu
- Simply pour into a small bowl and serve alongside:
- As a noodle sauce:
- Cook 8 oz of rice noodles or spaghetti according to package directions
- Drain the noodles and return to the pot
- Add ½ cup of the peanut sauce
- Toss until noodles are evenly coated
- Add cooked chicken or tofu and vegetables if desired
- As a marinade:
- Place 1 pound of chicken, pork, or tofu in a zip-top bag
- Add ½ cup of peanut sauce
- Massage to coat evenly
- Refrigerate for at least 2 hours or overnight
- Grill, bake, or stir-fry as desired
Troubleshooting Common Issues
Sauce is Too Thick
- Problem: Sauce won’t pour or drizzle
- Solution: Add warm water 1 tablespoon at a time while whisking until desired consistency is reached
- What went wrong: This usually happens if your peanut butter was very thick or you didn’t add enough liquid
Sauce is Too Thin
- Problem: Sauce doesn’t cling to food
- Solution:
- Add 1 tablespoon more peanut butter and whisk thoroughly
- Or simmer gently on low heat for 2-3 minutes, stirring constantly
- What went wrong: You may have added too much liquid or used a very runny peanut butter
Sauce Separates
- Problem: Oil separating from other ingredients
- Solution:
- Whisk vigorously for 1-2 minutes
- Or use an immersion blender for 10-15 seconds
- If refrigerated, let it come to room temperature before whisking again
- What went wrong: This is normal with natural peanut butter and just needs re-mixing
Too Spicy
- Problem: Overwhelming heat level
- Solution:
- Add 1 tablespoon more coconut milk and 1 teaspoon more honey
- Stir well and taste again
- What went wrong: Added too many red pepper flakes – always start with less!
Not Enough Flavor
- Problem: Tastes bland
- Solution:
- Add ½ teaspoon more soy sauce for saltiness
- Add ¼ teaspoon more lime juice for tanginess
- Add a tiny pinch more ginger and garlic for aromatic flavor
- What went wrong: Measurements may have been slightly off or ingredients aren’t fresh
Bitter Taste
- Problem: Sauce has a bitter aftertaste
- Solution: Add ½ tablespoon more honey to balance the bitterness
- What went wrong: Garlic may have been old or ginger skin might have been included
Variations & Substitutions
Thai Red Curry Peanut Sauce
- Add 1 tablespoon Thai red curry paste when adding the garlic and ginger
- Reduce red pepper flakes to just a pinch to compensate for the curry paste’s heat
- Perfect for a more authentic Thai flavor profile
- For another authentic Thai option, try my Thai Tamarind Sauce which offers a different sweet-sour flavor profile
Extra Spicy Version
- Add 1 minced Thai bird chili or ½ teaspoon sriracha when adding red pepper flakes
- Balance with an extra ½ teaspoon honey
- Great for spice lovers
Lower Fat Option
- Use powdered peanut butter reconstituted with water (PB2) – follow package directions to make ½ cup
- Use light coconut milk instead of full-fat
- Add an extra 1 teaspoon of cornstarch if needed for thickness
Vegan Adaptation
- Replace honey with 2 tablespoons maple syrup or agave nectar
- Double-check that your peanut butter doesn’t contain honey
- Perfect for plant-based diets
Quick Version (When You’re Really in a Hurry)
- Use garlic powder (¼ teaspoon) instead of fresh garlic
- Use ground ginger (¼ teaspoon) instead of fresh ginger
- Still tasty but not quite as aromatic as the fresh version
Storage & Reheating
Refrigerator Storage
- Store in an airtight container for up to 2 weeks
- Glass containers work best for preventing staining and odor absorption
- Sauce will thicken when cold – this is completely normal
- Write the date on the container with a piece of tape
Freezer Storage
- Freeze in ice cube trays for convenient portions
- Fill each cube about ¾ full
- Cover with plastic wrap
- Freeze until solid (about 4 hours)
- Once frozen, transfer cubes to a labeled freezer bag
- Remove as much air as possible before sealing
- Keeps for up to 3 months
- Each cube is approximately 2 tablespoons
Reheating Instructions
- From refrigerator:
- Remove desired amount from refrigerator
- Let sit at room temperature for 10 minutes
- If still too thick, add a splash of warm water (start with 1 teaspoon)
- Microwave in 15-second intervals, stirring between each, until warm
- Be careful not to overheat as it can separate
- From freezer:
- Remove desired number of cubes
- Thaw in refrigerator overnight (best method)
- For quick thawing, place frozen cubes in a bowl and microwave on defrost setting for 1 minute
- Stir well after thawing and add 1-2 teaspoons of warm water if needed to restore consistency
Safety Notes & Tips
Food Safety
- Always wash hands thoroughly before beginning preparation
- Use clean utensils and cutting boards
- Refrigerate leftover sauce within 2 hours of making
- If sauce has been left out for more than 2 hours at room temperature, discard it
- If sauce develops an off smell, color, or mold, throw it away immediately
- Never double-dip when using as a dipping sauce – pour individual portions instead
Allergy Warnings
- Contains peanuts (main ingredient)
- Contains soy (from soy sauce)
- May contain tree nuts depending on your peanut butter brand
- For severe allergies, be aware of cross-contamination in your kitchen
- Always inform guests of these allergens when serving
Serving Tips
- Perfect pairings for this sauce:
- Drizzled over rice bowls with vegetables and protein
- As a dipping sauce for spring rolls or satay
- Tossed with noodles for a quick peanut noodle dish
- As a marinade for chicken or tofu (use at least 4 hours for best results)
- Spread thinly on wraps or sandwiches instead of mayo
- Pro tip for beginners: For a beautiful presentation, transfer sauce to a small serving bowl and garnish with:
- 1 teaspoon chopped cilantro
- 1 tablespoon sliced green onions
- 1 tablespoon crushed peanuts
- A small lime wedge on the side
- Pro tip for texture: If you like a bit of crunch, stir in 2 tablespoons of finely chopped peanuts just before serving