Prep Time: 15 minutes | Cook Time: 25 minutes | Total Time: 40 minutes | Servings: 4
- Perfectly charred chicken with a smoky spice crust creates flavor magic with creamy pasta
- Ready in just 40 minutes – faster than takeout and twice as good
- One-pan technique means less cleanup and more time enjoying your creation
- Customizable heat level lets everyone at your table enjoy their perfect spice balance
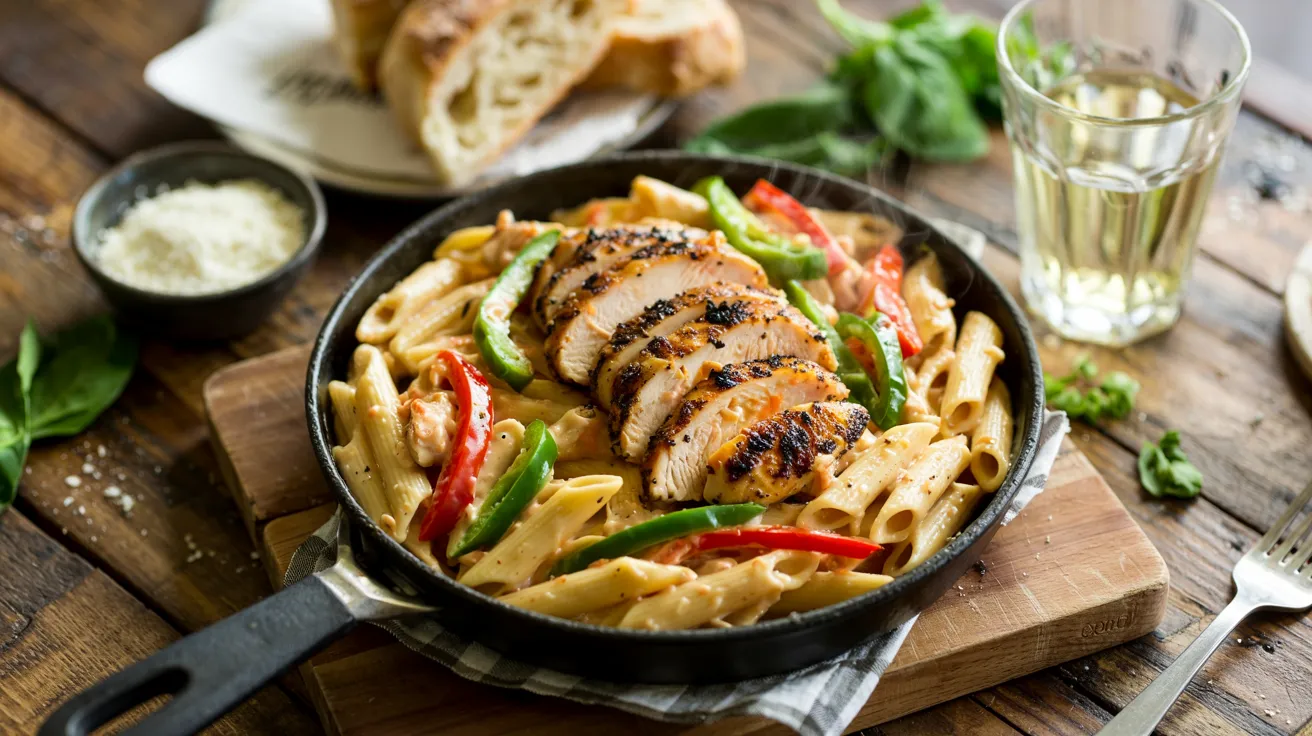
Why This Blackened Chicken Pasta Recipe Will Change Your Dinner Forever
Ever stood in your kitchen at 6 PM with no dinner plan? This Blackened Chicken Pasta recipe solves that problem with ingredients you likely have right now.
The secret to this Blackened Chicken Pasta lies in the perfect balance between smoky blackened chicken and creamy pasta. The contrast between the bold, spicy crust and the smooth, rich sauce creates a dinner that feels like restaurant quality without the wait or price tag.
This Blackened Chicken Pasta recipe transforms basic ingredients into something extraordinary. Best of all? It serves four people perfectly, making it ideal for family dinner or meal prep. If you enjoy pasta dishes with bold flavors, you might also love my Cajun Salmon Pasta which uses similar spice profiles.
Nutrition Facts
| Nutrient | Amount Per Serving |
|---|---|
| Calories | 520 |
| Protein | 38g |
| Carbohydrates | 42g |
| Fat | 22g |
| Fiber | 3g |
| Sodium | 680mg |
Values are approximate and may vary based on specific ingredients used.
What You’ll Need
Ingredients
| Ingredient | Amount | Notes |
|---|---|---|
| Boneless, skinless chicken breasts | 1½ pounds | About 3 medium breasts |
| Blackening seasoning | 2 tablespoons | Store-bought or homemade |
| Olive oil | 3 tablespoons | Divided |
| Butter | 2 tablespoons | Unsalted preferred |
| Garlic | 4 cloves | Minced |
| Bell peppers | 1 red, 1 green | Sliced into strips |
| Heavy cream | 1 cup | Room temperature |
| Chicken broth | ½ cup | Low sodium recommended |
| Parmesan cheese | ¾ cup | Freshly grated |
| Penne pasta | 12 ounces | About 4 cups dry |
| Fresh parsley | ¼ cup | Chopped, for garnish |
| Salt and pepper | To taste |
Kitchen Tools
| Tool | Purpose |
|---|---|
| Large skillet | For blackening chicken and making sauce |
| Large pot | For boiling pasta |
| Cutting board | For prep work |
| Sharp knife | For cutting chicken and vegetables |
| Measuring cups and spoons | For accurate measurements |
| Tongs | For flipping chicken |
| Wooden spoon | For stirring sauce |
| Colander | For draining pasta |
| Meat thermometer | For checking chicken doneness |
| Timer | To track cooking times |
Possible Substitutions
- Pasta: Swap penne for fettuccine, linguine, or any pasta shape you have
- Cream: Half-and-half works but makes a thinner sauce
- Chicken: Boneless thighs work great for more flavor and moisture
- Vegetables: Add mushrooms, onions, or zucchini if desired
- Dairy-free option: Use coconut cream instead of heavy cream
Step-By-Step Instructions
Preparation Phase
- Gather all ingredients
- Take everything out of the refrigerator and pantry
- Place all ingredients on your counter
- Let refrigerated items (especially heavy cream) come to room temperature for about 20 minutes
- WHY THIS MATTERS: Room temperature cream combines more smoothly and is less likely to curdle
- Prepare your workspace
- Clear and clean your countertop
- Set up a “raw chicken” area with a dedicated cutting board
- Set up a separate area for vegetable prep
- Have a small bowl ready for your measured spices
- TIP: Place a damp paper towel or kitchen towel under your cutting board to prevent slipping
- Measure your ingredients
- Use measuring spoons to portion out blackening seasoning
- Measure olive oil and set aside in a small bowl
- Measure heavy cream and chicken broth
- TIP: Measure all liquids at eye level on a flat surface for accuracy
- Prep the chicken
- Unwrap chicken breasts and pat completely dry with paper towels
- WHY THIS MATTERS: Moisture prevents proper blackening and creates steam instead of sear
- Place chicken on cutting board and look at the thickness
- If breasts are thicker than ½ inch, place your hand flat on top
- Carefully slice horizontally through the middle to create two thinner pieces
- CAUTION: Keep fingers away from the knife blade at all times
- Place chicken pieces between two sheets of plastic wrap
- Gently pound with the flat side of a meat tenderizer or heavy pan until even thickness
- TIP: Even thickness ensures even cooking
- Season the chicken
- Place chicken pieces on a plate
- Sprinkle half the blackening seasoning evenly over one side of all pieces
- Use your fingertips to gently press seasoning into the meat
- Flip pieces over and repeat on the other side
- TIP: For full flavor, make sure the entire surface is coated with seasoning
- Let chicken rest with seasoning for 5-10 minutes while you prep other ingredients
- WHY THIS MATTERS: This rest time helps seasoning adhere better
- Prep the vegetables
- Wash bell peppers under cold running water
- Pat dry with paper towels
- Place pepper on cutting board with stem facing up
- Cut straight down around the stem in four cuts, creating four panels
- Discard the core with seeds
- Stack pepper panels and slice into ¼-inch strips
- TIP: Keep strips uniform in size for even cooking
- Repeat with second pepper
- Place sliced peppers in a bowl and set aside
- Prep the garlic
- Place garlic cloves on cutting board
- Place wide side of knife blade flat on each clove
- Press down firmly with the heel of your hand to crush
- CAUTION: Keep fingers away from the knife edge
- Peel away loose skin
- Finely chop garlic into tiny pieces
- TIP: The smaller you chop, the more flavor will release
- Prep the cheese and herbs
- If using block Parmesan, grate it now using the small holes of a box grater
- TIP: Freshly grated cheese melts much better than pre-grated
- Wash parsley under cold water
- Pat dry with paper towels
- Remove leaves from stems
- Gather leaves into a tight bunch
- Slice through the bunch with a rocking motion to chop finely
- Set aside for garnish
- Start the pasta water
- Fill large pot ⅔ full with water (about 4 quarts)
- Add 1 tablespoon salt
- WHY THIS MATTERS: Heavily salted water flavors the pasta from the inside
- Place pot on stove over high heat
- Cover with lid to speed up boiling
- TIP: This will take about 8-10 minutes to come to a boil, so start this before cooking chicken
Cooking Phase
- Cook the chicken
- Place large skillet on stove over medium-high heat
- Add 2 tablespoons olive oil to skillet
- Allow oil to heat until it shimmers but doesn’t smoke (about 1-2 minutes)
- HOW TO CHECK: Tilt pan slightly to spread oil, look for rippling effect
- WARNING: Turn on range hood fan or open window as blackening creates smoke
- Using tongs, carefully place seasoned chicken pieces in skillet
- CAUTION: Place chicken away from you to avoid oil splatter
- Let chicken cook undisturbed for 4 minutes
- WHY THIS MATTERS: Moving too soon prevents proper crust formation
- Check underside – it should be dark and crusty
- Using tongs, carefully flip each piece
- Cook second side for 3-4 minutes
- TIP: Press down gently with tongs to ensure even contact with pan
- Use meat thermometer to check internal temperature
- SAFETY NOTE: Chicken must reach 165°F in thickest part
- Once done, transfer chicken to clean plate
- Loosely tent with foil to keep warm
- TIP: Let chicken rest at least 5 minutes before slicing to retain juices
- Cook the pasta
- Once water is at a rolling boil (large bubbles breaking the surface)
- Add pasta to pot
- Immediately stir with wooden spoon to prevent sticking
- Set timer for 8 minutes (or 1 minute less than package directions)
- WHY THIS MATTERS: Slightly undercooked pasta will finish in the sauce
- Stir occasionally while cooking
- About 1 minute before pasta is done, scoop out ½ cup of pasta water
- TIP: The starchy water helps thicken and bind the sauce
- Pour pasta water into a measuring cup and set aside
- Test pasta by taking one piece out, running under cold water, and tasting
- It should be slightly firm in center (al dente)
- Place colander in sink
- Carefully pour pasta into colander to drain
- CAUTION: Steam is hot! Pour away from your face and body
- Do not rinse pasta
- WHY THIS MATTERS: Starch on pasta helps sauce adhere
- Slice the chicken
- After chicken has rested, transfer to cutting board
- Using sharp knife, slice chicken across the grain into ½-inch strips
- HOW TO TELL: Look for lines in the meat and cut perpendicular to them
- TIP: Cutting against the grain makes each bite more tender
- Set sliced chicken aside, keeping foil tent on to stay warm
- Make the sauce
- Return the same skillet used for chicken to stove
- Set heat to medium
- Add remaining 1 tablespoon olive oil and 2 tablespoons butter
- When butter has melted completely (about 30 seconds)
- Add sliced bell peppers
- Stir with wooden spoon to coat in oil-butter mixture
- Cook for 3-4 minutes until peppers begin to soften
- HOW TO TELL: Peppers will become slightly translucent at edges
- Add minced garlic to pan
- CAUTION: Garlic burns easily! Watch closely
- Stir constantly for exactly 30 seconds until fragrant
- TIP: If garlic starts to brown too quickly, reduce heat immediately
- Pour in ½ cup chicken broth
- CAUTION: Liquid will sizzle and steam when added to hot pan
- Use wooden spoon to scrape bottom of pan
- WHY THIS MATTERS: This releases browned bits (fond) which add flavor
- Allow broth to simmer for 1 minute, reducing slightly
- Slowly pour in heavy cream while stirring
- Bring mixture to a gentle simmer (small bubbles around edge of pan)
- CAUTION: Don’t let cream boil or it may curdle
- Reduce heat to medium-low if needed
- Let sauce simmer gently for 2 minutes, stirring occasionally
- Gradually add grated Parmesan cheese, handful by handful
- Stir constantly while adding cheese to ensure smooth melting
- TIP: If sauce seems too thick, add reserved pasta water, 1 tablespoon at a time
- Taste sauce and adjust seasoning with salt and pepper if needed
- Combine components
- Add drained pasta directly to sauce in skillet
- Using tongs or two wooden spoons, gently toss pasta to coat completely
- TIP: Lift and fold pasta rather than stirring to avoid breaking
- Add three-quarters of the sliced chicken
- Gently fold chicken into pasta mixture
- WHY THIS MATTERS: Saving some chicken for topping makes for better presentation
- Let everything heat together for 1-2 minutes
- If sauce becomes too thick, add a splash of reserved pasta water
- HOW TO CHECK: Sauce should coat pasta but still flow slightly when pan is tilted
Finishing Phase
- Serve the dish
- Warm serving plates or bowls if possible
- TIP: Run under hot water and dry quickly or place in 200°F oven for 2 minutes
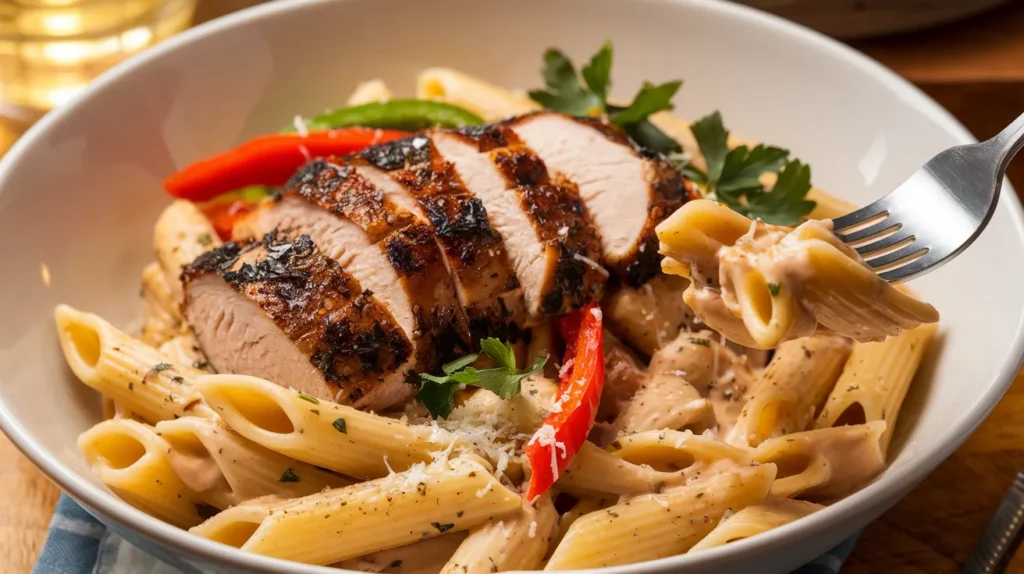
- Divide pasta mixture evenly among four plates or bowls
- Top each serving with remaining sliced chicken
- Sprinkle each portion with fresh chopped parsley
- Offer extra grated Parmesan at the table
- TIP: For restaurant presentation, place pasta first, arrange sliced chicken on top, then garnish
- Final touches
- For extra flavor, add a light drizzle of good olive oil over each portion
- Consider a wedge of lemon on the side for brightness
- Serve immediately while hot
- TIP: Warm crusty bread makes a perfect accompaniment for this Blackened Chicken Pasta
Troubleshooting
Common Problems and Solutions
- Chicken too dry:
- Problem: Internal temperature exceeded 165°F
- Solution: Use a meat thermometer next time or try chicken thighs instead
- Quick fix: Drizzle with extra sauce or a touch of olive oil
- Chicken not blackened enough:
- Problem: Pan wasn’t hot enough or chicken was too wet
- Solution: Make sure pan is properly preheated and pat chicken very dry
- Quick fix: Add a pinch of paprika to darken color
- Sauce too thin:
- Problem: Not simmered long enough
- Solution: Simmer for a few more minutes to reduce
- Quick fix: Mix 1 teaspoon cornstarch with 1 tablespoon cold water, stir into sauce
- Sauce too thick:
- Problem: Reduced too much or too much cheese
- Solution: Add more pasta water or chicken broth, 1 tablespoon at a time
- Quick fix: A splash of milk or cream will thin it out
- Too spicy:
- Problem: Too much blackening seasoning
- Solution: Balance with more cream or a squeeze of lemon juice
- Quick fix: Serve with a dollop of sour cream
- Not spicy enough:
- Problem: Mild seasoning or too little used
- Solution: Add a pinch of cayenne or red pepper flakes
- Quick fix: Offer hot sauce at the table
- Pasta sticking together:
- Problem: Not stirred soon enough after adding to water
- Solution: Always stir pasta within first minute of cooking
- Quick fix: Rinse briefly with hot water before adding to sauce
- Garlic burned:
- Problem: Pan too hot or cooked too long
- Solution: Lower heat before adding garlic and watch carefully
- Quick fix: Remove burned pieces if possible; if whole sauce tastes burned, start sauce over
- Cheese clumping:
- Problem: Added too quickly or sauce too hot
- Solution: Remove from heat and add cheese gradually while stirring
- Quick fix: Whisk vigorously to break up clumps
Variations to Try
Make It Your Own
- Cajun Style
- Add ½ pound sliced Andouille sausage with the chicken
- Include ½ cup diced tomatoes and ¼ cup diced onions
- Sprinkle with sliced green onions before serving
- TIP: Brown sausage first, then remove and cook chicken in the same pan
- Primavera Version
- Double the vegetables
- Add 1 cup broccoli florets, ½ cup sliced zucchini, and ½ cup halved cherry tomatoes
- Cook broccoli and zucchini with bell peppers
- Add tomatoes during the last minute of cooking
- Finish with a squeeze of lemon and 1 teaspoon lemon zest
- Lighter Option
- Use milk instead of cream (2% or whole milk works best)
- Reduce cheese to ⅓ cup
- Increase vegetables to 3 cups total
- Reduce pasta to 8 ounces
- TIP: If using milk, stabilize the sauce by whisking 1 teaspoon flour into the milk before adding
- Seafood Twist
- Replace chicken with 1 pound large shrimp (peeled and deveined) or sea scallops
- Add 1 teaspoon Old Bay seasoning to blackening mix
- Cook seafood just 2 minutes per side (until pink for shrimp or opaque for scallops)
- Finish with 1 tablespoon lemon zest and 2 tablespoons chopped fresh dill
- CAUTION: Seafood cooks much faster than chicken – watch carefully!
If you enjoy pasta with chicken, my Chicken Aubergine Pasta offers a completely different flavor profile that’s equally delicious.
Storage & Reheating
Keep It Fresh
- Refrigeration:
- Allow leftovers to cool completely (no more than 1 hour)
- Transfer to airtight containers
- Store in refrigerator for up to 3 days
- TIP: Store pasta and chicken together with sauce for best flavor melding
- Freezing:
- Not recommended as cream sauce may separate and pasta will become mushy
- If you must freeze, store in airtight containers up to 1 month
- TIP: If freezing, slightly undercook pasta to prevent mushiness when reheated
- Reheating in Microwave:
- Place portion in microwave-safe bowl
- Add 1 tablespoon milk or broth per cup of pasta
- Cover with microwave-safe lid or damp paper towel
- Heat at 50% power for 1 minute
- Stir thoroughly
- Continue heating in 30-second intervals at 50% power, stirring between each
- WHY THIS MATTERS: Low power prevents sauce separation and overheating
- Reheating on Stovetop:
- Place in skillet over low heat
- Add 1-2 tablespoons milk, cream, or broth per cup of pasta
- Cover with lid
- Warm gently, stirring occasionally
- Heat until just warmed through (about 5-7 minutes)
- TIP: Add a sprinkle of fresh Parmesan after reheating for renewed flavor
Safety Notes & Pro Tips
Safety First
- Food Safety:
- Chicken must reach 165°F internal temperature
- Use separate cutting board for raw chicken
- Wash hands with soap for 20 seconds after handling raw chicken
- Don’t reuse utensils that touched raw chicken without washing
- Refrigerate leftovers within 1 hour in summer, 2 hours in winter
- Kitchen Safety:
- Use oven mitts when handling hot pots and pans
- Keep pan handles turned inward on stove to prevent bumping
- Have a lid nearby when blackening chicken to smother potential flare-ups
- Keep a fire extinguisher accessible but away from cooking area
- Allergies:
- Contains dairy (butter, cream, cheese)
- May contain gluten (pasta)
- For gluten-free version, use certified gluten-free pasta
- For dairy-free version, substitute coconut cream and dairy-free butter
Pro Tips
- For deeper flavor:
- Marinate chicken in 1 tablespoon oil and spices for 30 minutes before cooking
- Toast spices in dry skillet for 30 seconds before adding to chicken
- Use half chicken stock and half white wine instead of all stock
- For perfect blackening:
- Cast iron skillet works best but isn’t required
- Don’t overcrowd the pan – cook in batches if needed
- The darker the crust (without burning), the more flavor
- Make ahead options:
- Blacken chicken up to a day ahead, then refrigerate
- Slice peppers and garlic up to a day ahead
- Make complete dish up to 2 hours ahead and keep warm in 200°F oven
- TIP: Add a splash of cream before serving if made ahead
- For restaurant presentation:
- Serve pasta in shallow bowl
- Arrange sliced chicken on top in fan pattern
- Drizzle a little sauce over chicken
- Garnish with microgreens or herb sprigs in addition to parsley
- The secret to silky sauce:
- Remove cream from refrigerator 20-30 minutes before using
- Always add cheese off heat or on very low heat
- Use freshly grated cheese, never pre-grated (contains anti-caking agents)
- Reserve more pasta water than you think you’ll need – it’s your sauce adjuster
Looking for a similar creamy pasta experience with a different flavor profile? Try my Garlic Chilli Cacio e Pepe for a simpler but equally impressive meal.