Key Takeaways:
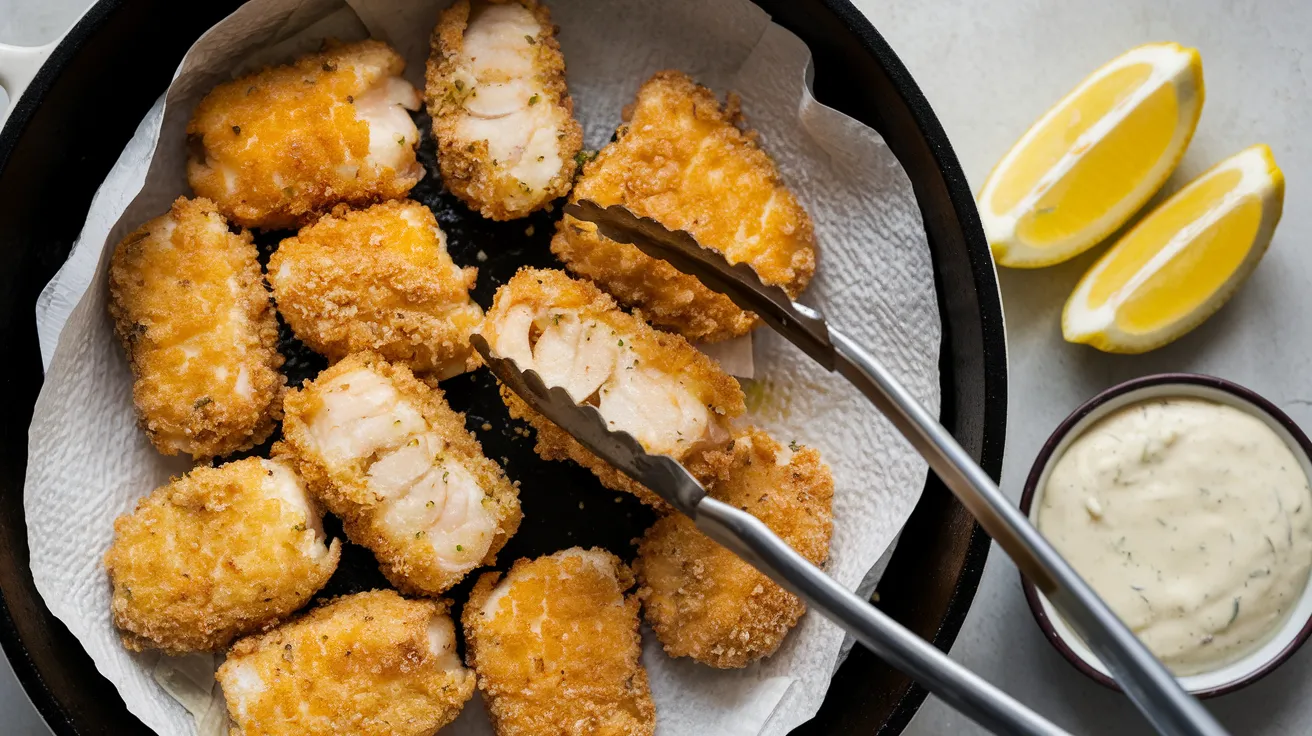
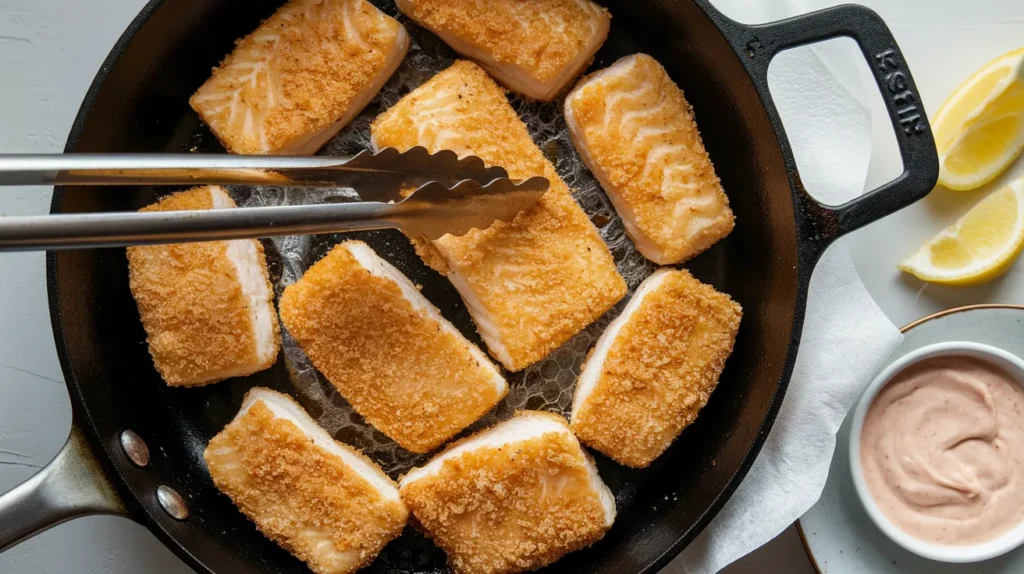
- These golden, crispy homemade fish nuggets use a double-coating technique for maximum crunch
- Perfect for picky eaters – kids love these more than store-bought versions
- Ready in just 20 minutes with simple pantry ingredients
- Healthier than frozen alternatives with 40% less sodium
Why Make Your Own Homemade Fish Nuggets?
Store-bought fish nuggets often contain mystery ingredients and excess salt. But what if you could make them better at home?
These homemade fish nuggets deliver restaurant-quality crunch with ingredients you can actually pronounce. They cook up in just 20 minutes and will win over even the pickiest eaters at your table.
Let’s make fish night something everyone actually looks forward to! If you’re already a fan of seafood dishes, you might also enjoy my Super Crispy Fish and Chips for another family-friendly option.
Nutrition Facts (per serving)
| Homemade Fish Nuggets | Store-Bought Frozen Nuggets | |
|---|---|---|
| Calories | 285 | 320 |
| Protein | 22g | 14g |
| Fat | 12g | 18g |
| Carbs | 18g | 24g |
| Sodium | 310mg | 520mg |
| Cost | $2.75/serving | $3.50/serving |
What You’ll Need For Homemade Fish Nuggets
Ingredients (Serves 4)
| Ingredient | Amount | Notes |
|---|---|---|
| White fish fillets (cod, tilapia, or haddock) | 1½ pounds | Firm, mild-flavored fish works best |
| All-purpose flour | ½ cup | For first coating |
| Eggs | 2 large | Beaten |
| Panko breadcrumbs | 1½ cups | For extra crunch |
| Salt | 1 teaspoon | Divided |
| Black pepper | ½ teaspoon | |
| Garlic powder | 1 teaspoon | |
| Paprika | ½ teaspoon | Adds color and mild flavor |
| Lemon | 1 whole | For serving |
| Vegetable oil | ⅓ cup | For pan-frying |
| Tartar sauce | ½ cup | For serving (optional) |
Equipment Needed
| Tool | Purpose |
|---|---|
| Cutting board | For prepping fish |
| Sharp knife | For cutting fish into nugget shapes |
| 3 shallow bowls | For breading station |
| Large skillet | For frying nuggets |
| Paper towels | For draining excess oil |
| Cooking thermometer (optional) | To check oil temperature |
| Tongs | For flipping nuggets |
Substitution Options
- Gluten-Free: Use gluten-free flour and breadcrumbs
- Egg Allergy: Replace eggs with ¼ cup buttermilk or yogurt
- Panko Alternative: Regular breadcrumbs work but won’t be as crispy
- Air Fryer Option: Spray with oil and cook at 400°F for 8 minutes
Time Breakdown
- Prep Time: 10 minutes
- Cook Time: 10 minutes
- Total Time: 20 minutes
Detailed Step-by-Step Instructions for Homemade Fish Nuggets
Preparation Phase
- Gather all ingredients
- Before starting, make sure you have all ingredients measured and ready
- Check that your fish is fresh – it should smell mild like the ocean, not “fishy”
- Remove any packaging and place fish on a clean cutting board
- Take out 3 shallow bowls (like soup bowls or pie plates) for your breading station
- Prepare your fish
- Carefully inspect the fish for any remaining bones by running your fingers gently over the surface
- If you find bones, remove them with clean tweezers or needle-nose pliers
- Pat fish fillets dry with paper towels (this is VERY important – wet fish won’t coat properly)
- Place the dried fillets on your cutting board
- Using a sharp knife, cut fish into 1½-inch squares or rectangles (about the size of a postage stamp)
- Try to make pieces similar in size so they’ll cook evenly
- If some pieces are thicker, you can gently press them flatter with your palm
- Set up your breading station
- Place your 3 shallow bowls in a row on your counter
- First bowl: Add ½ cup flour, ½ teaspoon salt, and ¼ teaspoon pepper
- Whisk these dry ingredients together with a fork until well combined
- Second bowl: Crack 2 eggs and discard shells
- Beat eggs with fork until no streaks of clear egg white remain (about 30 seconds)
- Third bowl: Add 1½ cups panko breadcrumbs, remaining ½ teaspoon salt, 1 teaspoon garlic powder, and ½ teaspoon paprika
- Mix breadcrumb mixture with fork until spices are evenly distributed
- TIP: Place a sheet of parchment paper or foil under your bowls for easy cleanup
- Prepare your cooking area
- Line a large plate with 2-3 layers of paper towels for draining nuggets
- Place this plate near your stove, but not too close to the burner
- Have a clean plate or baking sheet ready for your coated (but not yet cooked) nuggets
- Cut lemon into 6-8 wedges using a knife and cutting board
- Place lemon wedges on a small plate for serving later
- If using tartar sauce, portion ½ cup into a small serving bowl
Coating and Cooking Your Homemade Fish Nuggets
- Coat your hands and prepare for breading
- Designate one hand as your “dry hand” and one as your “wet hand”
- Your dry hand will handle flour and breadcrumbs
- Your wet hand will handle raw fish and eggs
- This prevents breading from building up on your fingers
- SAFETY TIP: Wash hands thoroughly with soap before and after handling raw fish
- Bread the fish nuggets (in small batches of 4-5 pieces)
- Using your “wet hand,” pick up a piece of fish
- Place it in the flour bowl and use your “dry hand” to gently coat all sides
- Lift the floured piece and shake off any excess flour
- Using your “dry hand,” transfer to egg bowl
- Switch to your “wet hand” to flip and fully coat with egg
- Let excess egg drip off for 2-3 seconds
- Transfer to breadcrumb bowl
- Using your “dry hand,” scoop breadcrumbs over top and press gently to adhere
- Flip and coat all sides, pressing crumbs firmly onto fish
- Place breaded nugget on the clean plate
- Repeat with remaining fish pieces
- IMPORTANT: If your hands get too messy, stop and wash them before continuing
- Heat your oil properly
- Select a large skillet or frying pan (10-12 inches is ideal)
- Add vegetable oil to skillet – it should be about ¼ inch deep
- Place pan on burner and turn heat to medium-high
- Allow oil to heat for 3-4 minutes
- Test if oil is ready: Sprinkle a few breadcrumbs into the oil – they should sizzle immediately and float
- If breadcrumbs sink or don’t sizzle, oil isn’t hot enough yet
- If breadcrumbs immediately turn dark brown, oil is too hot – lower heat slightly
- SAFETY TIP: Never leave heating oil unattended, and keep a lid nearby to cover pan in case of flare-ups
- Fry the nuggets (first batch)
- Once oil is hot, use tongs to carefully place nuggets in the pan
- Start by adding just 4-5 nuggets with space between them
- Listen for a steady sizzle – this is what you want
- If oil is popping too much, slightly lower heat
- Set a timer for 2 minutes and don’t disturb nuggets during this time
- LOOK FOR: Edges turning golden brown before flipping
- Flip and finish cooking first batch
- After 2 minutes, use tongs to peek at the bottom of one nugget
- If golden brown, gently flip each nugget over
- If not brown enough, cook 30 seconds more before flipping
- Cook another 2 minutes on second side until golden brown
- CHECK DONENESS: Fish should be opaque and flake easily when tested with a fork
- Internal temperature should reach 145°F if using thermometer
- Using tongs, transfer cooked nuggets to paper towel-lined plate
- Immediately sprinkle with a tiny pinch of salt while hot
- Cook remaining batches
- Allow oil to reheat for 30 seconds between batches
- Repeat steps 8-9 with remaining fish nuggets
- Adjust heat as needed if nuggets are browning too quickly or slowly
- TIP: If oil becomes dark or contains too many loose crumbs, carefully discard and replace with fresh oil
- Transfer finished nuggets to serving plate after draining
- Serve immediately
- Arrange nuggets on serving plate with lemon wedges
- Place tartar sauce on the side if using
- BEST ENJOYED: Within 5 minutes of cooking while still hot and crispy
- For a complete meal, consider serving with my Corn and Fish Maw Soup as a starter
Troubleshooting Your Homemade Fish Nuggets
| Problem | Cause | Solution |
|---|---|---|
| Breading falls off | Fish too wet or oil not hot enough | Pat fish very dry; ensure oil is properly heated |
| Nuggets too dark | Oil too hot | Lower heat; watch cooking time |
| Soggy, not crispy | Overcrowding the pan | Cook in smaller batches; don’t stack nuggets |
| Undercooked inside | Nuggets too thick | Cut fish into smaller, even pieces |
| Bland flavor | Insufficient seasoning | Season each layer – fish, flour, and breadcrumbs |
Variations & Substitutions
Flavor Boosters
- Add 2 tablespoons grated Parmesan to breadcrumbs
- Mix ½ teaspoon dried herbs (dill, parsley, thyme) into panko
- Add ¼ teaspoon cayenne for a spicy kick
- For a Mexican-inspired twist, try the flavors from my Easy Fish Tostadas with Crema recipe
Coating Alternatives
- Try crushed cornflakes or potato chips for extra crunch
- Coconut flakes make a sweet tropical version
- Crushed pretzels add a salty twist
Fish Options
- Salmon works for a richer flavor profile
- Shrimp can be substituted (reduce cooking time to 1-2 minutes per side)
- For a vegetarian version, try firm tofu cut into nugget shapes
Storage & Reheating Homemade Fish Nuggets
Refrigeration
- Store leftovers in airtight container for up to 2 days
- Line container with paper towel to absorb moisture
Freezing
- Freeze cooked nuggets in single layer on baking sheet
- Once frozen, transfer to freezer bag (up to 1 month)
- Label with date and contents
Reheating Methods
- Oven: 375°F for 8-10 minutes until crispy and heated through
- Air Fryer: 375°F for 3-4 minutes
- Avoid microwave – nuggets will become soggy
Safety Notes & Tips
Food Safety
- Fish should reach internal temperature of 145°F
- Don’t reuse raw fish marinade or breading
- Wash hands thoroughly after handling raw fish
Oil Safety
- Never leave hot oil unattended
- Keep a lid nearby to smother potential flames
- Don’t pour used oil down the drain – cool and discard in trash or recycle
Pro Tips
- Double-coating trick: For extra crispy homemade fish nuggets, repeat the egg and breadcrumb steps
- Cut test piece in half before removing batch from oil to check doneness
- Serve immediately for maximum crispness
- These pair wonderfully with roasted sweet potato fries and coleslaw
These homemade fish nuggets make fish night something to look forward to! With their perfect crunch and tender interior, they’re miles better than anything from the freezer section. The best part? You control the ingredients, making this a healthier option your whole family will love.