Key Takeaways:
- Quick prep – This homemade Heinz Thai Chili Sauce takes just 20 minutes to make
- Pantry staples – Uses simple ingredients you likely already have
- Customizable heat – Adjust the spice level to your preference
- Fresher taste – Less preservatives than store-bought versions
Missing That Sweet-Spicy Kick? Make Your Own!
Can’t find Heinz Thai Chili Sauce at your local store? Don’t worry! This homemade version delivers that perfect balance of sweet, tangy, and spicy flavors that makes the original sauce so addictive.
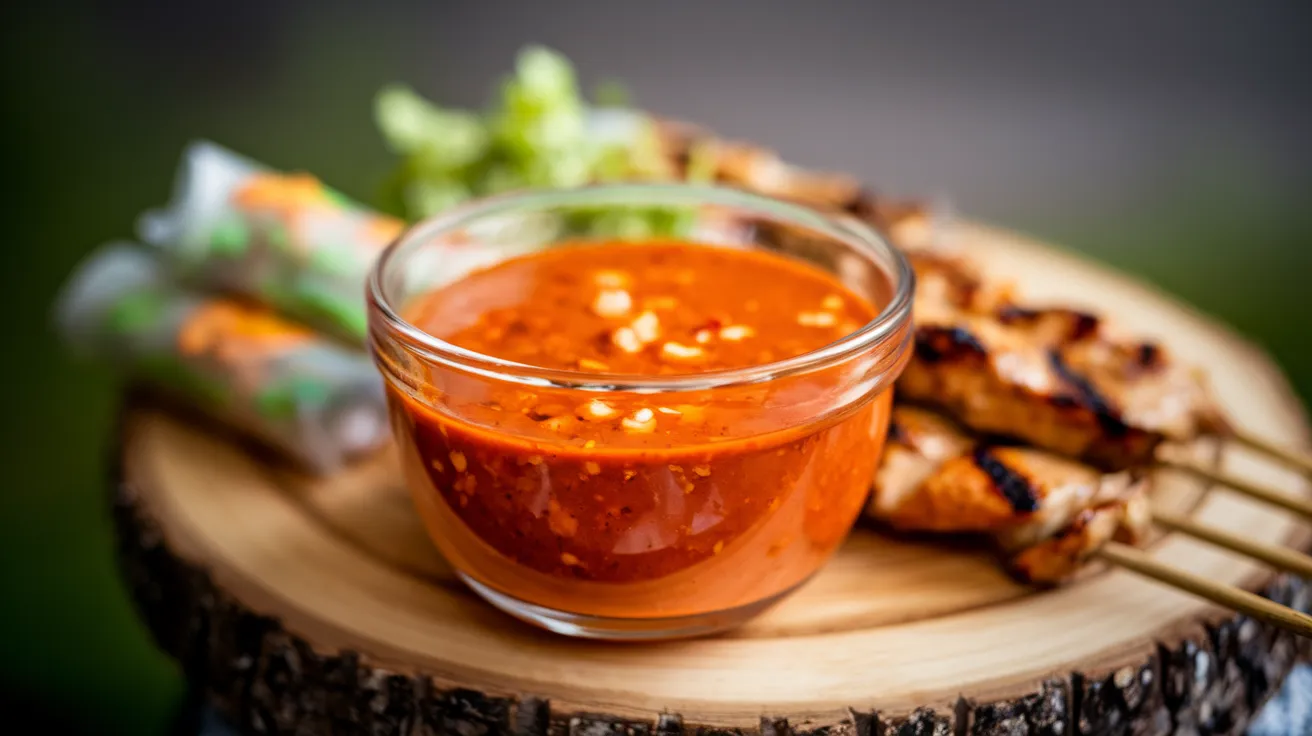
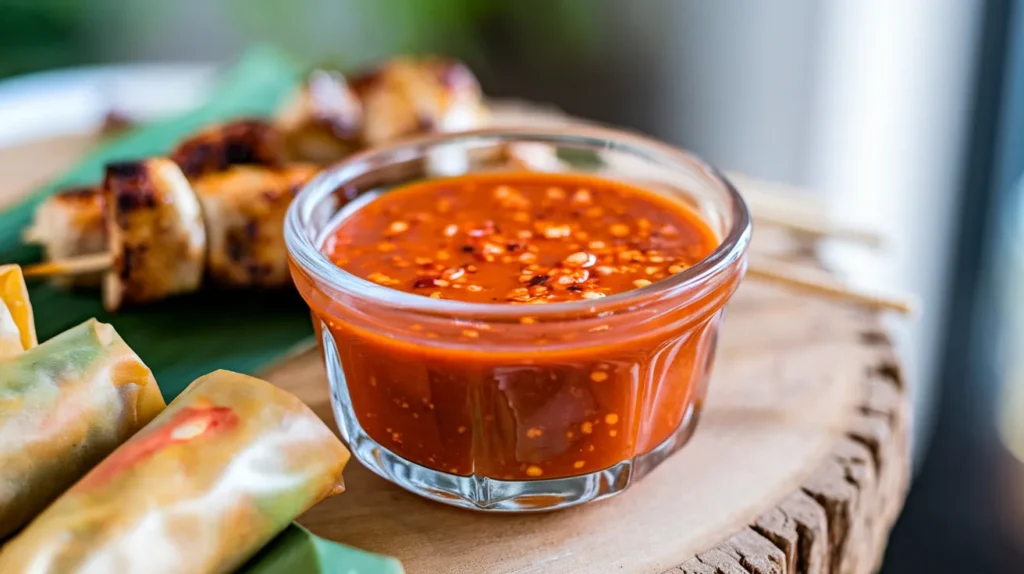
You’ll create this Heinz Thai Chili Sauce recipe using fresh ingredients in just 20 minutes. The result? A vibrant dipping sauce that works with everything from spring rolls to grilled chicken.
Let’s make a batch that serves 4 people generously!
Nutrition Comparison
| Nutrient | Homemade Version (per 2 Tbsp) | Store-Bought (per 2 Tbsp) |
|---|---|---|
| Calories | 35 | 45 |
| Sugar | 6g | 9g |
| Sodium | 230mg | 320mg |
| Fat | 0g | 0g |
| Carbs | 8g | 11g |
What You’ll Need
Ingredients
| Ingredient | Amount | Purpose |
|---|---|---|
| Red chili peppers (fresh) | 6-8 medium | Heat and flavor base |
| Sugar | ⅓ cup | Sweetness |
| Rice vinegar | ¼ cup | Tanginess |
| Water | ½ cup | Consistency |
| Garlic | 3 cloves, minced | Aromatic base |
| Fresh ginger | 1 Tbsp, grated | Warmth and depth |
| Tomato paste | 2 Tbsp | Body and color |
| Salt | 1 tsp | Flavor enhancer |
| Cornstarch | 1 Tbsp | Thickening agent |
| Cold water (for cornstarch) | 2 Tbsp | Creates slurry |
Kitchen Tools
| Tool | Purpose |
|---|---|
| Blender or food processor | Pureeing chilies |
| Medium saucepan | Cooking the sauce |
| Measuring cups/spoons | Accurate measurements |
| Wooden spoon | Stirring |
| Fine mesh strainer | Straining sauce (optional) |
| Glass jars | Storage |
| Rubber gloves | Handling chilies |
Substitutions
- Red chili peppers: Substitute with 2-3 Tbsp of red pepper flakes or 2-3 Tbsp of sambal oelek (try my homemade chili seasoning recipe for a perfect blend)
- Rice vinegar: White vinegar or apple cider vinegar work in a pinch
- Fresh ginger: ½ tsp ground ginger
- Sugar: Brown sugar or honey (reduces sauce’s brightness but adds depth)
Prep Time & Planning
- Prep time: 5 minutes
- Cook time: 15 minutes
- Total time: 20 minutes
- Yield: 1 cup (serves 4)
Step-by-Step Instructions
Preparation Phase
- Gather all ingredients and tools:
- Place all ingredients on your counter
- Make sure all measuring spoons and cups are clean and ready
- Check that your blender or food processor is assembled properly
- Have a clean kitchen towel nearby for any spills
- Beginner tip: Measuring all ingredients before you start cooking (called “mise en place”) will make the process much smoother
- Safety preparation:
- Put on rubber gloves before handling chilies
- Place newspaper or paper towels on your cutting surface if needed
- Open a window or turn on a fan for ventilation
- Keep a sink full of soapy water for tools that touch the chilies
- Beginner warning: Chili oils can remain on skin for hours and can cause serious pain if they get in your eyes! Always wear gloves.
- Prepare the chilies:
- Wash chilies under cold running water
- Place chilies on cutting board
- Hold each chili steady with one hand (with gloves!)
- Using a sharp knife, cut off the stem end of each chili
- Slice chilies lengthwise down the middle
- If you want less heat, use the tip of your knife to scrape out the seeds and white membranes (this is where most of the heat resides)
- Roughly chop chilies into ¼-inch pieces
- Beginner tip: Removing all seeds and membranes can reduce heat by up to 70%
- Prepare the garlic:
- Place garlic cloves on cutting board
- With the flat side of your knife, press down firmly on each clove to crush it slightly
- This makes the peel easier to remove
- Remove all peels and discard
- Chop garlic into very small pieces (about the size of a grain of rice)
- Beginner tip: If pieces are uneven in size, the larger ones may not cook properly and could taste raw in the finished sauce
- Prepare the ginger:
- Using a spoon, scrape the skin off the ginger (a spoon works better than a peeler for ginger’s bumpy surface)
- Once peeled, use the fine side of a grater to grate the ginger
- Measure out 1 tablespoon of the grated ginger
- Beginner tip: Freeze ginger for 10 minutes before grating to make it easier to handle
- Measure remaining ingredients:
- Use individual small bowls to measure:
- ⅓ cup sugar
- ¼ cup rice vinegar
- ½ cup water
- 2 tablespoons tomato paste
- 1 teaspoon salt
- Having everything pre-measured prevents mistakes when cooking
- Beginner tip: For sticky ingredients like tomato paste, spray your measuring spoon with a tiny bit of cooking spray first
- Use individual small bowls to measure:
Assembly Steps
- Blend the chilies, garlic, and ginger:
- Place prepared chilies, minced garlic, and grated ginger in blender
- Secure blender lid completely (very important to avoid spills)
- Pulse 8-10 times, stopping to scrape down sides with a spatula as needed
- Continue until mixture is finely chopped but still has some texture
- Mixture should look like a rough paste, not completely smooth
- Beginner tip: If you don’t have a blender, you can finely mince everything with a knife, but wear gloves and take your time
- Create cornstarch slurry:
- Take a small bowl
- Add 1 tablespoon cornstarch
- Add 2 tablespoons cold water (must be cold!)
- Stir with a fork or small whisk until completely smooth
- Make sure there are absolutely no lumps
- If you see lumps, crush them against the side of the bowl with your fork
- Beginner tip: Never add cornstarch directly to hot liquid as it will instantly clump and ruin your sauce
Cooking Phase
- Prepare your cooking area:
- Place saucepan on stove burner
- Keep wooden spoon within reach
- Have a heat-resistant surface ready for when you remove the pot
- Keep all pre-measured ingredients within arm’s reach
- Beginner tip: Cooking goes quickly once you start, so having everything in place prevents burning or mistakes
- Start the sauce base:
- Turn heat to medium
- Add blended chili mixture to pan
- Stir immediately with wooden spoon
- Continue stirring constantly for 1-2 minutes
- The mixture will become fragrant and may cause you to cough – this is normal
- If it starts to stick to the pan, reduce heat slightly
- Beginner warning: Stand back while it cooks as chili fumes may irritate your eyes and nose
- Add liquids and seasonings:
- Pour in the pre-measured ½ cup water
- Add the ¼ cup rice vinegar (stand back as it may steam when it hits the hot pan)
- Stir to combine
- Add the ⅓ cup sugar
- Stir until sugar begins to dissolve (about 30 seconds)
- Add 2 tablespoons tomato paste and 1 teaspoon salt
- Stir vigorously until all ingredients are fully combined
- The mixture should now be a uniform reddish-orange color
- Beginner tip: Always add liquids before dry ingredients when adding to a hot pan to prevent burning
- Simmer the sauce:
- Once everything is combined, allow mixture to come to a gentle boil
- You’ll see small bubbles forming around the edges first, then across the surface
- When bubbling throughout, reduce heat to low
- Simmer for 8-10 minutes, stirring every 1-2 minutes
- Watch closely to make sure it doesn’t boil over
- The sauce will begin to reduce (water evaporates, making it thicker)
- You’ll notice it becoming slightly darker and more concentrated
- Beginner tip: Place a wooden spoon across the pot to help prevent boiling over
- Thicken the sauce:
- After simmering, your sauce should be slightly reduced
- Stir the cornstarch slurry again with a fork (it separates when sitting)
- Turn heat to medium-low
- Using one hand to stir constantly, slowly pour the slurry into the sauce with your other hand
- Pour in a thin stream while stirring continuously to prevent lumps
- Continue cooking and stirring for 2-3 more minutes
- The sauce will change from slightly watery to thicker and glossier
- To test thickness: dip a spoon in the sauce, then run your finger across the back – if it leaves a clear path that doesn’t immediately fill in, it’s ready
- Beginner tip: If you accidentally add the slurry too quickly and get lumps, you can strain the sauce later
Finishing Steps
- Check consistency:
- Remove pot from heat
- Carefully look at how the sauce coats the back of your wooden spoon
- If too thin (runs off quickly): Return to heat and simmer 2-3 more minutes
- If too thick (doesn’t pour easily): Add 1 tablespoon water, return to heat, stir to incorporate
- Ideal consistency is similar to maple syrup or chocolate syrup
- Beginner tip: The sauce will thicken slightly more as it cools, so it’s better to err on the slightly thinner side
- Taste and adjust seasoning:
- Let sauce cool slightly (about 2 minutes)
- Use a clean spoon to taste a small amount
- Too sweet? Add ¼ teaspoon more vinegar, stir, taste again
- Not sweet enough? Add ½ teaspoon more sugar, stir until dissolved, taste again
- Not spicy enough? Add a pinch of red pepper flakes, stir, taste again
- Too spicy? Add ½ teaspoon more sugar and a teaspoon of water
- Not salty enough? Add a small pinch of salt, stir, taste again
- Beginner tip: Always add adjustments in very small amounts and taste between each addition
- Cool and strain (optional):
- Remove from heat if not already done
- Let cool for 5-10 minutes (sauce will be very hot!)
- For a smoother sauce:
- Place fine mesh strainer over a clean bowl
- Slowly pour sauce into strainer
- Use the back of a spoon to gently press mixture, extracting all liquid
- Discard solids left in strainer
- For a more rustic sauce, skip straining
- Beginner tip: Place a damp kitchen towel under your bowl to prevent it from sliding while you strain
- Transfer to storage containers:
- Allow sauce to cool for another 5 minutes
- Use a funnel if available to help prevent spills
- Pour sauce into clean glass jars or containers
- Leave about ½ inch space at the top
- Wipe any drips from the rim with a clean, damp cloth
- Secure lids tightly
- Beginner tip: If you don’t have proper storage containers, even a clean jar from pasta sauce or salsa works well after washing
Troubleshooting
Common Issues and Solutions
| Problem | Possible Cause | Solution |
|---|---|---|
| Sauce is too thin | Not enough cornstarch or inadequate simmering | Add more cornstarch slurry (½ tsp cornstarch mixed with 1 Tbsp water) |
| Sauce is too thick | Too much cornstarch or over-reduction | Add water, 1 Tbsp at a time, until desired consistency |
| Sauce is too spicy | Too many seeds included | Add more sugar (1 tsp at a time) to balance heat |
| Sauce is too sweet | Too much sugar added | Add more vinegar (½ tsp at a time) to balance sweetness |
| Sauce separated | Overheating or cooling too quickly | Whisk vigorously while reheating gently |
| Sauce has lumps | Cornstarch added improperly | Strain through fine mesh strainer or blend briefly |
| Burned bits in sauce | Heat too high during cooking | Strain through fine mesh strainer (but if heavily burned, better to start over) |
| Sauce tastes raw | Not cooked long enough | Return to heat and simmer 3-5 more minutes |
Variations & Substitutions
Make It Your Own!
- Extra Garlicky: Double the garlic for a stronger flavor profile
- Citrus Infused: Add 1 tsp of lime zest for a bright, citrusy note
- Herbal Twist: Stir in 1 Tbsp chopped cilantro at the end
- Sweet & Sour: Increase vinegar to ⅓ cup for a tangier sauce (this makes it closer to my sweet chili sauce recipe that readers love)
- Extra Sweet: For a dessert sauce, increase sugar to ½ cup and reduce chilies by half
- Pineapple Version: Replace 2 Tbsp of water with pineapple juice for a tropical twist
- Low Sugar Option: Replace sugar with 3 Tbsp honey and reduce water by 1 Tbsp
Storage & Reheating
- Cooling: Allow sauce to cool completely before refrigerating (about 30-45 minutes)
- Refrigeration: Store in airtight glass containers for up to 2 weeks
- Signs of spoilage: Discard if you see mold, smell fermentation, or notice darkening
- Freezing: Freeze in ice cube trays, then transfer frozen cubes to freezer bags (lasts 3 months)
- Thawing: Move from freezer to refrigerator 24 hours before needed
- Before serving: Let refrigerated sauce come to room temperature for 15 minutes
- Reheating: Warm gently in microwave (15-second intervals, stirring between) or on stovetop (low heat)
- Consistency fix: If sauce thickens during storage, add a few drops of water and stir
Safety Notes & Tips
- Ventilation matters: Make this sauce in a well-ventilated kitchen as chili fumes can irritate eyes and lungs
- Glove removal: To remove rubber gloves, pull from wrist area, turning them inside out as you go
- Hand washing: Even after using gloves, wash hands thoroughly with soap
- Child safety: Keep children away from the preparation area when handling hot peppers
- Pet safety: Capsaicin can be harmful to pets – keep them out of the kitchen while preparing
- Tasting safely: Always use a clean spoon for tasting and never double-dip
- Jar preparation: If keeping longer than a week, sterilize jars by boiling for 10 minutes
- Food safety: Never leave sauce at room temperature for more than 2 hours
- Heat caution: When sampling or serving, remember that the sauce contains chilies that can burn sensitive mouths
Serving Suggestions
This homemade Heinz Thai Chili Sauce pairs perfectly with:
- Spring rolls or egg rolls
- Grilled chicken or shrimp
- Fried rice
- Roasted vegetables
- As a marinade (mix with equal parts soy sauce)
- Drizzled over cream cheese with crackers for a quick appetizer
- Mixed with mayonnaise (1:3 ratio) for a spicy sandwich spread
Pro tip: For a restaurant-quality presentation, serve in small dipping bowls with a sprinkle of sesame seeds on top.
Final Thoughts
Making your own Heinz Thai Chili Sauce at home gives you complete control over the ingredients and flavor profile. It’s fresher, more customizable, and free from preservatives—plus, it’ll impress your dinner guests!
This recipe makes enough for 4 people, but you can easily double it to keep extra on hand. Once you try this homemade version, you might never go back to store-bought!