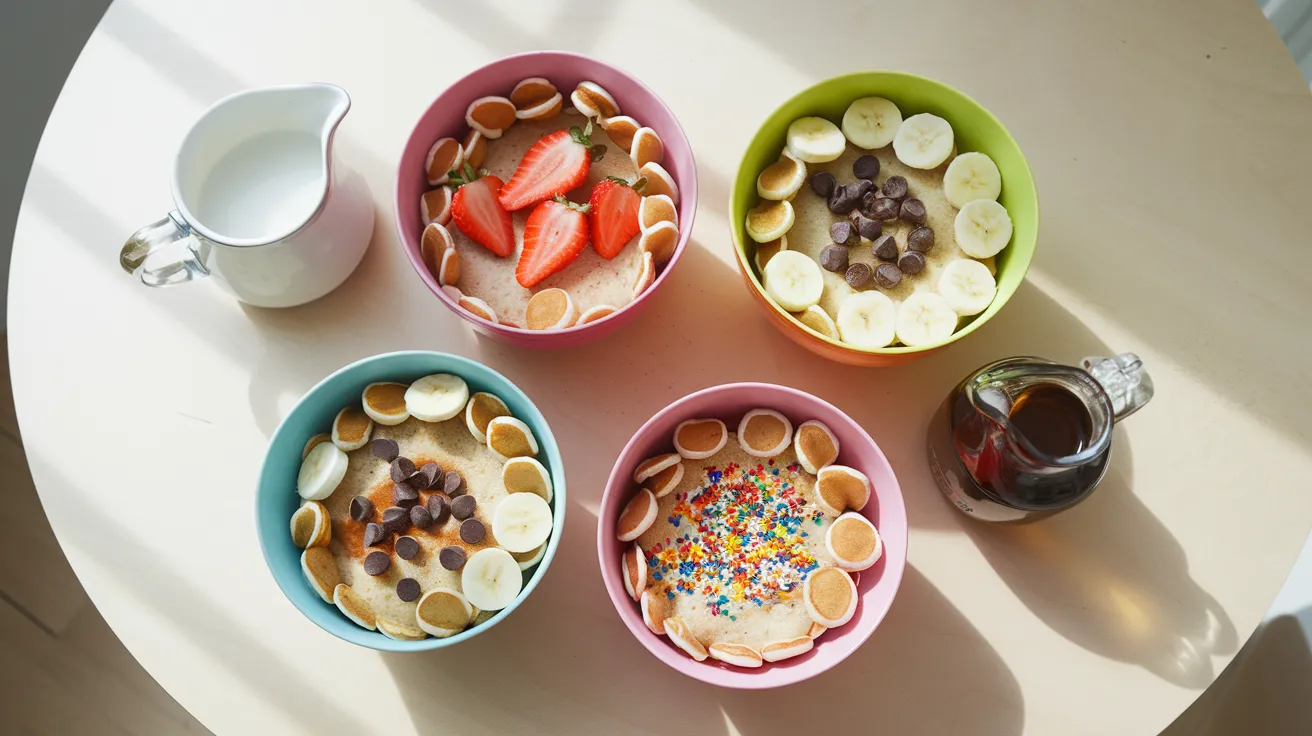
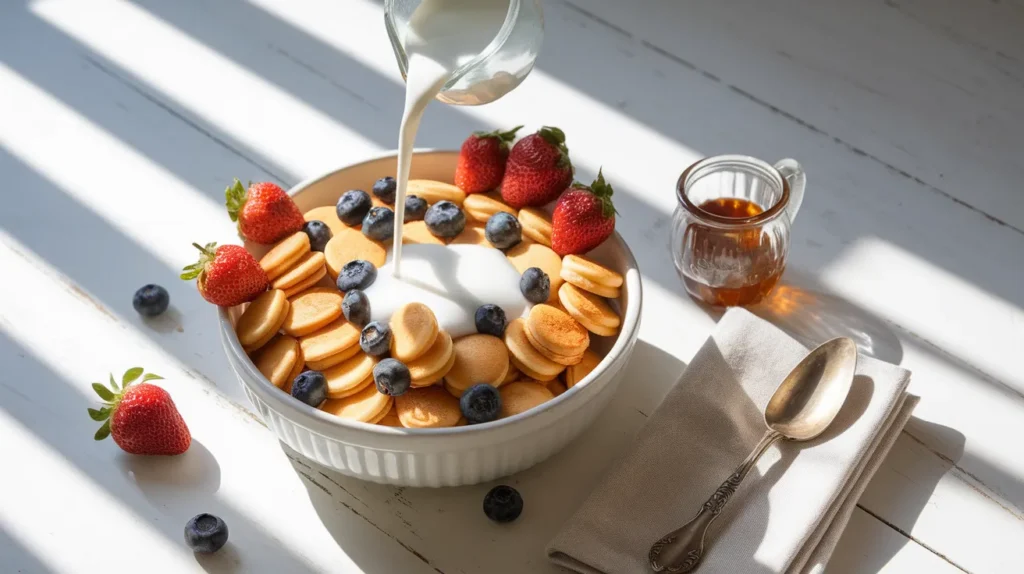
Imagine a bowl filled with dozens of golden, bite-sized pancakes swimming in milk like the world’s most delicious cereal. That’s exactly what mini pancake cereal delivers—a playful twist on traditional breakfast that turns ordinary pancakes into poppable, spoonable bites. This viral sensation combines the comfort of homemade pancakes with the convenience of cereal, creating a breakfast experience that’s as Instagram-worthy as it is tasty. Perfect for weekend mornings or whenever you want to add a little whimsy to your breakfast routine.
SERVES: 4 | PREP: 15 MIN | COOK: 25 MIN | TOTAL: 40 MIN
What Makes Mini Pancake Cereal Special
This isn’t just about making small pancakes. Mini pancake cereal transforms breakfast into an interactive experience where you get to enjoy fluffy, golden pancakes in every spoonful. Each tiny pancake is perfectly sized to fit on a spoon, making this recipe ideal for kids who love novelty and adults seeking a nostalgic breakfast moment.
The beauty here? You’re using familiar ingredients but reimagining how you cook and serve them.
Ingredients You’ll Need
Dry Ingredients
| Ingredient | Amount |
|---|---|
| All-purpose flour | 2 cups |
| Granulated sugar | 3 tablespoons |
| Baking powder | 2 teaspoons |
| Baking soda | 1 teaspoon |
| Salt | ½ teaspoon |
Wet Ingredients
| Ingredient | Amount |
|---|---|
| Buttermilk | 1¾ cups |
| Large eggs | 2 |
| Melted butter | 4 tablespoons |
| Vanilla extract | 2 teaspoons |
For Serving
| Ingredient | Amount |
|---|---|
| Milk of choice | 2 cups |
| Maple syrup | ½ cup |
| Fresh berries | 1 cup |
| Butter (optional) | 2 tablespoons |
Step-by-Step Instructions
Phase 1: Preparing Your Batter (5 minutes)
Step 1: Grab a large mixing bowl and combine your dry ingredients—flour, sugar, baking powder, baking soda, and salt. Whisk these together for 30 seconds until everything looks evenly distributed. This prevents clumping and ensures every tiny pancake has the same fluffy texture.
Step 2: In a separate medium bowl, crack your eggs and beat them lightly with a fork for about 10 seconds. You’re not making scrambled eggs here—just breaking up the yolks.
Step 3: Pour the buttermilk into your egg bowl, followed by the melted butter and vanilla extract. Whisk until the mixture looks smooth and slightly frothy, about 20 seconds. The buttermilk’s acidity is what makes these pancakes extra tender.
Step 4: Create a well in the center of your dry ingredients by pushing them toward the sides of the bowl. Pour your wet mixture directly into this well. This technique prevents overmixing, which is the enemy of fluffy pancakes.
Step 5: Using a wooden spoon or spatula, gently fold the wet and dry ingredients together. Stop when you still see a few small lumps—they’ll disappear during cooking. Overmixed batter creates tough, rubbery pancakes, so resist the urge to keep stirring.
Step 6: Let your batter rest for 5 minutes while you prep your cooking station. During this rest, the flour hydrates and the leavening agents start working. You’ll notice the batter becomes slightly thicker—that’s perfect.
Phase 2: Setting Up Your Cooking Station (3 minutes)
Step 7: Transfer your batter to a squeeze bottle or a ziplock bag with one corner snipped off. The opening should be about ¼ inch wide—any larger and your pancakes won’t be mini. If you’re using a bag, twist the top to prevent spills.
Step 8: Place a large nonstick skillet or griddle over medium heat. Let it preheat for 2 full minutes. Test the temperature by flicking a drop of water onto the surface—it should sizzle and evaporate within 2 seconds. Too hot and you’ll burn the outsides before cooking the centers.
Step 9: Very lightly brush the cooking surface with butter or spray with cooking oil. You want just a thin sheen—too much fat makes the pancakes greasy instead of golden.
Phase 3: Making Your Mini Pancakes (15-18 minutes)
Step 10: Hold your squeeze bottle or bag about 2 inches above the griddle. Squeeze out batter dots about the size of a nickel—roughly 1 inch in diameter. Space them ½ inch apart so they don’t touch. You should fit 20-25 mini pancakes per batch.
Step 11: Watch for bubbles to form on the surface—this happens after about 45-60 seconds. When the bubbles pop and create little craters that don’t fill back in, your mini pancakes are ready to flip. The edges will also look set and slightly dry.
Step 12: Using a thin spatula (a fish spatula works great here), quickly flip each pancake. Work fast but don’t rush—each pancake only needs a light touch. They’re so small they flip easily.
Step 13: Cook the second side for 30-45 seconds until golden brown. These cook faster than the first side because the heat has already penetrated through. You’ll see the edges turn a deeper golden color.
Step 14: Transfer the cooked mini pancakes to a parchment-lined baking sheet. Keep them in a single layer so they don’t steam and get soggy. If you’re making multiple batches, place the sheet in a 200°F oven to keep everything warm.
Step 15: Repeat the piping and cooking process with the remaining batter. You’ll get faster with each batch—the first one is always practice. Adjust your heat slightly between batches if you notice uneven browning.
Step 16: By batch three or four, you might notice the griddle getting too hot. Lower the heat slightly and let it cool for 30 seconds between batches if your pancakes are browning too quickly.
Phase 4: Assembling Your Cereal (2 minutes)
Step 17: Divide your mini pancakes among four bowls, giving each person about 40-50 tiny pancakes. Pile them high in the center—presentation matters here.
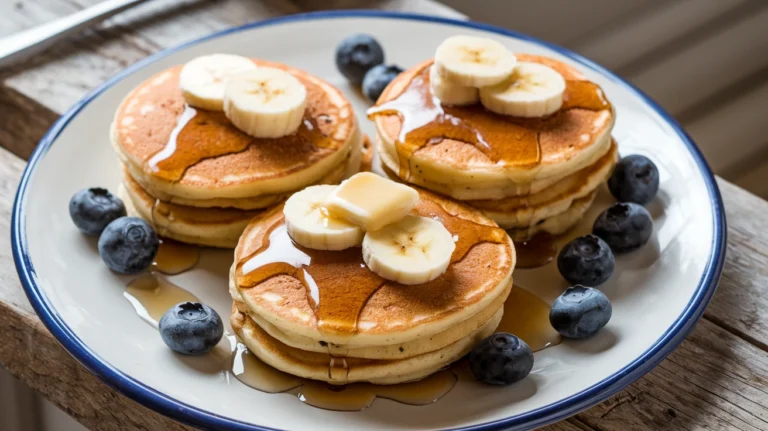
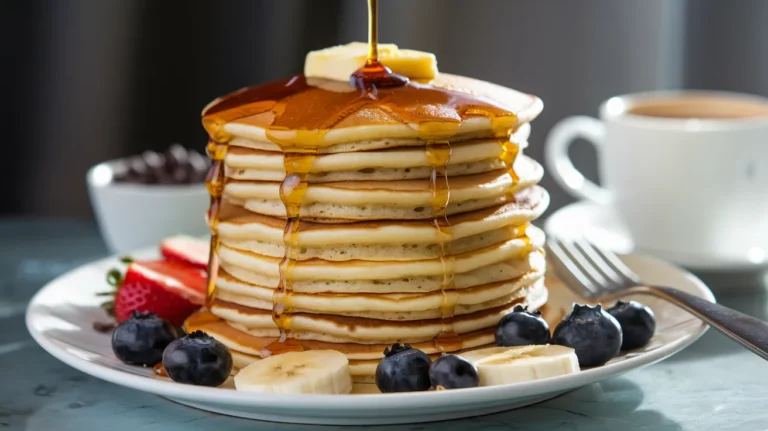
Step 18: Pour ½ cup of cold milk around (not over) the pancakes in each bowl. Let each person drizzle their desired amount of maple syrup on top. Add fresh berries and a pat of butter if you’re feeling fancy.
Chef’s Notes
Temperature control is everything. Your griddle needs to stay at a consistent medium heat. If your mini pancake cereal is browning too fast or staying too pale, adjust by 25°F increments.
Batch cooking saves time. Once you’ve mastered the piping technique, you can make 100+ mini pancakes in under 20 minutes. The rhythm becomes almost meditative.
Buttermilk makes the difference. Don’t substitute regular milk here—the acidity creates chemical reactions with the baking soda that give you those fluffy, tender interiors. If you’re desperate, mix 1¾ cups milk with 2 tablespoons lemon juice and let it sit 5 minutes.
Squeeze bottle precision matters. The more uniform your pancake sizes, the more evenly they’ll cook. Think of it like making cookies—consistency equals better results across the board.
Nutrition Information (Per Serving)
Calories: 485 | Protein: 14g | Carbohydrates: 68g | Fat: 16g | Fiber: 2g | Sugar: 22g
Creative Variations to Try
Chocolate Chip Mini Pancake Cereal
Add ½ cup mini chocolate chips to your batter. The chips will melt slightly during cooking, creating little pockets of chocolate in each bite. Serve with chocolate milk instead of regular milk for a full dessert-for-breakfast experience.
Cinnamon Sugar Version
Mix 2 teaspoons of cinnamon into your dry ingredients. After cooking, toss the warm mini pancakes in a mixture of 3 tablespoons sugar and 1 teaspoon cinnamon. This creates a churro-like coating that’s absolutely addictive. If you love cinnamon-forward breakfasts, you’ll also enjoy these 3-ingredient pumpkin pancakes that celebrate warm spices.
Berry Blast Mini Pancakes
Fold ½ cup of finely diced fresh strawberries into your batter. The berries add natural sweetness and moisture, plus gorgeous pink specks throughout. For more strawberry inspiration, check out these double strawberry pancakes that take berry flavor to the next level.
Protein-Packed Version
Replace ½ cup of flour with vanilla protein powder and add an extra egg. This boosts protein to 22g per serving while maintaining the fluffy texture. Use unsweetened almond milk for serving to keep the sugar content lower.
Storage and Reheating Tips
Refrigerator storage: Place cooled mini pancakes in an airtight container with parchment paper between layers. They’ll stay fresh for 3 days. Don’t pour milk over them until you’re ready to eat.
Freezer storage: Arrange mini pancakes in a single layer on a baking sheet and freeze for 1 hour. Transfer to freezer bags once solid—they’ll keep for 2 months. This prevents them from freezing into one giant clump.
Reheating methods: Microwave 20-30 mini pancakes for 30-45 seconds until warm. For crispier edges, reheat in a 350°F oven for 5 minutes. Skip the toaster—these are too small and might fall through the grates.
Make-ahead strategy: Prepare the batter the night before and refrigerate it in your squeeze bottle. Let it sit at room temperature for 10 minutes before cooking in the morning. This saves precious morning time.
Troubleshooting Common Problems
Problem 1: Pancakes Are Too Dense
Solution: You’ve overmixed your batter or the leavening agents are old. Baking powder and baking soda lose potency after 6 months. Check freshness by adding ½ teaspoon baking powder to hot water—it should fizz vigorously. Mix your batter just until combined next time, even if lumps remain.
Problem 2: Uneven Cooking
Solution: Your griddle has hot spots or your pancake sizes vary too much. Rotate your pan 180 degrees halfway through each batch to compensate for uneven heating. Practice consistent squeezing pressure for uniform sizes.
Problem 3: Pancakes Stick to the Pan
Solution: Your pan isn’t hot enough or needs more fat. Wait until the pan passes the water droplet test before adding batter. Wipe the surface with a butter-soaked paper towel between every batch.
Problem 4: Batter Too Thick to Squeeze
Solution: Add buttermilk 1 tablespoon at a time until the batter flows smoothly but still holds its shape. You want honey-like consistency—thick enough to stay in a mound when piped but thin enough to spread slightly.
Problem 5: Pancakes Get Soggy in Milk
Solution: You’ve added milk too early or the pancakes weren’t fully cooled. Pour milk only when ready to eat, and let hot pancakes cool for 2 minutes first. The steam needs to escape before adding liquid.
Equipment Essentials
- Large mixing bowls (at least 2)
- Whisk and spatula
- Squeeze bottle or gallon-size ziplock bag
- Large nonstick skillet or griddle (12 inches works best)
- Thin metal spatula (fish spatulas are perfect)
- Measuring cups and spoons
- Parchment paper
- Baking sheet (for keeping batches warm)
Shopping List by Store Section
Dairy Section
- Buttermilk (1¾ cups)
- Eggs (2)
- Butter (6 tablespoons total)
- Milk for serving (2 cups)
Baking Aisle
- All-purpose flour (2 cups)
- Granulated sugar (3 tablespoons)
- Baking powder (2 teaspoons)
- Baking soda (1 teaspoon)
- Vanilla extract (2 teaspoons)
Produce Section
- Fresh berries (1 cup, optional)
Condiments
- Maple syrup (½ cup)
Pantry Staples
- Salt (½ teaspoon)
Success Secrets for Perfect Mini Pancake Cereal
1. Master the squeeze technique. Hold the bottle vertically and apply steady, even pressure. Each squeeze should take about 1 second—any faster and you’ll make irregular shapes. Practice on parchment paper first if you’re nervous.
2. Don’t skip the batter rest. Those 5 minutes allow the flour to fully hydrate and the gluten to relax. You’ll notice the batter thickens slightly and becomes smoother—this creates better texture in the finished pancakes.
3. Cook in batches efficiently. While one batch cooks, prep the next by positioning your squeeze bottle over the empty portion of the griddle. This assembly-line approach cuts your total cooking time significantly.
4. Serve immediately for best results. Mini pancake cereal tastes best when the pancakes are warm and the milk is cold. The temperature contrast creates a more enjoyable eating experience—plus the pancakes stay fluffier when fresh.
5. Experiment with toppings. Think beyond maple syrup—try honey, Nutella, peanut butter drizzle, or fruit compote. Each topping changes the entire flavor profile, turning one recipe into dozens of variations.
Pro tip: Make a double batch and freeze half for busy mornings. You’ll thank yourself when you can pour ready-made mini pancake cereal in under 2 minutes flat.