Prep Time: 10 minutes | Cook Time: 10 minutes | Total Time: 20 minutes | Servings: 4
Key Takeaways
- This Classic Brioche French Toast creates restaurant-quality results at home
- The perfect soaking technique gives you crispy edges with a custardy center
- Ready in just 20 minutes for a quick weekend breakfast treat
- Works with endless topping combinations from maple syrup to fresh berries
Why This Classic Brioche French Toast Works
Ever tried making French toast only to end up with soggy bread or a bland breakfast? We’ve all been there.
The solution? Using brioche bread and the perfect egg mixture ratio.
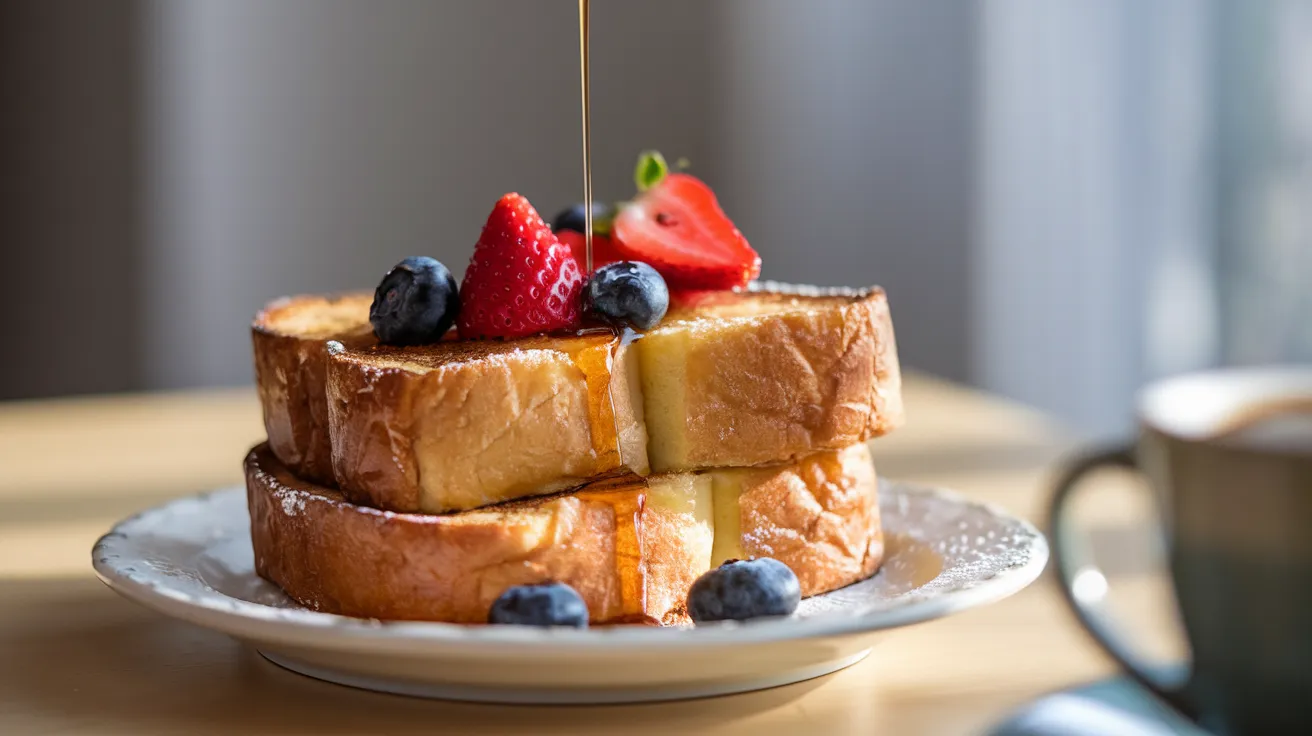
This Classic Brioche French Toast turns simple ingredients into an impressive breakfast. The rich, buttery brioche soaks up the vanilla-scented custard without falling apart.
Best of all, you can make this Classic Brioche French Toast in just 20 minutes with ingredients you likely already have. If you’re a fan of French toast variations, you’ll love how this classic version serves as the perfect foundation for countless flavor combinations (check out some creative twists in our French toast varieties guide).
Nutrition Information
| Nutrient | Amount per Serving |
|---|---|
| Calories | 385 |
| Protein | 12g |
| Carbohydrates | 42g |
| Fat | 18g |
| Fiber | 1g |
| Sugar | 15g |
| Sodium | 420mg |
Note: Nutrition values may vary based on exact ingredients used
What You’ll Need for Classic Brioche French Toast
Ingredients
| Ingredient | Amount | Notes |
|---|---|---|
| Brioche bread | 8 slices (1-inch thick) | Day-old works best |
| Large eggs | 4 | Room temperature |
| Whole milk | 1 cup | 2% works too |
| Vanilla extract | 2 teaspoons | Pure, not imitation |
| Ground cinnamon | 1 teaspoon | Plus extra for dusting |
| Granulated sugar | 2 tablespoons | |
| Salt | ¼ teaspoon | |
| Unsalted butter | 4 tablespoons | For cooking |
| Maple syrup | For serving | |
| Fresh berries | 1 cup | Optional, for serving |
| Powdered sugar | For dusting | Optional |
Kitchen Tools
| Tool | Purpose |
|---|---|
| Large shallow bowl | For egg mixture |
| Whisk | For beating eggs |
| Large skillet or griddle | For cooking |
| Spatula | For flipping |
| Measuring cups and spoons | For precise measurements |
| Cooling rack | Optional, keeps toast crisp |
Ingredient Substitutions
- Bread: No brioche? Use challah or thick-cut white bread instead
- Milk: Substitute half-and-half for extra richness or almond milk for dairy-free
- Sugar: Brown sugar works well in place of granulated sugar
- Cinnamon: Pumpkin pie spice makes a great alternative
- Vanilla extract: Almond extract (use half the amount) or maple extract
Dietary Notes: This Classic Brioche French Toast recipe contains dairy, eggs, and gluten. For a dairy-free version, use plant-based milk and oil instead of butter.
Step-by-Step Instructions for Classic Brioche French Toast
Preparation Phase
- Set up your workspace
- Clear your countertop to create a proper workflow space
- Place all ingredients on the counter within easy reach
- Take eggs out of the refrigerator 15-20 minutes before starting (room temperature eggs blend better and create a smoother mixture)
- Set your stove to a clear, clean area where you can work without obstacles
- Have a serving plate or baking sheet lined with paper towels ready nearby
- Set out all measuring tools before beginning
- Prepare your egg mixture bowl
- Choose a wide, shallow bowl or baking dish with a flat bottom
- The bowl should be large enough to fit a slice of brioche bread lying flat
- A pie dish or 8×8 baking dish works perfectly for this
- Place the bowl on a stable surface near where you’ll be cooking
- Have a fork or small whisk ready beside the bowl
- Mix the French toast batter (step 1)
- Crack one egg at a time into a separate small bowl first
- Check each egg for shell fragments before transferring to your main bowl
- This extra step prevents shell pieces from ruining your entire mixture
- Continue until all 4 eggs are in your main bowl
- Using a whisk, beat the eggs vigorously with a circular motion
- Beat until completely combined with no visible streaks of egg white (about 45-60 seconds)
- The mixture should be an even yellow color throughout
- Mix the French toast batter (step 2)
- Measure 1 cup milk using a liquid measuring cup
- Pour the milk slowly into the beaten eggs while whisking continuously
- Whisk the eggs and milk together until fully incorporated (about 30-45 seconds)
- The mixture should be a consistent color with no streaks
- Add flavorings to the batter
- Measure 2 teaspoons vanilla extract (use the correct measuring spoon)
- Pour the vanilla extract into the egg-milk mixture
- Measure 1 teaspoon cinnamon using a measuring spoon
- To prevent clumping, add cinnamon by sprinkling it evenly over the surface of the mixture
- Measure 2 tablespoons sugar using a measuring spoon
- Add the sugar to the mixture
- Add ¼ teaspoon salt to balance the flavors
- Whisk everything together for at least 1 full minute
- Make sure to scrape the sides and bottom of the bowl while whisking
- Check that all cinnamon clumps are broken up and the mixture is smooth
- The sugar should be fully dissolved
- Prepare your brioche bread
- If using packaged pre-sliced brioche, check that slices are about 1-inch thick
- If slices are thinner than 1-inch, use them but reduce soaking time by half
- If bread is unsliced, use a serrated knife to cut 8 even slices
- If using very fresh brioche, lay slices on a wire rack for 15-20 minutes to dry slightly
- Slightly stale or day-old bread works best for Classic Brioche French Toast as it absorbs the egg mixture without falling apart
- Arrange bread slices on a plate or cutting board near your egg mixture for easy access
- Beginner tip: If bread is extremely fresh, you can place slices in a 200°F oven for 10 minutes to dry slightly without toasting
Cooking Your Classic Brioche French Toast
- Prepare your cooking surface
- Choose a large skillet or griddle with a flat bottom
- A 10-12 inch non-stick or well-seasoned cast iron skillet works best
- Place the pan on the stove over medium heat (typically level 4-5 on most stoves)
- Allow the pan to heat up for 2-3 minutes before adding butter
- To test if the pan is ready, sprinkle a few drops of water on the surface
- If the water droplets sizzle and evaporate quickly, your pan is ready
- Beginner tip: If water droplets instantly disappear with a loud sizzle, your pan is too hot
- Prepare the cooking surface
- Cut 1 tablespoon of butter from your stick (most butter sticks have tablespoon markings)
- Add the butter to the preheated pan
- Using the handle, tilt the pan in all directions to spread the melting butter evenly across the surface
- Watch as the butter melts completely and begins to bubble slightly
- The butter should sizzle gently but not brown or smoke
- If butter starts to brown immediately or smoke, your pan is too hot
- If this happens, remove the pan from heat, wipe it clean, reduce heat, and start again
- Visual cue: Properly melted butter will coat the pan with tiny bubbles and have a light golden color
- Soak the first slice of bread
- Pick up one slice of brioche bread with your fingers or tongs
- Hold the bread over your egg mixture bowl
- Gently place the bread into the egg mixture
- Using your fingers or a fork, press down very gently on the bread to help it absorb the mixture
- Count to 10 seconds out loud: “one-one thousand, two-one thousand…”
- Use a fork to carefully flip the bread over without tearing it
- Press down gently again on the second side
- Count another 10 seconds for the second side
- Beginner warning: If the bread starts to fall apart at any point, your soaking time is too long – reduce to 5 seconds per side for remaining slices
- After soaking both sides, use a fork or your fingers to lift the bread straight up
- Hold it above the bowl for 2-3 seconds to allow excess mixture to drip off
- The bread should feel heavier and look saturated but still maintain its shape
- Cook the first slice
- Carefully transfer the soaked bread to the hot, buttered skillet
- Listen for a gentle sizzle as the bread hits the pan – this is a good sign
- If there’s no sizzle, your pan isn’t hot enough
- If there’s an aggressive sizzle or splatter, your pan is too hot
- Let the bread cook completely undisturbed for 2-3 minutes
- Visual cue: Look for the edges to begin to set and the bottom to turn golden brown
- Beginner tip: After 2 minutes, gently lift one corner with a spatula to peek at the color
- The bottom should be golden brown, not pale (undercooked) or dark brown (overcooked)
- Important skill: Use a wide, thin spatula for flipping
- Slide the spatula completely under the bread before attempting to flip
- Support the top of the toast with your other hand using a fork or second spatula
- In one smooth, confident motion, flip the bread over to cook the other side
- If you hesitate during flipping, the toast may fold or tear
- Cook for another 2-3 minutes until the second side is also golden brown
- Testing doneness: Gently press the center with your spatula – it should spring back slightly and not be wet or soggy
- Cook the second slice (if your pan has room)
- While the first slice is cooking, prepare a second slice by repeating the soaking process
- If your pan is large enough, add this second slice to cook simultaneously
- Keep track of which slice went in first so you know when to flip each one
- Give each slice enough space – they should not be touching in the pan
- Follow the same cooking process as with the first slice
- Remove and keep warm
- Once both sides are golden brown, remove the toast from the pan
- Use your spatula to transfer it to your prepared plate
- If serving immediately, transfer directly to serving plates
- If cooking multiple batches, keep cooked pieces warm by placing them on a baking sheet in a 200°F oven
- Place the toast in a single layer, not stacked, to maintain crispness
- Beginner tip: If using the oven to keep warm, leave the oven door slightly ajar to prevent condensation from making the toast soggy
- Cook remaining slices
- Before cooking the next batch, check your pan
- If there are any burnt butter bits, wipe the pan clean with a paper towel
- Add another tablespoon of butter and let it melt completely
- Repeat the soaking and cooking process with your remaining bread slices
- Temperature management: Watch the cooking time of each batch
- If your French toast is browning too quickly (under 2 minutes per side), your heat is too high – lower it slightly
- If browning is too slow (taking more than 4 minutes per side), your heat is too low – increase slightly
- Add fresh butter before each new batch for the best flavor and to prevent sticking
- Beginner tip: As you gain confidence, you can soak the next slice while the current ones are cooking to save time
Finishing Your Classic Brioche French Toast
- Prepare for serving
- Warm your serving plates in the oven for 1-2 minutes if possible
- If using maple syrup, warm it by placing the container in a bowl of hot water for 3-5 minutes
- Wash and pat dry any fresh berries you’ll be using
- If using powdered sugar, place it in a small fine-mesh sieve or strainer
- Have all toppings ready before serving for the best presentation and temperature
- Plate your Classic Brioche French Toast
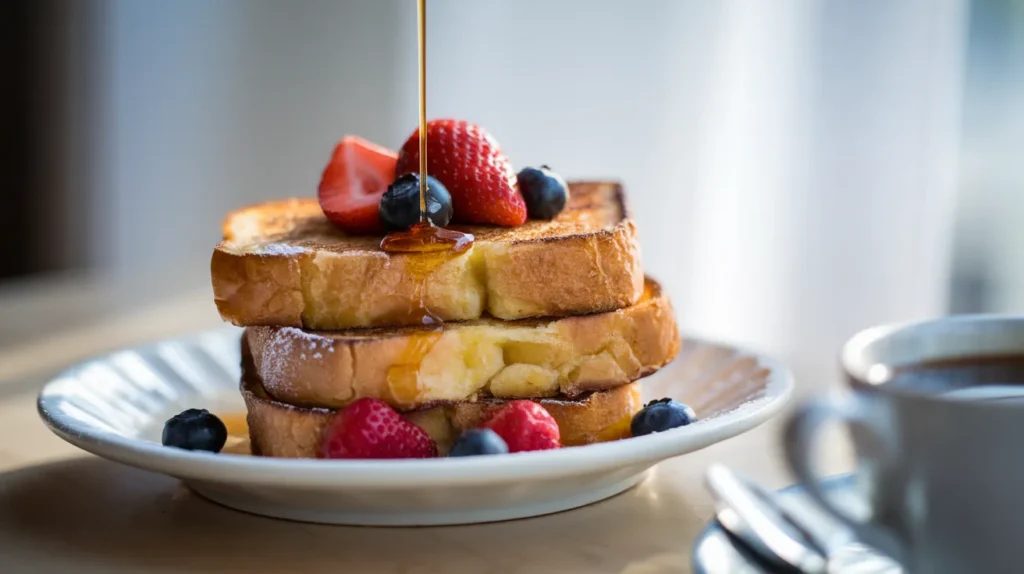
- Arrange 2 slices of French toast on each plate
- Overlap them slightly or stack them based on your preference
- If dusting with powdered sugar, hold your sieve about 6 inches above the plate
- Tap the sieve gently with your finger to create an even, light dusting
- Arrange fresh berries attractively on top or alongside the French toast
- Pour warm maple syrup into a small pitcher for serving
- Alternatively, drizzle syrup directly over the French toast in a zigzag pattern
- For an extra-special touch, add a small pat of butter (about ½ teaspoon) on top of each serving
- The butter will melt appealingly over the warm French toast
- Beginner plating tip: Keep it simple – sometimes less is more for an elegant presentation
- For a citrusy twist, try our orange French toast topping variation
Troubleshooting Your Classic Brioche French Toast
Common Problems and Solutions
- Problem: Too soggy inside
- Cause: Your bread slices might be too thick, too fresh, or soaked too long
- Solution: Use day-old bread or dry fresh bread in the oven for 10 minutes
- Solution: Reduce soaking time to 5 seconds per side
- Solution: Increase cooking time by 1 minute per side, but lower heat slightly
- Solution: Make sure your egg mixture isn’t too heavy on the milk
- Problem: Burning on the outside, raw inside
- Cause: Your heat is too high
- Solution: Lower temperature to medium-low and cook more slowly
- Solution: Start with a clean pan and fresh butter for each batch
- Solution: Try covering the pan with a lid for 1 minute to help cook the inside
- Solution: Make sure your bread slices aren’t thicker than 1 inch
- Problem: Egg mixture won’t stick to bread
- Cause: Your bread might be too fresh or your egg mixture not well combined
- Solution: Make sure egg mixture is well whisked with no separation
- Solution: Try slightly older, drier bread that will absorb better
- Solution: Gently press bread into mixture with a fork while soaking
- Solution: Let bread sit in mixture a few seconds longer
- Solution: Check that your egg-to-milk ratio is correct (4 eggs to 1 cup milk)
- Problem: French toast tastes eggy
- Cause: Too much egg in your mixture or not enough flavoring
- Solution: Next time, add a bit more milk or reduce eggs to 3 instead of 4
- Solution: Add an extra ½ teaspoon vanilla extract to mask egg flavor
- Solution: Increase cinnamon to 1½ teaspoons
- Solution: Add a tablespoon of maple syrup directly to the egg mixture
Classic Brioche French Toast Variations & Substitutions
Sweet Variations
- Cinnamon Raisin Classic Brioche French Toast:
- Add ½ cup raisins soaked in hot water for 5 minutes (then drained) to the batter
- Increase cinnamon to 1½ teaspoons
- Serve with a sprinkle of extra cinnamon on top
- Orange Scented Classic Brioche French Toast:
- Add 1 tablespoon fresh orange zest and 2 tablespoons orange juice to the egg mixture
- Reduce vanilla to 1 teaspoon
- Serve with orange slices and a drizzle of honey
- Chocolate Lover’s French Toast:
- Add 2 tablespoons cocoa powder to the egg mixture
- Add 1 tablespoon more sugar to balance the bitterness
- Serve with chocolate sauce and fresh raspberries
- Stuffed French Toast:
- Spread 1 tablespoon cream cheese or Nutella between two thin slices of bread
- Press edges together slightly before soaking
- Soak for 5 seconds per side (stuffed toast needs less soaking time)
- Cook on slightly lower heat to ensure the center warms through
- Cinnamon Glazed Brioche French Toast:
- For a sweet twist that tastes like a donut, try our cinnamon glazed donut French toast variation
Savory Options
- Herb & Cheese French Toast:
- Omit sugar and vanilla from the base recipe
- Add 1 tablespoon fresh chopped herbs (like thyme, chives, or parsley)
- Add ¼ cup grated Parmesan cheese to the egg mixture
- Serve with a side of sliced tomatoes or avocado
- Ham & Swiss French Toast:
- Omit sugar and vanilla from the base recipe
- Make a sandwich with thin slices of ham and Swiss cheese between two pieces of bread
- Dip the entire sandwich in the egg mixture (5 seconds per side)
- Cook on lower heat for a bit longer to ensure cheese melts
- Serve with a touch of Dijon mustard on the side
Storing and Reheating Your Classic Brioche French Toast
Storage Instructions
- Refrigerator Storage:
- Allow French toast to cool completely to room temperature
- Place pieces in a single layer in an airtight container
- If stacking, place parchment paper between layers to prevent sticking
- Seal container tightly and label with date
- Store in refrigerator for up to 2 days
- Beginner tip: Don’t store French toast while still warm or condensation will make it soggy
- Freezer Storage:
- Cool French toast completely
- Place pieces in a single layer on a baking sheet lined with parchment paper
- Place in freezer uncovered until solid (about 1-2 hours)
- Once frozen, transfer pieces to a freezer-safe bag or container
- Press out as much air as possible before sealing
- Label with name and date
- Store in freezer for up to 1 month
- Beginner tip: Flash freezing individually prevents pieces from sticking together
Reheating Methods
- Toaster Method:
- Best for: 1-2 refrigerated slices
- Place cold French toast in toaster slot
- Use a medium-low setting (lower than you’d use for regular toast)
- Watch carefully to prevent burning
- Run a second, shorter cycle if not warm enough in the center
- Not recommended for frozen slices
- Beginner tip: Place a piece of foil under the toaster to catch any butter drips
- Oven Method (Best Overall Method):
- Best for: Multiple slices, maintaining texture
- Preheat oven to 350°F
- Place French toast on a baking sheet in a single layer
- For refrigerated slices: heat for 5-7 minutes
- For frozen slices: heat for 8-10 minutes
- Flip slices halfway through heating time
- Texture tip: Place on a wire rack on the baking sheet for crispier results
- Beginner tip: Cover loosely with foil if you’re worried about drying out
- Microwave Method (Quickest Method):
- Best for: When you’re in a hurry
- Place 1-2 slices on a microwave-safe plate
- Cover with a slightly damp paper towel to maintain moisture
- Heat refrigerated slices for 15-20 seconds per slice
- Heat frozen slices for 30-40 seconds per slice
- If not warm enough, heat in additional 10-second increments
- Important note: This method will make the bread softer, not crisp
- Beginner tip: Let stand for 30 seconds before eating to allow heat to distribute
- Skillet Method (Best for Texture):
- Best for: Restoring the original crispy-outside, soft-inside texture
- Melt 1 teaspoon butter in a skillet over medium-low heat
- Add French toast and heat for 1-2 minutes per side
- Best for refrigerated slices
- For frozen slices, thaw in refrigerator first, or use the microwave to thaw before crisping in skillet
- Beginner tip: Don’t use high heat or your French toast will burn before warming through
Safety Notes & Tips for Classic Brioche French Toast
Food Safety
- Use fresh eggs with intact shells without cracks
- Check egg expiration dates before using
- Keep egg mixture refrigerated if preparing ahead of time
- Don’t leave egg mixture at room temperature for more than 30 minutes
- Don’t leave cooked French toast at room temperature for more than 2 hours
- Ensure internal temperature reaches at least 165°F to safely cook the eggs
- Wash hands thoroughly with soap for 20 seconds after handling raw eggs
- Clean all surfaces that came into contact with raw eggs with hot, soapy water
- Use separate utensils for raw egg mixture and cooked French toast
Pro Tips for Perfect Classic Brioche French Toast
- For the crispiest edges: Use clarified butter or a mix of butter and neutral oil (like canola)
- Even soaking: Use a flat-bottomed dish for the egg mixture so bread lies flat
- Make ahead option: Prepare the egg mixture the night before and refrigerate in a covered container
- Serving suggestion: Warm maple syrup before serving by placing the container in hot water for 3-5 minutes
- Flavor boost: Add a splash (1 tablespoon) of bourbon or rum to the egg mixture for adults (alcohol will cook off)
- Cinnamon distribution: Mix cinnamon with sugar first before adding to egg mixture to prevent clumping
- Perfect thickness: Aim for bread slices that are 1-inch thick – too thin will fall apart, too thick won’t cook through
- Testing doneness: Gently press the center with your finger – it should spring back and not be wet or soggy
- Beginner’s first batch: Start with just one slice of bread for your first cook to build confidence
- Even cooking: If your stove has hot spots, rotate the pan occasionally for even browning
- Texture balance: The perfect Classic Brioche French Toast should have crispy edges but a custard-like center
Remember, the key to perfect Classic Brioche French Toast is quality bread, the right soaking time, and proper heat management. Don’t get discouraged if your first batch isn’t perfect – French toast takes practice, and each batch will get better!
Related Recipes You Might Like
- Looking for more French toast variations? Check out our complete guide to different French toast styles from around the world
- Try our zingy Orange French Toast for a citrus lover’s dream breakfast
- For something extra special, our Cinnamon Glazed Donut French Toast combines two breakfast favorites