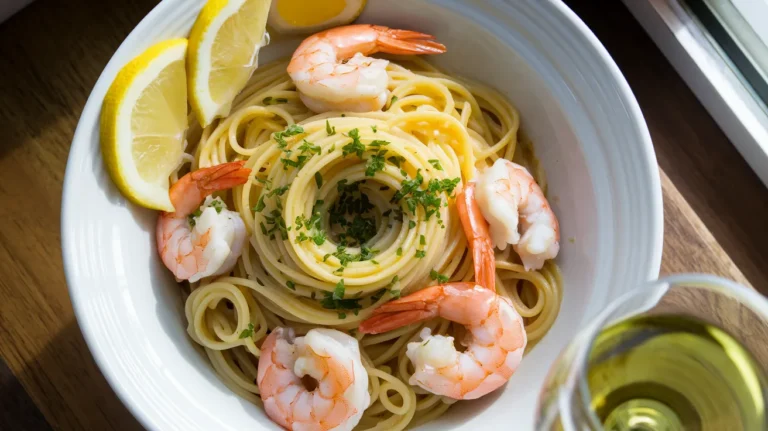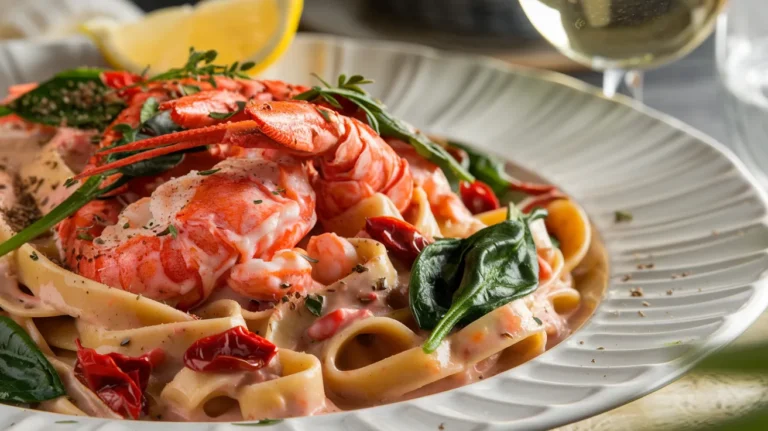
This elegant lobster shrimp pasta brings restaurant-quality flavors to your dinner table in just 30 minutes. Sweet lobster and tender shrimp mingle with garlic butter sauce for an unforgettable lobster shrimp pasta experience that will impress family and guests alike.
SERVES: 4 | PREP: 15 MIN | COOK: 15 MIN | TOTAL: 30 MIN
INGREDIENTS
For the Pasta:
- 1 lb linguine pasta
- 2 tbsp kosher salt (for pasta water)
For the Seafood:
- 4 medium lobster tails (6 oz each)
- 1 lb large shrimp, peeled and deveined
- Salt and freshly ground black pepper
For the Sauce:
- 6 tbsp unsalted butter
- 3 tbsp extra virgin olive oil
- 6 large garlic cloves, minced
- 1/2 cup dry white wine
- 1/4 cup heavy cream (optional)
- 2 medium lemons (juiced and zested)
- 1/4 cup fresh flat-leaf parsley, chopped
- 1/4 tsp red pepper flakes
STEP-BY-STEP LOBSTER SHRIMP PASTA DIRECTIONS
PREP THE SEAFOOD (5 minutes)
- Prepare lobster tails like a pro: Using kitchen shears, cut down the center of each lobster shell from thick end toward the fan tail, stopping 1 inch from the end. Gently pull shell apart and lift out meat in one piece. Look for the dark vein running down the back and remove it with your knife tip. Cut lobster meat into uniform 1-inch chunks. Pat completely dry with paper towels – wet seafood steams instead of browning.
- Get shrimp ready for perfect searing: If not already done, peel shrimp by pulling off shells starting from the legs. Make a shallow cut along the back and rinse out the dark vein under cold water. Pat shrimp completely dry with paper towels – this prevents oil splatter and ensures golden browning. Season both lobster and shrimp generously with salt and freshly ground pepper on all sides. Let sit at room temperature for 5 minutes for even cooking.
START THE PASTA (8-10 minutes) 3. Set up your pasta water properly: Fill your largest pot with 4-5 quarts cold water and add 2 tablespoons kosher salt – it should taste like mild seawater. Bring to a rolling boil over high heat (cover to speed up process). When you see big bubbles constantly breaking the surface, add linguine. Stir immediately to prevent sticking, then stir again after 1 minute. Cook according to package directions minus 1 minute – we’ll finish cooking in the sauce for perfect lobster shrimp pasta texture.
- Save that liquid gold: About 2 minutes before your pasta timer goes off, use a measuring cup to scoop out 1 full cup of the cloudy, starchy cooking water. This is your secret weapon for silky lobster shrimp pasta sauce. Drain pasta in colander and shake well to remove excess water, but don’t rinse – the surface starch helps sauce cling to every strand.
COOK THE SEAFOOD (4-5 minutes) 5. Heat your pan to the perfect temperature: Place large skillet over medium-high heat. Add olive oil and let it heat until it shimmers and moves freely when you tilt the pan – this takes about 1-2 minutes. The oil should be hot but not smoking. If it smokes, reduce heat slightly.
- Master the shrimp technique: Add shrimp to hot oil in a single layer – don’t overcrowd or they’ll steam. You should hear gentle sizzling when they hit the pan. Cook for 1-2 minutes without moving them (resist the urge to flip early). When bottoms turn pink and opaque, flip with tongs. Cook another 1-2 minutes until other side is pink and shrimp curl into C-shapes. Transfer immediately to a clean plate – overcooked shrimp become rubbery.
- Achieve perfect lobster sear: Add lobster chunks to the same hot pan – they should sizzle on contact. Cook for 2-3 minutes on first side without moving to develop golden crust. Flip gently with tongs and cook another 1-2 minutes until just opaque throughout with no translucent areas. Lobster cooks faster than shrimp and becomes tough when overdone. Transfer to plate with shrimp, including any accumulated juices.
BUILD YOUR LOBSTER SHRIMP PASTA SAUCE (3-4 minutes) 8. Create the butter base: Reduce heat to medium. Add butter to the same skillet – don’t clean it first, those browned bits add incredible flavor. Let butter melt completely, swirling pan occasionally. The butter should foam and smell nutty but not turn brown. If it starts browning, remove from heat for 30 seconds.
- Add aromatics carefully: Add minced garlic and red pepper flakes to melted butter. Stir constantly with wooden spoon for 30-45 seconds until garlic becomes fragrant and just starts to turn golden. Don’t let it brown or your lobster shrimp pasta will taste bitter. If garlic browns too fast, pull pan off heat momentarily.
- Deglaze with wine properly: Pour in white wine – it will bubble vigorously and create steam (this is normal). Let it cook for 1-2 minutes, stirring occasionally with wooden spoon, until alcohol smell reduces by half and mixture looks slightly syrupy. This concentrates flavors and removes harsh alcohol taste.
BRING YOUR LOBSTER SHRIMP PASTA TOGETHER (3-4 minutes) 11. Marry pasta and sauce: Add drained linguine directly to skillet with wine sauce. Using long-handled tongs, toss vigorously for 30-60 seconds to coat every strand. The pasta should look glossy but might seem slightly dry at this point – that’s normal.
- Create silky perfection: Add 1/4 cup reserved pasta water and toss aggressively with tongs for 1-2 minutes. The starchy water will emulsify with butter and oil to create a glossy sauce that clings to pasta. If it still looks dry, add more pasta water 2 tablespoons at a time. Your lobster shrimp pasta should look creamy and well-coated, not dry or soupy.
- Reunite with seafood: Gently fold cooked shrimp and lobster back into pasta along with any plate juices – these juices add extra flavor. Toss carefully with tongs to distribute seafood evenly without breaking delicate pieces. Heat through for 30-60 seconds – don’t cook longer or seafood will toughen.
- Final flavor boost: Remove pan from heat completely. Add fresh lemon juice, lemon zest, and chopped parsley. Toss gently one final time with tongs. Taste and adjust seasoning with salt, pepper, and more lemon juice as needed. The finished lobster shrimp pasta should taste bright, rich, and perfectly balanced.
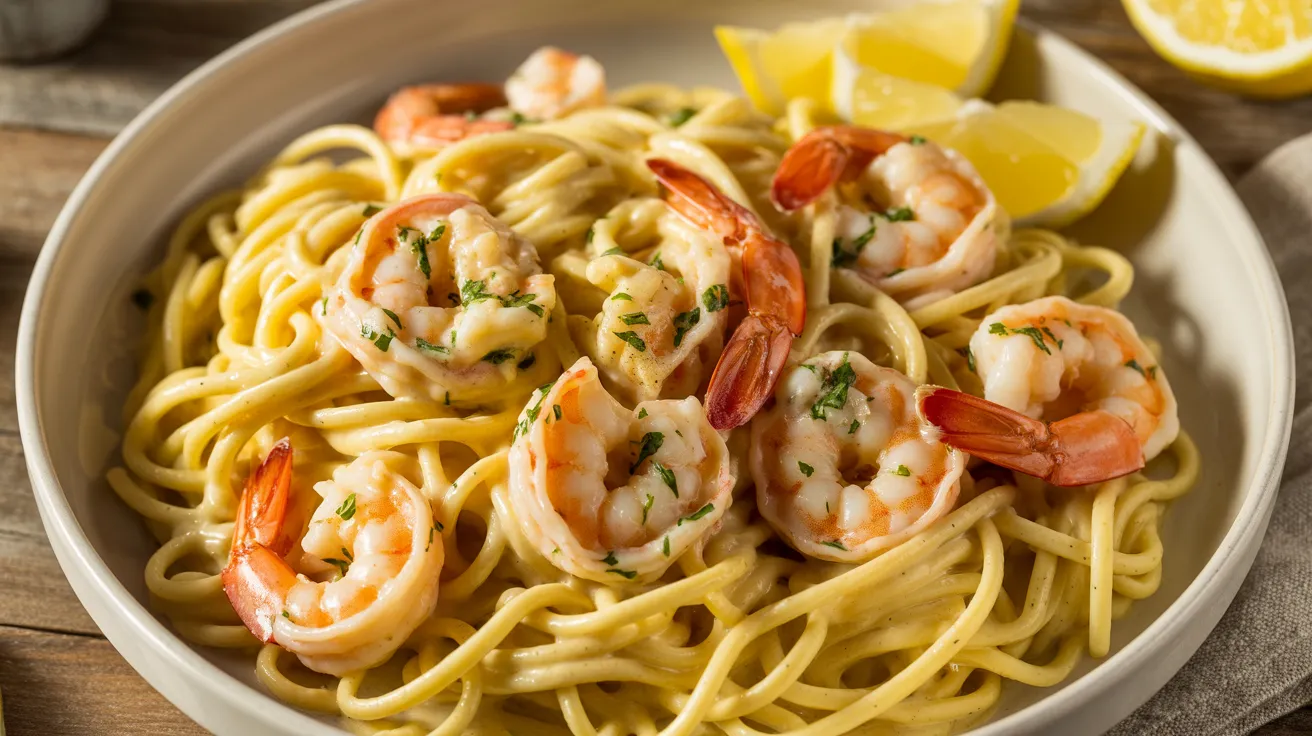
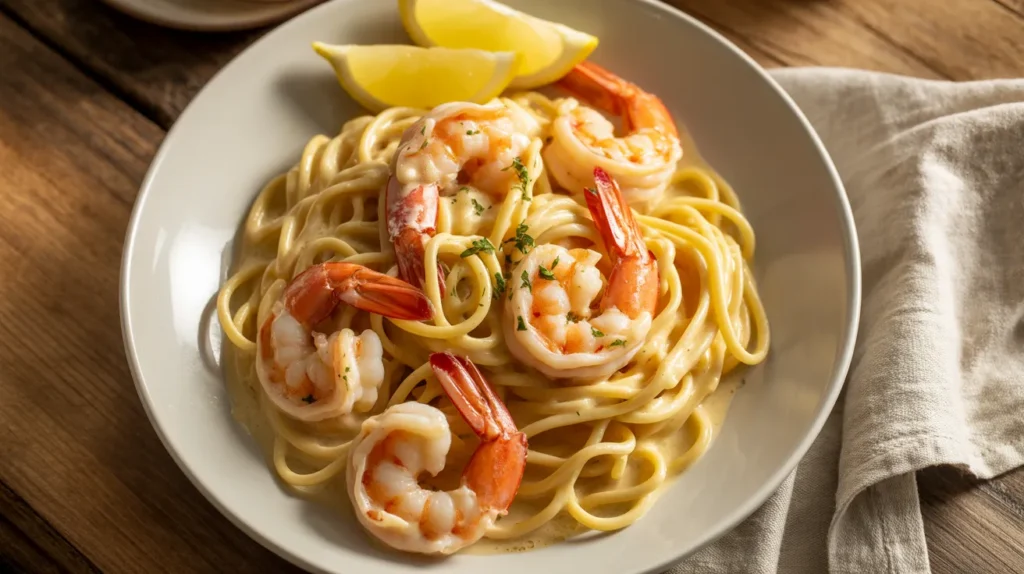
- Serve at peak perfection: Divide lobster shrimp pasta immediately among 4 warmed bowls or plates. Garnish with extra parsley and lemon zest if desired. Serve right away while pasta is hot and sauce is glossy. Have extra lemon wedges and red pepper flakes on the table for customization.
CHEF’S NOTES FOR PERFECT LOBSTER SHRIMP PASTA
Make It Perfect: The key to silky lobster shrimp pasta is using starchy pasta water to bind the sauce. This cloudy liquid contains starches that help create restaurant-quality emulsification. Don’t skip this crucial step!
Seafood Success: Pat seafood completely dry before cooking to prevent dangerous oil splattering and ensure proper golden browning. Wet seafood steams instead of searing, resulting in pale, rubbery texture.
Wine Wisdom: Use wine you’d actually drink in your lobster shrimp pasta – cooking concentrates flavors, so poor wine creates poor sauce. Pinot Grigio or Sauvignon Blanc work beautifully.
Timing is Everything: Have all ingredients prepped and measured before you start cooking. This lobster shrimp pasta moves quickly once cooking begins, and there’s no time to stop and chop garlic mid-recipe.
NUTRITION (Per Serving)
- Calories: 485
- Protein: 28g
- Carbs: 45g
- Fat: 22g
VARIATIONS
Spicy Kick: Double the red pepper flakes and add diced jalapeños with garlic.
Extra Creamy: Stir in heavy cream during final tossing for restaurant richness.
Lighter Option: Try this technique with low-carb orzo pasta for fewer carbs.
Veggie Boost: Add cherry tomatoes or asparagus in the last 2 minutes of cooking.
For those exploring pasta alternatives, this sauce pairs beautifully with lentil and sweet potato pasta for added nutrition.
STORAGE & REHEATING
Refrigerator: Store leftovers up to 2 days in airtight containers.
Reheating: Add 2-3 tbsp water to skillet. Heat pasta gently over medium-low heat, tossing frequently. Don’t microwave.
Freezing: Not recommended – seafood texture suffers when frozen.
TROUBLESHOOTING YOUR LOBSTER SHRIMP PASTA
Pasta looks dry and clumpy? Add more reserved pasta water, 2 tablespoons at a time, while tossing vigorously with tongs. The sauce should be glossy and coat every strand of your lobster shrimp pasta.
Seafood turned out rubbery? You overcooked it. Next time, undercook seafood slightly – it finishes cooking when tossed with hot pasta. Shrimp should curl into C-shapes, lobster should be just opaque.
Sauce won’t stick to pasta? You need more starchy pasta water and more aggressive tossing action. The emulsification process requires vigorous mixing to bind oil, butter, and pasta water together.
Garlic tastes bitter? It burned. Keep heat at medium and stir constantly once garlic hits the pan. Burnt garlic ruins the entire lobster shrimp pasta dish.
Not enough flavor overall? Add more fresh lemon juice first, then salt. Seafood pasta needs bright acidity to make flavors pop and balance the richness.
EQUIPMENT ESSENTIALS
- Large pot (6+ quarts)
- Large skillet (12-inch)
- Fine-mesh colander
- Long-handled tongs
- Sharp chef’s knife
SHOPPING LIST
Seafood Counter:
- 4 medium lobster tails
- 1 lb large shrimp (21-25 count)
Pantry Staples:
- Linguine pasta
- Olive oil
- Butter
- Garlic
- White wine
Fresh Picks:
- Lemons (2 medium)
- Fresh parsley
- Heavy cream (optional)
SUCCESS SECRETS
- Quality seafood makes the biggest difference in lobster shrimp pasta
- Pasta water is liquid gold – save more than you think you need
- Medium heat prevents burning while developing proper flavors
- Serve immediately while sauce is glossy and pasta is hot
- Prep everything first – this dish moves fast once you start cooking
This lobster shrimp pasta recipe proves that elegant seafood dishes can be simple and approachable. With proper timing and quality ingredients, you’ll create a meal that rivals any upscale restaurant right in your own kitchen.