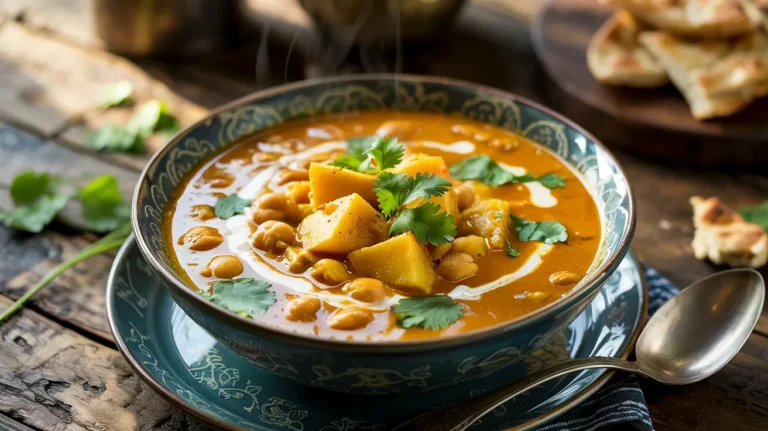
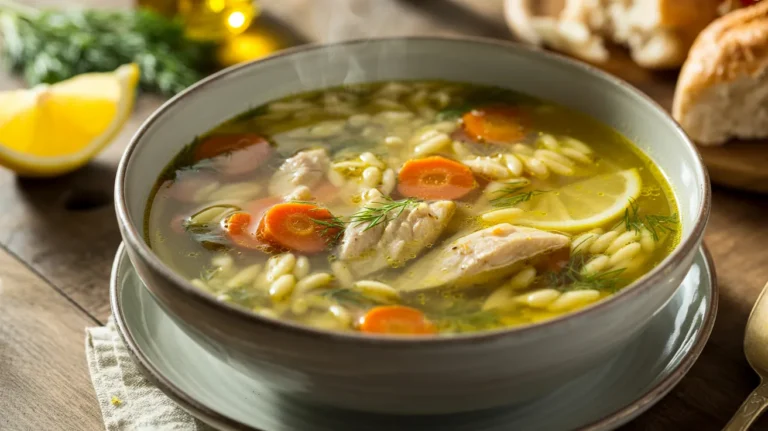
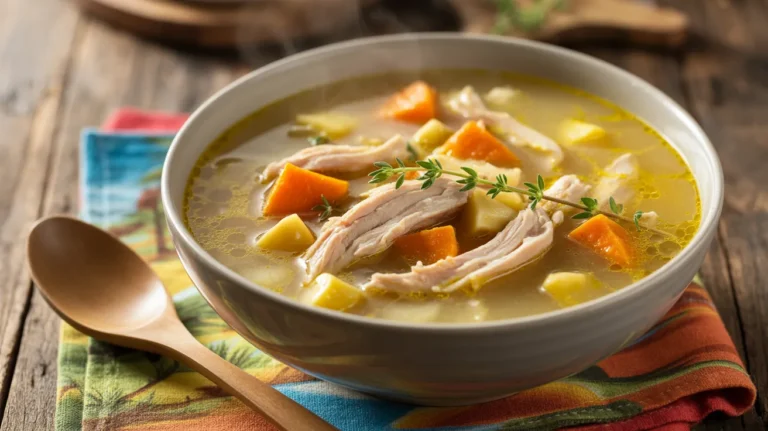
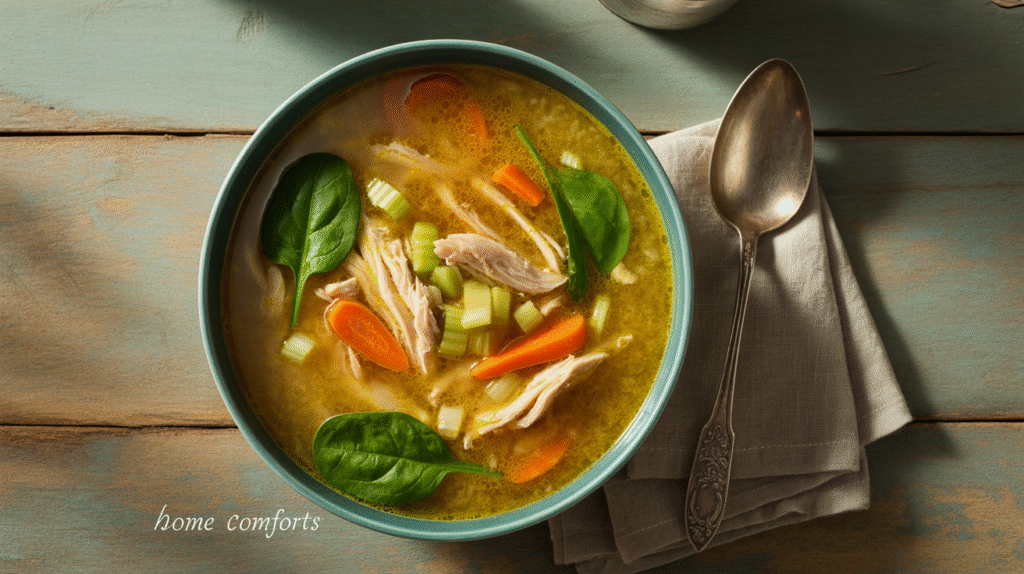
This nourishing anti-inflammatory chicken soup combines tender chicken with healing spices like turmeric and ginger to create a comforting bowl that fights inflammation naturally. Our detailed anti-inflammatory chicken soup recipe guides beginners through every step, ensuring you’ll create a restaurant-quality soup that soothes both body and soul while delivering maximum anti-inflammatory benefits.
SERVES: 4 | PREP: 20 MIN | COOK: 35 MIN | TOTAL: 55 MIN
Ingredients for Anti-Inflammatory Chicken Soup
Protein & Base
| Ingredient | Amount | Purpose |
|---|---|---|
| Bone-in chicken thighs | 1.5 lbs | Provides rich flavor and tender meat |
| Low-sodium chicken broth | 6 cups | Creates flavorful soup base |
| Water | 2 cups | Extends liquid for proper consistency |
Anti-Inflammatory Aromatics & Spices
| Ingredient | Amount | Benefits |
|---|---|---|
| Yellow onion, diced | 1 medium | Adds natural sweetness and depth |
| Carrots, sliced | 2 large | Provides beta-carotene and natural sweetness |
| Celery stalks, chopped | 3 stalks | Adds crunch and savory flavor |
| Fresh garlic, minced | 4 cloves | Boosts immune system and flavor |
| Fresh ginger, grated | 2 tablespoons | Primary anti-inflammatory ingredient |
| Ground turmeric | 1 teaspoon | Contains powerful curcumin |
| Ground cumin | 1/2 teaspoon | Aids digestion and adds warmth |
| Black pepper | 1/2 teaspoon | Enhances turmeric absorption |
Fresh Finishing Touches
| Ingredient | Amount | When to Add |
|---|---|---|
| Fresh spinach | 2 cups | Last 2 minutes of cooking |
| Fresh lemon juice | 3 tablespoons | Just before serving |
| Fresh parsley, chopped | 1/4 cup | Final garnish |
| Sea salt | To taste | Throughout cooking process |
| Extra virgin olive oil | 2 tablespoons | For sautéing vegetables |
Complete Step-by-Step Anti-Inflammatory Chicken Soup Instructions
Phase 1: Preparing Your Workspace and Ingredients (5 minutes)
- Set up your cooking station like a professional chef. Place your large Dutch oven or heavy-bottomed pot on the stove. Gather all ingredients on your counter in the order you’ll use them. This preparation method, called “mise en place,” ensures smooth cooking without scrambling for ingredients mid-recipe.
- Prepare all vegetables before you start cooking. Dice the onion into 1/2-inch pieces (they should be roughly the same size for even cooking). Slice carrots into 1/4-inch rounds on the diagonal for an attractive presentation. Chop celery into 1/2-inch pieces, including some leaves for extra flavor. Mince garlic finely and grate ginger using the small holes of a box grater.
- Pat chicken thighs completely dry with paper towels. Moisture on the surface prevents proper browning, which reduces flavor development. Season both sides lightly with salt and pepper, then set aside on a clean plate.
Phase 2: Building the Flavor Foundation (8-10 minutes)
- Heat olive oil in your pot over medium heat for 2 minutes. The oil is ready when it shimmers slightly but doesn’t smoke. If it starts smoking, remove the pot from heat briefly and reduce temperature. Medium heat is crucial – too high will burn your vegetables and create bitter flavors.
- Add diced onions first and cook for 3-4 minutes, stirring every 30 seconds. You’ll hear gentle sizzling when the onions hit the oil – this is perfect. The onions should become translucent (you can see through them) but not brown. If they start browning, reduce heat immediately.
- Add carrots and celery to create the classic soup base. Stir to combine with onions and cook for another 3-4 minutes. The vegetables should start softening but still have a slight crunch. This combination creates the foundational flavor that makes anti-inflammatory chicken soup so comforting.
- Add minced garlic and grated ginger – timing is everything here. Push vegetables to one side of the pot and add garlic and ginger to the cleared space. Cook for exactly 30-45 seconds, stirring constantly. You’ll smell an amazing aroma when they’re ready. Cooking longer than 1 minute will make them bitter and harsh.
Phase 3: Activating Anti-Inflammatory Spices (2-3 minutes)
- Add turmeric, cumin, and black pepper to the vegetables. Sprinkle spices evenly over the vegetables and stir immediately. Cook for 30 seconds while stirring constantly – this process, called “blooming,” releases essential oils and dramatically improves flavor. The mixture should smell warm and aromatic.
- Watch for color changes as you stir. The turmeric will turn the vegetables golden yellow, and you might see some spices sticking to the bottom of the pot. This is normal and adds flavor, but don’t let them burn. If anything starts sticking badly, add a splash of chicken broth and scrape with your wooden spoon.
Phase 4: Adding Chicken and Building Soup Base (8-10 minutes)
- Carefully place chicken thighs in the pot skin-side down. You should hear immediate sizzling when the chicken hits the hot surface. Don’t move the chicken for 3-4 minutes – this allows proper browning, which adds deep flavor to your anti-inflammatory chicken soup. The skin should release easily when properly browned.
- Pour chicken broth slowly around the edges of the pot, not directly over the chicken. Start with 4 cups and add the remaining 2 cups gradually. The liquid should just barely cover the chicken pieces. If it doesn’t quite cover, add water 1/2 cup at a time until chicken is submerged.
- Add water to achieve the perfect consistency. Pour in 2 cups of water (or more if needed) to create the right soup-to-solid ratio. Your anti-inflammatory chicken soup should have enough liquid to serve 4 generous bowls while still being hearty with vegetables and chicken.
- Season the cooking liquid with 1 teaspoon of sea salt. Stir gently to distribute salt without disturbing the chicken too much. Taste the broth with a clean spoon – it should taste slightly under-seasoned since it will concentrate as it cooks.
Phase 5: The Critical Simmering Stage (25-30 minutes)
- Bring the pot to a gentle boil over medium-high heat. Watch for small bubbles consistently breaking the surface – this usually takes 5-7 minutes. Once boiling, immediately reduce heat to low. Violent boiling will make the chicken tough and create a cloudy broth.
- Adjust heat to maintain a gentle simmer. You should see occasional bubbles lazily rising to the surface, about 1-2 bubbles per second. Cover the pot partially (leave about 1 inch gap) to prevent too much liquid from evaporating while allowing steam to escape.
- Simmer patiently for 25-30 minutes without lifting the lid frequently. Check every 10 minutes to ensure the simmer rate is correct. The chicken is done when it easily pulls away from the bone and reaches an internal temperature of 165°F. Use an instant-read thermometer inserted into the thickest part of the thigh.
- Skim the surface every 10 minutes for the clearest broth. Use a large spoon to remove any foam, fat, or impurities that rise to the surface. This step isn’t mandatory, but it creates a more appealing, restaurant-quality appearance in your anti-inflammatory chicken soup.
Phase 6: Chicken Preparation and Final Assembly (8-10 minutes)
- Carefully remove chicken using tongs and transfer to a clean cutting board. The meat will be very hot and tender, so handle gently to prevent it from falling apart. Let chicken cool for 3-4 minutes until you can handle it safely – this prevents burns and makes shredding easier.
- Remove and discard skin and bones while chicken is still warm. The skin should peel off easily, and bones will slide out with gentle pulling. Don’t worry if some small bone fragments remain – you’ll catch them during shredding. Work systematically, removing all visible bones and cartilage.
- Shred chicken into bite-sized pieces using two forks. Hold one fork steady and use the other to pull meat apart, following the natural grain. Aim for pieces about 1/2 to 3/4 inch – they should be large enough to feel substantial but small enough to fit comfortably on a spoon.
- Return shredded chicken to the simmering soup base. Stir gently to distribute chicken evenly throughout the pot. Let it simmer for 2-3 minutes to reheat the chicken and allow it to absorb more of the anti-inflammatory flavors from the broth.
Phase 7: Adding Fresh Elements and Final Seasoning (3-5 minutes)
- Add fresh spinach leaves to the pot and stir gently. The spinach will wilt dramatically – 2 cups of fresh leaves will reduce to about 1/2 cup when cooked. Stir just until wilted, about 1-2 minutes. Overcooking spinach makes it slimy and dull green.
- Remove pot from heat before adding lemon juice. This prevents the citric acid from becoming bitter with continued cooking. Add lemon juice 1 tablespoon at a time, tasting after each addition. The soup should taste bright and balanced, not sour.
- Perform final seasoning adjustments. Taste your anti-inflammatory chicken soup with a clean spoon and adjust salt and pepper as needed. Remember that salt enhances all other flavors, so don’t be afraid to add more if the soup tastes flat. Add pepper gradually – its heat builds over time.
- Stir in fresh chopped parsley just before serving. This adds a fresh, herbaceous note and beautiful color contrast to your anti-inflammatory chicken soup. Reserve some parsley for garnishing individual bowls if desired.
Professional Chef’s Notes for Perfect Anti-Inflammatory Chicken Soup
Turmeric Absorption Tip: The black pepper in this anti-inflammatory chicken soup recipe isn’t just for flavor – piperine in black pepper increases curcumin absorption by up to 2000%, maximizing the anti-inflammatory benefits of turmeric.
Ginger Selection: Choose fresh ginger with smooth, tight skin and no wrinkles. Store unused ginger in the refrigerator wrapped in paper towels, then plastic wrap. Fresh ginger provides significantly more anti-inflammatory compounds than dried powder.
Bone-In Chicken Benefits: Using bone-in thighs adds collagen, minerals, and gelatin to your anti-inflammatory chicken soup, creating a more nutritious and satisfying meal. The bones also prevent overcooking better than boneless cuts.
Make-Ahead Strategy: This anti-inflammatory chicken soup actually tastes better the next day as flavors continue developing. Prepare completely but add spinach and lemon juice only when reheating to maintain their fresh qualities.
Nutrition Information Per Serving
- Calories: 285
- Protein: 28g
- Carbohydrates: 12g
- Fat: 14g
- Fiber: 3g
- Sodium: 780mg
- Vitamin C: 45% DV (from lemon and vegetables)
- Vitamin A: 70% DV (from carrots and spinach)
Creative Anti-Inflammatory Chicken Soup Variations
Golden Coconut Anti-Inflammatory Soup: Replace 2 cups of broth with coconut milk and add lemongrass for an Asian twist. The coconut milk enhances turmeric absorption while creating a creamy texture. If you love traditional Mexican chicken soup flavors, our authentic caldo de pollo offers a completely different but equally comforting approach to healing chicken soup.
Mediterranean Anti-Inflammatory Bowl: Add diced tomatoes, white beans, and fresh oregano during the last 10 minutes of cooking. Finish with olive oil and crumbled feta cheese for added richness and probiotics.
Hearty Grain-Enhanced Version: Stir in 1 cup of cooked quinoa or brown rice during the final assembly. This transforms your anti-inflammatory chicken soup into a complete meal that’s even more filling and nutritious.
Vegetable-Forward Anti-Inflammatory Soup: Double the vegetables and add sweet potatoes, zucchini, or bell peppers during the simmering phase. For more vegetable-focused inspiration, try our nourishing ABC Soup recipe that complements this anti-inflammatory approach perfectly.
Storage & Reheating Your Anti-Inflammatory Chicken Soup
Proper Refrigerator Storage: Cool your anti-inflammatory chicken soup completely at room temperature (no more than 2 hours) before refrigerating. Transfer to airtight containers and store for up to 4-5 days. The flavors actually improve over time.
Freezer Method for Meal Prep: Freeze in individual or family-sized portions for up to 3 months. Use freezer-safe containers and leave 1-inch headspace for expansion. Label containers with contents and date for easy identification.
Reheating Instructions: Thaw frozen soup overnight in the refrigerator. Reheat gently on the stovetop over low heat, stirring occasionally to prevent sticking. Add a splash of broth or water if the soup has thickened too much during storage.
Fresh Element Addition: When reheating stored anti-inflammatory chicken soup, add fresh spinach and lemon juice during the warming process to restore their vibrant color and nutritional value.
Complete Troubleshooting Guide
Problem: Anti-inflammatory chicken soup tastes bland or flat Solution: This usually means insufficient salt or acid. Add salt gradually, tasting after each addition, then brighten with fresh lemon juice. The acid helps other flavors pop and creates balance. Don’t forget that under-seasoned soup is the most common beginner mistake.
Problem: Chicken turned out tough or stringy Solution: You likely cooked at too high heat or for too long. Next time, maintain a gentle simmer and check doneness at 20 minutes. Chicken thighs are forgiving, but aggressive boiling will toughen any protein.
Problem: Vegetables are mushy and overcooked Solution: Cut vegetables larger next time and add delicate ones like spinach only at the end. Root vegetables should retain slight firmness even when fully cooked. Consider the cooking time when sizing your cuts.
Problem: Anti-inflammatory flavors aren’t prominent enough Solution: Increase fresh ginger to 3 tablespoons and add an extra 1/2 teaspoon of turmeric. Remember that anti-inflammatory compounds are more potent when fresh ingredients are used rather than dried alternatives.
Problem: Soup consistency is too thin or watery Solution: Simmer uncovered for 15-20 minutes to reduce and concentrate flavors. Alternatively, mix 2 tablespoons of cornstarch with cold water to create a slurry, then stir into the simmering soup until thickened.
Problem: Oil layer floating on top of soup Solution: This happens when chicken releases fat during cooking. Skim the surface with a large spoon, or refrigerate the soup and remove the solidified fat layer before reheating.
Essential Equipment for Anti-Inflammatory Chicken Soup Success
Primary Cooking Vessel: Large Dutch oven or heavy-bottomed pot (minimum 6-quart capacity) for even heat distribution and preventing hot spots that could burn your aromatics.
Sharp Knife Set: 8-inch chef’s knife for efficient vegetable prep and 4-inch paring knife for detailed work like mincing garlic and removing chicken from bones.
Cutting Board System: Use separate boards for vegetables and raw chicken to prevent cross-contamination. Plastic boards are easier to sanitize than wood for raw meat.
Essential Utensils: Long-handled wooden spoon for stirring without scratching, sturdy tongs for safely handling hot chicken, and ladle for serving.
Measuring Tools: Liquid measuring cups, dry measuring cups, and measuring spoons for accuracy in this anti-inflammatory chicken soup recipe.
Safety Equipment: Instant-read thermometer for checking chicken doneness (165°F internal temperature) and timer to track cooking phases accurately.
Organized Shopping List for Anti-Inflammatory Chicken Soup
Fresh Meat Counter
- 1.5 lbs bone-in chicken thighs (ask butcher for uniform sizes)
Fresh Produce Section
- 1 medium yellow onion
- 2 large carrots
- 1 bunch celery (you’ll use 3 stalks)
- 1 head fresh garlic
- 2-3 inch piece fresh ginger root
- 2 cups fresh baby spinach
- 1 bunch fresh flat-leaf parsley
- 2-3 fresh lemons (for juicing)
Pantry & Spice Aisle
- Ground turmeric (check freshness date)
- Ground cumin
- Black peppercorns or pre-ground black pepper
- Sea salt or kosher salt
- Extra virgin olive oil
Canned/Boxed Goods
- 48 oz container low-sodium chicken broth (or 6 cups)
Optional Additions
- Coconut milk (for variation)
- Fresh lemongrass (for Asian twist)
Five Success Secrets for Perfect Anti-Inflammatory Chicken Soup
- Choose quality bone-in chicken thighs over breasts – thighs stay moist during longer cooking times and contribute more flavor and nutrients to your anti-inflammatory chicken soup base through their natural collagen content.
- Never rush the aromatic vegetable foundation – properly sautéed onions, carrots, and celery create the flavor backbone that separates good soup from extraordinary soup. Take the full 8-10 minutes for this crucial step.
- Maintain gentle, consistent heat throughout cooking – aggressive boiling will make chicken tough, create cloudy broth, and can cause vegetables to break down into mush. Patience creates the best anti-inflammatory chicken soup.
- Add acidic ingredients like lemon juice only at the end – citric acid brightens all flavors and adds freshness, but becomes bitter and harsh if cooked for extended periods. This timing makes all the difference.
- Taste and adjust seasoning at every phase – the best anti-inflammatory chicken soup is seasoned throughout the cooking process, not just at the end. Build layers of flavor by tasting and adjusting salt, pepper, and spices as you cook.