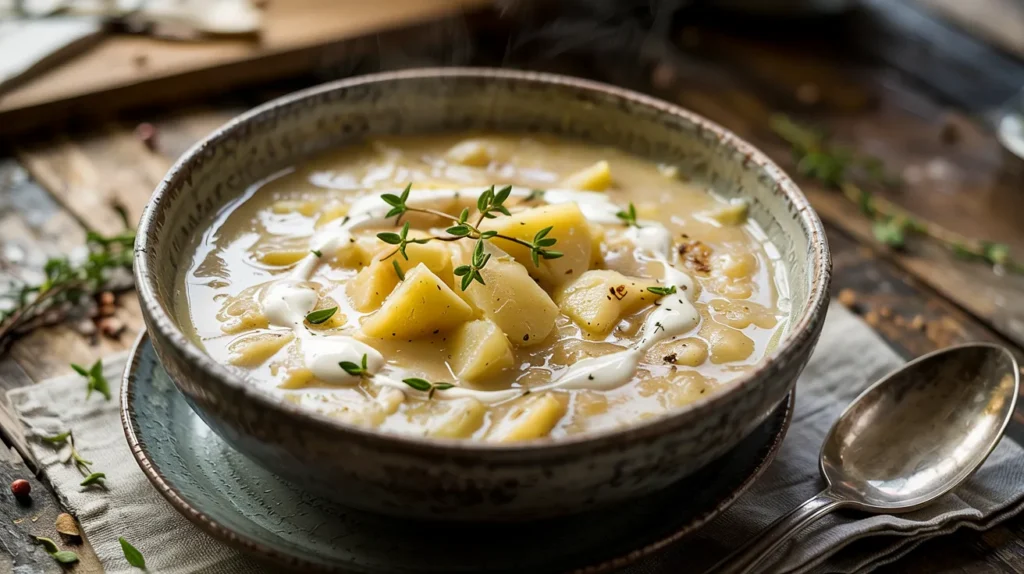
This creamy potato garlic soup brings together tender potatoes and aromatic roasted garlic in a luxuriously smooth base that’s pure comfort in a bowl. Our foolproof creamy potato garlic soup recipe guides beginners through every step to create restaurant-quality results at home.
SERVES: 4 | PREP: 20 MIN | COOK: 25 MIN | TOTAL: 45 MIN
Ingredients
Base Vegetables
| Ingredient | Amount |
|---|---|
| Yukon Gold potatoes, peeled and cubed | 2 lbs |
| Garlic cloves | 8 large |
| Yellow onion, diced | 1 medium |
| Celery stalks, chopped | 2 |
Liquids & Dairy
| Ingredient | Amount |
|---|---|
| Low-sodium chicken broth | 4 cups |
| Heavy cream | 1 cup |
| Whole milk | ½ cup |
| Butter | 3 tablespoons |
Seasonings & Herbs
| Ingredient | Amount |
|---|---|
| Fresh thyme leaves | 2 teaspoons |
| Bay leaves | 2 |
| Salt | 1 teaspoon |
| Black pepper | ½ teaspoon |
| Olive oil | 2 tablespoons |
Detailed Step-by-Step Instructions for Creamy Potato Garlic Soup
Phase 1: Ingredient Preparation (8 minutes)
Step 1: Prepare the Potatoes
- Wash 2 pounds of Yukon Gold potatoes under cold running water, scrubbing away any dirt with a vegetable brush
- Using a sharp peeler, remove all skin from potatoes – work in one direction for even peeling
- Place peeled potatoes on cutting board and cut into uniform 1-inch cubes using a sharp chef’s knife
- Why this matters: Even-sized pieces cook at the same rate, preventing some from becoming mushy while others stay hard
- Immediately place cubed potatoes in a large bowl filled with cold water to prevent browning
- Beginner tip: If potatoes start turning brown, add 1 tablespoon lemon juice to the water
Step 2: Prepare the Garlic
- Take 8 large garlic cloves and place them on cutting board
- Using the flat side of your chef’s knife, gently press down on each clove to loosen the papery skin
- Peel away all skin completely – any remaining bits will taste bitter when cooked
- Slice each garlic clove lengthwise into 3-4 thin strips rather than mincing
- Why slice instead of mince: Sliced garlic releases flavor more gradually and won’t burn as easily
- Set sliced garlic aside in a small bowl
Step 3: Prepare Other Vegetables
- Peel 1 medium yellow onion and cut off both ends
- Cut onion in half from top to bottom, then slice each half into ¼-inch dice pieces
- Visual cue: Pieces should be about the size of small peas
- Wash 2 celery stalks and trim off leafy tops and bottom inch
- Cut celery into ¼-inch pieces to match the onion size
- Pro tip: Keep vegetable pieces the same size so they cook evenly and look professional
Phase 2: Building the Flavor Base (12 minutes)
Step 4: Heat the Cooking Fat
- Place a heavy-bottomed 4-quart pot or Dutch oven on stovetop over medium heat
- Add 2 tablespoons olive oil and 1 tablespoon butter to the pot
- Why use both: Oil prevents butter from burning, while butter adds rich flavor
- Heat for 1-2 minutes until butter completely melts and mixture starts to shimmer
- Temperature check: The oil should move freely when you tilt the pot, but not smoke
Step 5: Cook the Garlic
- Add sliced garlic to the heated oil and butter mixture
- Stir gently with wooden spoon for exactly 2 minutes
- What to watch for: Garlic should sizzle gently and become fragrant, but NOT turn brown
- Beginner warning: If garlic starts browning, immediately lower heat to medium-low
- Visual cue: Properly cooked garlic will look slightly translucent and smell sweet, not sharp
Step 6: Add Onion and Celery
- Add diced onion and celery to the pot with the garlic
- Stir everything together with wooden spoon to coat vegetables with oil
- Cook for 5-6 minutes, stirring every minute to prevent sticking
- What you’re looking for: Onion pieces should become see-through (translucent) and celery should soften slightly
- Sound cue: Vegetables should make a gentle sizzling sound – if they’re silent, increase heat slightly
Step 7: Season the Vegetable Base
- Sprinkle ½ teaspoon salt and ¼ teaspoon black pepper over the cooked vegetables
- Stir for 30 seconds to distribute seasonings evenly
- Why season now: Salt helps vegetables release their natural moisture and concentrates flavors
- Taste test: Take a small spoonful (blow on it first!) – you should taste balanced garlic, onion, and celery
Phase 3: Building the Creamy Potato Garlic Soup Base (15 minutes)
Step 8: Add the Potatoes
- Drain potatoes completely in a colander, shaking off excess water
- Add drained potatoes to the pot with seasoned vegetables
- Using wooden spoon, gently stir to coat potatoes with the aromatic mixture
- Gentle mixing tip: Don’t stir aggressively – we want to coat potatoes without breaking them
- Cook for 2 minutes, stirring occasionally, until potatoes are well-coated
Step 9: Add Liquid and Herbs
- Pour 4 cups low-sodium chicken broth into the pot slowly to avoid splashing
- Liquid level check: Broth should cover potatoes by about 1 inch
- If potatoes aren’t fully covered, add more broth ¼ cup at a time until they are
- Add 2 bay leaves and 2 teaspoons fresh thyme leaves to the pot
- Herb tip: Rub thyme between your fingers before adding to release more oils
Step 10: Bring to Proper Boil
- Increase heat to medium-high and watch the pot carefully
- What to watch for: Small bubbles will appear around edges first, then larger bubbles in center
- When soup reaches a full rolling boil (large bubbles breaking surface constantly), immediately reduce heat
- Critical step: Lower heat to medium-low so soup maintains gentle simmer
- Why this matters: Violent boiling breaks down potatoes into mush instead of tender pieces
Step 11: Simmer Until Tender
- Set timer for 12 minutes and let soup simmer gently
- Perfect simmer looks like: Small, lazy bubbles occasionally breaking the surface
- Check at 10 minutes: Insert fork into largest potato piece – it should slide in with slight resistance
- Check at 12 minutes: Fork should slide through potato easily without any hard center
- If not tender: Continue simmering 2-3 more minutes and test again
- Remove bay leaves: Fish them out with spoon and discard – they’ve done their job
Phase 4: Creating the Perfect Creamy Texture (8 minutes)
Step 12: Mash for Thickness
- Using a potato masher or large fork, gently mash about half the potatoes directly in the pot
- Technique: Press down 8-10 times in different spots around the pot
- Goal: Create natural thickening while leaving chunky potato pieces for texture
- Visual guide: Soup should look thick and chunky, not smooth like baby food
- Don’t over-mash: Too much mashing creates gluey, unpleasant texture
Step 13: Prepare Dairy for Adding
- In a measuring cup, combine 1 cup heavy cream and ½ cup whole milk
- Let this mixture sit for 2-3 minutes to come closer to room temperature
- Critical temperature tip: Never add cold dairy to hot soup – it can cause curdling
- Test the soup temperature: It should be hot but not violently bubbling
Step 14: Add Dairy Gradually
- Turn heat to LOW – this is crucial for preventing curdling
- Pour cream mixture into soup in a slow, steady stream while stirring constantly
- Stirring technique: Use figure-8 motions to incorporate dairy evenly
- What you’ll see: Soup will immediately become pale and creamy-looking
- Temperature rule: Do NOT let soup boil after adding dairy
Step 15: Finish with Butter
- Add remaining 2 tablespoons butter to the creamy potato garlic soup
- Stir gently until butter completely melts and disappears into soup
- Visual cue: Soup surface should look glossy and rich when butter is fully incorporated
- Texture check: Soup should coat the back of a spoon but still pour easily
Step 16: Final Seasoning
- Taste soup carefully (it’s hot!) and add remaining ½ teaspoon salt and ¼ teaspoon pepper
- Seasoning tip: Cream mutes flavors, so this creamy potato garlic soup needs bold seasoning
- Add seasonings gradually, tasting after each addition
- Perfect balance: You should taste potato sweetness, garlic richness, and balanced salt
Phase 5: Final Cooking and Serving (2 minutes)
Step 17: Final Simmer
- Keep heat on LOW and let soup simmer very gently for 2 more minutes
- What’s happening: Flavors are melding together and soup is reaching perfect consistency
- Stir occasionally to prevent any sticking on bottom
- Consistency check: Soup should be thick enough to coat spoon but thin enough to pour smoothly
Step 18: Serve Your Creamy Potato Garlic Soup
- Warm serving bowls: Place 4 bowls in 200°F oven for 2 minutes while soup finishes
- Ladle carefully: Fill each bowl about ¾ full, leaving room for garnishes
- Garnish options: Fresh thyme sprigs, cracked black pepper, or small butter pat
- Serve immediately: This creamy potato garlic soup is best enjoyed hot and fresh
Chef’s Notes for Perfect Creamy Potato Garlic Soup
Potato Selection: Yukon Golds are essential for the best creamy potato garlic soup because they hold their shape while contributing natural creaminess. Russets become too starchy and fall apart.
Garlic Control: Slicing garlic instead of mincing prevents overwhelming heat and bitter flavor. For even deeper taste, roast whole garlic cloves in the oven at 400°F for 20 minutes first.
Dairy Temperature: Always add cream to cooled soup base, never boiling liquid. Room temperature dairy incorporates smoothly without seizing or creating lumps.
Consistency Secrets: Mashing only half the potatoes creates ideal texture for creamy potato garlic soup. For silkier results, use an immersion blender for exactly 10 seconds maximum.
Nutrition Information (Per Serving)
- Calories: 385
- Protein: 12g
- Carbohydrates: 42g
- Fat: 20g
- Fiber: 4g
- Sodium: 650mg
Creative Variations of Creamy Potato Garlic Soup
Loaded Potato Style: Transform your creamy potato garlic soup by adding crispy bacon bits, sharp cheddar cheese, and green onions for a hearty twist that rivals restaurant versions.
Herb Garden Version: Incorporate fresh rosemary, sage, and parsley for an aromatic upgrade. This pairs beautifully with our cajun potato soup for variety nights.
Roasted Vegetable Addition: Fold in roasted cauliflower or parsnips for extra depth. The caramelized vegetables complement the garlic beautifully in this creamy potato garlic soup.
Healthy Makeover: Substitute half-and-half for heavy cream and add pureed white beans for protein. Try this alongside our broccoli and potato soup for a nutritious meal.
Storage & Reheating Your Creamy Potato Garlic Soup
Refrigerator: Store covered for up to 4 days. The flavors of this creamy potato garlic soup actually improve overnight as they meld together.
Freezing: Freeze for up to 2 months in portion-sized containers. Note that dairy-based soups may separate slightly when thawed but still taste delicious.
Reheating: Warm gently over low heat, stirring frequently. Add splash of milk if soup becomes too thick. Never microwave at full power – it breaks the cream.
Make-Ahead: Prepare through step 12, then add dairy when ready to serve. This prevents cream from breaking during storage.
Troubleshooting Guide
Soup Too Thin: Mix 2 tablespoons cornstarch with cold milk, then stir into simmering creamy potato garlic soup. Cook 2 minutes until thickened.
Lumpy Texture: Cream was added to boiling soup. Strain through fine mesh, then return to pot and reheat gently.
Overwhelming Garlic: Add extra cream and a pinch of sugar to balance the intensity in your creamy potato garlic soup. Lemon juice also helps mellow harsh garlic.
Gluey Consistency: Potatoes were over-mashed or wrong variety used. Add hot broth gradually to thin, but texture won’t fully recover.
Broken Cream: Temperature shock caused separation. Whisk in cold cream off heat, then warm very gently while stirring constantly.
Equipment Essentials
- Heavy-bottomed pot (4-quart minimum)
- Potato masher or large fork
- Sharp chef’s knife for even chopping
- Cutting board with groove for juices
- Ladle for smooth serving
- Fine-mesh strainer (optional, for silky texture)
Shopping List
Produce Section
- 2 lbs Yukon Gold potatoes
- 1 head fresh garlic
- 1 yellow onion
- 2 celery stalks
- Fresh thyme
Dairy Case
- 1 cup heavy cream
- ½ cup whole milk
- Butter (3 tablespoons needed)
Pantry Items
- Low-sodium chicken broth (32 oz)
- Olive oil
- Bay leaves
- Salt and black pepper
Success Secrets for Perfect Results
1. Start with room temperature dairy to prevent temperature shock when adding to your hot creamy potato garlic soup base.
2. Taste constantly during the final phase – cream masks flavors, so bold seasoning is essential for the best creamy potato garlic soup.
3. Control your heat after adding cream. Low and slow prevents breaking and ensures silky results every time.
4. Prep everything first – this creamy potato garlic soup moves quickly once you start cooking, and timing matters for perfect texture.
5. Warm your serving bowls in a 200°F oven for 2 minutes. Hot soup in cold bowls loses temperature immediately.
This creamy potato garlic soup recipe delivers comfort food perfection every time you make it. The secret lies in building layers of flavor and respecting the dairy – treat it gently, and you’ll be rewarded with restaurant-quality creamy potato garlic soup that’ll become your go-to cold weather favorite for years to come.