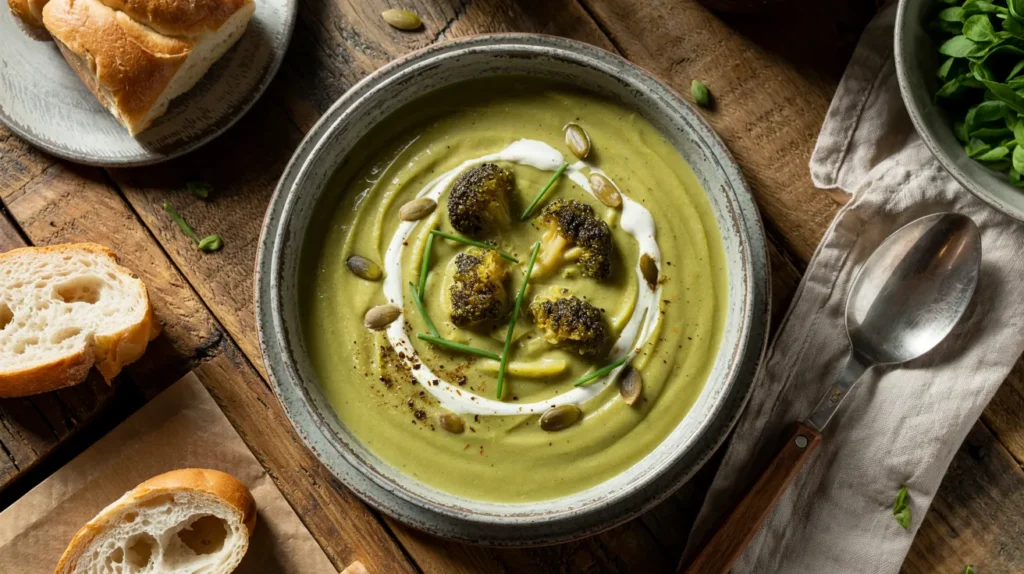
This luxurious creamy caramelized broccoli soup elevates simple vegetables into an extraordinary comfort dish that rivals any restaurant. The magic happens when you properly caramelize each ingredient, building layers of complex flavors that make this creamy caramelized broccoli soup absolutely unforgettable on chilly days.
Recipe Information
SERVES: 4 | PREP: 20 MIN | COOK: 25 MIN | TOTAL: 45 MIN
Ingredients
Vegetables
| Ingredient | Amount |
|---|---|
| Fresh broccoli crowns | 2 large heads (about 2 lbs) |
| Yellow onion | 1 large, diced |
| Carrots | 2 medium, chopped |
| Celery stalks | 2, chopped |
| Garlic cloves | 4, minced |
Base & Seasonings
| Ingredient | Amount |
|---|---|
| Vegetable broth | 4 cups |
| Heavy cream | 1 cup |
| Olive oil | 3 tablespoons |
| Butter | 2 tablespoons |
| Salt | 2 teaspoons |
| Black pepper | 1/2 teaspoon |
| Dried thyme | 1 teaspoon |
Optional Garnishes
- Toasted pumpkin seeds
- Crumbled bacon
- Fresh chives
- Parmesan cheese
Detailed Step-by-Step Instructions for Perfect Creamy Caramelized Broccoli Soup
Phase 1: Careful Preparation (8 minutes)
Step 1: Prepare Your Broccoli Like a Pro Remove the broccoli from packaging and rinse under cold water. Using a sharp knife, cut the florets away from the main stem, making each piece about 1-inch in size. Beginner tip: Cut the stem into small pieces too – they add extra flavor and nutrition to your creamy caramelized broccoli soup. Don’t throw them away! Pat everything dry with paper towels because wet vegetables won’t caramelize properly.
Step 2: Master the Vegetable Prep Peel your onion and cut it in half from top to bottom. Lay each half flat and slice into 1/4-inch thick pieces, then turn and dice into small, uniform squares. Why this matters: Even-sized pieces cook at the same rate, preventing some from burning while others stay raw. Wash and peel carrots, then cut into 1/4-inch pieces. Trim celery ends and cut into similar 1/4-inch pieces.
Step 3: Garlic Preparation Secret Peel garlic cloves by placing them under the flat side of your knife and gently pressing down until you hear a crack. The skin will slip right off. Mince garlic into tiny pieces, but don’t do this until you’re almost ready to use it. Safety note: Pre-cut garlic can develop bacteria, so always mince fresh right before cooking.
Phase 2: Building Flavor Through Caramelization (15 minutes)
Step 4: Heat Your Pot Correctly Choose a heavy-bottomed pot that’s at least 4-6 quarts in size. Place it on your stove over medium-high heat for 1 minute before adding any fat. Temperature test: Flick a drop of water into the pot – it should sizzle and evaporate immediately when it’s ready. Add 3 tablespoons olive oil and 2 tablespoons butter. The butter will foam and then settle – this is perfect.
Step 5: Start with Onions for Sweet Foundation Add your diced onions to the hot oil and butter mixture. Listen for the sizzle – this tells you the temperature is right. Stir the onions every 60-90 seconds with a wooden spoon. What to look for: After 3-4 minutes, the onions should start turning a light golden color and smell sweet, not sharp. Beginner mistake to avoid: Don’t stir constantly or the onions won’t caramelize properly.
Step 6: Add Carrots and Celery for Depth Add your chopped carrots and celery to the pot with the onions. Timing is crucial: Cook for 5-6 minutes, stirring every 2 minutes. Visual cues to watch for: The edges of vegetables should start getting golden brown spots, and you’ll hear consistent gentle sizzling. Temperature check: If vegetables are browning too fast, reduce heat to medium. If there’s no sizzling, increase heat slightly.
Step 7: Caramelize Broccoli for Maximum Flavor Add all broccoli florets and chopped stems to the pot. This is the magic step that makes your creamy caramelized broccoli soup special. Cook for 6-7 minutes, stirring every 2-3 minutes. What you’re looking for: Some broccoli pieces should have dark golden spots, and the mixture should smell nutty and sweet. Pro technique: Let vegetables sit undisturbed for 2 minutes between stirs to develop proper caramelization.
Step 8: Add Garlic at the Perfect Moment Add your minced garlic and dried thyme to the pot. Critical timing: Cook for only 30-60 seconds, stirring constantly. Why this matters: Garlic burns quickly and becomes bitter if cooked too long. Success indicator: You should smell fragrant garlic and herbs, but nothing should look dark brown or black.
Phase 3: Creating the Soup Base (10 minutes)
Step 9: Deglaze Like a Professional Chef Pour 1/2 cup of your vegetable broth into the pot first. Important technique: Use a wooden spoon to scrape up any brown bits stuck to the bottom of the pot – these are pure flavor gold for your creamy caramelized broccoli soup. What you’ll hear: The liquid will bubble and steam dramatically when it hits the hot pot. This is normal and good!
Step 10: Add Remaining Broth Gradually Slowly pour in the remaining 3.5 cups of vegetable broth, stirring as you pour. Temperature control: Bring the mixture to a rolling boil over medium-high heat – this usually takes 3-4 minutes. Visual cue: You’ll see large bubbles breaking the surface consistently across the entire pot.
Step 11: Season and Simmer to Perfection Add 2 teaspoons salt and 1/2 teaspoon black pepper. Reduce heat to medium-low so the soup maintains a gentle simmer – you should see small bubbles occasionally breaking the surface, not violent boiling. Timing: Simmer for 5-7 minutes until the largest broccoli pieces are easily pierced with a fork but still hold their shape.
Step 12: Test for Doneness Use a fork to test the biggest broccoli floret. Perfect texture: The fork should slide through with just slight resistance – tender but not mushy. Beginner tip: If vegetables are still firm, simmer 2-3 minutes longer. If they’re falling apart, your soup will still taste great, just have a more rustic texture.
Phase 4: Blending to Creamy Perfection (7 minutes)
Step 13: Safety First – Cool Before Blending Remove the pot from heat completely. Critical safety step: Let the soup cool for 3-5 minutes before blending. Why this matters: Hot soup can splatter violently when blended, potentially causing severe burns. Temperature test: The surface should stop bubbling completely before you blend.
Step 14: Blend to Your Preferred Texture If using an immersion blender: Insert it into the deepest part of the pot and pulse in 3-4 second bursts until smooth. For regular blender: Work in batches, filling blender only halfway each time. Texture options: Blend completely smooth for restaurant-style soup, or leave slightly chunky for rustic texture. Safety reminder: Never fill a blender more than halfway with hot liquid.
Step 15: Strain for Ultra-Smooth Results (Optional) For restaurant-quality smoothness, pour the blended soup through a fine-mesh strainer back into the pot, pressing solids with the back of a spoon. Beginner note: This step is optional but creates the silkiest creamy caramelized broccoli soup texture.
Phase 5: Final Touches and Serving (5 minutes)
Step 16: Add Cream Without Curdling Return pot to the stove on low heat only. Temperature crucial: The soup should barely simmer – no bubbling. Slowly pour in 1 cup heavy cream while stirring constantly with a wooden spoon. What to avoid: Never let the soup boil after adding cream, or it will curdle and look lumpy.
Step 17: Final Seasoning Adjustment Taste your soup with a clean spoon. Seasoning guide: Add more salt if flavors seem flat, more pepper for warmth, or a pinch of sugar if the soup tastes too sharp from the vegetables. Professional tip: The soup should coat the back of a spoon lightly when perfect.
Step 18: Serve Immediately Ladle the hot creamy caramelized broccoli soup into warmed bowls. Serving temperature: The soup should be steaming hot but not bubbling. Final touch: Add your choice of garnishes like toasted pumpkin seeds, crumbled bacon, or fresh chives for color and texture contrast.
Chef’s Notes for Creamy Caramelized Broccoli Soup Success
Caramelization Secret: The difference between good and exceptional creamy caramelized broccoli soup lies in patience during the browning process. Those golden-brown bits create complex, nutty flavors impossible to achieve any other way.
Cream Temperature: Always add cream off direct heat or on the lowest setting. High temperatures cause dairy proteins to separate, creating an unappetizing curdled texture that can’t be fixed.
Consistency Control: If your soup becomes too thick after cooling, thin with additional warm broth. Too thin? Simmer uncovered for 5-10 minutes to concentrate flavors and reduce liquid.
Make-Ahead Magic: This creamy caramelized broccoli soup actually improves overnight as flavors meld together. Just reheat gently and add a splash of cream if needed to restore silky texture.
Nutrition Information (Per Serving)
- Calories: 285
- Protein: 8g
- Carbohydrates: 18g
- Fat: 22g
- Fiber: 6g
- Sodium: 890mg
Creative Variations for Your Creamy Caramelized Broccoli Soup
Broccoli Cheddar Upgrade
Transform your basic creamy caramelized broccoli soup by adding 1 cup sharp cheddar cheese in the final step. Stir until completely melted and smooth. This pairs beautifully with easy tomato soup with grilled cheese for the ultimate comfort meal combination.
Cauliflower-Broccoli Blend
Replace half the broccoli with cauliflower florets for a milder flavor profile. This creates a beautiful color contrast similar to our creamy roasted cauliflower soup but with added green vegetable nutrition and visual appeal.
Spicy Kick Version
Add 1 diced jalapeño with the onions and a pinch of cayenne pepper during caramelization. The gentle heat balances beautifully with the cream, creating a warming sensation without overwhelming the delicate broccoli flavors.
Protein-Packed Option
Stir in 2 cups cooked white beans or 1 cup cooked quinoa before blending for extra protein and substance. This makes your creamy caramelized broccoli soup a complete meal that will keep you satisfied longer.
Storage & Reheating Your Creamy Caramelized Broccoli Soup
Refrigerator Storage
Store in airtight containers for up to 4 days in the refrigerator. The soup will naturally thicken when cold due to the cream and vegetables – this is completely normal and expected.
Freezer Instructions
Freeze for up to 3 months in freezer-safe containers. Important: Leave 1 inch of headspace for expansion. Note: The texture may be slightly different after freezing due to cream separation, but taste remains excellent.
Reheating Methods
- Stovetop: Heat gently over low heat, stirring frequently. Add splash of broth or cream if needed.
- Microwave: Heat in 30-second intervals, stirring between each interval to prevent hot spots.
- From Frozen: Thaw overnight in refrigerator before reheating for best results.
Troubleshooting Your Creamy Caramelized Broccoli Soup
Problem: Soup is Too Thin
Solution: Simmer uncovered for 10-15 minutes to reduce liquid and concentrate flavors. Alternative: Mix 2 tablespoons cornstarch with 3 tablespoons cold water and stir into simmering soup until thickened.
Problem: Soup Curdled After Adding Cream
Solution: Remove from heat immediately and use an immersion blender to re-emulsify. Prevention: Always add cream off heat and never let dairy-based soup boil vigorously.
Problem: Bitter or Burnt Taste
Solution: This usually means vegetables or garlic burned during caramelization. Add 1-2 teaspoons sugar and extra cream to balance harsh flavors. Prevention: Watch heat levels carefully during browning phase.
Problem: Not Creamy Enough
Solution: Add more heavy cream gradually, or blend in 1/4 cup cream cheese for extra richness and body. Alternative: Add 2 tablespoons butter for additional smoothness.
Problem: Lumpy or Grainy Texture
Solution: Strain through fine-mesh sieve or blend longer with immersion blender. For stubborn lumps: Use regular blender in small batches and strain if necessary.
Equipment Essentials for Perfect Results
Must-Have Tools
- Heavy-bottomed pot (4-6 quart capacity) – prevents burning during caramelization
- Immersion blender or regular blender for smooth texture
- Sharp knife for even vegetable chopping
- Wooden spoon for stirring and scraping browned bits
Nice-to-Have Items
- Fine-mesh strainer for ultra-smooth, restaurant-quality texture
- Large ladle for easy, mess-free serving
- Kitchen scale for precise ingredient measurements
Shopping List Organized by Store Sections
Produce Section
- 2 large fresh broccoli heads (avoid yellowing florets)
- 1 large yellow onion (sweet onions work great too)
- 2 medium carrots
- 2 fresh celery stalks
- 1 head fresh garlic
Dairy Section
- Heavy cream (buy 1 pint – you’ll need 1 cup)
- Butter (2 tablespoons needed from standard stick)
Pantry Items
- Extra virgin olive oil
- Low-sodium vegetable broth (32 oz container)
- Salt, black pepper, dried thyme
Success Secrets for Restaurant-Quality Creamy Caramelized Broccoli Soup
1. Temperature Control Mastery: Medium-high heat for proper caramelization, then reduce to gentle simmer. This prevents burning while developing deep, complex flavors that make this soup extraordinary.
2. Timing is Everything: Never rush the caramelization process. Those extra 10-12 minutes of proper browning create the fundamental difference between ordinary and exceptional creamy caramelized broccoli soup.
3. Blend Smart and Safe: Always let soup cool slightly before blending to prevent dangerous splattering. Pulse in short bursts rather than continuous blending for better texture control.
4. Season in Strategic Stages: Salt early to help vegetables release moisture during caramelization, then adjust seasoning at the end for perfect flavor balance throughout your finished soup.
5. Fresh Ingredients Matter: Use fresh broccoli rather than frozen for better texture, more vibrant color, and superior flavor in your final creamy caramelized broccoli soup.
This creamy caramelized broccoli soup proves that simple, humble ingredients can create truly extraordinary results when treated with proper technique, patience, and attention to detail. The caramelization process transforms ordinary vegetables into a sophisticated, restaurant-quality soup that will impress family and guests alike.