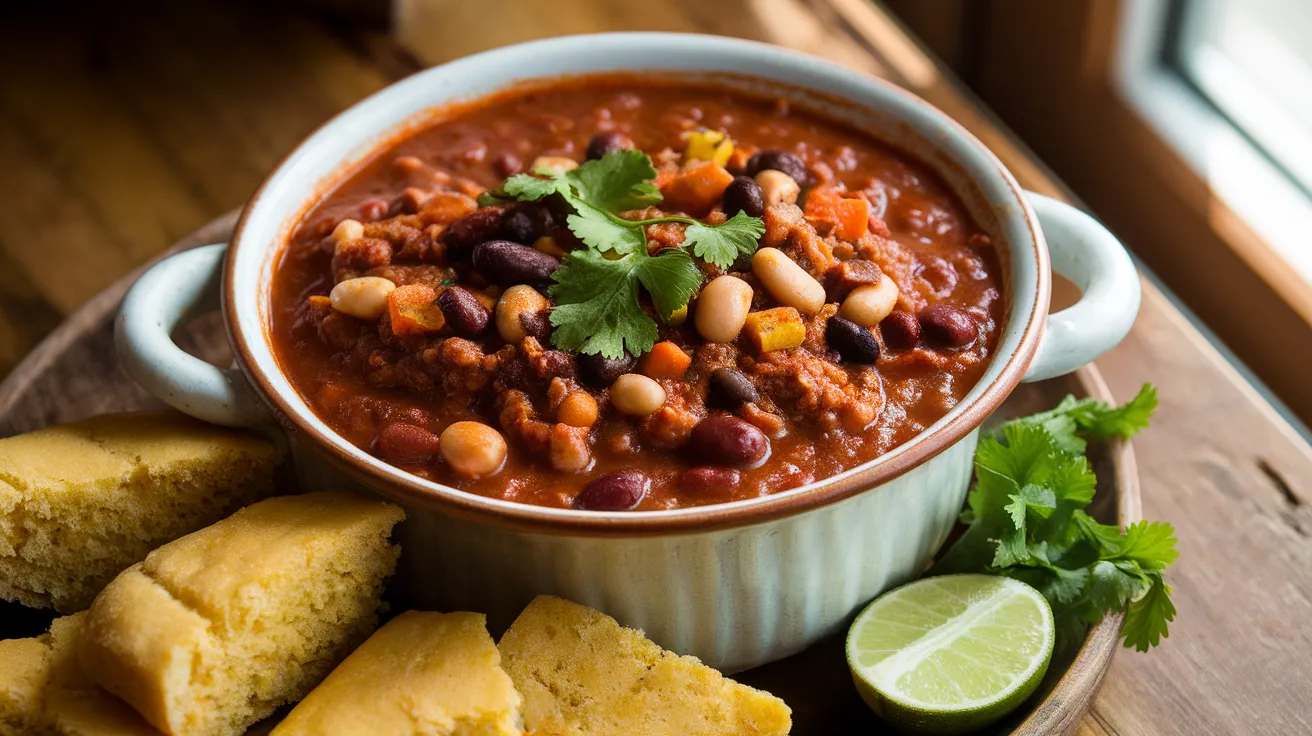
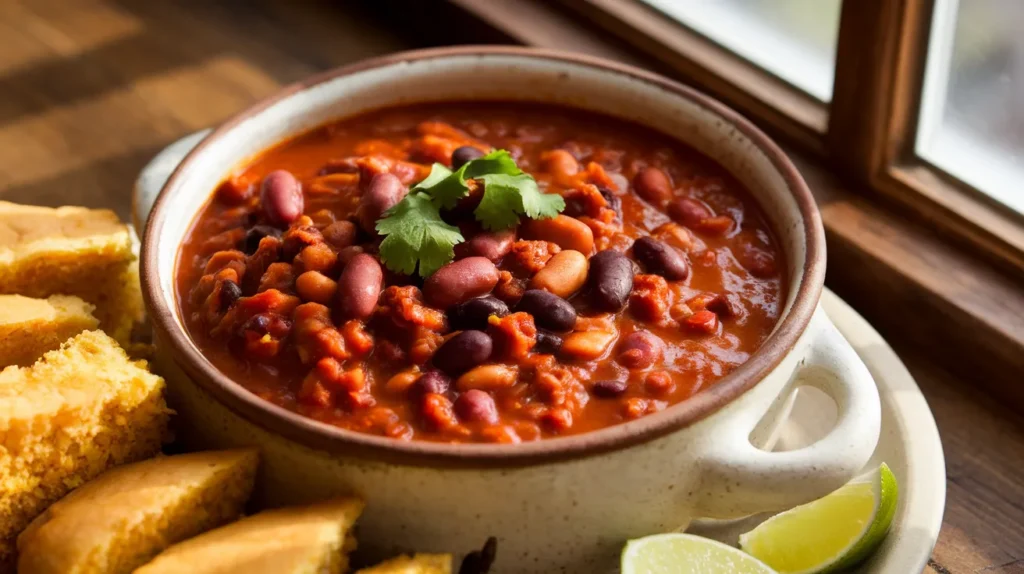
This vegan chili packs all the bold, smoky flavors you crave in a traditional chili, but without any meat or dairy. Loaded with three types of beans, fire-roasted tomatoes, and a perfect blend of spices, this vegan chili delivers incredible depth and satisfaction. It’s the kind of comfort food that brings everyone to the table, whether they’re plant-based or not.
SERVES: 4 | PREP: 20 MIN | COOK: 25 MIN | TOTAL: 45 MIN
Ingredients for Perfect Vegan Chili
Aromatics & Base
| Ingredient | Amount |
|---|---|
| Yellow onion, diced | 1 large |
| Bell pepper, diced | 1 medium |
| Celery stalks, diced | 2 stalks |
| Garlic cloves, minced | 4 cloves |
| Olive oil | 2 tablespoons |
Spices & Seasonings
| Ingredient | Amount |
|---|---|
| Chili powder | 2 tablespoons |
| Ground cumin | 1 tablespoon |
| Smoked paprika | 1 teaspoon |
| Oregano | 1 teaspoon |
| Salt | 1 teaspoon |
| Black pepper | ½ teaspoon |
| Cayenne pepper | ¼ teaspoon |
Main Components
| Ingredient | Amount |
|---|---|
| Fire-roasted diced tomatoes | 28 oz can |
| Tomato paste | 3 tablespoons |
| Kidney beans, drained | 15 oz can |
| Black beans, drained | 15 oz can |
| Pinto beans, drained | 15 oz can |
| Vegetable broth | 2 cups |
| Dark chocolate, chopped | 1 oz |
| Bay leaves | 2 leaves |
Step-by-Step Vegan Chili Instructions for Beginners
Phase 1: Preparing Your Kitchen and Equipment (2-3 minutes)
1. Set your large, heavy-bottomed pot on the stove and turn the heat to medium. A heavy pot distributes heat evenly and prevents burning—if you only have a thin pot, use medium-low heat instead. Place all your ingredients within arm’s reach of the stove.
Beginner tip: Open all your cans now and have your measuring spoons ready. Once you start cooking, things move quickly.
2. Pour 2 tablespoons of olive oil into the pot. The oil is ready when it shimmers and moves easily when you tilt the pot slightly. This should take about 1-2 minutes. If the oil starts smoking, your heat is too high—turn it down immediately and let the pot cool for 30 seconds.
Visual cue: The oil should look like it’s moving in slow waves across the bottom of the pot.
Phase 2: Building the Aromatic Base (8-10 minutes)
3. Add your diced onion to the hot oil. You should hear a gentle sizzling sound—not aggressive popping or crackling. Stir with a wooden spoon to coat all the onion pieces with oil. Cook for 3-4 minutes, stirring every 45 seconds to prevent sticking.
What to look for: The onion pieces will start turning from bright white to translucent (you can almost see through them). They should smell sweet, not sharp.
4. Add the diced bell pepper and celery to the pot with the onions. These vegetables are harder than onions, so they need time to soften. Stir everything together and cook for 3-4 minutes, stirring every minute.
Beginner note: If your vegetables start browning too quickly, lower the heat to medium-low. We want them to soften, not caramelize yet.
5. Make a small well (clear space) in the center of your vegetables by pushing them to the sides with your spoon. Add the minced garlic to this empty space. Cook for 30 seconds without stirring—you’ll smell the garlic becoming fragrant.
Important: Garlic burns easily and tastes bitter when burnt. If it starts turning brown, immediately stir everything together and lower your heat.
6. Stir the garlic into all the vegetables and cook for another 30 seconds. The mixture should smell amazing—sweet onions, earthy celery, and aromatic garlic working together.
Phase 3: Building Flavor with Tomato Paste and Spices (3-4 minutes)
7. Push all your vegetables to one half of the pot, creating an empty space on the other side. Add 3 tablespoons of tomato paste to the empty space. Don’t stir it in yet—let it cook undisturbed for 1 full minute.
Why this matters: Cooking tomato paste directly against the hot pot caramelizes it, removing the raw, metallic taste and creating deep, rich flavor.
Visual cue: The tomato paste will darken slightly and may start to sizzle around the edges.
8. Now stir the caramelized tomato paste into all the vegetables. Everything should be coated in a reddish color. Cook this mixture for 30 seconds while stirring.
9. Add all your ground spices at once: chili powder, cumin, smoked paprika, oregano, salt, black pepper, and cayenne. Stir constantly for 1 minute. The spices should smell toasted and aromatic, not raw or dusty.
Beginner warning: Spices can burn quickly. Keep stirring constantly during this step. If they start to smell bitter or burnt, immediately move to the next step.
What success smells like: You should smell warm, toasted spices—think of a Mexican restaurant kitchen.
Phase 4: Adding Liquids and Creating Your Vegan Chili Base (5-7 minutes)
10. Open your can of fire-roasted diced tomatoes. Pour the entire can (including all the juices) into the pot. Use your wooden spoon to break up any large tomato pieces against the side of the pot.
Technique tip: The cold tomatoes will cause vigorous bubbling when they hit the hot pot—this is normal. Stir immediately to prevent splattering.
11. Pour in 2 cups of vegetable broth slowly while stirring. As you add the broth, scrape the bottom of the pot with your spoon to release any browned bits stuck to the bottom—these are flavor gold for your vegan chili.
What you’re looking for: The liquid should come to a gentle simmer (small bubbles around the edges) within 2-3 minutes.
12. While waiting for the liquid to heat up, drain and rinse your three cans of beans in a colander under cold running water. Shake the colander to remove excess water. Rinsing removes excess sodium and the thick liquid that can make your chili gummy.
13. Add all the rinsed beans to the pot: kidney beans, black beans, and pinto beans. Drop in the 2 bay leaves—they’ll float on top, which is perfect.
Bean tip: Don’t worry if some beans break apart—this actually helps thicken your chili naturally.
Phase 5: Simmering Your Vegan Chili to Perfection (15-20 minutes)
14. Increase heat to medium-high until the vegan chili reaches a rolling boil (large bubbles breaking the surface consistently). This should take 2-3 minutes.
15. Once boiling, immediately reduce heat to medium-low. You want a gentle simmer—small bubbles should break the surface every few seconds, not a vigorous boil. Partially cover the pot with a lid, leaving about a 2-inch gap for steam to escape.
Temperature control: If your chili is bubbling aggressively, turn the heat down more. If you see no bubbles at all, turn it up slightly.
16. Set a timer for 15 minutes. During this time, stir your vegan chili every 5 minutes to prevent sticking and ensure even cooking. Each time you stir, scrape the bottom of the pot gently.
What’s happening: The flavors are melding together, the beans are absorbing the spiced tomato base, and the liquid is reducing to create the perfect chili consistency.
17. After 15 minutes, check the consistency. The chili should coat the back of your spoon but still be soupy. If it’s too thick, add ¼ cup more broth. If it’s too thin, continue simmering uncovered for 5-10 more minutes.
Phase 6: Final Touches for Restaurant-Quality Vegan Chili (3-5 minutes)
18. Remove the pot from heat. Fish out the 2 bay leaves with a spoon and discard them—they’ve done their job of adding subtle depth.
Safety note: Bay leaves are sharp and inedible. Count them as you remove them to make sure you got both.
19. Add 1 ounce of chopped dark chocolate to the hot chili. Stir until it completely melts and disappears. Don’t worry—your chili won’t taste like chocolate. The chocolate adds richness and balances the acidity of the tomatoes.
Chocolate tip: Use 70% dark chocolate or higher. Milk chocolate will make your chili too sweet.
20. Now comes the most important step: taste and adjust. Use a clean spoon each time you taste. Your vegan chili might need: – More salt (add ¼ teaspoon at a time) – More heat (pinch of cayenne or hot sauce) – More acid (squeeze of lime juice) – More sweetness (1 teaspoon maple syrup if too acidic)
21. Let the chili rest off the heat for 5 minutes before serving. This resting time allows all the flavors to settle and meld together perfectly.
Final tip: Taste one more time after resting—you might find it needs just a tiny pinch more salt to make all the flavors pop.
Chef’s Notes for Perfect Vegan Chili
Spice Level Control: Start with less cayenne if you’re sensitive to heat. You can always add hot sauce at the table, but you can’t take the heat out once it’s in your vegan chili.
Bean Texture Tip: For a heartier texture, mash about ½ cup of the beans against the side of the pot during the last 5 minutes of cooking. This naturally thickens your chili.
Make-Ahead Magic: This vegan chili tastes even better the next day. The flavors continue developing overnight, making it perfect for meal prep.
Chocolate Secret: Don’t skip the dark chocolate—it’s not detectable as chocolate flavor but adds incredible depth that makes people wonder what your secret ingredient is.
Nutrition Information (Per Serving)
- Calories: 285
- Protein: 15g
- Carbohydrates: 48g
- Fat: 8g
- Fiber: 18g
Creative Vegan Chili Variations
Smoky Chipotle Version
Add 2 minced chipotle peppers in adobo sauce during step 9 for a smoky, complex heat that pairs beautifully with the beans.
White Bean Alternative
Swap all beans for cannellini and great northern beans, use white wine instead of some broth, and add fresh herbs for a lighter twist.
Sweet Potato Power
Dice 2 cups of sweet potato and add them in step 13. They’ll break down slightly and create natural sweetness while boosting nutrition.
Cincinnati Style
Add 1 teaspoon each of cinnamon and cocoa powder in step 9, plus a bay leaf. Serve over spaghetti for an authentic Cincinnati experience. For more plant-based comfort food ideas, check out these vegan crockpot recipes that pair perfectly with chili nights.
Storage & Reheating Your Vegan Chili
Refrigerator: Store covered for up to 5 days. The flavors actually improve over time.
Freezer: Freeze in portion-sized containers for up to 3 months. Leave 1 inch of headspace for expansion.
Reheating: Warm gently on the stovetop over medium-low heat, adding a splash of broth if it’s too thick. Microwave in 1-minute intervals, stirring between.
Pro Tip: Freeze some in ice cube trays for easy single-serving portions that thaw quickly.
Troubleshooting Guide
Problem: Chili is too thin
Solution: Simmer uncovered for 10-15 more minutes, or mash some beans against the pot’s side to naturally thicken.
Problem: Too salty
Solution: Add a diced potato and simmer for 15 minutes—it absorbs excess salt. Remove before serving.
Problem: Lacks depth
Solution: Add 1 tablespoon tomato paste, 1 teaspoon soy sauce, or a splash of apple cider vinegar to brighten flavors.
Problem: Too acidic
Solution: Stir in 1 teaspoon of sugar or maple syrup to balance the tomato acidity.
Problem: Burnt bottom
Solution: Don’t scrape the bottom. Transfer everything to a new pot immediately, leaving the burnt layer behind.
Equipment Essentials
- Large heavy-bottomed pot (at least 4-quart capacity)
- Sharp chef’s knife for consistent vegetable dicing
- Cutting board with good grip
- Can opener and colander for beans
- Wooden spoon for stirring without scratching
- Measuring cups and spoons
Alternative: A slow cooker works great too—just sauté the aromatics first, then add everything and cook on low for 6-8 hours.
Shopping List
Produce Section
- 1 large yellow onion
- 1 medium bell pepper
- 2 celery stalks
- 1 head garlic
Pantry/Canned Goods
- 28 oz fire-roasted diced tomatoes
- 3 oz tomato paste
- 15 oz kidney beans
- 15 oz black beans
- 15 oz pinto beans
- 32 oz vegetable broth
- Olive oil
- Spice blend (if you don’t have individual spices)
Baking Aisle
- 1 oz dark chocolate (70% cacao works best)
- Bay leaves
Success Secrets
1. Don’t rush the vegetable base—those extra few minutes of cooking create the flavor foundation your vegan chili needs to shine.
2. Toast your spices in the pot before adding liquids. This simple step transforms good chili into great chili.
3. Use fire-roasted tomatoes instead of regular—the smoky flavor adds complexity that regular tomatoes can’t match.
4. Let it rest after cooking. Just like a good steak, chili needs time to settle and develop its final flavor profile.
5. Taste and adjust at the end. Every batch is slightly different, so trust your palate over the recipe for final seasoning adjustments.
This vegan chili recipe proves that plant-based cooking doesn’t mean sacrificing flavor or satisfaction. Serve it with cornbread, over baked potatoes, or alongside some vegan cupcakes for a complete comfort food experience that’ll have everyone asking for seconds.