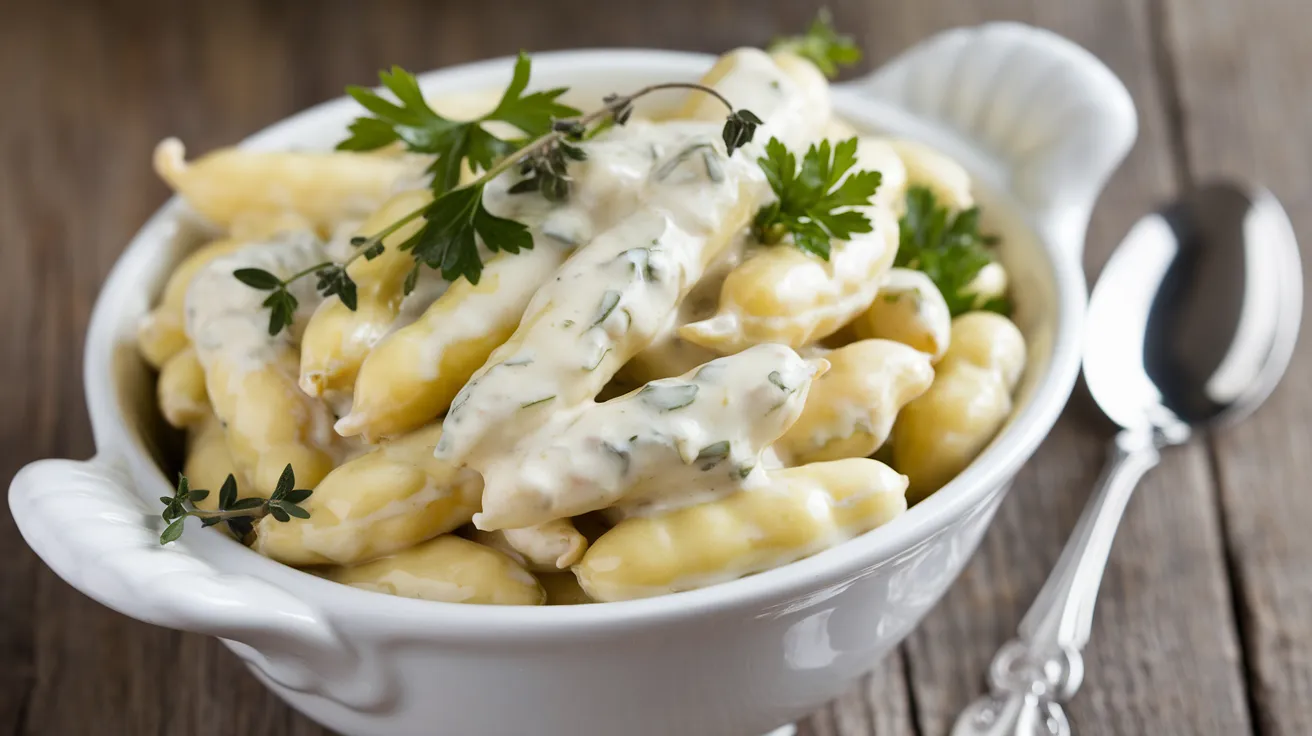
This creamy sauce for yellow beans transforms ordinary vegetables into an extraordinary side dish that even picky eaters will love. Our foolproof sauce for yellow beans recipe creates a rich, herb-infused coating that makes fresh yellow beans absolutely irresistible for any family dinner.
SERVES: 4 | PREP: 20 MIN | COOK: 25 MIN | TOTAL: 45 MIN
Ingredients
For the Yellow Beans:
| Ingredient | Amount |
|---|---|
| Fresh yellow wax beans | 1½ pounds |
| Salt (for blanching water) | 2 tablespoons |
| Ice cubes | 4 cups |
| Cold water | 4 cups |
For the Creamy Sauce for Yellow Beans:
| Ingredient | Amount |
|---|---|
| Unsalted butter | 4 tablespoons |
| All-purpose flour | 3 tablespoons |
| Whole milk (room temperature) | 1 cup |
| Heavy cream | ½ cup |
| Fresh thyme leaves | 2 teaspoons |
| Fresh parsley (finely chopped) | 3 tablespoons |
| Garlic cloves (minced) | 3 large |
| Dijon mustard | 1 teaspoon |
| Fine sea salt | ¾ teaspoon |
| Freshly ground black pepper | ¼ teaspoon |
| Fresh lemon juice | 1 tablespoon |
Detailed Step-by-Step Instructions for Beginners
Phase 1: Preparing Your Yellow Beans (15 minutes)
Step 1: Inspect and wash your beans Start by examining each yellow bean carefully. Look for beans that are bright yellow-green in color with no dark spots, wrinkles, or soft areas. Rinse the beans under cold running water in a colander, gently rubbing them with your hands to remove any dirt or debris. Pat them completely dry with clean paper towels before proceeding.
Step 2: Trim the beans properly Using sharp kitchen shears or a paring knife, cut off both ends of each bean. Remove about ¼ inch from each end – you’ll see a small stem end and a pointed tip end. If you find any beans longer than 4 inches, cut them in half diagonally for even cooking. This ensures all pieces cook at the same rate.
Step 3: Set up your ice bath station Fill a large mixing bowl with 4 cups of ice cubes and 4 cups of very cold water. Stir to distribute the ice evenly. Place this bowl next to your stove where you can easily reach it. This ice bath will immediately stop the cooking process and keep your beans bright yellow and crisp.
Step 4: Prepare your blanching water Fill your largest pot (at least 4-quart capacity) with water, leaving about 3 inches from the rim. Place it on your stove’s largest burner and turn heat to high. Add 2 tablespoons of salt to the water – this seasons the beans from the inside and helps them cook more evenly. The water should taste like mild seawater.
Step 5: Achieve the perfect boil Wait for the water to reach a full, rolling boil. You’ll see large bubbles constantly breaking the surface, not just small bubbles around the edges. This usually takes 8-10 minutes depending on your stove. Don’t add the beans until you have this vigorous boil.
Step 6: Blanch the beans with precision Carefully add all the trimmed yellow beans to the boiling water at once. The water will stop boiling momentarily – this is normal. Keep the heat on high and wait for the water to return to a boil. Once boiling again, set a timer for exactly 3 minutes. The beans should turn bright yellow and be tender-crisp when pierced with a fork.
Step 7: Execute the ice bath shock The moment your timer goes off, immediately remove the beans from the boiling water using a large slotted spoon or spider strainer. Quickly plunge them into your prepared ice bath. Let them sit in the ice water for exactly 2 minutes – this stops the cooking process completely and locks in that perfect texture.
Step 8: Drain and dry thoroughly Remove the beans from the ice bath and drain them in a colander. Shake the colander gently to remove excess water, then spread the beans on clean paper towels. Pat them completely dry – any remaining water will thin out your sauce and make it less creamy.
Phase 2: Creating Your Perfect Sauce Base (12 minutes)
Step 9: Prepare your workspace Before you start cooking, arrange all your sauce ingredients within easy reach. Measure out the milk and cream into separate measuring cups. Have your whisk ready – you’ll need to stir constantly once you start. Turn your stove to medium heat and let your pan warm up for 30 seconds.
Step 10: Melt butter to perfection Add 4 tablespoons of cold butter to your medium saucepan. As it melts, you’ll see it foam slightly – this is normal and means the water in the butter is evaporating. Swirl the pan occasionally to ensure even melting. The butter should be completely liquid and slightly foamy, but not brown or smoking.
Step 11: Sauté garlic for maximum flavor Add your 3 minced garlic cloves to the melted butter. You should hear a gentle sizzling sound. Stir constantly with a wooden spoon for exactly 30 seconds. The garlic should become fragrant but remain pale yellow – if it turns golden or brown, it will taste bitter and overpower your sauce for yellow beans.
Step 12: Create the roux foundation Sprinkle the 3 tablespoons of flour evenly over the butter and garlic. Immediately begin whisking vigorously to combine. The mixture will look paste-like and may seem dry at first. Continue whisking and cooking for 1-2 minutes. This cooking time removes the raw flour taste and creates a smooth base that will thicken your sauce properly.
Step 13: Add liquids gradually (the most critical step) Here’s where many beginners make mistakes, so follow carefully. Pour about ¼ cup of the room-temperature milk into your roux while whisking constantly. The mixture will bubble and may look lumpy initially – keep whisking! Add another ¼ cup of milk, whisking until smooth. Continue this process until all the milk is incorporated, then slowly whisk in the heavy cream.
Step 14: Achieve the perfect simmer Increase heat slightly to medium-high. Continue whisking as the mixture comes to a gentle simmer – you’ll see small bubbles breaking the surface, not a vigorous boil. Once simmering, reduce heat to medium-low. The sauce should coat the back of your whisk and have a consistency similar to heavy cream.
Phase 3: Perfecting Your Sauce for Yellow Beans (8 minutes)
Step 15: Thicken to ideal consistency Continue simmering your sauce for 3-4 minutes, whisking every 30 seconds. To test thickness, dip a clean spoon into the sauce and run your finger across the back – if the line holds without running together, your sauce is ready. If too thin, simmer 1-2 minutes longer. If too thick, whisk in milk 1 tablespoon at a time.
Step 16: Season with professional technique Remove the pan from heat before adding seasonings – this prevents curdling. Whisk in 1 teaspoon Dijon mustard, ¾ teaspoon salt, and ¼ teaspoon freshly ground black pepper. The mustard adds depth and slight tanginess without being detectable. Taste the sauce and adjust seasoning as needed.
Step 17: Incorporate fresh herbs properly Add 2 teaspoons fresh thyme leaves and 3 tablespoons finely chopped fresh parsley. Stir gently to distribute evenly. Fresh herbs should always be added off the heat to preserve their bright flavor and color. If using dried herbs, use half the amount and add them earlier with the flour.
Step 18: Brighten with lemon Stir in 1 tablespoon fresh lemon juice – this cuts through the richness and makes all flavors more vibrant. Fresh lemon juice is essential; bottled juice lacks the brightness needed for this sauce for yellow beans recipe.
Step 19: Combine beans and sauce Return the pan to low heat. Gently fold in your prepared yellow beans using a large spoon or spatula. Toss carefully to coat each bean without breaking them. Heat through for 1-2 minutes until the beans are warmed completely.
Step 20: Final taste and serve Remove from heat and taste one more time. Adjust salt, pepper, or lemon juice as needed. Your sauce for yellow beans should be creamy, herb-forward, and perfectly seasoned. Serve immediately in a warmed serving bowl for the best experience.
Chef’s Notes for Perfect Sauce for Yellow Beans
• Temperature control: Keep your heat at medium or lower throughout the sauce-making process. High heat causes cream sauces to break or curdle.
• Ingredient temperature: Room temperature milk incorporates more easily than cold milk, reducing the chance of lumps in your sauce for yellow beans.
• Fresh herb timing: Always add fresh herbs after removing from heat to maintain their bright color and prevent bitterness.
• Bean doneness: Slightly undercooked beans are better than overcooked ones, as they’ll finish cooking when combined with the warm sauce.
Nutrition Information (Per Serving)
- Calories: 185
- Protein: 6g
- Carbohydrates: 15g
- Fat: 12g
- Fiber: 4g
- Sodium: 620mg
Creative Variations for Your Sauce for Yellow Beans
Mediterranean Herb Sauce
Replace thyme with 2 teaspoons dried oregano and add 2 tablespoons finely chopped sun-dried tomatoes. This Mediterranean twist on sauce for yellow beans pairs beautifully with grilled chicken or fish.
Rich Parmesan Version
Stir in ½ cup freshly grated Parmesan cheese with the herbs for an incredibly rich coating. For more vegetable sauce inspiration, try our sauce for green beans recipe.
Spicy Cajun Style
Add ½ teaspoon paprika, ¼ teaspoon cayenne pepper, and ¼ teaspoon garlic powder with your other seasonings. This creates a sauce for yellow beans with a delicious kick.
Fresh Lemon-Dill Cream
Replace parsley and thyme with 3 tablespoons fresh dill and increase lemon juice to 2 tablespoons. This bright version works perfectly for lighter meals, similar to our sauce for zucchini boats.
Storage & Reheating Your Sauce for Yellow Beans
Refrigerator Storage: Store your leftover sauce for yellow beans covered for up to 3 days. The sauce will thicken considerably when cold.
Proper Reheating: Warm gently in a saucepan over low heat, whisking in 2-3 tablespoons milk to restore the creamy texture. Never boil reheated cream sauces as they will separate.
Freezing Guidelines: This sauce for yellow beans doesn’t freeze well due to the cream content, which separates when thawed.

Troubleshooting Your Sauce for Yellow Beans
Problem: Lumpy, grainy sauce
Solution: Remove from heat and whisk vigorously. If lumps persist, strain through a fine-mesh sieve. Prevention: Add liquids very gradually while whisking constantly.
Problem: Sauce too thin or watery
Solution: Return to heat and simmer uncovered for 2-3 minutes, or create a slurry by whisking 1 tablespoon flour with 2 tablespoons cold milk, then stir into sauce.
Problem: Broken or curdled sauce
Solution: Remove from heat immediately and whisk in 2 tablespoons cold cream. Prevention: Never let cream-based sauces boil and avoid high heat.
Problem: Beans are mushy
Solution: Unfortunately, there’s no fix for overcooked beans. Next time, reduce blanching time to 2-3 minutes and test frequently with a fork.
Problem: Bland, flavorless sauce for yellow beans
Solution: Add salt ¼ teaspoon at a time, increase lemon juice, or add a pinch of garlic powder. Taste after each addition.
Essential Equipment for This Sauce for Yellow Beans Recipe
- Large pot (4-quart minimum) for blanching
- Medium saucepan (2-quart) for sauce
- Wire whisk (essential for smooth sauce)
- Large slotted spoon or spider strainer
- Large mixing bowl for ice bath
- Colander for draining
- Sharp paring knife or kitchen shears
- Measuring cups and spoons
- Clean paper towels
Organized Shopping List
Fresh Produce Section
- 1½ pounds fresh yellow wax beans
- 3 large garlic cloves
- 1 fresh lemon
- Fresh thyme (small package)
- Fresh parsley (1 bunch)
Dairy Refrigerator Section
- Unsalted butter (1 stick needed)
- Whole milk (1 quart)
- Heavy cream (1 pint)
Pantry & Condiment Aisles
- All-purpose flour
- Dijon mustard
- Fine sea salt
- Black peppercorns (for fresh grinding)
Expert Success Secrets for Perfect Sauce for Yellow Beans
1. Master the ice bath technique – This single step makes the difference between restaurant-quality and home-cooked vegetables. Never skip the ice bath when making sauce for yellow beans.
2. Whisk with confidence – Constant whisking when adding liquids prevents lumps and creates the silky texture that makes this sauce for yellow beans recipe so special.
3. Taste and adjust constantly – Professional cooks taste at every stage. Start with the recommended seasonings, but adjust to your family’s preferences.
4. Serve at the right temperature – This sauce for yellow beans is designed to be served hot. The cream sauce thickens as it cools, so timing is important.
5. Fresh ingredients matter most – Using fresh herbs, real butter, and quality cream creates a sauce for yellow beans that tastes like it came from an upscale restaurant kitchen.


