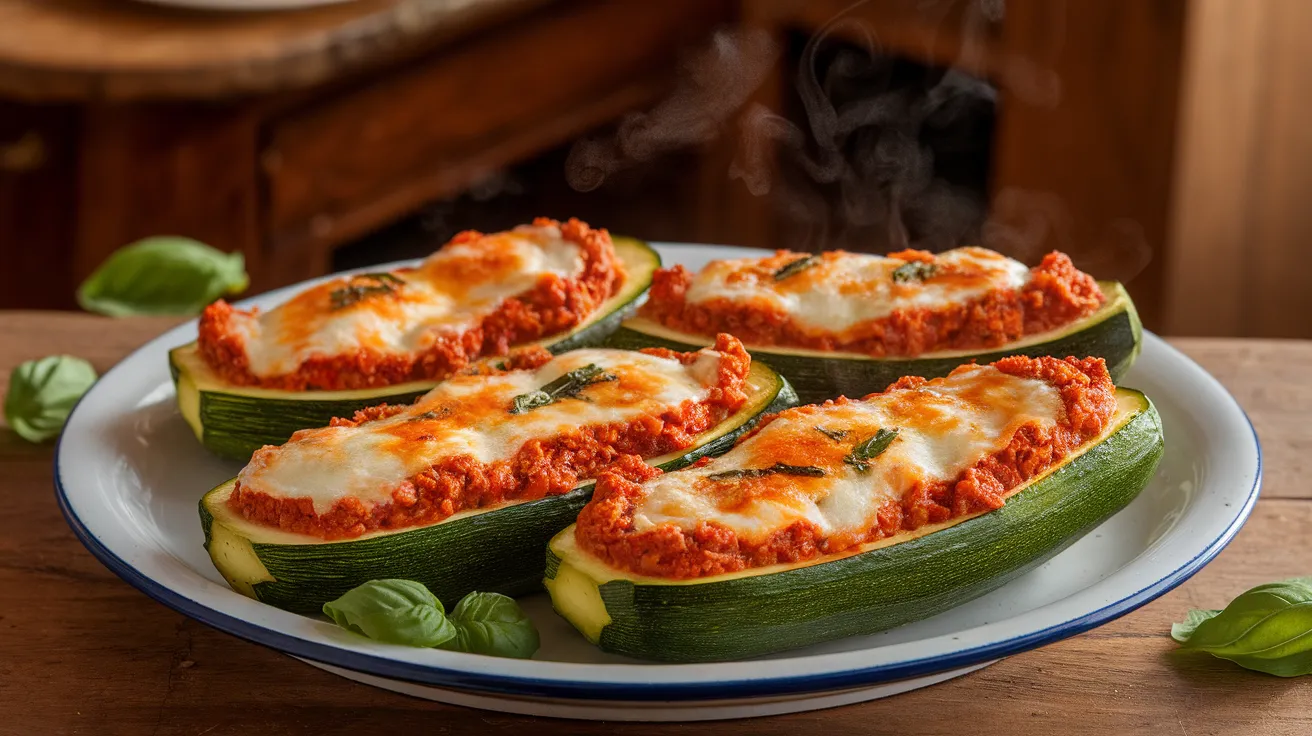
Create the most delicious sauce for zucchini boats with this foolproof recipe that turns ordinary vegetables into an extraordinary meal. This comprehensive guide walks you through every step to master the perfect sauce for zucchini boats, ensuring restaurant-quality results in your own kitchen. Perfect for beginners who want to impress family and friends with minimal effort.
SERVES: 4 | PREP: 20 MIN | COOK: 25 MIN | TOTAL: 45 MIN
Ingredients
For the Zucchini Base:
| Ingredient | Amount |
|---|---|
| Large zucchini | 2 (about 8 inches each) |
| Olive oil | 2 tablespoons |
| Salt | 1 teaspoon |
| Black pepper | ½ teaspoon |
For the Sauce for Zucchini Boats:
| Ingredient | Amount |
|---|---|
| Ground turkey or beef | 1 pound |
| Yellow onion, diced | 1 medium |
| Garlic cloves, minced | 3 |
| Crushed tomatoes | 1 (14.5 oz) can |
| Tomato paste | 2 tablespoons |
| Italian seasoning | 1 tablespoon |
| Fresh basil, chopped | ¼ cup |
| Red pepper flakes | ¼ teaspoon |
| Mozzarella cheese, shredded | 1 cup |
| Parmesan cheese, grated | ½ cup |
Detailed Step-by-Step Instructions for Perfect Sauce for Zucchini Boats
Phase 1: Preparing Your Zucchini Foundation (15 minutes)
Step 1: Oven Setup and Workspace Preparation Set your oven rack in the middle position and preheat to 400°F (200°C). This temperature ensures the zucchini cooks through without becoming mushy. Line a large rimmed baking sheet with parchment paper, making sure the paper extends up the sides slightly. This prevents sticking and makes cleanup effortless. If you don’t have parchment paper, lightly grease the baking sheet with cooking spray.
Step 2: Selecting and Washing Your Zucchini Choose zucchini that feels heavy for their size – this indicates they’re fresh and have good moisture content. The skin should be glossy and firm without any soft spots or wrinkles. Rinse each zucchini under cool running water, gently scrubbing with your hands to remove any dirt. Pat completely dry with paper towels or a clean kitchen towel.
Step 3: Making the Perfect Cut Place the zucchini on a cutting board with a damp towel underneath to prevent slipping. Using your sharpest chef’s knife, carefully cut each zucchini in half lengthwise. Make sure your cuts are straight and even – this helps the boats sit flat in the oven. If your zucchini rolls while cutting, slice a thin strip off the bottom to create a flat surface first.
Step 4: Creating the Perfect Zucchini Boats Here’s where beginners often make mistakes, so take your time. Using a sturdy spoon or melon baller, start scooping from one end of each zucchini half. Begin about ½ inch from the edge and scoop toward the center, creating a boat shape. Leave walls that are ¼ to ⅜ inch thick – any thinner and they’ll break during baking.
Important tip: Don’t throw away the scooped flesh! Chop it roughly and set aside in a bowl. We’ll use this in our sauce, adding extra vegetables and preventing waste.
Step 5: Seasoning the Zucchini Base Using a pastry brush or your fingers, coat the inside of each zucchini boat with olive oil. This creates a barrier that prevents the boats from becoming soggy when we add the sauce. Sprinkle salt and pepper evenly inside each boat, using about ¼ teaspoon salt and a pinch of pepper per boat. The salt will draw out excess moisture during the initial baking.
Phase 2: Building Your Signature Sauce (20 minutes)
Step 6: Preparing Your Mise en Place Before you start cooking, prepare all your ingredients – this is called mise en place in professional kitchens. Dice your onion into ¼-inch pieces (they should be small enough to fit comfortably on a spoon). Mince your garlic cloves finely – if you’re new to mincing garlic, crush each clove with the flat side of your knife first, then chop. Measure out all your seasonings into small bowls.
Step 7: Browning the Meat Perfectly Heat a large, heavy-bottomed skillet (cast iron works beautifully) over medium-high heat for about 2 minutes. You’ll know it’s ready when a drop of water sizzles immediately. Add your ground meat without any oil – it will release its own fat as it cooks.
Break the meat apart with a wooden spoon or spatula, creating pieces about the size of a grape. Don’t stir constantly – let the meat sit for 2-3 minutes at a time to develop a nice brown color. This browning process, called the Maillard reaction, creates deep, savory flavors in your sauce. Cook for 6-8 minutes total until no pink remains.
Step 8: Building Flavor with Aromatics Push the cooked meat to one side of your skillet. If there’s excess fat (more than 2 tablespoons), drain off the extra, leaving just enough to cook your vegetables. Add the diced onion to the empty side of the pan and let it cook for 3-4 minutes without stirring initially.
You’ll know the onions are ready when they turn translucent and smell sweet. If they start browning too quickly, reduce the heat to medium. Properly cooked onions should be soft enough to mash easily with your spoon.
Step 9: Adding Garlic Without Burning Create a small well in your onion mixture and add the minced garlic. Cook for just 30-45 seconds, stirring constantly. Garlic cooks much faster than onions and turns bitter if burned. You’ll smell the wonderful aroma when it’s ready – it should smell fragrant, not sharp or acrid.
Step 10: Incorporating the Reserved Zucchini Roughly chop your reserved zucchini flesh into ½-inch pieces. Add these to your skillet and stir everything together. The zucchini will release some moisture, which is perfect – it helps deglaze any browned bits stuck to the bottom of your pan. Cook for 3-4 minutes until the zucchini pieces start to soften.
Step 11: Concentrating Tomato Flavor Add the tomato paste directly to the center of your mixture. Using your spoon, stir the paste constantly for 60-90 seconds. This technique, called blooming, removes the raw taste from tomato paste and concentrates its flavor. The paste should darken slightly and become very fragrant.
Step 12: Building the Sauce Base Pour in the crushed tomatoes, scraping up any browned bits from the bottom of the pan with your spoon – these bits add incredible flavor. Add the Italian seasoning, red pepper flakes, ½ teaspoon salt, and ¼ teaspoon black pepper. Stir everything together until well combined.
Step 13: Simmering to Perfection Reduce the heat to medium-low and let the sauce simmer gently. You should see small bubbles breaking the surface, but it shouldn’t be boiling vigorously. Stir every 2-3 minutes to prevent sticking. The sauce will gradually thicken as it cooks – this takes 10-12 minutes.
Texture check: When ready, the sauce should coat the back of your spoon and hold its shape when you draw a line through it with your finger.
Step 14: Final Seasoning and Fresh Herbs Remove the skillet from heat and stir in the fresh chopped basil. Taste your sauce and adjust the seasoning – you might need more salt, pepper, or a pinch of sugar if the tomatoes are very acidic. The sauce should taste rich, savory, and well-balanced.
Phase 3: Assembly and Baking Your Zucchini Boats (25 minutes)
Step 15: Perfect Sauce Distribution Using a large spoon, divide your sauce evenly among the four zucchini boats. Fill each boat generously, mounding the sauce slightly in the center – it should reach almost to the top of the zucchini walls. Don’t worry if some sauce spills over the edges; this is normal and adds to the rustic appeal.
Step 16: Cheese Layer Strategy Sprinkle the mozzarella cheese evenly over each boat, making sure to cover the sauce completely. The cheese acts as a protective layer that prevents the sauce from drying out during baking. Top with Parmesan cheese, which will create a beautiful golden-brown crust.
Step 17: Initial Baking Phase Place your baking sheet in the preheated oven and bake for 10 minutes uncovered. This initial phase allows the zucchini to start softening while the cheese begins to melt.
Step 18: Achieving Golden Perfection After 10 minutes, check your boats. The cheese should be melted and starting to bubble. Continue baking for 8-10 more minutes until the cheese is golden brown and the zucchini feels tender when pierced with a fork. The internal temperature should reach 165°F (74°C) if using a meat thermometer.
Step 19: Critical Resting Period Remove from the oven and let the boats rest for 5-7 minutes before serving. This resting period is crucial – it allows the sauce to set slightly and prevents it from running all over your plate when you cut into the boats. The cheese will also firm up just enough to slice cleanly.
Step 20: Final Presentation Using a large spatula, carefully transfer each boat to individual serving plates. Garnish with additional fresh basil if desired, and serve immediately while still hot.
Expert Chef’s Notes for Sauce for Zucchini Boats
• Zucchini selection matters: Choose medium-sized zucchini that are firm and heavy. Oversized zucchini often have large seeds and watery flesh that can make your sauce for zucchini boats soggy.
• Don’t skip the salting step: This draws out excess moisture and concentrates the zucchini flavor, preventing watery results.
• Make your sauce ahead: The sauce for zucchini boats can be prepared up to 2 days in advance and refrigerated. This actually improves the flavors as they have time to meld.
• Temperature control is key: Keep your cooking temperatures moderate to prevent burning the aromatics while ensuring thorough cooking.
Nutrition Information (Per Serving)
- Calories: 285
- Protein: 28g
- Carbohydrates: 12g
- Fat: 14g
- Fiber: 4g
- Sodium: 680mg
Creative Variations for Your Sauce for Zucchini Boats
Mediterranean-Style Sauce
Transform your basic sauce for zucchini boats by replacing the ground meat with diced eggplant, kalamata olives, and sun-dried tomatoes. Add oregano, lemon zest, and finish with crumbled feta cheese. This lighter version pairs beautifully with a sauce for yellow beans as a complete Mediterranean meal.
Spicy Mexican Version
Give your sauce for zucchini boats a south-of-the-border twist using ground turkey seasoned with cumin, chili powder, and smoked paprika. Add diced jalapeños, corn, and black beans. Top with pepper jack cheese and fresh cilantro for authentic Mexican flavors.
Hearty Vegetarian Option
Create a meat-free sauce for zucchini boats using a combination of diced mushrooms, bell peppers, and lentils. The mushrooms provide umami depth while lentils add protein and fiber. Season with extra herbs and a splash of balsamic vinegar.
Breakfast-Style Boats
Turn your sauce for zucchini boats into a morning meal by filling them with scrambled eggs, breakfast sausage, and sharp cheddar cheese. Add diced bell peppers and onions for extra vegetables. This technique also works wonderfully with a sauce for zucchini chips for brunch appetizers.
Storage & Reheating Your Sauce for Zucchini Boats
Refrigerator Storage: Cool completely before covering with plastic wrap or transferring to airtight containers. Properly stored boats will keep for up to 4 days in the refrigerator.
Freezer Storage: Wrap individual boats in aluminum foil, then place in freezer bags. Label with the date and contents. Frozen boats will maintain quality for up to 3 months.
Reheating Instructions: For refrigerated boats, cover with foil and reheat at 350°F for 15-20 minutes. For frozen boats, thaw overnight in the refrigerator first, then reheat as above. Individual portions can be microwaved on medium power for 2-3 minutes.
Make-ahead strategy: Prepare the sauce for zucchini boats completely, then assemble and refrigerate unbaked for up to 24 hours. Add 5-10 minutes to the baking time when cooking from cold.

Troubleshooting Common Sauce for Zucchini Boats Problems
Problem: Watery, soggy boats
Solution: This usually happens when the zucchini releases too much moisture. Always salt the scooped boats and let them sit for 10-15 minutes, then pat dry thoroughly. Also ensure your sauce is thick enough before adding to the boats.
Problem: Sauce is too thin or runny
Solution: Simmer your sauce uncovered for an additional 10-15 minutes to reduce excess liquid. Add an extra tablespoon of tomato paste for body and thickness.
Problem: Zucchini boats fall apart during baking
Solution: The walls were likely scooped too thin. Leave at least ¼-inch thickness in the walls and bottom. Also, don’t overbake – the zucchini should be tender but still hold its shape.
Problem: Cheese burns before zucchini is cooked
Solution: Cover with foil for the first 15 minutes of baking, then remove the foil to allow browning. Alternatively, reduce oven temperature to 375°F and increase cooking time.
Problem: Sauce slides off the zucchini
Solution: Make sure you’ve scooped deep enough wells in the zucchini. The boats should have pronounced sides to contain the sauce. Also, let the sauce cool slightly before filling to prevent it from being too liquid.
Essential Equipment for Perfect Sauce for Zucchini Boats
• Large rimmed baking sheet – prevents spills and allows even heat circulation • Sharp chef’s knife – essential for clean, even cuts • Sturdy spoon or melon baller – for scooping zucchini flesh cleanly • Heavy-bottomed skillet – ensures even heat distribution for the sauce • Wooden spoon – won’t scratch your pan and is perfect for stirring • Measuring cups and spoons – accuracy is important for consistent results • Parchment paper – prevents sticking and makes cleanup easy
Complete Shopping List
Produce Section:
- 2 large zucchini (about 8 inches each)
- 1 medium yellow onion
- 1 head fresh garlic
- Fresh basil (1 bunch)
Meat Department:
- 1 pound ground turkey or lean ground beef
Dairy Section:
- 1 bag shredded mozzarella cheese
- Grated Parmesan cheese container
Pantry Essentials:
- Extra virgin olive oil
- Crushed tomatoes (14.5 oz can)
- Tomato paste (small can)
- Italian seasoning blend
- Red pepper flakes
- Sea salt and black peppercorns
Five Success Secrets for Sauce for Zucchini Boats
1. Temperature Control is Everything Keep your skillet at medium-high heat when browning meat, then reduce to medium-low for simmering. This prevents burning while ensuring thorough cooking and proper sauce consistency.
2. Proper Zucchini Preparation Score the zucchini flesh in a crosshatch pattern before scooping. This makes removal easier and helps prevent the walls from cracking under pressure.
3. Sauce Consistency Matters Your finished sauce should be slightly thicker than regular pasta sauce. It will thin out slightly from the zucchini’s natural moisture during baking.
4. Strategic Cheese Application Use a combination of mozzarella for creaminess and Parmesan for sharp flavor and beautiful browning. Apply the mozzarella first, then the Parmesan on top.
5. The Resting Rule Always let your finished boats rest for 5-7 minutes before serving. This allows the sauce to set properly and prevents a messy presentation when cutting.
This comprehensive guide ensures your sauce for zucchini boats turns out perfectly every time. With detailed explanations for each step, even complete beginners can create this impressive dish that looks and tastes like it came from a high-end restaurant. The key to success lies in taking your time with each phase and understanding why each step matters in the overall process.