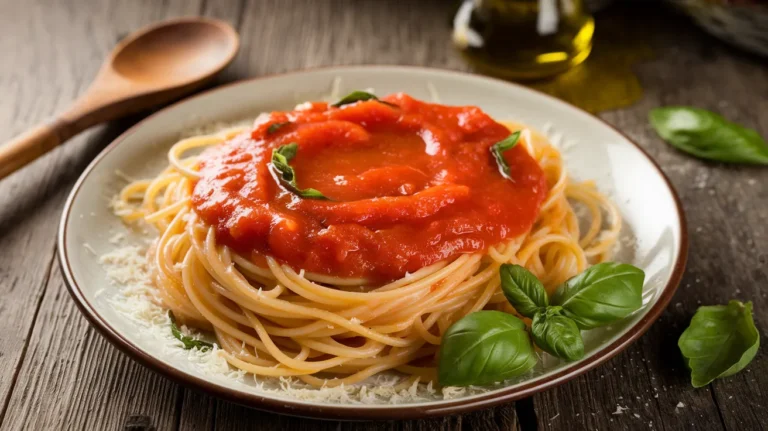
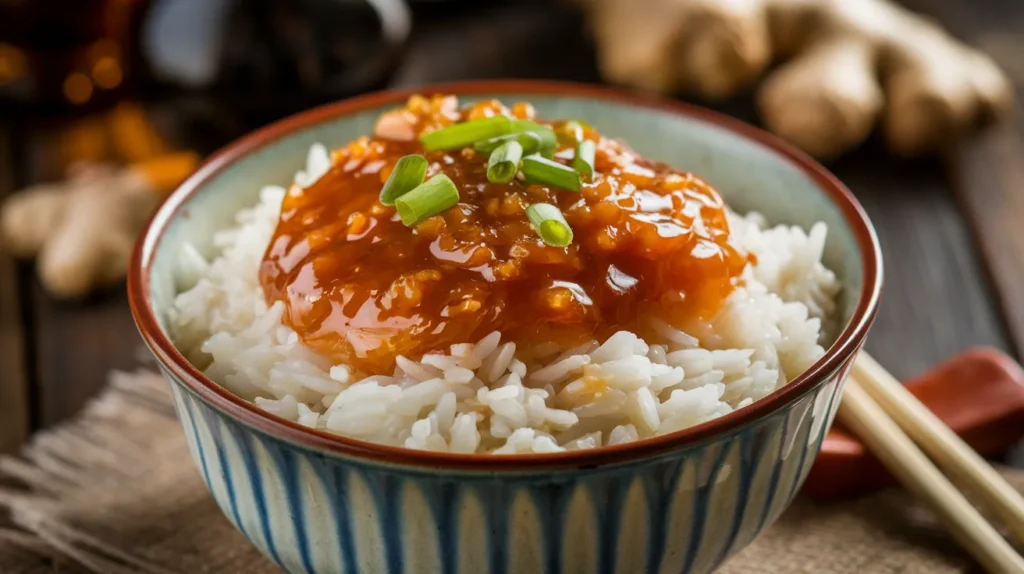
This foolproof sauce for rice bowls recipe turns ordinary rice into an extraordinary meal with just a few simple ingredients. Perfect for beginners, this versatile sauce for rice bowls delivers restaurant-quality flavor at home, combining the perfect balance of savory, sweet, and umami notes that will make your taste buds dance.
SERVES: 4 | PREP: 15 MIN | COOK: 10 MIN | TOTAL: 25 MIN
Ingredients
Sauce Base
| Ingredient | Amount | Notes |
|---|---|---|
| Soy sauce (low sodium) | 1/3 cup | Use low sodium to control saltiness |
| Rice vinegar | 3 tablespoons | Adds bright acidity |
| Mirin | 2 tablespoons | Sweet rice wine for depth |
| Brown sugar | 1 tablespoon | Balances the saltiness |
| Sesame oil | 1 teaspoon | For nutty aroma |
Aromatics
| Ingredient | Amount | Notes |
|---|---|---|
| Fresh garlic | 3 cloves, minced | Essential for flavor base |
| Fresh ginger | 1 tablespoon, grated | Adds warmth and spice |
| Green onions | 2 stalks, sliced thin | For fresh finish |
Thickening Agent
| Ingredient | Amount | Notes |
|---|---|---|
| Cornstarch | 1 tablespoon | Creates glossy consistency |
| Water | 2 tablespoons | For cornstarch slurry |
Detailed Step-by-Step Instructions for Perfect Sauce for Rice Bowls
Phase 1: Complete Preparation (8 minutes)
Step 1: Set Up Your Workspace Clear your counter space and gather all ingredients in front of you. Place a medium saucepan on your stove (don’t turn heat on yet). Get out measuring cups, spoons, a sharp knife, cutting board, small bowl, and whisk. Having everything ready prevents rushing and mistakes.
Step 2: Prepare the Garlic Properly Remove 3 garlic cloves from the bulb. Use the flat side of your knife to gently crush each clove – this makes the papery skin easy to remove. Peel off the skin completely. Mince the garlic into tiny, even pieces about 1/8-inch in size. Tip: If pieces are too big, they’ll burn and create bitter flavors in your sauce.
Step 3: Grate Fresh Ginger Like a Pro Use a spoon to scrape the skin off a 1-inch piece of fresh ginger (yes, a spoon works better than a peeler!). Hold the ginger firmly and grate using the smallest holes on your box grater. You need 1 tablespoon of grated ginger. Safety note: Watch your knuckles – ginger pieces get small quickly.
Step 4: Slice Green Onions Correctly Rinse 2 green onions under cold water and pat dry. Trim off the root ends and any wilted green parts. Slice both the white and green parts into thin rings, about 1/8-inch thick. Keep the white and green parts separate – you’ll use them at different times.
Step 5: Create the Perfect Cornstarch Slurry In a small bowl, combine 1 tablespoon cornstarch with 2 tablespoons cold water. Whisk vigorously for 30 seconds until completely smooth with no lumps visible. Set aside, but remember to stir again before using – cornstarch settles quickly.
Phase 2: Building the Flavor Base (4 minutes)
Step 6: Heat Your Pan Correctly Place your medium saucepan over medium-low heat (about 3-4 on a scale of 1-10). Let it warm for 1 minute. You don’t need oil yet. Why medium-low? High heat burns garlic instantly, creating bitter flavors that ruin your sauce for rice bowls.
Step 7: Cook Aromatics to Perfection Add your minced garlic and grated ginger to the dry, warm pan. Stir constantly with a wooden spoon or spatula for exactly 30-45 seconds. You’ll smell an amazing aroma, but stop before the garlic turns brown. If it starts browning, immediately move to the next step.
Step 8: Add Soy Sauce at the Right Moment Pour in the 1/3 cup soy sauce immediately after the aromatics become fragrant. This stops the cooking process and prevents burning. You’ll hear a sizzling sound – this is normal and good! Stir everything together thoroughly.
Phase 3: Creating Your Perfect Sauce for Rice Bowls (5 minutes)
Step 9: Incorporate All Liquid Ingredients Add the 3 tablespoons rice vinegar and 2 tablespoons mirin to the soy sauce mixture. Stir constantly as you pour – this prevents hot spots and ensures even mixing. The mixture should start bubbling gently within 30 seconds.
Step 10: Dissolve Sugar Completely Sprinkle in the 1 tablespoon brown sugar while stirring continuously. Keep stirring for 1-2 minutes until you can’t see any sugar granules. Undissolved sugar creates gritty texture and uneven sweetness in your finished sauce.
Step 11: Achieve the Perfect Simmer Increase heat slightly to medium (about 5-6 on your dial) until the mixture reaches a gentle simmer. You should see small bubbles breaking the surface, not a rolling boil. If it’s bubbling vigorously, reduce heat immediately – aggressive boiling makes the sauce bitter.
Step 12: Add White Green Onion Parts Drop in only the white parts of your sliced green onions (save the green parts for later). These cook down and add mild onion flavor without overwhelming the sauce. Simmer for 2 minutes, stirring occasionally.
Phase 4: Thickening and Final Touches (8 minutes)
Step 13: Prepare to Thicken Re-stir your cornstarch slurry – it has definitely separated while sitting. Whisk it again until smooth. Have it ready to pour because the next steps happen quickly.
Step 14: Add Thickener Like a Professional While stirring the simmering sauce constantly with one hand, very slowly drizzle the cornstarch slurry with the other hand. Don’t dump it all at once! Pour in a thin stream while never stopping the stirring motion. This technique prevents lumps from forming.
Step 15: Perfect the Consistency Continue simmering and stirring for 2-3 minutes exactly. The sauce should coat the back of your spoon when you lift it out. Test this: Dip a clean spoon in the sauce, lift it out, and run your finger across the back. If the line stays clear, your sauce is ready. If it runs together immediately, simmer 1 more minute.
Step 16: Add Sesame Oil for Aroma Remove the pan from heat completely. Wait 30 seconds for slight cooling, then stir in the 1 teaspoon sesame oil. Adding sesame oil off the heat preserves its delicate nutty flavor. Mix thoroughly.
Step 17: Final Garnish and Taste Test Sprinkle the reserved green parts of the green onions over your finished sauce. Now taste carefully (it’s hot!) and adjust if needed: add more soy sauce for saltiness, brown sugar for sweetness, or rice vinegar for tang.
Step 18: Rest Before Serving Let your sauce for rice bowls rest for 2-3 minutes. This allows flavors to meld and the sauce to reach perfect serving consistency. It will thicken slightly more as it cools.
Chef’s Notes
Perfect Sauce Consistency: Your finished sauce for rice bowls should coat rice without being gloppy. It should flow like heavy cream, not thick like ketchup.
Flavor Balance Secret: The magic ratio is 3:2:1 – soy sauce to vinegar to mirin. This creates the perfect umami balance that makes rice bowls irresistible.
Make-Ahead Advantage: This sauce for rice bowls tastes even better the next day. Store covered in the refrigerator and gently reheat before serving.
Beginner Success Tip: Don’t worry if your first batch isn’t perfect. Sauce-making is about tasting and adjusting. Take notes on what you’d change for next time.
Nutrition Information (Per Serving)
- Calories: 45
- Protein: 2g
- Carbohydrates: 9g
- Fat: 1g
- Sodium: 680mg
- Sugar: 6g
Amazing Sauce for Rice Bowls Variations
Spicy Heat Version
Add 1-2 teaspoons sriracha or 1/2 teaspoon red pepper flakes during step 10 when you add the brown sugar. This creates a perfect balance of sweet heat.
Citrus Fresh Style
Replace 1 tablespoon of rice vinegar with fresh lime juice and add 1 teaspoon lime zest in the final step. Incredibly bright and fresh flavor.
Extra Ginger Powerhouse
Double the ginger to 2 tablespoons for those who love that warming spice. Add half during step 7 and half during step 16 for layered ginger flavor.
Vegetable Garden Sauce
Perfect for drizzling over our sauce for veggies and rice – add 1 tablespoon rice wine vinegar and 1 teaspoon honey for extra vegetable-friendly sweetness.
Storage & Reheating Your Sauce for Rice Bowls
Refrigerator Storage
Store in an airtight container for up to 1 week. The sauce actually improves after 24 hours as flavors meld together beautifully.
Freezing Instructions
Pour into ice cube trays for individual portions. Once frozen, transfer cubes to freezer bags. Keeps for up to 3 months. Each cube equals about 2 tablespoons of sauce.
Proper Reheating Method
Warm gently in a small saucepan over low heat, stirring frequently. Add 1-2 tablespoons water if the sauce has thickened too much. Never microwave on high – it can separate the sauce.
Troubleshooting Your Sauce for Rice Bowls
Problem: My sauce is way too salty
Solution: Add 1 tablespoon brown sugar and 1 tablespoon rice vinegar gradually. Taste after each addition. The sweetness and acid will balance the salt perfectly.
Problem: Sauce won’t thicken no matter what
Solution: Mix 1 teaspoon cornstarch with 1 tablespoon cold water separately. Add this new slurry slowly while stirring, then simmer 2-3 more minutes. Be patient.
Problem: Lumpy, chunky consistency
Solution: Pour the sauce through a fine-mesh strainer into a clean bowl, pressing solids through with a spoon. Return smooth sauce to pan if more cooking needed.
Problem: Tastes too sweet like candy
Solution: Add 1 tablespoon soy sauce and 2 teaspoons rice vinegar to cut sweetness. The umami and acid will restore proper balance.
Problem: Bitter, harsh flavor
Solution: Unfortunately, this usually means burned garlic. Start over, keeping heat lower and watching the aromatics more carefully. There’s no fix for burned garlic taste.
Essential Equipment for Perfect Sauce
- Medium heavy-bottomed saucepan (prevents hot spots)
- Wire whisk for smooth mixing
- Wooden spoon for stirring (won’t scratch pan)
- Microplane grater for perfect ginger texture
- Sharp knife for precise garlic mincing
- Small mixing bowl for cornstarch slurry
- Fine-mesh strainer (backup for any lumps)
Complete Shopping List
Pantry Aisle
- Low-sodium soy sauce (1 bottle)
- Rice vinegar (1 bottle)
- Mirin (Asian section – 1 bottle)
- Brown sugar (1 box)
- Cornstarch (1 box)
- Sesame oil (1 bottle)
Fresh Produce Section
- Fresh garlic (1 bulb)
- Fresh ginger root (1 piece, about 2 inches)
- Green onions/scallions (1 bunch)
Top 5 Success Secrets for Beginners
1. Master Your Heat Control: Low and slow wins every time. Rushing with high heat creates bitter, burned flavors that ruin your sauce for rice bowls.
2. Prep Everything First: This sauce comes together in 10 minutes once you start cooking. Having everything measured and chopped prevents panic and mistakes.
3. Taste Throughout the Process: Your palate is your best guide. Taste after adding each major ingredient and adjust to your preferences.
4. Don’t Skip the Resting Time: Those final 2-3 minutes allow flavors to marry and create the complex taste that makes restaurant-style sauce for rice bowls.
5. Practice Makes Perfect: Your second batch will be noticeably better than your first. Take notes on what you’d adjust, and don’t be afraid to experiment with our variations.
This comprehensive sauce for rice bowls recipe gives beginners everything needed to create restaurant-quality results at home. For more delicious rice bowl inspiration, try our sauce for rice and chicken recipe next!