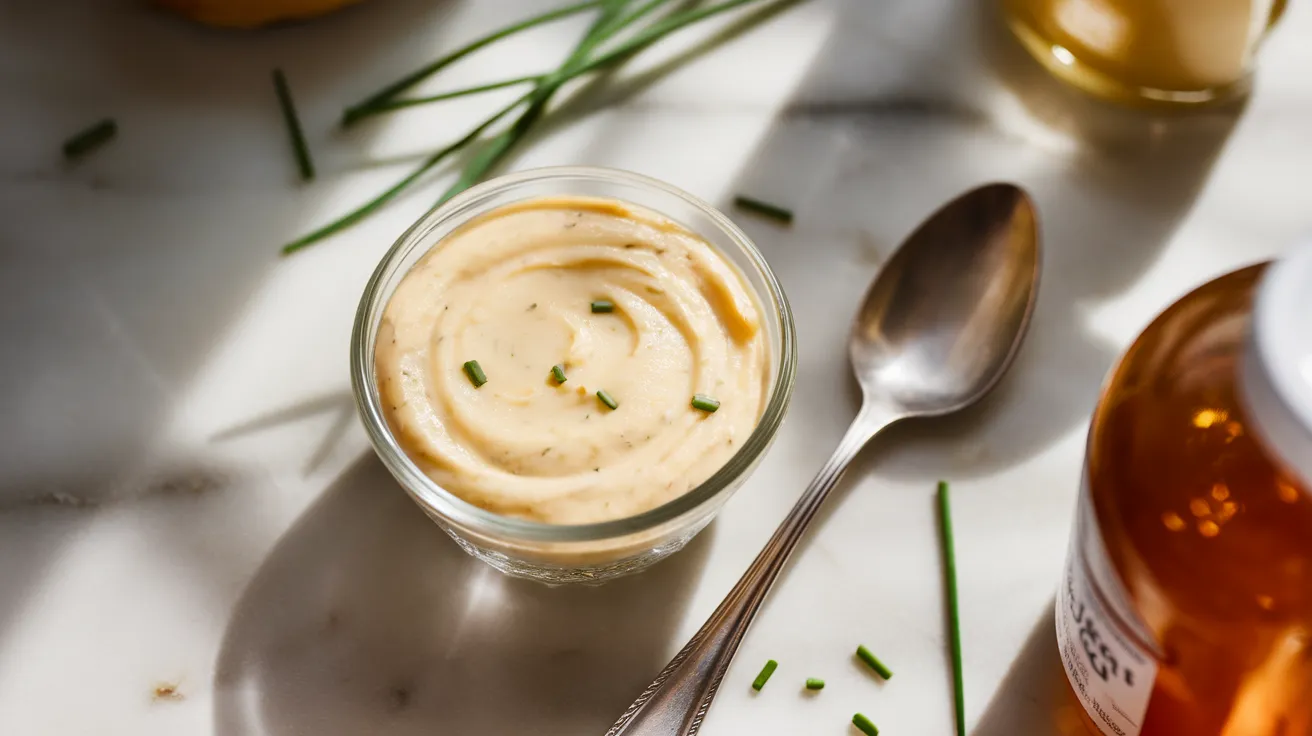
This creamy, flavorful sauce for ham sandwiches transforms ordinary lunch into something special. Made with simple pantry ingredients, this homemade sauce for ham sandwiches combines tangy Dijon mustard, sweet honey, and fresh herbs to create the ultimate sandwich spread. Whether you’re making school lunches or weekend treats, this easy sauce for ham sandwiches recipe delivers gourmet taste every time.
SERVES: 4 | PREP: 15 MIN | COOK: 10 MIN | TOTAL: 25 MIN
Ingredients
Base Ingredients
| Ingredient | Amount |
|---|---|
| Mayonnaise | 1/2 cup |
| Dijon mustard | 2 tablespoons |
| Honey | 1 tablespoon |
| Apple cider vinegar | 1 teaspoon |
Flavor Enhancers
| Ingredient | Amount |
|---|---|
| Fresh chives | 2 tablespoons, chopped |
| Garlic powder | 1/2 teaspoon |
| Onion powder | 1/4 teaspoon |
| Sweet paprika | 1/4 teaspoon |
| Black pepper | 1/4 teaspoon |
| Salt | 1/8 teaspoon |
Detailed Step-by-Step Instructions for Beginners
Phase 1: Getting Everything Ready (10 minutes)
Step 1: Prepare Your Workspace Clear a clean area on your counter near the sink. Wash your hands thoroughly with soap and warm water for 20 seconds. This sauce for ham sandwiches requires clean hands since you’ll be tasting as you go. Lay out a clean kitchen towel for wiping hands and spills.
Step 2: Gather All Ingredients Take out every ingredient listed above and place them on your counter. Read each label carefully to make sure you have the right items. Pull your mayonnaise from the refrigerator 15 minutes early – cold mayo is harder to mix smoothly. Room temperature ingredients blend much better than cold ones, creating a silky sauce for ham sandwiches.
Step 3: Get Your Tools Ready Find a medium-sized mixing bowl (about 4-cup capacity). Glass or stainless steel works best. Get a wire whisk – if you don’t have one, a regular fork works perfectly fine. You’ll also need measuring cups, measuring spoons, a sharp knife, and a small cutting board. Having everything ready saves time and prevents mistakes.
Step 4: Prepare the Fresh Chives Rinse 2 tablespoons worth of fresh chives under cool water. Pat them completely dry with paper towels – wet herbs will make your sauce watery. Place chives on cutting board and chop them finely with your sharp knife. The pieces should be about 1/8-inch long. Finely chopped herbs distribute flavor better throughout your sauce for ham sandwiches.
Phase 2: Building the Creamy Base (8 minutes)
Step 5: Start with the Mayonnaise Measure exactly 1/2 cup mayonnaise using a dry measuring cup. Level it off with a knife for accuracy. Scoop the mayo into your mixing bowl. Use the back of your measuring spoon to spread it around the bottom of the bowl – this makes mixing easier and prevents lumps in your sauce for ham sandwiches.
Step 6: Add the Dijon Mustard Measure 2 tablespoons Dijon mustard carefully. Regular yellow mustard won’t work the same way – Dijon has the right tang and consistency. Add it right on top of the mayonnaise. Don’t mix yet – adding all wet ingredients first prevents splattering when you start whisking.
Step 7: Incorporate Honey and Vinegar Drizzle 1 tablespoon honey over the mustard and mayo. If your honey is thick, warm the measuring spoon under hot water first – this helps honey flow easily. Add 1 teaspoon apple cider vinegar next. The vinegar cuts through richness and adds necessary tang to balance your sauce for ham sandwiches.
Step 8: Mix the Base Thoroughly Now comes the important part. Start whisking slowly to avoid splattering. Use smooth, circular motions, scraping the sides of the bowl frequently. Keep whisking for 2-3 minutes until the mixture is completely smooth and uniform in color. No streaks of mustard or honey should remain – this ensures every bite of your sauce for ham sandwiches tastes consistent.
Phase 3: Adding the Flavor Elements (7 minutes)
Step 9: Add Dry Seasonings Measure 1/2 teaspoon garlic powder, 1/4 teaspoon onion powder, and 1/4 teaspoon sweet paprika. Add them all at once to prevent forgetting any. Dry spices need thorough mixing to prevent pockets of strong flavor. Don’t use fresh garlic here – the powder distributes more evenly and won’t overpower your sauce.
Step 10: Season with Salt and Pepper Add 1/4 teaspoon freshly ground black pepper and 1/8 teaspoon salt. Start with less salt – you can always add more, but you can’t take it out. Freshly ground pepper tastes much better than pre-ground, but use what you have. Mix everything thoroughly with your whisk.
Step 11: Taste and Adjust This is crucial for perfect sauce for ham sandwiches. Dip a clean spoon into the mixture and taste it. Does it need more honey for sweetness? Add 1/2 teaspoon at a time. Want more tang? Add 1/4 teaspoon more vinegar. Needs more depth? Add a pinch more garlic powder. Always use a clean spoon for each taste to avoid contamination.
Step 12: Fold in Fresh Chives Add your finely chopped chives to the bowl. Use a spoon instead of the whisk now – whisking will bruise the delicate herbs. Fold gently by scooping from bottom to top, rotating the bowl as you go. Mix just until chives are evenly distributed – overmixing makes herbs look wilted and bruised.
Phase 4: Final Steps and Storage (5 minutes)
Step 13: Let Flavors Develop Cover the bowl with plastic wrap and let your sauce for ham sandwiches rest for exactly 10 minutes at room temperature. This resting time is not optional – it allows all flavors to meld together and intensify. The sauce will taste much better after this brief wait.
Step 14: Final Taste and Consistency Check After resting, remove plastic wrap and stir gently with a spoon. Taste again with a clean spoon. The flavors should be more balanced now. Is the consistency right? Good sauce for ham sandwiches should spread easily but not drip off the bread. If too thick, add 1/2 teaspoon warm water and mix. If too thin, add 1 tablespoon more mayo.
Step 15: Transfer to Storage Container Use a clean spoon to transfer your finished sauce to an airtight container. Glass jars work best for storing homemade sauces. Leave about 1/2 inch of space at the top of the container. Clean the rim of the jar before putting the lid on – this ensures a proper seal.
Step 16: Proper Storage Setup Label your container with the date you made it. This sauce for ham sandwiches keeps for 7 days in the refrigerator. Store it in the main body of the fridge, not the door – temperature fluctuations in the door can affect quality. Your sauce is now ready to make amazing ham sandwiches!
Chef’s Notes
Temperature Matters: The best sauce for ham sandwiches comes together when ingredients are at room temperature. Cold mayo creates lumps that are hard to smooth out, even with vigorous whisking.
Flavor Balance is Key: Perfect sauce for ham sandwiches balances sweet (honey), tangy (vinegar and mustard), and savory (herbs and spices). Adjust these elements to match your family’s taste preferences.
Fresh Herb Advantage: While dried chives work in emergencies, fresh chives provide the bright, oniony pop that makes this sauce for ham sandwiches truly special.
Make-Ahead Benefits: This sauce for ham sandwiches actually tastes better after overnight refrigeration when all flavors have time to marry and deepen.
Nutrition Facts (Per Serving)
- Calories: 185
- Protein: 1g
- Carbohydrates: 4g
- Fat: 19g
- Sodium: 290mg
Creative Sauce for Ham Sandwiches Variations
Spicy Ham Sandwich Sauce
Transform your basic sauce for ham sandwiches by adding 1/2 teaspoon hot sauce and 1/4 teaspoon cayenne pepper. This creates a zesty kick that pairs wonderfully with our sauce for chicken sandwich recipe for variety in your meal planning.
Mediterranean Ham Sandwich Sauce
Give your sauce for ham sandwiches a Greek twist by replacing chives with 2 tablespoons fresh dill and adding 1 teaspoon fresh lemon juice plus 1 minced garlic clove. This variation brings bright, Mediterranean flavors to your sandwiches.
Sweet & Smoky Ham Sauce
Create a barbecue-style sauce for ham sandwiches by substituting regular paprika with smoked paprika and increasing honey to 2 tablespoons. The smoky sweetness complements ham’s saltiness perfectly.
Italian-Style Ham Sandwich Sauce
Make an Italian-inspired sauce for ham sandwiches by mixing in 1 tablespoon fresh basil and 1 teaspoon balsamic vinegar instead of apple cider vinegar. For more Mediterranean inspiration, try our sauce for Italian sandwich recipe.
Storage & Reheating Your Ham Sandwich Sauce
Refrigerator Storage
Store your homemade sauce for ham sandwiches in an airtight glass container for up to 7 days. Glass preserves flavor better than plastic and doesn’t absorb odors from other foods.
Freezing Guidelines
Never freeze mayonnaise-based sauces like this sauce for ham sandwiches – they separate and become grainy when thawed. Make fresh batches as needed instead.
Serving Temperature
Remove your sauce for ham sandwiches from the refrigerator 10-15 minutes before using. Room temperature sauce spreads easier and has better flavor than cold sauce straight from the fridge.
Troubleshooting Your Ham Sandwich Sauce
Problem: Sauce for Ham Sandwiches is Too Thick
Solution: Add 1 teaspoon warm water at a time, whisking thoroughly after each addition. Don’t add too much at once – you can always add more, but you can’t take it out.
Problem: Too Salty
Solution: Balance the saltiness in your sauce for ham sandwiches by adding 1/2 teaspoon more honey or 1 tablespoon additional mayonnaise to dilute the salt concentration.
Problem: Sauce Lacks Flavor
Solution: Let your sauce for ham sandwiches sit 15 minutes longer for flavors to develop, or add a pinch more garlic powder and fresh herbs to brighten the taste.
Problem: Sauce Separates
Solution: Temperature changes can cause separation. Whisk vigorously by hand or use an immersion blender for 30 seconds to re-emulsify your sauce for ham sandwiches.
Problem: Too Sweet
Solution: Balance overly sweet sauce for ham sandwiches by adding 1/2 teaspoon more apple cider vinegar or extra Dijon mustard to counteract the honey’s sweetness.
Equipment Essentials
- Medium mixing bowl (glass or stainless steel preferred)
- Wire whisk or large fork for mixing
- Sharp knife for chopping fresh chives
- Small cutting board for herb preparation
- Measuring cups and spoons (dry and liquid)
- Airtight storage container (glass jar recommended)
- Clean kitchen towels for cleanup
Shopping List for Ham Sandwich Sauce
Dairy Section
- Mayonnaise (quality brand recommended – avoid light versions)
Condiment Aisle
- Dijon mustard (not yellow mustard)
- Honey (pure honey, not corn syrup blend)
- Apple cider vinegar (with “mother” preferred)
Spice Section
- Garlic powder (not garlic salt)
- Onion powder
- Sweet paprika (not hot paprika)
- Black pepper (whole peppercorns for grinding)
- Salt (kosher or sea salt preferred)
Produce Section
- Fresh chives (look for bright green, firm stems)
Success Secrets for Perfect Ham Sandwich Sauce
1. Temperature Control: Room temperature ingredients are the secret to smooth, lump-free sauce for ham sandwiches. Cold ingredients don’t blend properly and create texture issues.
2. Taste Frequently: Every brand varies in saltiness and tang – taste your sauce for ham sandwiches multiple times during preparation and adjust seasonings to your preference.
3. Fresh Herb Priority: Fresh chives provide irreplaceable flavor that dried herbs simply cannot match. The bright, mild onion taste makes this sauce for ham sandwiches truly special.
4. Patience Pays Off: Allow 10 minutes for flavors to meld after mixing. This resting time transforms good sauce for ham sandwiches into extraordinary sauce.
5. Double Batch Wisdom: Make twice as much since this sauce for ham sandwiches keeps well refrigerated and you’ll want it for multiple meals throughout the week. It’s too good to make just once!