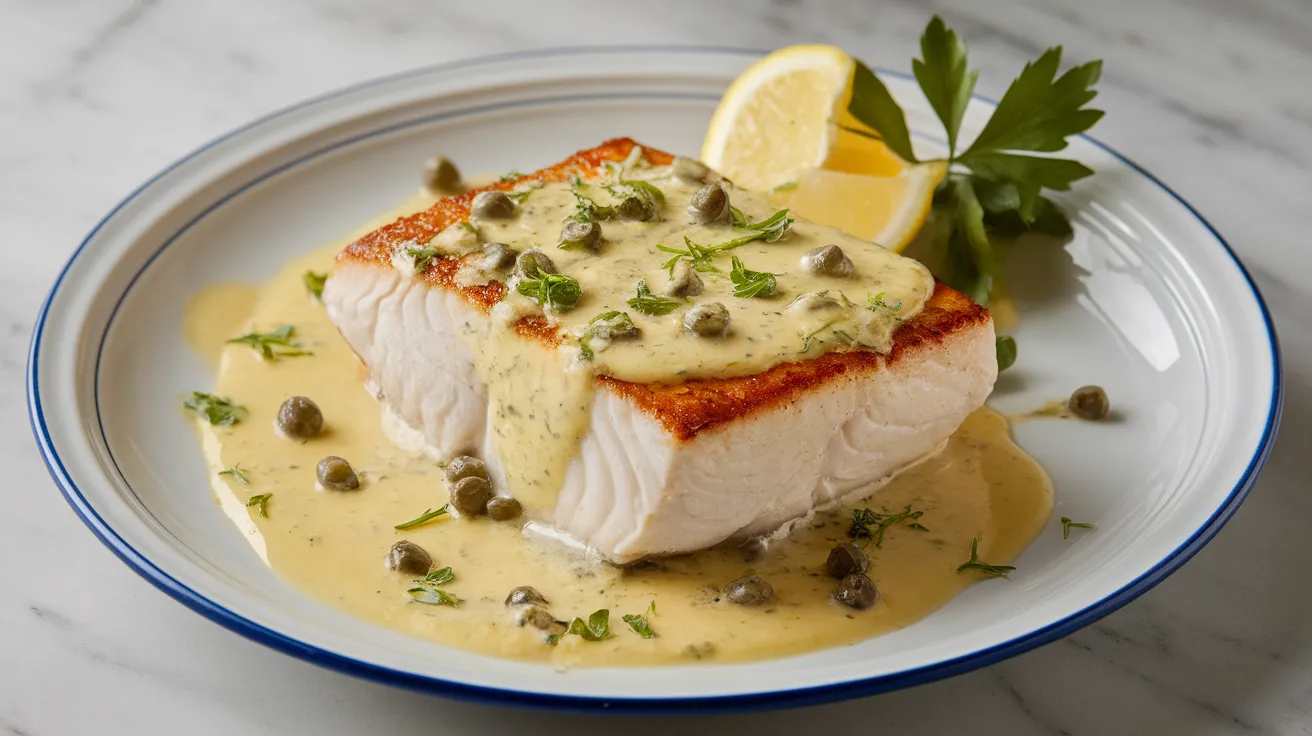
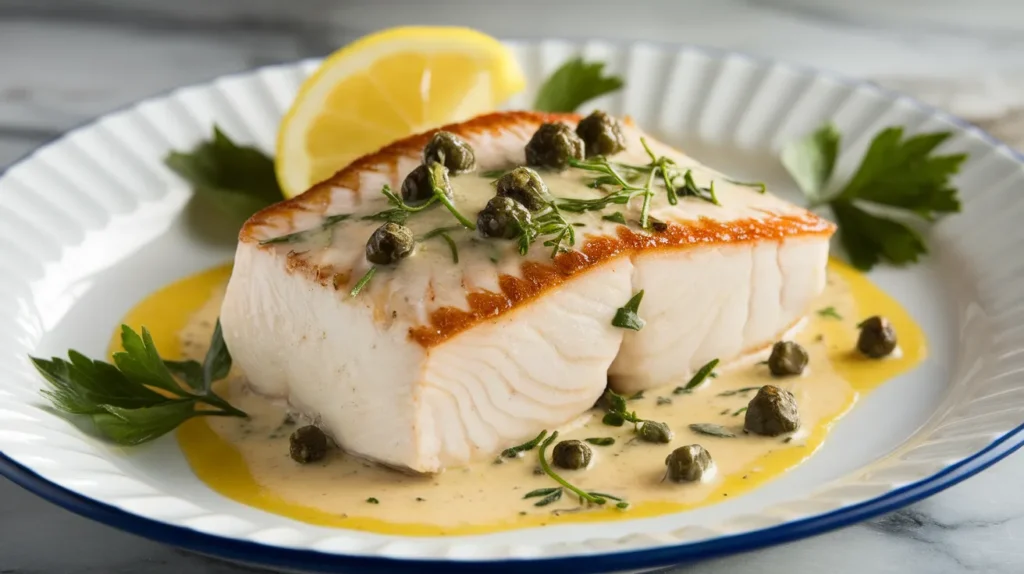
This restaurant-quality sauce for halibut fish transforms your home cooking into a gourmet experience. Our creamy lemon butter sauce perfectly complements halibut’s delicate, flaky texture while adding luxurious richness to every bite. This foolproof sauce for halibut fish recipe uses simple ingredients and beginner-friendly techniques to create an elegant dinner that impresses every time.
Recipe Information
SERVES: 4 | PREP: 15 MIN | COOK: 12 MIN | TOTAL: 27 MIN
Ingredients
For the Halibut
| Ingredient | Amount |
|---|---|
| Fresh halibut fillets | 4 pieces (6 oz each) |
| Salt | 1 teaspoon |
| Black pepper | ½ teaspoon |
| Olive oil | 2 tablespoons |
For the Classic Sauce
| Ingredient | Amount |
|---|---|
| Unsalted butter | 6 tablespoons |
| Fresh lemon juice | 3 tablespoons |
| White wine | ¼ cup |
| Shallot, minced | 1 medium |
| Fresh thyme | 2 teaspoons |
| Heavy cream | 3 tablespoons |
| Capers | 2 tablespoons |
| Fresh parsley, chopped | 2 tablespoons |
Detailed Step-by-Step Instructions for Beginners
Phase 1: Preparing Your Halibut (8 minutes)
Step 1: Inspect and Clean the Fish Remove halibut fillets from refrigerator and place on a clean cutting board. Look for any remaining bones by running your fingers along the flesh. Use tweezers or needle-nose pliers to remove any pin bones you find. Pat each fillet completely dry with paper towels – this is crucial because any moisture will cause the fish to steam instead of getting that beautiful golden crust we want for our sauce for halibut fish dish.
Step 2: Season Properly Sprinkle 1 teaspoon salt evenly across both sides of all four fillets. The salt should look like light snowfall covering the surface. Add ½ teaspoon black pepper the same way. Don’t just dump it in one spot – spread it evenly so every bite tastes seasoned. Press the seasoning gently into the flesh with your fingertips.
Step 3: Rest the Fish Let seasoned halibut sit on the counter for exactly 10 minutes. This does two important things: it brings the fish to room temperature so it cooks evenly, and it allows the salt to penetrate the flesh for better flavor. Cold fish from the fridge will cook unevenly – the outside overcooks while the center stays raw.
Step 4: Check Your Equipment While fish rests, gather all your tools. You’ll need a large stainless steel or cast-iron skillet (non-stick won’t work well for this recipe), a thin fish spatula, a wooden spoon, a small whisk, and measuring spoons. Having everything ready prevents scrambling later when timing matters.
Phase 2: Creating the Perfect Pan and Cooking Base (6 minutes)
Step 5: Heat Your Pan Correctly Place your skillet over medium heat and let it warm for 2-3 minutes. To test if it’s ready, flick a few drops of water into the pan. They should sizzle and evaporate immediately but not bounce around violently. If water just sits there, the pan isn’t hot enough. If it bounces and disappears instantly, it’s too hot – reduce the heat.
Step 6: Add Oil at the Right Moment Pour 2 tablespoons olive oil into the hot pan. The oil should shimmer and move easily but not smoke. If it smokes, your pan is too hot – remove from heat for 30 seconds. Good oil temperature means your fish will sear properly instead of sticking or burning.
Step 7: Place Fish Strategically Gently lay each halibut fillet into the pan, placing the thickest part toward the center where heat is most intense. Don’t overcrowd – there should be at least 1 inch between fillets. If your pan isn’t large enough, cook in two batches. Listen for a gentle sizzling sound – this means you’re creating that golden crust.
Step 8: Master the First Flip DO NOT MOVE THE FISH for exactly 4-5 minutes. Beginners often peek and poke, but this prevents proper browning. You’ll know it’s ready to flip when the edges look opaque white and you can slide a thin spatula under the fish easily. If it resists, wait another minute.
Phase 3: Perfecting the Cook and Starting Your Sauce for Halibut Fish (5 minutes)
Step 9: Execute the Perfect Flip Using a thin fish spatula, carefully flip each fillet. The bottom should be golden brown – if it’s pale, your heat was too low. If it’s dark brown or black, your heat was too high. Cook the second side for 3-4 minutes until the internal temperature reaches 145°F on an instant-read thermometer inserted into the thickest part.
Step 10: Test for Doneness Gently press the thickest part of a fillet with your finger. Properly cooked halibut feels firm but gives slightly, like pressing a ripe peach. If it feels mushy, cook 1-2 minutes longer. If it feels very hard, it’s overcooked. The fish should flake easily when tested with a fork but still look slightly translucent in the very center.
Step 11: Rest the Fish Properly Transfer cooked halibut to a warm plate (you can warm plates in a 200°F oven for 5 minutes beforehand). Tent loosely with aluminum foil to keep warm. Don’t wash the pan yet – those brown bits stuck to the bottom are pure gold for building your sauce for halibut fish.
Step 12: Examine Your Fond Look at your pan. You should see golden-brown bits stuck to the bottom – this is called “fond” and it’s where most of your sauce flavor comes from. If you see black bits, your heat was too high, but don’t worry – the sauce will still taste good. If you see no brown bits, your heat was too low, but again, we can work with this.
Phase 4: Building Your Sauce for Halibut Fish Foundation (4 minutes)
Step 13: Prepare Your Shallot While keeping the pan over medium-low heat (reduce from medium), add your minced shallot directly to the same pan with the fond. Don’t add any oil – there should be enough residual fat from cooking the fish. Stir constantly with a wooden spoon for exactly 1 minute until the shallot becomes fragrant and slightly translucent.
Step 14: Master the Deglazing Technique Pour ¼ cup white wine into the pan all at once. It will sizzle dramatically – this is normal and good! Immediately start scraping the bottom of the pan with your wooden spoon, loosening all those brown bits. This process is called deglazing, and it’s what transforms simple wine into flavorful sauce base. Scrape thoroughly – every brown bit adds flavor.
Step 15: Reduce Like a Pro Let the wine bubble and simmer while stirring occasionally. You’ll see the liquid level dropping – this is reduction, which concentrates flavors. After about 2 minutes, the wine should be reduced by half. You’ll know it’s ready when you can draw a line through the liquid with your spoon and it takes a second to fill back in.
Step 16: Add Acid and Aromatics Stir in 3 tablespoons fresh lemon juice and 2 teaspoons fresh thyme. The mixture will bubble up again – keep stirring. The lemon juice adds brightness that cuts through the richness we’re about to add. Let this simmer for 1 minute more until it smells wonderfully aromatic.
Phase 5: Creating the Silky Sauce Finish (4 minutes)
Step 17: Remove from Heat (Critical Step) Take the pan completely off the burner. This next step must be done off heat, or your sauce will break and become greasy instead of silky. The pan will still be plenty hot from residual heat.
Step 18: Master Butter Emulsification Add 1 tablespoon cold butter to the pan and whisk constantly until it melts completely. Then add another tablespoon and whisk again. Continue this process with all 6 tablespoons, adding one at a time. This technique creates an emulsion – a smooth, silky sauce for halibut fish that coats beautifully. If you dump all the butter in at once, it won’t emulsify properly.
Step 19: Add Cream for Richness Whisk in 3 tablespoons heavy cream until fully incorporated. The sauce should now look smooth and coat the back of a spoon. If it looks separated or oily, whisk vigorously off heat – it should come back together.
Step 20: Finish with Flavor Pops Stir in 2 tablespoons capers (rinse them first if they seem very salty) and 2 tablespoons chopped fresh parsley. The capers add little bursts of briny flavor that complement the rich sauce perfectly.
Phase 6: Final Assembly and Serving (2 minutes)
Step 21: Taste and Adjust Dip a clean spoon into your sauce for halibut fish and taste it. It should be rich, bright, and well-balanced. If it needs more brightness, add another squeeze of lemon. If it needs more seasoning, add a pinch of salt. If it seems too thick, whisk in a tablespoon of cream or white wine.
Step 22: Warm and Serve Return the pan to very low heat for just 30 seconds to warm the sauce through – don’t let it bubble or it may break. Gently nestle the halibut fillets back into the pan to warm for 1 minute, spooning sauce over each piece.
Step 23: Plate Like a Pro Place one halibut fillet in the center of each warmed plate. Spoon the sauce for halibut fish generously over and around each fillet. Garnish with additional fresh parsley and a lemon wedge on the side.
Chef’s Notes for Perfect Sauce for Halibut Fish
• Temperature Control: Keep sauce warm but never let it boil after adding butter. High heat breaks the emulsion, turning your smooth sauce for halibut fish into a greasy mess.
• Wine Selection: Use a dry white wine you’d actually drink. Sauvignon Blanc, Pinot Grigio, or Chardonnay all work beautifully in this recipe.
• Timing Strategy: Have all ingredients prepped before you start cooking. This sauce comes together quickly once you begin.
• Quality Matters: Fresh halibut makes the biggest difference. Look for fillets that smell like the ocean, not “fishy,” with firm, translucent flesh.
Nutrition Information (Per Serving)
- Calories: 340
- Protein: 35g
- Carbohydrates: 4g
- Fat: 18g
- Sodium: 420mg
Creative Variations for Your Sauce for Halibut Fish
Mediterranean Style
Replace capers with chopped Kalamata olives and add sun-dried tomatoes to the sauce base. This variation shares similar techniques with our sauce for haddock fish recipe but creates a completely different flavor profile.
Asian Fusion Twist
Substitute low-sodium soy sauce for salt and add fresh minced ginger with the shallots. Finish with a drizzle of sesame oil and sliced green onions instead of parsley.
Herb Garden Special
Double the fresh herbs by adding fresh dill and chives alongside the thyme. This creates a vibrant green sauce that’s perfect for spring and summer dinners.
Tropical Version
Replace heavy cream with coconut cream and finish with fresh lime juice and cilantro. This lighter variation uses similar sauce-building techniques found in our sauce for mahi-mahi preparation.
Storage & Reheating Your Sauce for Halibut Fish
Refrigeration: Store leftover sauce separately from fish for up to 2 days in the refrigerator. The butter sauce will solidify but re-emulsifies beautifully when reheated properly.
Reheating Method: Warm sauce very slowly over low heat, whisking constantly. Add a splash of cream or white wine if it appears too thick after reheating.
Make-Ahead Tips: Prepare sauce base through the wine reduction step, then finish with butter and cream just before serving for optimal texture.
Freezing Note: This creamy sauce for halibut fish doesn’t freeze well due to the dairy content, which separates and becomes grainy when thawed.
Troubleshooting Your Sauce for Halibut Fish
Problem: Sauce looks greasy or separated
Solution: Remove from heat immediately and whisk in 1 tablespoon cold butter or cream. The emulsion should come back together with vigorous whisking.
Problem: Halibut sticks to pan despite using oil
Solution: Fish wasn’t dry enough, or pan wasn’t properly heated. Always pat fish completely dry and test pan temperature with water drops.
Problem: Sauce tastes flat or boring
Solution: Add more fresh lemon juice, a pinch of salt, or extra fresh herbs. The sauce should be bright and well-balanced.
Problem: Fish is overcooked and dry
Solution: Use an instant-read thermometer and remove fish at exactly 145°F. It continues cooking from residual heat.
Problem: Sauce is too thin and watery
Solution: Return to heat and simmer to reduce liquid further, or whisk in additional cold butter for proper thickness.
Equipment Essentials
- Large stainless steel or cast-iron skillet (12-inch preferred)
- Fine-mesh strainer (optional for ultra-smooth sauce)
- Instant-read thermometer for perfect doneness
- Sharp fillet knife for prep work
- Wooden spoon for deglazing and stirring
- Small whisk for sauce emulsification
- Thin fish spatula for flipping
Shopping List
Seafood Counter
- Fresh halibut fillets (1½ lbs total, about 6 oz each)
Produce Section
- Shallot (1 medium)
- Fresh lemons (2 large for juice)
- Fresh thyme (small package)
- Fresh flat-leaf parsley
Dairy Case
- Unsalted butter (1 stick)
- Heavy cream (small container)
Pantry Items
- Capers in brine
- Dry white wine
- Extra virgin olive oil
- Sea salt and black pepper
Success Secrets for Perfect Sauce for Halibut Fish
1. Always bring fish to room temperature before cooking – this ensures even cooking and prevents the outside from overcooking while the center stays raw.
2. Don’t skip the deglazing step when making your sauce for halibut fish – those brown bits create the complex flavor foundation that separates good sauce from great sauce.
3. Add butter gradually and off the heat to create a silky emulsion that coats the fish beautifully without breaking or becoming greasy.
4. Taste and adjust seasoning at every major step, especially after adding cream and capers, to ensure perfect balance in your finished dish.
5. Serve immediately while the sauce for halibut fish maintains its perfect consistency and the fish stays flaky, warm, and delicious.