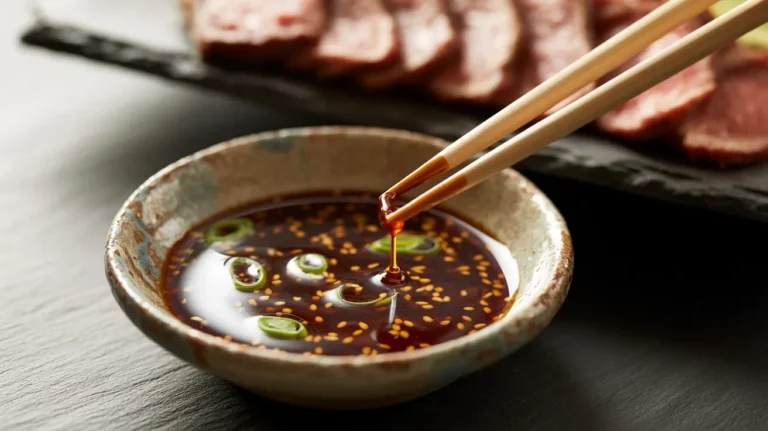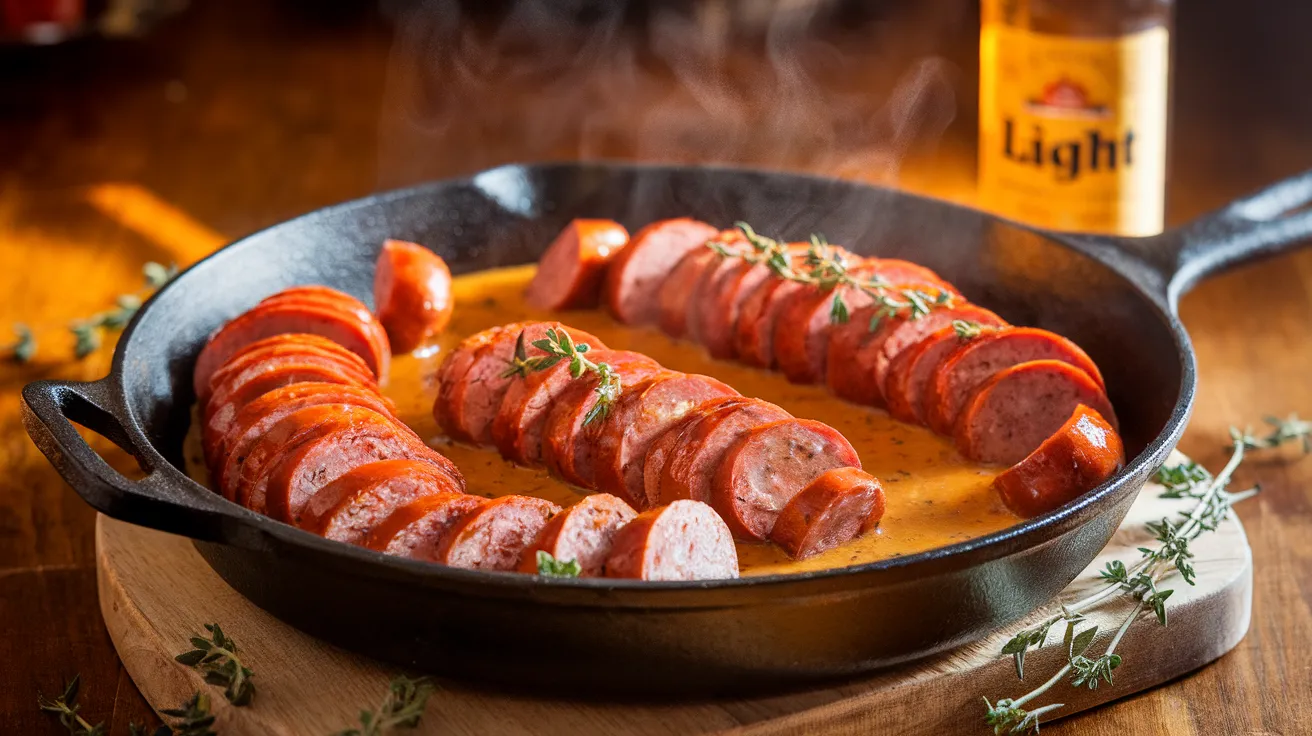
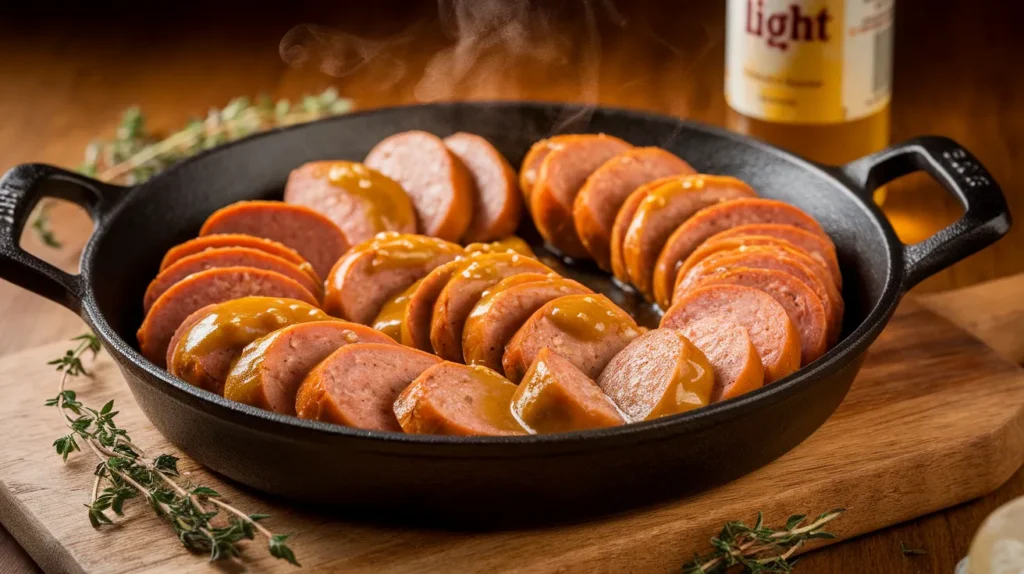
Discover the ultimate sauce for kielbasa that transforms ordinary sausage into an extraordinary meal. This foolproof sauce for kielbasa recipe combines rich beer flavors with tangy mustard, creating a restaurant-quality dish that serves four people perfectly. Even complete beginners can master this sauce for kielbasa in just 35 minutes.
SERVES: 4 | PREP: 15 MIN | COOK: 20 MIN | TOTAL: 35 MIN
Ingredients for Your Sauce for Kielbasa
For Classic Mustard Beer Sauce
| Ingredient | Amount | Purpose |
|---|---|---|
| Whole grain mustard | 3 tablespoons | Creates texture and tangy base |
| Beer (lager or pilsner) | 1 cup | Adds depth and helps reduce |
| Brown sugar | 2 tablespoons | Balances acidity |
| Apple cider vinegar | 1 tablespoon | Brightens flavors |
| Butter | 2 tablespoons | Creates glossy finish |
| Onion powder | 1/2 teaspoon | Adds savory depth |
| Black pepper | 1/4 teaspoon | Provides gentle heat |
| Kielbasa | 1 pound | Main protein |
Optional Flavor Boosters
| Ingredient | Amount |
|---|---|
| Garlic (minced) | 2 cloves |
| Fresh thyme | 1 teaspoon |
| Paprika | 1/2 teaspoon |
Detailed Step-by-Step Instructions for Sauce for Kielbasa
Phase 1: Essential Preparation (8-10 minutes)
Step 1: Set Up Your Workspace Clear your counter space and gather all ingredients within arm’s reach. Place a large plate next to your stove for the cooked kielbasa. This organization prevents panic during cooking and ensures your sauce for kielbasa turns out perfectly.
Step 2: Prepare Your Kielbasa Using a sharp knife, slice the kielbasa into 1/2-inch thick diagonal pieces. Why diagonal? This cut exposes more surface area, allowing the sauce to coat better and creating more appealing presentation. Each slice should be uniform – this ensures even cooking and prevents some pieces from burning while others stay pale.
Step 3: Measure Everything Precisely Place each ingredient in separate small bowls or cups. Cooking moves quickly once you start, so having everything pre-measured prevents mistakes. Tip for beginners: Double-check your measurements before starting – it’s much easier to fix errors now than during cooking.
Step 4: Choose Your Cooking Fat You’ll use the fat rendered from the kielbasa, but have 1 tablespoon of vegetable oil ready as backup. Some kielbasa varieties are leaner and don’t release much fat. The fat is crucial for building flavor in your sauce for kielbasa.
Phase 2: Building the Flavor Foundation (10-12 minutes)
Step 5: Heat Your Pan Correctly Use a large, heavy-bottomed skillet – at least 12 inches wide. Place it over medium heat for 2-3 minutes until you can feel warmth when you hold your hand 6 inches above the surface. Never use high heat, as this will burn the kielbasa exterior before the interior heats through.
Step 6: Test the Temperature Drop a small piece of kielbasa into the pan. It should sizzle immediately but not aggressively. If it’s silent, the pan isn’t hot enough. If it splatters violently, reduce the heat and wait 30 seconds before proceeding.
Step 7: Cook the Kielbasa Properly Add all kielbasa pieces in a single layer – don’t overcrowd. You should hear a gentle, consistent sizzling. Cook for 4-5 minutes without moving them. This creates the golden crust that adds incredible flavor to your final sauce for kielbasa. Visual cue: The edges should look golden brown.
Step 8: Flip with Confidence Using tongs, flip each piece individually. The cooked side should be deep golden brown. If some pieces are pale, let them cook another minute. Cook the second side for 3-4 minutes until equally golden. Temperature check: The internal temperature should reach 140°F if you have a meat thermometer.
Step 9: Reserve the Cooking Fat Remove all kielbasa to your prepared plate and cover with aluminum foil to keep warm. Look at the pan – you should see rendered fat with beautiful brown bits (called fond) stuck to the bottom. This is liquid gold for your sauce! If you have more than 2 tablespoons of fat, pour off the excess, leaving exactly 1-2 tablespoons in the pan.
Phase 3: Creating Your Sauce for Kielbasa Base (8-10 minutes)
Step 10: Sauté the Aromatics (If Using) If using garlic, add it to the hot fat now. Cook for 30-45 seconds until fragrant – you’ll smell it immediately. Warning: Garlic burns quickly and becomes bitter, so watch carefully. If it starts turning brown, remove the pan from heat temporarily.
Step 11: Deglaze with Beer Remove the pan from heat temporarily. Pour the beer slowly down the side of the pan, not directly onto the hot bottom – this prevents excessive foaming. What you’ll see: The liquid will bubble and steam dramatically. This is normal and desired.
Step 12: Scrape Up the Fond Return the pan to medium heat. Using a wooden spoon or silicone spatula, scrape all the brown bits from the bottom of the pan. These dissolve into the beer, creating incredible flavor. Technique tip: Use firm pressure and scrape in one direction rather than stirring in circles.
Step 13: Add the Sweet Element Sprinkle the brown sugar evenly across the surface of the beer. Stir constantly for 1-2 minutes until completely dissolved. Visual check: No granules should remain visible. The mixture should look smooth and slightly caramel-colored.
Phase 4: Building the Perfect Sauce for Kielbasa Texture (6-8 minutes)
Step 14: Incorporate the Mustard Add the whole grain mustard and stir vigorously. What to expect: The sauce will look slightly separated at first – this is normal. Keep stirring for 1-2 minutes until it becomes smooth and cohesive. The mustard seeds will soften and release their oils.
Step 15: Simmer and Reduce Adjust heat to medium-low – the sauce should bubble gently around the edges, not boil vigorously. Simmer for 6-8 minutes, stirring occasionally. Visual cues: The sauce will gradually thicken and reduce by about half. It should coat the back of a spoon when ready.
Step 16: Test the Consistency Lift your spoon from the sauce and let it drip back into the pan. The sauce should fall in a steady stream, not individual drops. If it’s too thin, simmer 2-3 minutes longer. If too thick, add beer 1 tablespoon at a time.
Step 17: Season Your Sauce for Kielbasa Add the apple cider vinegar, onion powder, and black pepper. Stir well and taste immediately. The sauce should balance sweet (brown sugar), tangy (vinegar and mustard), and savory (kielbasa drippings) flavors. Adjust seasonings as needed.
Phase 5: Final Assembly and Finishing (3-5 minutes)
Step 18: Add the Butter Finish Remove the pan from heat. Add cold butter one tablespoon at a time, whisking constantly after each addition. Why cold butter? It creates an emulsion that makes the sauce glossy and rich. Visual result: The sauce should become noticeably shinier and smoother.
Step 19: Return the Kielbasa Add the reserved kielbasa back to the pan and toss gently with tongs to coat evenly. Gentle heat: Return to low heat for 2-3 minutes just to warm the sausage through. Don’t let it boil, or the sauce may break.
Step 20: Final Quality Check Taste one piece of sauced kielbasa. The sauce for kielbasa should cling nicely without being gloppy. The flavors should be balanced – rich, tangy, and savory. Garnish options: Fresh parsley, chives, or a sprinkle of paprika add color and freshness.
Chef’s Professional Notes for Sauce for Kielbasa Success
• Temperature is everything – medium heat prevents the sauce for kielbasa from breaking while ensuring proper reduction and flavor development.
• Quality beer matters – avoid hoppy IPAs or dark stouts. Light lagers and pilsners provide clean, malty flavors that complement rather than compete.
• Timing the butter – always add cold butter off the heat to prevent breaking. This technique creates restaurant-quality gloss and richness.
• Batch cooking tip – this sauce for kielbasa recipe doubles easily for meal prep or entertaining larger groups.
Complete Nutrition Information (Per Serving)
- Calories: 295
- Protein: 16g
- Carbohydrates: 12g
- Total Fat: 20g
- Saturated Fat: 8g
- Fiber: 1g
- Sodium: 920mg
- Sugars: 11g
Creative Sauce for Kielbasa Variations
Spicy German-Style Sauce
Transform your basic sauce for kielbasa by adding 2 tablespoons of horseradish and 1 teaspoon caraway seeds. This creates an authentic German beer hall experience. The horseradish adds heat without overwhelming the delicate beer and mustard balance.
Sweet Apple Cider Version
Replace the beer with 1 cup apple cider and add 1 diced Granny Smith apple. This autumn-inspired sauce for kielbasa pairs beautifully with roasted vegetables. For similar sweet and savory combinations, try our sauce for grilled pork chops recipe.
Smoky BBQ-Style Sauce
Add 1 tablespoon tomato paste, 1 teaspoon smoked paprika, and 2 tablespoons molasses to create a barbecue-inspired sauce for kielbasa. This version works especially well for outdoor grilling and pairs perfectly with our sauce for pulled pork techniques.
Herb and White Wine Elegance
Substitute the beer with 3/4 cup dry white wine and add 2 tablespoons fresh herbs (thyme, rosemary, or sage). This sophisticated version elevates your sauce for kielbasa to dinner party status.
Storage and Reheating Your Sauce for Kielbasa
Immediate Storage: Cool completely before refrigerating. Store in airtight containers for up to 5 days. The flavors actually improve overnight as they meld together.
Freezing Instructions: This sauce for kielbasa freezes beautifully for up to 4 months. Freeze in portion-sized containers or ice cube trays for easy reheating.
Reheating Method: Warm gently over low heat, stirring frequently. Add warm beer or chicken broth 1 tablespoon at a time if the sauce seems too thick after storage.
Make-Ahead Strategy: Prepare the sauce completely up to step 17, then reheat and add the butter finish when ready to serve. Brown the kielbasa and store separately.
Troubleshooting Your Sauce for Kielbasa
Problem: Sauce Too Thin Solution: Return to heat and simmer uncovered for 3-5 minutes, stirring occasionally. Alternatively, mix 1 teaspoon cornstarch with 1 tablespoon cold beer and whisk into the sauce.
Problem: Sauce Too Thick or Pasty Solution: Gradually whisk in warm beer or chicken stock, 1 tablespoon at a time, until you reach desired consistency. Never add cold liquid to hot sauce.
Problem: Bitter or Burnt Flavor Solution: This usually means the garlic burned or the heat was too high. Unfortunately, there’s no fix – start over with lower heat and fresh ingredients.
Problem: Sauce Separating or Curdling Solution: Remove from heat immediately. Whisk in 1 tablespoon cold butter vigorously. If this doesn’t work, strain out the solids and start the sauce portion over.
Problem: Not Enough Flavor Impact Solution: Add 1/4 teaspoon salt and another tablespoon of mustard. Sometimes the sauce for kielbasa needs more seasoning to balance the rich sausage.
Essential Equipment for Perfect Sauce for Kielbasa
Must-Have Tools: • 12-inch heavy-bottomed skillet – ensures even heat distribution • Wooden spoon or silicone spatula – won’t scratch your pan • Tongs – for safe kielbasa handling • Wire whisk – creates smooth sauce texture • Sharp chef’s knife – for clean, even cuts
Measuring Tools: • Liquid measuring cup (2-cup capacity) • Dry measuring cups and spoons • Kitchen scale (optional but helpful)
Nice-to-Have Equipment: • Instant-read thermometer – ensures proper kielbasa temperature • Fine-mesh strainer – for ultra-smooth sauce if desired
Smart Shopping List for Sauce for Kielbasa
Meat Department
- 1 lb Polish or German kielbasa (avoid pre-cooked if possible)
Dairy Section
- Unsalted butter (European-style for richer flavor)
Condiment and Baking Aisles
- Whole grain mustard (Dijon works as substitute)
- Apple cider vinegar
- Light brown sugar
- Onion powder
- Black peppercorns (for freshest flavor)
Beverage Section
- 12 oz bottle light lager or pilsner (drink the rest!)
Produce Section (Optional)
- Fresh garlic bulb
- Fresh herbs (thyme or parsley)
Budget-Friendly Tips: Buy beer in single bottles rather than six-packs. Store brands work perfectly for cooking.
Top 5 Success Secrets for Amazing Sauce for Kielbasa
1. Master the Browning Step The golden crust on your kielbasa isn’t just for looks – it’s the foundation of flavor for your entire sauce for kielbasa. Don’t rush this step. Proper browning takes 8-10 minutes total and creates the fond (brown bits) that transform ordinary beer into liquid gold.
2. Control Your Heat Like a Pro Medium heat is your best friend throughout this entire recipe. High heat burns the delicate sugars and proteins, while low heat won’t create proper caramelization. Visual cue: The sauce should bubble gently around the edges, never boil aggressively.
3. Taste and Adjust Constantly
Every brand of kielbasa has different salt levels, and every beer varies in sweetness. Start with the recipe amounts, then adjust gradually. Professional tip: Add acid (vinegar) last – it brightens all the other flavors and makes them more pronounced.
4. Perfect the Butter Technique Cold butter whisked into hot (but not boiling) sauce creates an emulsion that gives restaurant-quality gloss and richness to your sauce for kielbasa. Never add hot butter or butter to boiling sauce – it will break and look oily.
5. Timing is Everything Prepare all ingredients before you start cooking. This sauce for kielbasa comes together quickly once you begin, and having everything ready prevents overcooking or burning. Beginner tip: Read through all steps twice before starting – understanding the process makes execution much easier.