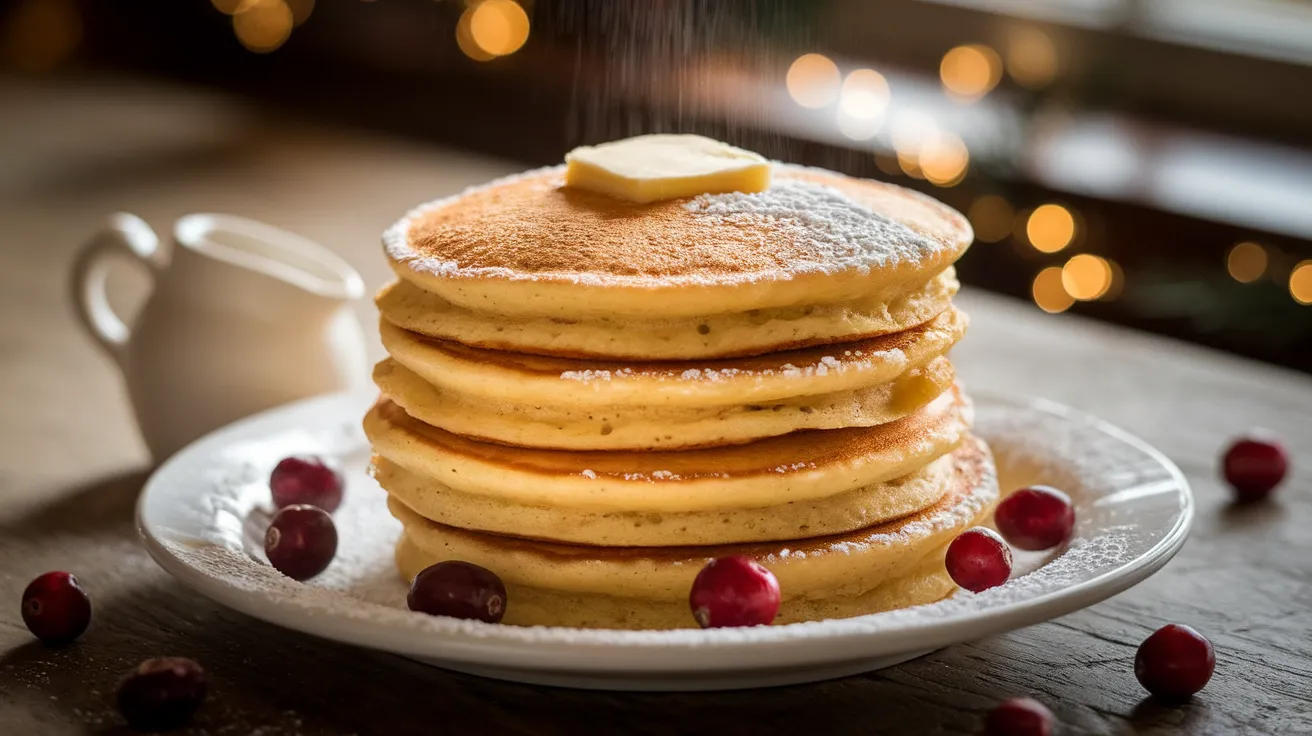
Start your Christmas morning with these magical Christmas pancakes that fill your kitchen with warm holiday spices and create lasting family memories. These festive Christmas pancakes combine fluffy texture with cinnamon and nutmeg, transforming your regular breakfast into a special holiday celebration that everyone will treasure.
Recipe Info
SERVES: 4 | PREP: 15 MIN | COOK: 20 MIN | TOTAL: 35 MIN
Ingredients
Dry Ingredients
| Ingredient | Amount |
|---|---|
| All-purpose flour | 2 cups |
| Sugar | 3 tablespoons |
| Baking powder | 2 teaspoons |
| Ground cinnamon | 1 teaspoon |
| Ground nutmeg | 1/4 teaspoon |
| Salt | 1/2 teaspoon |
Wet Ingredients
| Ingredient | Amount |
|---|---|
| Whole milk | 1 3/4 cups |
| Large eggs | 2 |
| Melted butter | 4 tablespoons |
| Vanilla extract | 2 teaspoons |
For Serving
| Ingredient | Amount |
|---|---|
| Butter | 4 tablespoons |
| Maple syrup | 1/2 cup |
| Powdered sugar | For dusting |
| Fresh cranberries | 1/2 cup (optional) |
Step-by-Step Christmas Pancakes Instructions for Beginners
Phase 1: Setting Up Your Kitchen (8 minutes)
Step 1: Prepare Your Cooking Surface Place your griddle or large heavy-bottomed skillet on the stove. Turn heat to medium (about setting 5 on most stoves). Don’t add oil or butter yet – we’ll do that later. If you’re using an electric griddle, set it to 350°F. Let it warm up while you prepare the batter. This gradual heating prevents hot spots that burn pancakes.
Step 2: Gather and Organize Ingredients Remove eggs and milk from refrigerator 30 minutes before cooking if possible. Room temperature ingredients mix together much easier and create fluffier Christmas pancakes. Set all ingredients on your counter in the order you’ll use them. This prevents forgotten ingredients and makes the process smoother for beginners.
Step 3: Prepare Your Workspace Get out two large mixing bowls, one whisk, one wooden spoon, measuring cups, and a wide spatula for flipping. Having everything ready prevents scrambling around while your batter sits too long. Place a clean kitchen towel nearby for wiping hands and cleaning spills.
Step 4: Test Your Griddle Temperature After 5-8 minutes of heating, test the temperature by flicking a few drops of water onto the surface. The water should sizzle immediately and evaporate within 2-3 seconds. If it just sits there, your griddle isn’t hot enough yet. If it bounces around violently, it’s too hot – turn down the heat slightly.
Phase 2: Creating Perfect Christmas Pancakes Batter (10 minutes)
Step 5: Mix All Dry Ingredients Thoroughly In your first large bowl, add flour, sugar, baking powder, cinnamon, nutmeg, and salt. Use a whisk to mix these ingredients for at least 30 seconds. Make sure you can’t see any clumps of baking powder or spices. This step is crucial because uneven mixing creates pancakes with bitter spots or dense areas. The cinnamon should be evenly distributed throughout for consistent Christmas pancakes flavor.
Step 6: Create a Well in Dry Ingredients Push the flour mixture to the sides of the bowl, creating a crater or well in the center. This well should be about 4 inches wide. This technique helps you gently combine wet and dry ingredients without overmixing, which makes pancakes tough.
Step 7: Prepare Wet Ingredients Separately In your second bowl, crack both eggs. Always crack eggs into a separate bowl first in case you get shell pieces – much easier to remove them now than from the final batter. Beat the eggs with a fork until the yolks and whites are completely combined and slightly frothy, about 1 minute of vigorous beating.
Step 8: Melt Butter Properly Melt butter in microwave for 30-45 seconds or in a small pan on the stove. Let it cool for 2-3 minutes before adding to other ingredients. Hot melted butter can scramble your eggs, creating lumpy batter. The butter should be liquid but not steaming hot.
Step 9: Combine All Wet Ingredients Add milk, cooled melted butter, and vanilla extract to your beaten eggs. Whisk everything together until completely smooth and well combined. The mixture should look pale yellow and have no streaks of butter floating on top.
Step 10: The Critical Mixing Step Pour the wet ingredient mixture directly into the well you created in the dry ingredients. Using a wooden spoon (not a whisk), gently stir in a folding motion from the bottom up. Stop mixing as soon as you can’t see dry flour. The batter should look lumpy with small pockets of flour – this is exactly what you want! Overmixing develops gluten, making your Christmas pancakes chewy instead of fluffy.
Phase 3: Cooking Your Christmas Pancakes to Perfection (20 minutes)
Step 11: Final Temperature Check and Greasing Do one more water drop test on your griddle. Add 1 tablespoon of butter to the cooking surface and spread it around with a paper towel. The butter should sizzle gently but not brown immediately. If it browns within 10 seconds, your heat is too high.
Step 12: Portion Your Pancakes Consistently Use a 1/4 cup measuring cup to scoop batter. Fill it completely level for uniform pancakes that cook at the same rate. Pour the batter onto your griddle, starting from one side and working across. Leave 2-3 inches between each pancake so you have room to flip them easily.
Step 13: Watch for the First Flip Signal Here’s the key to perfect Christmas pancakes: Don’t flip too early! Watch the surface of each pancake carefully. You’ll see small bubbles forming across the top. Wait until these bubbles pop and leave little holes that don’t fill back in. The edges should also look slightly dry and set. This takes 2-4 minutes depending on your heat level.
Step 14: The Perfect Flip Technique Slide your wide spatula completely under each pancake, supporting the entire bottom. Lift straight up about 2 inches, then flip in one quick motion. Don’t hesitate or do it slowly – confidence creates better flips! The cooked side should be golden brown. If it’s too dark, reduce your heat for the next batch.
Step 15: Cook the Second Side The second side cooks faster than the first, usually 1-2 minutes. You can gently lift a corner to check the color. When both sides are golden brown and the pancake feels set when gently pressed in the center, it’s done. The middle should spring back slightly when touched.
Step 16: Keep Pancakes Warm Transfer finished Christmas pancakes to a baking sheet and place in a 200°F oven to keep warm. Don’t stack them directly on top of each other – this makes them soggy. Instead, arrange them in a single layer or use a wire cooling rack on top of the baking sheet for air circulation.
Step 17: Continue Cooking in Batches Add more butter to your griddle between batches if pancakes start sticking. You might need to adjust heat slightly as your pan gets hotter. Clean any burnt bits with a paper towel between batches to prevent bitter flavors.
Phase 4: Serving Your Christmas Pancakes (5 minutes)
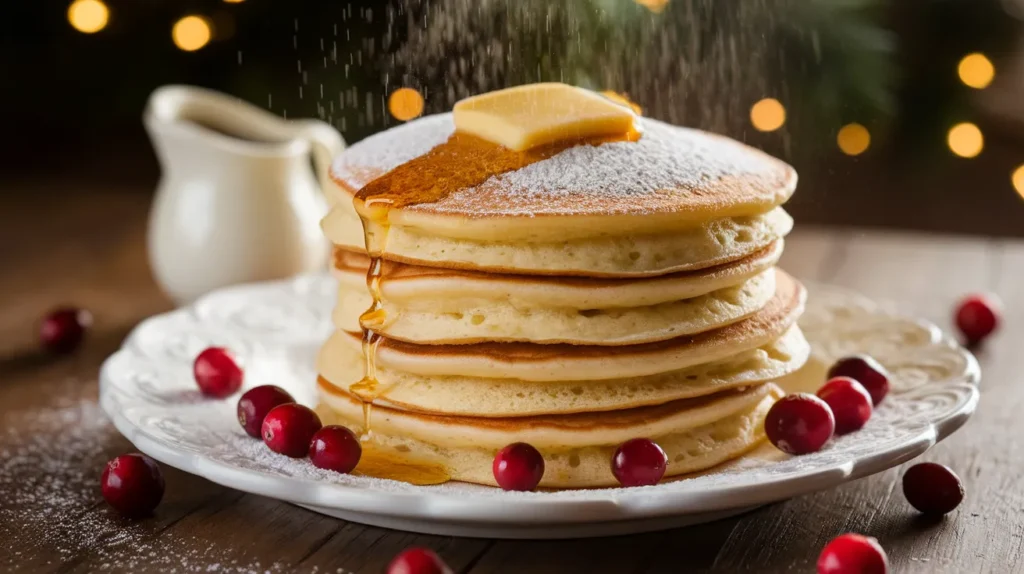
Step 18: Create Beautiful Presentation Stack 3-4 Christmas pancakes per plate. Dust the top with powdered sugar using a fine-mesh strainer for even coverage. Add a pat of butter on top and let it melt naturally down the sides.
Step 19: Serve Immediately Bring plates to the table while pancakes are still warm. Provide warm maple syrup in individual small pitchers or bowls. The contrast between warm pancakes and room temperature syrup creates the perfect bite.
Step 20: Final Touches Scatter fresh cranberries around the plate for festive color. Serve with additional butter on the side. These Christmas pancakes taste best when eaten immediately while still fluffy and warm.
Chef’s Notes for Christmas Pancakes Success
Temperature Consistency: The secret to perfect Christmas pancakes lies in consistent medium heat. Too high burns the outside before cooking the center; too low makes them dense and gummy.
Batter Texture: Your Christmas pancakes batter should pour easily but not be watery. It should have small lumps throughout – smooth batter creates tough pancakes.
Timing Magic: Mix your batter right before cooking. Christmas pancakes batter that sits too long loses its lift and becomes flat.
Spice Distribution: Sift your dry ingredients if you want extra-smooth Christmas pancakes with perfectly distributed spices throughout every bite.
Nutrition Information (Per Serving)
- Calories: 285
- Protein: 9g
- Carbohydrates: 42g
- Fat: 10g
- Fiber: 2g
- Sugar: 8g
Festive Christmas Pancakes Variations
Cranberry Orange Christmas Pancakes
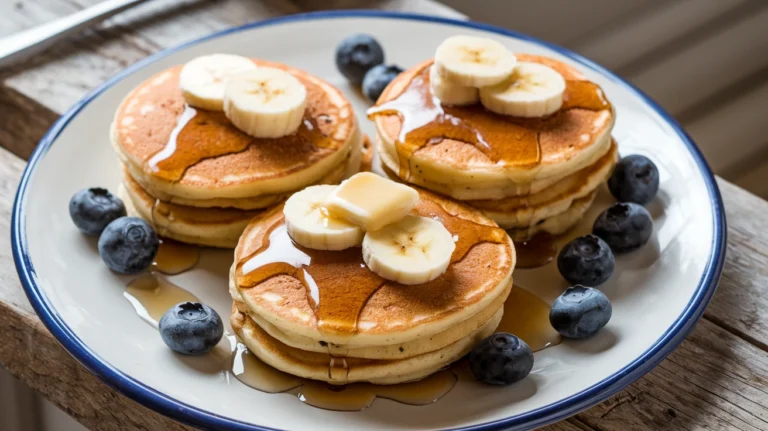
Fold 1/2 cup dried cranberries and 1 tablespoon fresh orange zest into your finished batter. The cranberries add festive color while orange brightens the Christmas pancakes flavor profile. For more fruit combinations, check out our chocolate chip and banana pancakes recipe.
Gingerbread Christmas Pancakes
Replace nutmeg with 1/4 teaspoon ground ginger and add 1/8 teaspoon ground cloves. These Christmas pancakes taste exactly like your favorite gingerbread cookies in fluffy pancake form.
Eggnog Christmas Pancakes
Substitute 1/2 cup eggnog for equal amount of milk. Add 1/4 teaspoon rum extract for authentic holiday flavor that makes these Christmas pancakes extra special.
Cinnamon Roll Christmas Pancakes
Create a cinnamon swirl by mixing 2 tablespoons melted butter with 1 tablespoon brown sugar. Drizzle this mixture onto each pancake before flipping. This technique works beautifully and creates results similar to our cinnamon roll pancakes recipe.
Storage & Reheating Your Christmas Pancakes
Refrigerator Storage
Cool Christmas pancakes completely before storing. Layer between parchment paper in an airtight container. Properly stored Christmas pancakes stay fresh for 3 days in the refrigerator.
Freezer Storage
Freeze Christmas pancakes for up to 2 months. Cool completely, then freeze in single layers on baking sheets. Once frozen solid, transfer to freezer bags with dates labeled.
Reheating Methods
- Toaster: Best method for frozen Christmas pancakes – no thawing needed
- Microwave: Heat for 30-45 seconds on medium power to avoid tough texture
- Oven: Warm at 350°F for 5-8 minutes until heated through completely
Christmas Pancakes Troubleshooting Guide
Problem: Dense, Heavy Christmas Pancakes
Solution: This happens from overmixing batter. Mix just until you can’t see dry flour – lumps are your friend! Also check if your baking powder is fresh by testing it in hot water.
Problem: Christmas Pancakes Burning Outside, Raw Inside
Solution: Your heat is too high. Reduce to medium-low and be patient. Christmas pancakes need gentle, even heat to cook through properly without burning.
Problem: Christmas Pancakes Won’t Rise
Solution: Check baking powder freshness – it loses potency after 6 months. Also ensure your milk isn’t too cold, which can inhibit rising action in the batter.
Problem: Batter Too Thick or Watery
Solution: Add milk 1 tablespoon at a time for thick batter. Add flour 1 tablespoon at a time for thin batter. Mix gently after each addition.
Problem: Christmas Pancakes Sticking to Pan
Solution: Your griddle isn’t hot enough, or you need more butter. Always test temperature with water drops before cooking your first batch.
Equipment Essentials for Christmas Pancakes
- Large mixing bowls (2) for separating wet and dry ingredients
- Whisk for combining dry ingredients thoroughly
- Wooden spoon for gentle batter mixing
- Griddle or large skillet with even heat distribution
- Wide spatula for easy pancake flipping
- Measuring cups and spoons for accurate portions
- 1/4 cup measure for consistent pancake sizing
Christmas Pancakes Shopping List
Dairy Section
- Whole milk (higher fat creates fluffier texture)
- Large eggs (room temperature works best)
- Butter for cooking and serving
- Real maple syrup (not pancake syrup)
Baking Aisle
- All-purpose flour
- Granulated sugar
- Fresh baking powder (check expiration date)
- Ground cinnamon
- Ground nutmeg
- Pure vanilla extract
- Salt
- Powdered sugar for dusting
Produce Section (Optional)
- Fresh cranberries for garnish
- Orange for zest (if making variations)
Christmas Pancakes Success Secrets
1. Room temperature ingredients are the secret to light, fluffy Christmas pancakes. Take eggs and milk out 30 minutes before cooking.
2. Never press down on Christmas pancakes while they cook. This squeezes out all the air bubbles that create fluffy texture.
3. Your first pancake is always a test. Use it to adjust heat, timing, and batter consistency for perfect Christmas pancakes.
4. Fresh baking powder makes the biggest difference in Christmas pancakes height. Test it by adding 1 teaspoon to hot water – vigorous bubbling means it’s good.
5. Let Christmas pancakes batter rest for 2-3 minutes after mixing. This allows flour to fully hydrate, creating more tender results every time.
These Christmas pancakes bring magic to your holiday breakfast table with their perfect blend of festive spices and fluffy texture. Whether you’re creating new family traditions or continuing old ones, these Christmas pancakes deliver restaurant-quality results that make every Christmas morning extra special. The detailed instructions ensure even first-time pancake makers can create beautiful, delicious Christmas pancakes that everyone will remember long after the holidays end.