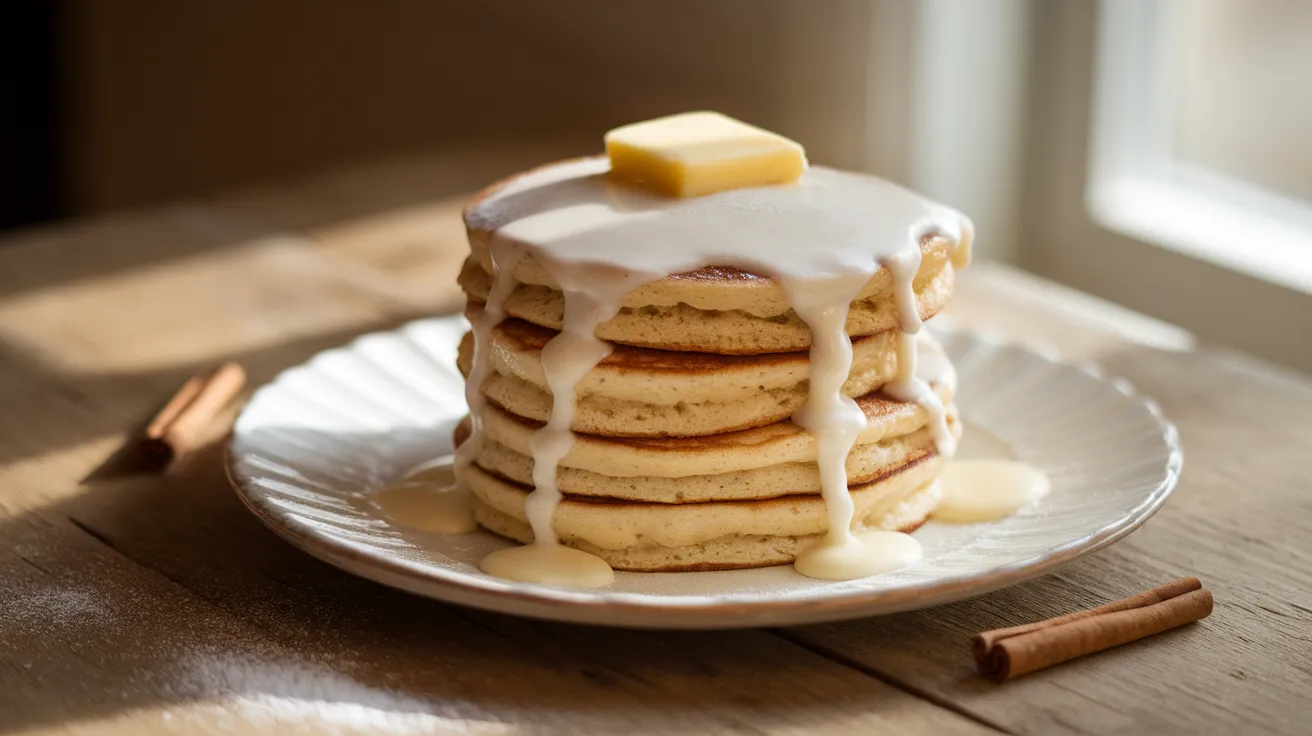
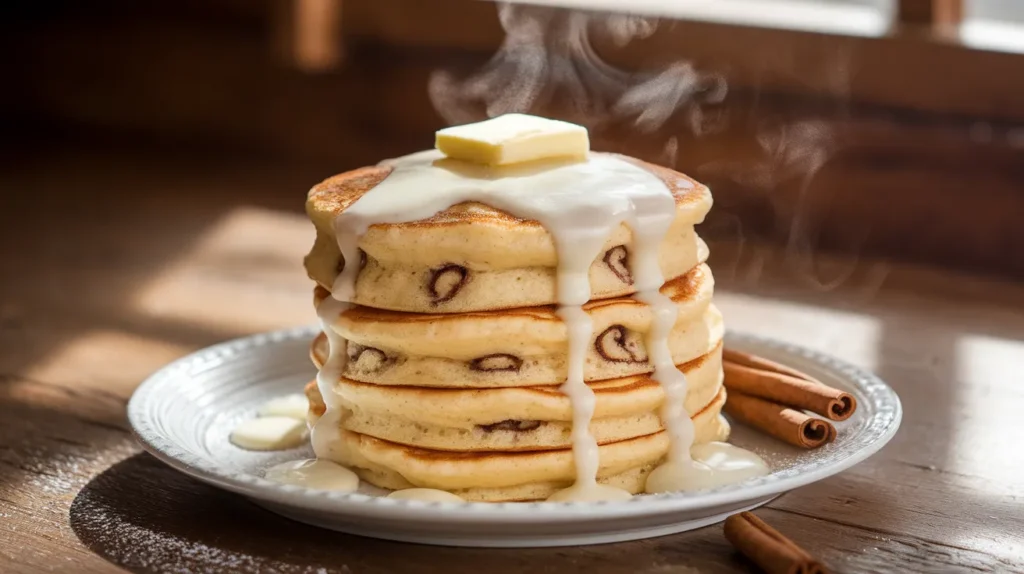
These beginner-friendly cinnamon roll pancakes bring bakery-style breakfast magic to your kitchen with simple techniques and foolproof results. Perfect cinnamon roll pancakes combine fluffy pancake texture with swirled cinnamon filling and creamy glaze, creating an unforgettable morning treat that serves four people perfectly.
SERVES: 4 | PREP: 20 MIN | COOK: 25 MIN | TOTAL: 45 MIN
Ingredients
For the Pancakes
| Ingredient | Amount |
|---|---|
| All-purpose flour | 2 cups |
| Granulated sugar | 3 tablespoons |
| Baking powder | 2 teaspoons |
| Salt | 1/2 teaspoon |
| Milk | 1 3/4 cups |
| Large eggs | 2 |
| Melted butter | 4 tablespoons |
| Vanilla extract | 1 teaspoon |
For the Cinnamon Swirl
| Ingredient | Amount |
|---|---|
| Butter (softened) | 6 tablespoons |
| Brown sugar | 1/2 cup |
| Ground cinnamon | 2 teaspoons |
| Vanilla extract | 1/2 teaspoon |
For the Cream Cheese Glaze
| Ingredient | Amount |
|---|---|
| Cream cheese (softened) | 4 oz |
| Powdered sugar | 1 1/2 cups |
| Milk | 3-4 tablespoons |
| Vanilla extract | 1 teaspoon |
Detailed Step-by-Step Cinnamon Roll Pancakes Instructions
Phase 1: Prepare Your Workspace and Components (15 minutes)
Step 1: Set Up Your Kitchen Clear a large workspace near your stove. Gather all ingredients and place them within arm’s reach – this prevents scrambling during cooking. Take your butter and cream cheese out of the refrigerator 30 minutes before cooking to ensure they’re properly softened. You’ll know butter is ready when you can easily press a finger into it without it being mushy.
Step 2: Make the Cinnamon Swirl Mixture In a medium mixing bowl, add the 6 tablespoons of softened butter. Using a fork or whisk, mash the butter until it’s creamy and smooth – this should take about 1-2 minutes of vigorous mixing. Add the brown sugar, cinnamon, and vanilla extract. Mix thoroughly until the mixture looks like thick frosting with no lumps of butter remaining. The consistency should be spreadable but thick enough to hold its shape when piped.
Step 3: Prepare Your Piping System Take a standard zip-lock bag and spoon all the cinnamon mixture into one corner. Twist the top of the bag tightly to prevent leaking, then use scissors to cut a small hole (about 1/4 inch) in the corner. Test the hole size by gently squeezing – the mixture should flow out in a steady stream without being too thin. If the hole is too small, make it slightly larger. Set this aside where you can easily grab it during cooking.
Step 4: Create the Cream Cheese Glaze Using an electric mixer or by hand with a whisk, beat the softened cream cheese for 2-3 minutes until it’s completely smooth and fluffy. Gradually add the powdered sugar, about 1/2 cup at a time, mixing well between additions. Add the vanilla extract, then slowly incorporate the milk one tablespoon at a time until you reach a consistency that drizzles smoothly but isn’t too thin. The glaze should coat the back of a spoon but still pour easily.
Phase 2: Create the Perfect Pancake Batter (8 minutes)
Step 5: Mix the Dry Ingredients In your largest mixing bowl, measure out the flour, granulated sugar, baking powder, and salt. Use a whisk to thoroughly combine these ingredients for about 30 seconds – this ensures even distribution and prevents pockets of baking powder that could create uneven rising. Create a large well (indentation) in the center of the flour mixture using your whisk. This well will hold the wet ingredients and make mixing easier.
Step 6: Prepare the Wet Ingredient Mixture In a separate medium bowl or large measuring cup, crack both eggs and whisk them vigorously for 30 seconds until they’re completely broken up and slightly frothy. Add the milk, melted butter (make sure it’s not too hot or it will cook the eggs), and vanilla extract. Whisk everything together for another 30 seconds until the mixture is uniform and the butter is fully incorporated.
Step 7: Combine Wet and Dry Ingredients Pour the wet ingredient mixture directly into the well you created in the flour mixture. Using a large spoon or spatula, gently stir from the center outward in a folding motion. Stop mixing as soon as you no longer see dry flour – the batter should look lumpy and rough. This should take no more than 15-20 gentle stirs. Lumps are completely normal and necessary for fluffy pancakes. Overmixing creates tough, dense pancakes instead of light, fluffy ones.
Phase 3: Set Up Your Cooking Station (5 minutes)
Step 8: Prepare Your Cooking Surface If using an electric griddle, set it to 325°F and allow it to preheat for 5 minutes. For a stovetop skillet, place it over medium heat and let it warm for 3-4 minutes. Test if your surface is ready by flicking a few drops of water onto it – they should sizzle and evaporate within 2-3 seconds. If they evaporate immediately, your surface is too hot; if they sit there without sizzling, it needs more time to heat up.
Step 9: Grease Your Cooking Surface Using butter or cooking spray, lightly coat your griddle or pan. You want just enough to prevent sticking without creating puddles. Wipe away any excess with a paper towel – too much grease will create uneven browning and greasy pancakes.
Phase 4: Master the Art of Cooking Cinnamon Roll Pancakes (20 minutes)
Step 10: Pour the Perfect Pancake Using a 1/3 cup measuring cup, scoop the batter and pour it onto your heated surface. Pour from about 2 inches above the griddle to help the batter spread naturally into a round shape. Leave at least 2 inches between each pancake to allow for spreading and easy flipping. You should be able to fit 2-3 pancakes on a standard griddle at once.
Step 11: Create the Signature Cinnamon Swirl Immediately after pouring each pancake (while the batter is still wet on top), take your prepared cinnamon mixture bag and gently squeeze to pipe a spiral pattern starting from the center of the pancake. Work quickly but steadily – create 2-3 circular swirls moving outward from the center. The mixture should sit on top of the wet batter initially but will begin to sink slightly as the pancake cooks.
Step 12: Monitor the First Side Watch for these visual cues: bubbles will start forming on the surface after 2-3 minutes, and the edges of the pancakes will begin to look set and slightly dry. The cinnamon swirl should be lightly caramelizing and becoming fragrant. Don’t flip too early – wait until you see bubbles across most of the surface and the edges look cooked.
Step 13: The Flip Technique Using a wide spatula, slide it completely under the pancake to support the entire surface. Flip with one confident, quick motion – hesitation can cause the pancake to fold or break. The flipped side should be golden brown with darker cinnamon swirl patterns. If it’s too light, your heat is too low; if it’s dark brown or black, reduce your heat.
Step 14: Complete the Cooking Process Cook the second side for 2-3 minutes until golden brown and cooked through. The pancake should spring back when lightly touched in the center. If you’re unsure, you can insert a toothpick in the thickest part – it should come out with just a few moist crumbs, not wet batter.
Step 15: Keep Pancakes Warm As you finish each batch of cinnamon roll pancakes, place them on a large plate or baking sheet in a 200°F oven. Cover loosely with aluminum foil to prevent drying out while you finish cooking the remaining batter. This ensures all pancakes stay warm for serving.
Phase 5: Final Assembly and Serving (5 minutes)
Step 16: Plate Your Cinnamon Roll Pancakes Remove the warm pancakes from the oven and stack 2-3 pancakes per serving plate. Place the most attractive pancake on top to showcase the cinnamon swirl pattern.
Step 17: Apply the Cream Cheese Glaze Drizzle the glaze generously over each stack while the pancakes are still warm. The heat will help the glaze soak in slightly and create the perfect texture. Start from the center and work outward in a spiral pattern to complement the cinnamon swirls.
Step 18: Final Presentation Serve immediately while warm for the best texture and flavor combination. Provide extra glaze on the side for those who want more, and consider offering butter and maple syrup as additional toppings.
Chef’s Notes for Perfect Cinnamon Roll Pancakes
Temperature is Everything: Keep your cooking surface at a consistent medium heat throughout the process. Too high heat burns the cinnamon before the pancake cooks through, while too low heat creates pale, dense pancakes.
Softened Butter Success: Properly softened butter should give slightly to pressure but not be melted. Leave it out for 30-45 minutes before cooking, or microwave for 10-second intervals until just softened.
Batter Consistency Check: The perfect pancake batter should pour easily but not be too thin. If it’s too thick, add milk one tablespoon at a time. If too thin, add flour one tablespoon at a time.
Cinnamon Swirl Pro Tips: Work quickly when adding the swirl – the batter surface changes as it cooks. Practice your spiral motion before starting to cook for smooth, even patterns.
Nutrition Information (Per Serving)
- Calories: 485
- Protein: 12g
- Carbohydrates: 68g
- Fat: 18g
- Fiber: 2g
- Sugar: 45g
Creative Cinnamon Roll Pancakes Variations
Apple Cinnamon Roll Pancakes: Fold 1 cup of finely diced apples into the finished batter and add an extra 1/2 teaspoon of cinnamon to your swirl mixture. The apples add natural sweetness and texture that complements the cinnamon beautifully.
Orange Cream Cheese Pancakes: Replace the vanilla in both the batter and glaze with fresh orange zest (about 2 teaspoons). The citrus brightens the rich flavors and adds a sophisticated twist.
Maple Pecan Twist: Substitute 1/2 cup of the milk with pure maple syrup and fold chopped pecans into the cinnamon swirl. For more seasonal breakfast ideas, try these Christmas pancakes that capture holiday magic.
Gluten-Free Cinnamon Roll Pancakes: Replace all-purpose flour with a 1:1 gluten-free baking flour blend. Add 1/4 teaspoon xanthan gum if your blend doesn’t include it for proper texture. For more alternative flour inspiration, explore these cornmeal pancakes without flour.
Storage & Reheating Your Cinnamon Roll Pancakes
Refrigerator Storage: Cool completely before storing leftover cinnamon roll pancakes in the refrigerator for up to 3 days. Layer between parchment paper in an airtight container to prevent sticking.
Freezer Method: Wrap individual pancakes in plastic wrap, then place in freezer bags. Label with date and freeze up to 2 months. This creates perfect quick breakfasts for busy mornings.
Reheating Best Practices: For refrigerated pancakes, microwave for 20-30 seconds or toast lightly in a toaster. For frozen pancakes, thaw overnight then reheat, or toast directly from frozen on a lower setting.
Glaze Storage: Store leftover cream cheese glaze in the refrigerator for up to one week. Warm slightly before serving to restore smooth, pourable consistency.
Troubleshooting Common Cinnamon Roll Pancakes Problems
Problem: My cinnamon roll pancakes turned out dense and heavy. Solution: This usually means the batter was overmixed. Mix only until flour disappears – lumps are completely normal and will cook out. Next time, use a gentler folding motion rather than vigorous stirring.
Problem: The cinnamon swirl burned before the pancake finished cooking. Solution: Your cooking temperature is too high. Reduce heat to medium-low and cover the pan with a lid during the first half of cooking. The steam helps cook the top while protecting the cinnamon from burning.
Problem: Pancakes are sticking to my griddle despite greasing. Solution: Your griddle isn’t hot enough, or you’re using too much grease. Ensure proper preheating and use just a light coating of butter or oil. Wipe away excess with a paper towel.
Problem: The cream cheese glaze is too thick or too thin. Solution: Add powdered sugar to thicken or milk to thin, one tablespoon at a time. Mix thoroughly between additions to avoid lumps in your glaze.
Problem: My cinnamon roll pancakes cook unevenly. Solution: Use a consistent 1/3 cup measure for each pancake and maintain steady medium heat. Don’t overcrowd the cooking surface – cook in batches for best results.
Equipment Essentials for Cinnamon Roll Pancakes
- Large mixing bowls (2-3 different sizes)
- Wire whisk (medium size works best)
- Large griddle or heavy-bottom skillet
- Wide spatula (thin, flexible edge preferred)
- Zip-lock bags (for piping cinnamon mixture)
- Measuring cups and spoons (full set)
- Electric mixer (for smooth glaze)
- Rubber spatula (for gentle mixing)
Shopping List for Cinnamon Roll Pancakes
Dairy Section
- Unsalted butter (2 sticks total)
- Whole milk (2 cups)
- Large eggs (1 dozen – you need 2)
- Cream cheese (8 oz block – you need 4 oz)
Pantry Items
- All-purpose flour
- Granulated white sugar
- Light brown sugar
- Powdered sugar
- Baking powder (check expiration date)
- Ground cinnamon
- Pure vanilla extract
- Table salt
Success Secrets for Perfect Cinnamon Roll Pancakes
- Temperature Control Mastery: Use medium heat consistently throughout cooking. Test your griddle temperature with water drops before starting each batch to ensure consistent results.
- Timing is Critical: Create the cinnamon swirl immediately after pouring batter while the surface is still wet. This allows proper integration without the swirl sitting on top.
- Ingredient Temperature Balance: Room temperature ingredients blend more easily and create smoother batter. Plan ahead by taking cold ingredients out 30 minutes before cooking.
- Glaze Application Strategy: Apply glaze while pancakes are warm but not scalding hot. This prevents complete melting while ensuring the glaze soaks in slightly for maximum flavor.
- Batch Cooking Excellence: Keep finished pancakes warm in a low oven on a wire rack rather than stacking on a plate. This prevents steam buildup that can make pancakes soggy.
These detailed instructions ensure your cinnamon roll pancakes turn out perfectly fluffy with beautiful cinnamon swirls every single time. Master these techniques, and you’ll create bakery-quality breakfast magic in your own kitchen that rivals any restaurant’s version.