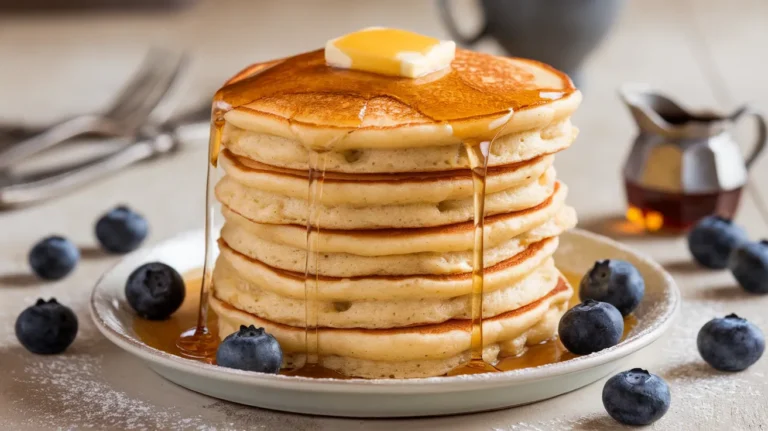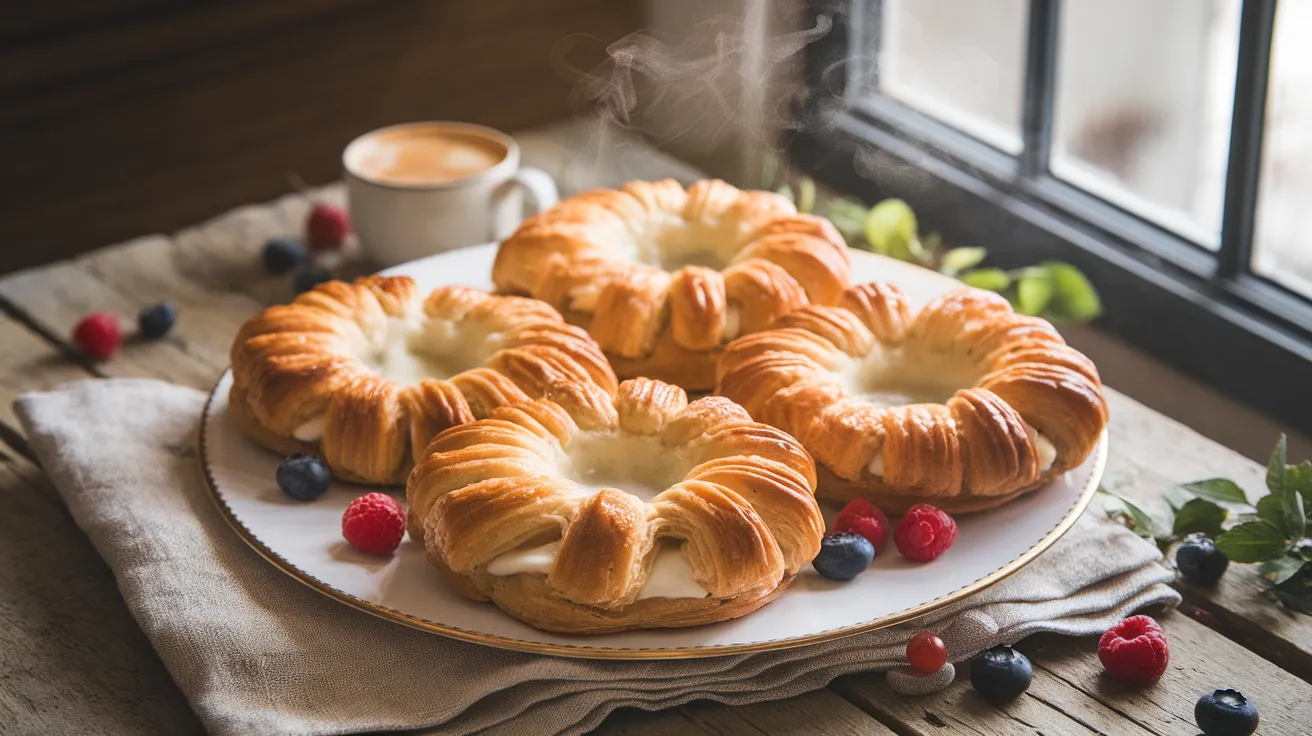
Indulge in these heavenly ricotta danish pastries that bring the bakery experience straight to your kitchen. These flaky, buttery treats feature a creamy ricotta filling nestled in tender pastry dough, creating the perfect balance of textures and flavors. Whether you’re hosting a weekend brunch or treating yourself to something special, this ricotta danish recipe delivers bakery-quality results that will impress family and friends alike.
SERVES: 4 | PREP: 45 MIN | COOK: 25 MIN | TOTAL: 1 HR 10 MIN
Ingredients
For the Pastry Dough:
| Ingredient | Amount |
|---|---|
| All-purpose flour | 2 cups |
| Cold unsalted butter | 8 tablespoons (1 stick) |
| Cream cheese (softened) | 4 oz |
| Salt | 1/2 teaspoon |
| Cold water | 2-3 tablespoons |
For the Ricotta Filling:
| Ingredient | Amount |
|---|---|
| Whole milk ricotta cheese | 1 cup |
| Large egg | 1 |
| Granulated sugar | 1/4 cup |
| Vanilla extract | 1 teaspoon |
| Lemon zest | 1 tablespoon |
| Salt | 1/4 teaspoon |
For Assembly & Finishing:
| Ingredient | Amount |
|---|---|
| Egg wash (1 egg + 1 tbsp milk) | As needed |
| Powdered sugar | 1/2 cup |
| Milk | 2-3 tablespoons |
| Vanilla extract | 1/2 teaspoon |
Step-by-Step Instructions
Phase 1: Preparing the Pastry Dough (15 minutes)
Step 1: Cut the cold butter into small cubes and place in the freezer for 10 minutes. This ensures the butter stays cold, which is crucial for creating flaky layers in your ricotta danish.
Step 2: In a large mixing bowl, combine 2 cups flour and 1/2 teaspoon salt. Whisk together to distribute evenly.
Step 3: Add the softened cream cheese to the flour mixture. Using a pastry cutter or two knives, cut the cream cheese into the flour until the mixture resembles coarse crumbs with some pea-sized pieces.
Step 4: Remove the butter cubes from the freezer and add them to the flour mixture. Cut in the butter until you have a mixture that looks like coarse meal with some larger butter pieces (about the size of small peas). These butter pieces create the flaky texture in your finished ricotta danish.
Step 5: Sprinkle 2 tablespoons of cold water over the mixture. Using a fork, gently stir until the dough just begins to come together. Add the third tablespoon of water only if needed – the dough should hold together when squeezed but not be sticky.
Step 6: Turn the dough onto a lightly floured surface and gently knead 2-3 times until it forms a cohesive ball. Flatten into a disk, wrap in plastic wrap, and refrigerate for at least 30 minutes.
Phase 2: Making the Ricotta Filling (10 minutes)
Step 7: In a medium bowl, combine 1 cup ricotta cheese, 1 egg, 1/4 cup granulated sugar, 1 teaspoon vanilla extract, 1 tablespoon fresh lemon zest, and 1/4 teaspoon salt.
Step 8: Whisk the mixture until completely smooth and well combined. The filling should be creamy without any lumps. Taste and adjust sweetness if desired – the filling should be pleasantly sweet but not overpowering since the pastry adds richness.
Step 9: Cover the ricotta filling and refrigerate until ready to use. Chilling helps the filling maintain its shape during baking.
Phase 3: Assembling the Danish (15 minutes)
Step 10: Preheat your oven to 375°F (190°C). Line a large baking sheet with parchment paper.
Step 11: Remove the chilled dough from the refrigerator and let it sit for 5 minutes to soften slightly. On a lightly floured surface, roll the dough into a 12×16-inch rectangle, about 1/8-inch thick.
Step 12: Using a sharp knife or pizza cutter, divide the dough into 8 equal rectangles (approximately 4×3 inches each). This recipe makes enough for 4 people to have 2 danish each.
Step 13: Place the dough rectangles on the prepared baking sheet, spacing them about 2 inches apart. Using a sharp knife, make diagonal cuts about 1 inch long on opposite corners of each rectangle, creating flaps that will fold over the filling.
Step 14: Spoon about 2 tablespoons of the ricotta filling into the center of each rectangle, leaving the cut corners free. Don’t overfill – excess filling will leak out during baking.
Step 15: Fold the cut corner flaps over the filling, overlapping them slightly in the center. This creates the classic danish shape and helps contain the filling during baking.
Phase 4: Baking the Danish (25 minutes)
Step 16: Prepare the egg wash by whisking together 1 egg and 1 tablespoon milk until smooth. Using a pastry brush, gently brush the exposed pastry with egg wash, avoiding the ricotta filling. This creates a beautiful golden color.
Step 17: Bake the ricotta danish for 20-25 minutes, or until the pastry is golden brown and the filling is set but still slightly jiggly in the center. The edges should be crisp and flaky.
Step 18: Remove from oven and let cool on the baking sheet for 10 minutes. The filling will continue to set as it cools.
Phase 5: Glazing and Serving (5 minutes)
Step 19: While the danish cool, prepare the glaze by whisking together 1/2 cup powdered sugar, 2-3 tablespoons milk, and 1/2 teaspoon vanilla extract until smooth. The glaze should be thick enough to coat the back of a spoon but thin enough to drizzle.
Step 20: Drizzle the glaze over the warm danish using a spoon or small whisk. Serve immediately while still warm for the best texture and flavor.
Chef’s Notes
Temperature Control: Keeping ingredients cold is essential for this ricotta danish recipe. Cold butter creates steam pockets during baking, resulting in flaky layers. If your kitchen is warm, chill the dough between steps.
Filling Consistency: The ricotta filling should be smooth but not overly wet. If your ricotta seems watery, drain it in a fine-mesh strainer for 15 minutes before mixing with other ingredients.
Pastry Perfection: Don’t overwork the dough when mixing or rolling. Gentle handling preserves the butter pieces that create flakiness in your finished ricotta danish.
Make-Ahead Magic: These danish are best served fresh, but you can prepare the dough and filling the night before. Assemble and bake in the morning for fresh pastries with minimal effort.
Nutrition Information (Per Danish)
- Calories: 285
- Protein: 8g
- Carbohydrates: 32g
- Fat: 14g
- Fiber: 1g
- Sugar: 12g
Delicious Variations
Berry Ricotta Danish: Add 1/4 cup fresh blueberries or chopped strawberries to the ricotta filling for a fruity twist that pairs beautifully with the creamy cheese.
Chocolate Chip Ricotta Danish: Fold 2 tablespoons mini chocolate chips into the ricotta mixture for an indulgent breakfast treat that kids will love.
Savory Herb Danish: Omit the sugar and vanilla from the filling, instead adding 2 tablespoons fresh chopped herbs like basil or chives. Similar to our ricotta garlic bread, this creates a sophisticated brunch option.
Lemon Ricotta Danish: Double the lemon zest and add 1 tablespoon fresh lemon juice to the filling for a bright, citrusy version that’s perfect for spring brunches, much like the fresh flavors in our ricotta banana bread.
Storage & Reheating
Fresh Storage: Store leftover ricotta danish covered at room temperature for up to 2 days. The pastry stays crispest when not refrigerated immediately.
Refrigeration: For longer storage, refrigerate in an airtight container for up to 5 days. The texture will soften slightly but the flavor remains excellent.
Freezing Instructions: Wrap individual danish in plastic wrap and freeze for up to 1 month. Thaw overnight in the refrigerator before reheating.
Reheating Method: Warm refrigerated danish in a 300°F oven for 8-10 minutes to restore crispness. Avoid microwaving, which makes the pastry soggy.
Fresh Glaze: If reheating glazed danish, prepare fresh glaze after warming for the best appearance and flavor.

Troubleshooting Common Issues
Problem: Pastry is tough instead of flaky Solution: This happens when the dough is overworked or the butter wasn’t cold enough. Keep butter frozen until use and handle dough minimally. Rest chilled dough before rolling for easier handling.
Problem: Filling leaks out during baking Solution: Don’t overfill the danish – 2 tablespoons per pastry is plenty. Ensure the corner flaps overlap properly and seal the edges gently with your fingers.
Problem: Bottom of danish is soggy Solution: Make sure your oven is fully preheated and use parchment paper on the baking sheet. If your oven runs cool, increase temperature by 25°F and reduce baking time slightly.
Problem: Ricotta filling is grainy Solution: Use whole milk ricotta and whisk thoroughly until completely smooth. Strain the mixture if needed to remove any lumps before using in your ricotta danish.
Problem: Pastry browns too quickly Solution: Lower oven temperature to 350°F and bake 5-8 minutes longer. Cover with foil if tops brown before filling is set.
Equipment Essentials
- Large mixing bowl for dough preparation
- Pastry cutter or two knives for cutting in butter
- Rolling pin for dough rolling
- Sharp knife or pizza cutter for cutting dough
- Large baking sheet (preferably rimmed)
- Parchment paper for easy cleanup
- Pastry brush for egg wash application
- Medium bowl for ricotta filling
- Whisk for smooth mixing
- Measuring cups and spoons for accurate ingredients
Shopping List
Dairy Section:
- Unsalted butter (1 stick)
- Cream cheese (4 oz package)
- Whole milk ricotta cheese (15 oz container)
- Large eggs (1 dozen)
- Milk (small carton)
Pantry Items:
- All-purpose flour
- Granulated sugar
- Powdered sugar
- Vanilla extract
- Salt
Produce Section:
- Fresh lemon (for zest)
Success Secrets
1. Temperature Matters: Keep all ingredients cold except cream cheese. Cold butter creates the flaky layers that make this ricotta danish recipe exceptional.
2. Don’t Rush the Chill: Allow dough to rest in the refrigerator for at least 30 minutes. This relaxes the gluten and makes rolling easier.
3. Even Thickness: Roll dough to uniform 1/8-inch thickness for consistent baking. Uneven thickness leads to some areas being overcooked while others remain underdone.
4. Perfect Portions: Use a kitchen scale to divide dough evenly, ensuring each danish bakes at the same rate and looks professional.
5. Visual Cues: Look for golden-brown edges and set (but slightly jiggly) filling as doneness indicators. The ricotta danish should sound hollow when gently tapped on the bottom.