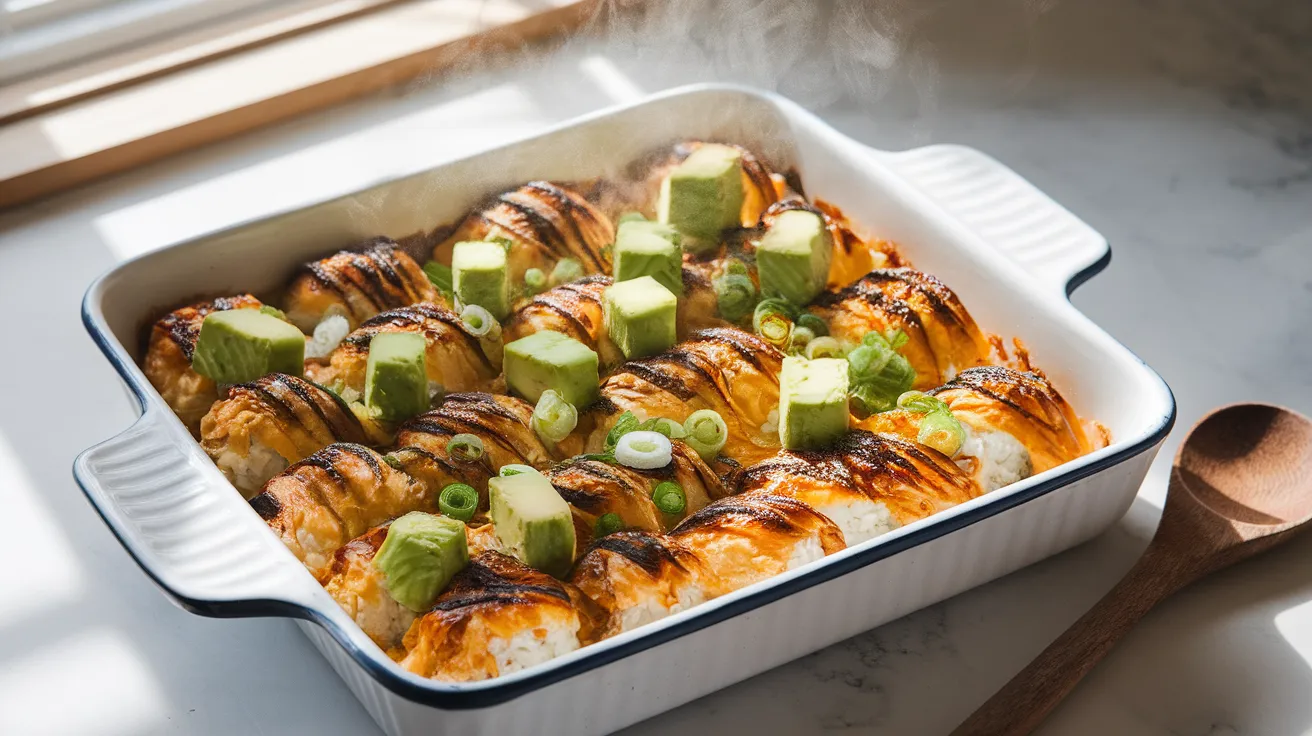
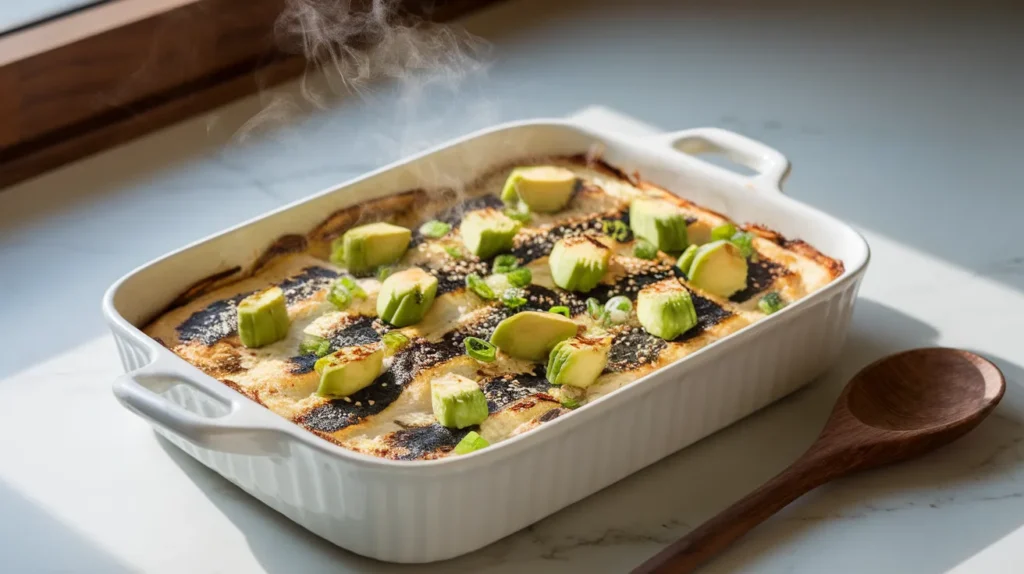
This crowd-pleasing vegan sushi bake transforms all your favorite sushi flavors into one incredible casserole dish. Perfect for entertaining or meal prep, this plant-based twist on the trendy vegan sushi bake delivers creamy, savory, and slightly sweet flavors that’ll have everyone asking for seconds. No rolling skills required!
SERVES: 4 | PREP: 20 MIN | COOK: 25 MIN | TOTAL: 45 MIN
Ingredients
Sushi Rice Base
| Ingredient | Amount |
|---|---|
| Short-grain sushi rice | 2 cups |
| Water | 2½ cups |
| Rice vinegar | 3 tablespoons |
| Sugar | 2 tablespoons |
| Salt | 1 teaspoon |
Creamy Topping Layer
| Ingredient | Amount |
|---|---|
| Vegan mayonnaise | ¾ cup |
| Sriracha sauce | 2 tablespoons |
| Soy sauce | 1 tablespoon |
| Nutritional yeast | 2 tablespoons |
| Garlic powder | 1 teaspoon |
Protein & Vegetables
| Ingredient | Amount |
|---|---|
| King oyster mushrooms, shredded | 2 large |
| Cucumber, diced | 1 medium |
| Avocado, cubed | 2 ripe |
| Nori sheets, torn | 3 sheets |
| Green onions, sliced | 4 stalks |
| Sesame seeds | 2 tablespoons |
Step-by-Step Instructions
Phase 1: Preparing the Sushi Rice (15 minutes)
Step 1: Rinse your sushi rice in a fine-mesh strainer under cold water for 2-3 minutes until the water runs clear. This removes excess starch and prevents your vegan sushi bake from becoming gummy.
Step 2: Combine rinsed rice and water in a medium saucepan. Bring to a rolling boil over high heat, then immediately reduce heat to low and cover tightly.
Step 3: Simmer for exactly 18 minutes without lifting the lid. Lifting releases steam and creates unevenly cooked rice that won’t hold together properly in your bake.
Step 4: While rice cooks, whisk together rice vinegar, sugar, and salt in a small bowl until completely dissolved. This seasoning mixture is what gives your vegan sushi bake its authentic flavor.
Step 5: Remove rice from heat and let stand covered for 5 minutes. This finishing steam ensures perfectly tender grains.
Phase 2: Seasoning and Cooling Rice (10 minutes)
Step 6: Transfer hot rice to a large mixing bowl and immediately drizzle with vinegar mixture. Use a wooden spoon or rice paddle to gently fold seasonings through rice using a cutting motion rather than stirring.
Step 7: Spread seasoned rice on a baking sheet to cool for 5 minutes. Room temperature rice prevents your creamy topping from melting when assembled.
Phase 3: Preparing Toppings (8 minutes)
Step 8: Preheat your oven to 425°F (220°C). Position rack in upper third of oven for perfect golden browning.
Step 9: Shred king oyster mushrooms by running a fork along the length of each stem. This creates perfect “crab-like” shreds that absorb flavors beautifully in your vegan sushi bake.
Step 10: Heat a dry skillet over medium-high heat and sauté shredded mushrooms for 3-4 minutes until slightly golden and any moisture evaporates. Season with a pinch of salt.
Step 11: Combine vegan mayo, sriracha, soy sauce, nutritional yeast, and garlic powder in a medium bowl. Whisk until completely smooth – lumps will create uneven browning.
Phase 4: Assembly and Baking (12 minutes)
Step 12: Press cooled sushi rice firmly into a greased 9×13 inch baking dish. Use damp hands to prevent sticking and create an even layer that reaches all corners.
Step 13: Sprinkle sautéed mushrooms evenly over rice, followed by diced cucumber. These vegetables add texture contrast to your vegan sushi bake.
Step 14: Spread creamy topping mixture over vegetables using an offset spatula. Create gentle peaks and valleys for maximum surface browning – this is where the magic happens!
Step 15: Bake for 12-15 minutes until the top is golden brown with deeper brown spots. The surface should feel slightly firm when gently pressed.
Phase 5: Finishing Touches (2 minutes)
Step 16: Remove from oven and immediately sprinkle with torn nori, sliced green onions, and sesame seeds. The residual heat will lightly toast these garnishes.
Step 17: Add cubed avocado just before serving to prevent browning. Gently press pieces slightly into the warm surface so they adhere but don’t get mushy.
Chef’s Notes
Mushroom Magic: King oyster mushrooms provide the perfect seafood-like texture for this vegan sushi bake. Their natural umami intensifies when sautéed, creating depth that rivals traditional versions.
Rice Perfection: Short-grain rice is essential – long-grain varieties won’t provide the sticky texture needed to hold your vegan sushi bake together when served.
Temperature Control: Serving this dish slightly warm enhances all the flavors, but it’s equally delicious at room temperature for meal prep portions.
Make-Ahead Friendly: Assemble completely but add avocado and nori garnishes only when ready to serve for best texture and color retention.
Nutrition Information (Per Serving)
- Calories: 485
- Protein: 12g
- Carbohydrates: 68g
- Fat: 18g
- Fiber: 6g
Creative Variations
Spicy Kimchi Version: Fold 1 cup chopped vegan kimchi into the rice layer for fermented tang that pairs beautifully with the creamy topping.
Tropical Twist: Replace cucumber with diced mango and add toasted coconut flakes. This variation reminds me of the sweet-savory balance found in dishes like vegan dirty rice with tropical ingredients.
Protein-Packed: Add crumbled seasoned tofu or tempeh to the mushroom layer for extra substance that makes this vegan sushi bake even more filling.
Mediterranean Fusion: Swap sriracha for sun-dried tomato paste and add diced olives, similar to how vegan pierogi can be adapted with different flavor profiles.
Storage & Reheating
Refrigerator Storage: Cover tightly and refrigerate for up to 4 days. Add fresh avocado and herbs when reheating for best appearance.
Freezing Instructions: Freeze assembled but unbaked casserole for up to 2 months. Thaw overnight and add 5 extra minutes to baking time.
Reheating Method: Warm individual portions in 350°F oven for 8-10 minutes, or microwave for 90 seconds. Avoid overheating to prevent the creamy topping from separating.
Troubleshooting Common Issues
Problem 1: Rice turns mushy or falls apart Solution: Your rice was overcooked or too wet when assembled. Always cool seasoned rice completely and use the precise water ratio for perfect texture.
Problem 2: Topping doesn’t brown properly Solution: Oven temperature too low or rack positioned incorrectly. Move to upper rack and increase temperature to 450°F for the last 5 minutes.
Problem 3: Flavors taste flat or bland Solution: Season each component separately and taste as you go. The rice, mushrooms, and creamy mixture should each be well-seasoned on their own.
Problem 4: Avocado turns brown quickly Solution: Toss cubed avocado with lemon juice before adding, and only garnish portions you’ll serve immediately.
Problem 5: Casserole seems dry after baking Solution: Your vegan mayo mixture may have been too thick. Thin with 1-2 tablespoons of plant milk before spreading over rice.
Equipment Essentials
- 9×13 inch baking dish – Glass or ceramic works best for even heating
- Fine-mesh strainer – Essential for properly rinsing rice
- Medium saucepan with tight-fitting lid – For perfect rice every time
- Large mixing bowl – Needed for seasoning rice without crushing grains
- Offset spatula – Creates smooth, even layers in your vegan sushi bake
- Sharp knife – For clean vegetable cuts and neat serving portions
Shopping List by Store Section
Pantry Aisle
- Short-grain sushi rice
- Rice vinegar
- Sugar
- Salt
- Vegan mayonnaise
- Sriracha sauce
- Soy sauce
- Nutritional yeast
- Garlic powder
- Sesame seeds
Produce Section
- King oyster mushrooms
- Cucumber
- Avocado
- Green onions
International/Asian Foods
- Nori sheets
Success Secrets
- Perfect Rice Ratio: The 1:1.25 rice-to-water ratio creates ideal texture for your vegan sushi bake – not too sticky, not too dry.
- Temperature Timing: Assembling with room-temperature rice prevents the creamy topping from melting before baking, ensuring proper browning.
- Mushroom Preparation: Sautéing mushrooms before adding removes excess moisture that could make your vegan sushi bake soggy.
- Even Distribution: Take time to spread each layer completely to edges – uneven layers create hot spots and inconsistent texture.
- Garnish Strategy: Add delicate garnishes after baking to preserve their color, texture, and nutritional value in every bite.