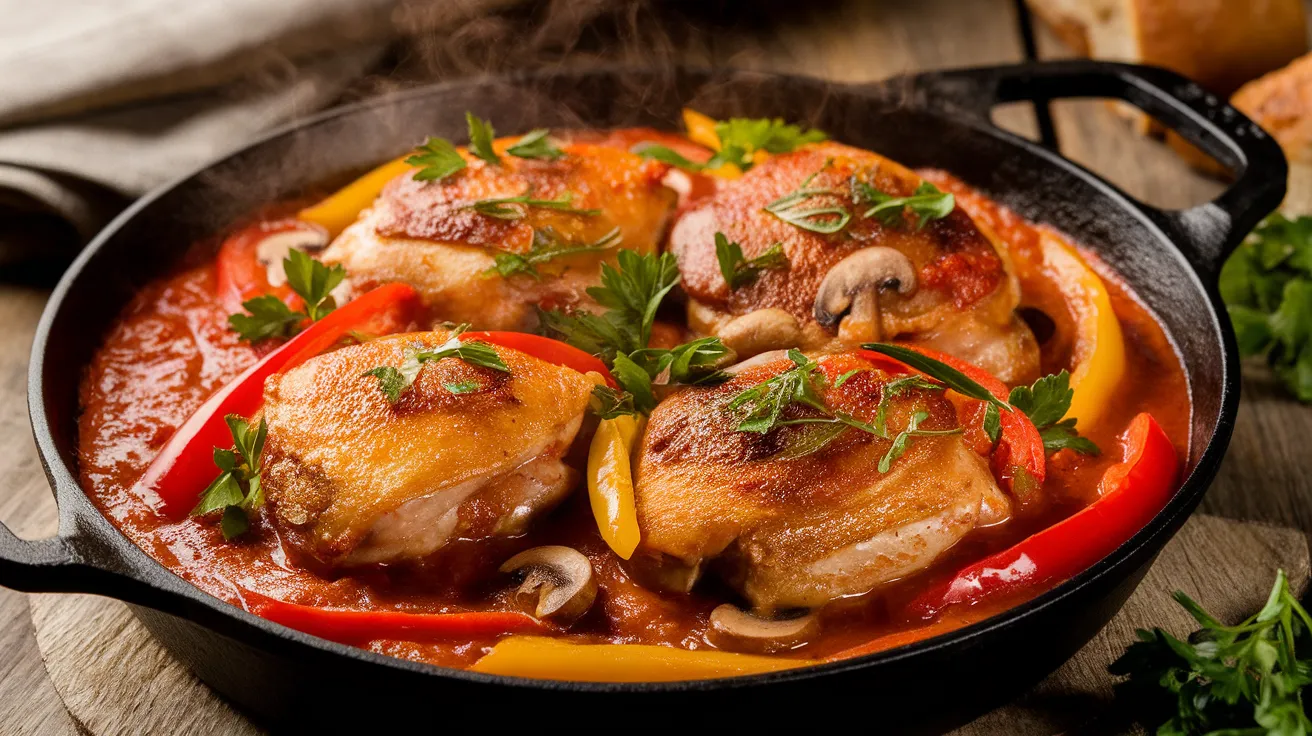
This authentic chicken cacciatore brings the rustic flavors of Italy straight to your dinner table with tender chicken simmered in a rich tomato sauce with bell peppers, onions, and aromatic herbs. This classic Italian comfort food transforms simple ingredients into a hearty, soul-warming meal that’s perfect for family dinners. Our chicken cacciatore recipe delivers restaurant-quality results with easy-to-follow steps that even beginner cooks can master.
SERVES: 4 | PREP: 20 MIN | COOK: 45 MIN | TOTAL: 65 MIN
Ingredients
Chicken & Seasoning
| Ingredient | Amount |
|---|---|
| Chicken thighs (bone-in, skin-on) | 8 pieces |
| All-purpose flour | 1/2 cup |
| Salt | 2 teaspoons |
| Black pepper | 1 teaspoon |
| Paprika | 1 teaspoon |
Vegetables
| Ingredient | Amount |
|---|---|
| Yellow onion (sliced) | 1 large |
| Bell peppers (mixed colors, sliced) | 2 large |
| Mushrooms (sliced) | 8 oz |
| Garlic cloves (minced) | 4 cloves |
Sauce & Liquids
| Ingredient | Amount |
|---|---|
| Crushed tomatoes | 28 oz can |
| Dry white wine | 1/2 cup |
| Chicken broth | 1/2 cup |
| Tomato paste | 2 tablespoons |
| Olive oil | 3 tablespoons |
Herbs & Seasonings
| Ingredient | Amount |
|---|---|
| Fresh rosemary (chopped) | 2 tablespoons |
| Fresh thyme | 1 tablespoon |
| Bay leaves | 2 leaves |
| Red pepper flakes | 1/2 teaspoon |
| Fresh parsley (for garnish) | 1/4 cup |
Step-by-Step Instructions
Phase 1: Preparation (8-10 minutes)
1. Pat the chicken thighs completely dry with paper towels. This crucial step ensures proper browning and prevents oil splatter. Any moisture will create steam instead of the golden crust we want.
2. Combine flour, salt, pepper, and paprika in a shallow dish. Mix thoroughly with a fork to distribute seasonings evenly. This seasoned flour will create a flavorful coating that helps thicken the sauce later.
3. Dredge each chicken thigh in the flour mixture, shaking off excess. Press the flour gently into the skin to help it adhere. Place coated chicken on a clean plate and let sit for 5 minutes to help the coating stick better.
Phase 2: Browning the Chicken (12-15 minutes)
4. Heat olive oil in a large, heavy-bottomed skillet or Dutch oven over medium-high heat. The oil is ready when it shimmers and a drop of water sizzles immediately. Don’t use too high heat or the coating will burn before the chicken cooks.
5. Carefully place chicken thighs skin-side down in the hot oil, leaving space between pieces. You’ll hear immediate sizzling – this is good! Don’t move the chicken for 5-6 minutes to develop a golden crust.
6. Flip chicken using tongs when the skin releases easily and shows deep golden color. Cook another 4-5 minutes on the other side. The chicken won’t be fully cooked yet – that’s intentional.
7. Transfer browned chicken to a large plate and set aside. Don’t worry about any stuck bits in the pan – those are flavor gold for our sauce!
Phase 3: Building the Sauce Base (8-10 minutes)
8. Reduce heat to medium and add sliced onions to the same pan with remaining oil and chicken drippings. Cook for 3-4 minutes, stirring occasionally, until onions start to soften and become translucent.
9. Add bell peppers and mushrooms to the pan. Cook for 4-5 minutes, stirring frequently. The vegetables should start to soften but still have some bite. This prevents them from becoming mushy during the long simmer.
10. Create a well in the center of the vegetables and add minced garlic and tomato paste. Cook for 1 minute, stirring constantly to prevent burning. The tomato paste should darken slightly and become fragrant.
11. Pour in white wine, scraping up any browned bits from the bottom of the pan with a wooden spoon. Let wine simmer for 2-3 minutes to cook off the alcohol. You’ll hear the sizzling quiet down as the alcohol evaporates.
Phase 4: Simmering the Chicken Cacciatore (25-30 minutes)
12. Add crushed tomatoes, chicken broth, rosemary, thyme, bay leaves, and red pepper flakes. Stir everything together to combine. The sauce should be bubbling gently.
13. Nestle the browned chicken thighs back into the sauce, skin-side up. This keeps the skin from getting soggy while allowing the meat to braise in the flavorful liquid below.
14. Bring the mixture to a gentle simmer, then reduce heat to medium-low. Cover partially with a lid, leaving a small gap for steam to escape. This prevents the sauce from getting too thick while allowing some evaporation.
15. Simmer for 25-30 minutes, checking every 10 minutes and adding more broth if needed. The chicken is done when it reaches 165°F internal temperature and the meat easily pulls away from the bone.
Phase 5: Final Touches (3-5 minutes)
16. Remove bay leaves and discard them. Taste the sauce and adjust seasoning with salt, pepper, or red pepper flakes as needed. The sauce should be rich, slightly thick, and well-balanced.
17. Let the chicken cacciatore rest off heat for 5 minutes. This allows the flavors to meld and the sauce to thicken slightly as it cools.
18. Garnish with freshly chopped parsley just before serving. The bright green color and fresh flavor provide a perfect contrast to the rich, rustic sauce.
Chef’s Notes
Perfect Browning: The key to exceptional chicken cacciatore lies in properly browning the chicken. Don’t rush this step – golden skin means deeper flavor throughout the dish.
Wine Selection: Use a dry white wine you’d actually drink. The alcohol cooks off, but the wine’s flavor concentrates and adds complexity to your chicken cacciatore sauce.
Vegetable Texture: Cut vegetables uniformly for even cooking. They should retain some texture after the long simmer, providing pleasant contrast to the tender chicken.
Make-Ahead Magic: This chicken cacciatore actually improves overnight in the refrigerator. The flavors meld beautifully, making it perfect for meal prep or entertaining.
Nutrition Information (Per Serving)
- Calories: 485
- Protein: 42g
- Carbohydrates: 18g
- Fat: 28g
- Fiber: 4g
- Sodium: 890mg
Delicious Variations
Mediterranean Style: Add Kalamata olives, capers, and a splash of balsamic vinegar for a Greek-inspired twist. The briny flavors complement the tomato base beautifully.
Tuscan Chicken Cacciatore: Include white beans and fresh spinach in the last 10 minutes of cooking. This creates a heartier, more substantial meal similar to our braised chicken thighs in tomato sauce.
Hunter’s Style with Bacon: Start by cooking chopped bacon until crispy, then use the rendered fat to brown your chicken. The smoky bacon flavor adds incredible depth.
French-Inspired Version: Replace white wine with red wine and add pearl onions for a dish reminiscent of coq au vin with Italian flair.
Storage & Reheating
Refrigerator Storage: Cool completely before transferring to airtight containers. Your chicken cacciatore will keep for up to 4 days in the refrigerator. The flavors actually improve after the first day.
Freezer Storage: Freeze for up to 3 months in freezer-safe containers. Leave 1 inch of headspace to allow for expansion. Label with contents and date for easy identification.
Reheating Instructions: Thaw frozen portions overnight in the refrigerator. Reheat gently in a covered pan over medium-low heat, adding a splash of broth if the sauce seems thick. Microwave individual portions on 70% power, stirring every 2 minutes.
Make-Ahead Tips: Prepare through step 15, then cool and refrigerate. Reheat the next day and add fresh parsley just before serving. The resting time allows flavors to develop even more fully.
Troubleshooting Guide
Problem: Chicken skin is soggy
Solution: Always brown skin-side down first and keep skin above the sauce during braising. If skin softens, place under broiler for 2-3 minutes before serving.
Problem: Sauce is too thin
Solution: Remove chicken and simmer sauce uncovered for 5-10 minutes to reduce. Alternatively, mix 1 tablespoon cornstarch with 2 tablespoons cold water and stir into simmering sauce.
Problem: Chicken is tough
Solution: Continue simmering longer – tough chicken needs more time. Check every 15 minutes until meat pulls easily from bone. Don’t cook on high heat, which toughens the meat.
Problem: Vegetables are mushy
Solution: Next time, add delicate vegetables like mushrooms later in the cooking process. For this batch, serve as-is – the soft vegetables will blend into the sauce for extra flavor.
Problem: Dish tastes bland
Solution: Season in layers throughout cooking. Add salt to the flour coating, season vegetables while cooking, and taste the sauce before the final simmer. Finish with fresh herbs and a pinch of salt.
Equipment Essentials
- Large Dutch oven or heavy skillet (at least 12-inch diameter)
- Sharp chef’s knife for uniform vegetable cuts
- Cutting board (preferably separate for vegetables)
- Instant-read thermometer to check chicken doneness
- Wooden spoon for stirring and scraping up browned bits
- Tongs for handling chicken safely
- Measuring cups and spoons for accurate ingredient portions
- Shallow dish for flour dredging
- Paper towels for drying chicken
Shopping List
Meat Counter
- Chicken thighs, bone-in, skin-on (8 pieces, about 3 lbs)
Produce Section
- Yellow onion (1 large)
- Bell peppers, mixed colors (2 large)
- Mushrooms (8 oz package)
- Fresh garlic (1 bulb)
- Fresh rosemary (small package)
- Fresh thyme (small package)
- Fresh parsley (1 bunch)
Pantry Staples
- All-purpose flour
- Olive oil
- Salt and black pepper
- Paprika
- Red pepper flakes
- Bay leaves
Canned Goods
- Crushed tomatoes (28 oz can)
- Tomato paste (small can)
- Chicken broth (14 oz carton)
Wine Section
- Dry white wine (cooking wine or regular)
Success Secrets
1. Temperature Control: Use medium heat for most steps. High heat burns the coating and vegetables before developing proper flavor depth in your chicken cacciatore.
2. Layered Seasoning: Season at each step rather than just at the end. This builds complex, well-integrated flavors throughout the entire dish.
3. Quality Ingredients: Choose good-quality crushed tomatoes and fresh herbs. Since chicken cacciatore has simple ingredients, each one’s quality directly impacts the final dish.
4. Patience with Browning: Don’t move the chicken until it releases easily from the pan. Proper browning creates the foundation for exceptional flavor.
5. Rest Before Serving: Let your finished chicken cacciatore sit for 5 minutes off heat. This resting time allows the sauce to thicken and flavors to settle perfectly.