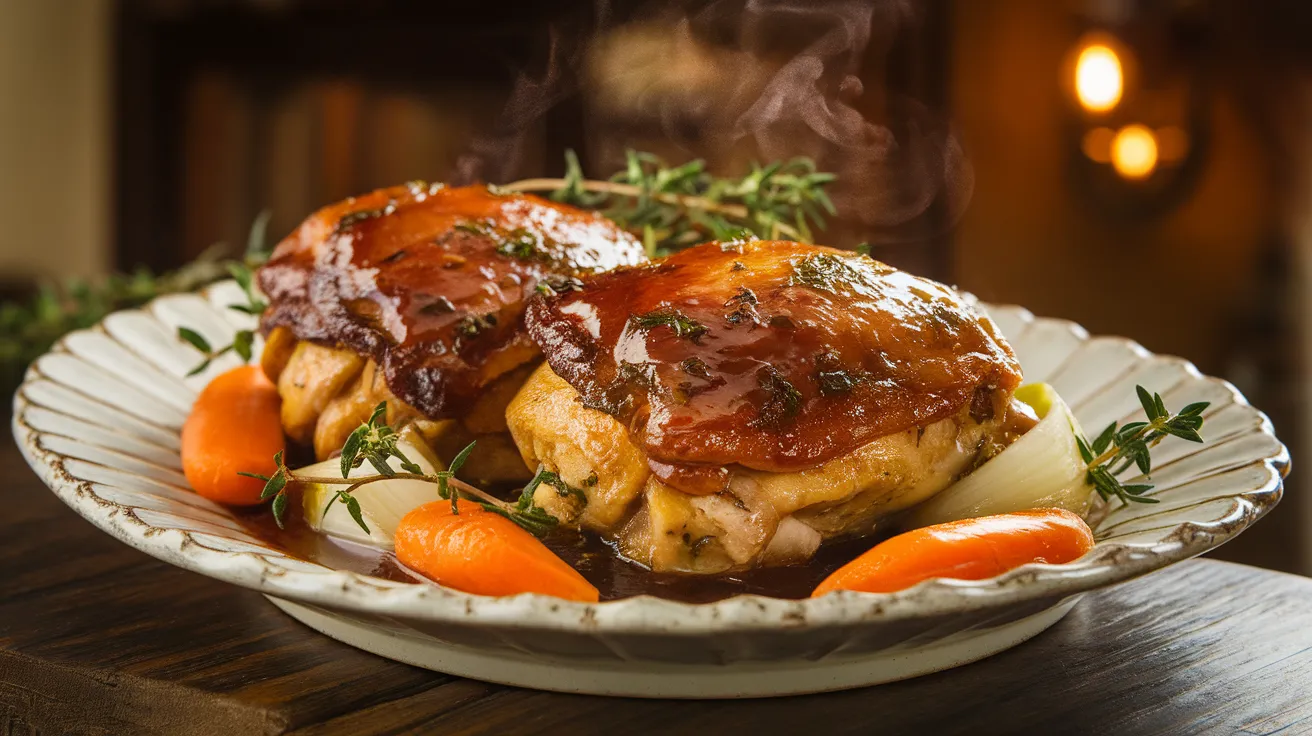
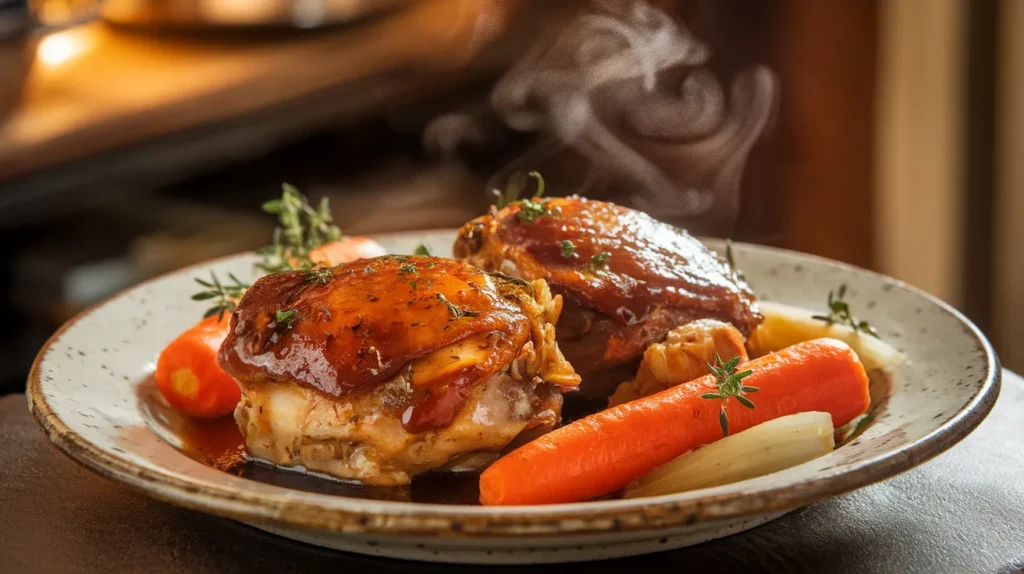
These slow cooker braised chicken thighs transform into fork-tender perfection with minimal effort. This comforting recipe creates succulent chicken thighs that practically fall off the bone, bathed in a rich, aromatic gravy that’s perfect for busy weeknight dinners or lazy weekend meals.
SERVES: 4 | PREP: 15 MIN | COOK: 6 HOURS | TOTAL: 6 HOURS 15 MIN
Ingredients
For the Chicken
| Ingredient | Amount |
|---|---|
| Bone-in chicken thighs, skin-on | 8 pieces (about 3 lbs) |
| All-purpose flour | 1/2 cup |
| Salt | 2 teaspoons |
| Black pepper | 1 teaspoon |
| Paprika | 1 teaspoon |
| Garlic powder | 1 teaspoon |
For the Braising Liquid
| Ingredient | Amount |
|---|---|
| Chicken broth | 2 cups |
| Dry white wine | 1/2 cup |
| Yellow onion, sliced | 1 large |
| Carrots, chopped | 3 medium |
| Celery stalks, chopped | 2 stalks |
| Fresh garlic cloves | 6 cloves |
| Fresh thyme sprigs | 6 sprigs |
| Bay leaves | 2 leaves |
| Tomato paste | 2 tablespoons |
| Olive oil | 2 tablespoons |
Step-by-Step Instructions
Phase 1: Preparation (10 minutes)
1. Pat each chicken thigh completely dry with paper towels. This crucial step ensures better browning and prevents the flour coating from becoming soggy. Any moisture will create steam instead of the golden crust we want.
2. In a large bowl, whisk together flour, salt, pepper, paprika, and garlic powder until evenly combined. This seasoned flour mixture will create both flavor and help thicken our braising liquid later.
3. Dredge each chicken thigh thoroughly in the seasoned flour mixture, shaking off excess. Press the flour gently into the skin to ensure it adheres properly. Set coated thighs on a clean plate.
4. Roughly chop your vegetables into bite-sized pieces. Don’t worry about perfect uniformity – they’ll break down beautifully during the long cooking process.
Phase 2: Building Flavor Base (5 minutes)
5. Add olive oil to your slow cooker and spread it around the bottom. Layer the sliced onions evenly across the bottom – they’ll act as a flavor foundation and prevent the chicken from sticking.
6. Nestle the chopped carrots and celery around the onions. Scatter the garlic cloves throughout the vegetables, crushing them lightly with the flat side of your knife first to release more flavor.
7. Dollop the tomato paste in several spots over the vegetables. Don’t mix it in yet – it will distribute naturally as everything cooks together.
Phase 3: Slow Cooker Braised Chicken Assembly
8. Arrange the floured chicken thighs skin-side up in a single layer over the vegetables. Try not to overlap them too much, as this ensures even cooking. The skin should face up to maintain some texture during braising.
9. Tuck the fresh thyme sprigs and bay leaves between the chicken pieces. Fresh herbs release their oils slowly during the long cooking process, creating incredible depth of flavor.
10. Pour the chicken broth and white wine around the edges of the slow cooker, not directly over the chicken. This prevents washing away the seasoned flour coating we worked to create.
Phase 4: The Braising Process
11. Cover the slow cooker with its lid and set to LOW heat. Cook for 6 hours without lifting the lid. Resist the urge to check – each peek releases heat and extends cooking time by 15-20 minutes.
12. After 6 hours, the chicken should be fork-tender and the internal temperature should reach 165°F when checked with a meat thermometer inserted into the thickest part without touching bone.
Phase 5: Final Touches
13. Carefully remove the chicken thighs using tongs and place them on a serving platter. Cover with foil to keep warm while you finish the gravy.
14. Remove and discard the thyme stems and bay leaves from the cooking liquid. The vegetables should be very soft and the liquid should be rich and flavorful.
15. Optional Gravy Thickening: If you prefer a thicker gravy, whisk 2 tablespoons of cornstarch with 3 tablespoons of cold water in a small bowl. Stir this slurry into the slow cooker liquid and let it sit for 5 minutes to thicken naturally from the residual heat.
Chef’s Notes
Skin Texture Tip: For crispier skin on your slow cooker braised chicken thighs, transfer them to a broiler-safe pan after cooking and broil for 2-3 minutes until golden and crispy.
Wine Substitution: If you prefer not to use wine, replace it with an equal amount of additional chicken broth plus 1 tablespoon of apple cider vinegar for acidity.
Make-Ahead Magic: This recipe tastes even better the next day as flavors meld together. Store in the refrigerator and gently reheat before serving.
Vegetable Variations: Root vegetables like parsnips, turnips, or sweet potatoes work beautifully in this recipe and add natural sweetness to complement the savory chicken.
Nutrition Information (Per Serving)
- Calories: 485
- Protein: 42g
- Carbohydrates: 8g
- Fat: 28g
- Fiber: 2g
- Sodium: 890mg
Delicious Variations
Mediterranean Style: Add kalamata olives, sun-dried tomatoes, and fresh oregano during the last hour of cooking. The briny olives create an amazing contrast to the rich chicken.
Asian-Inspired: Replace wine with rice wine vinegar, add fresh ginger, and finish with green onions and sesame oil for an completely different flavor profile.
Creamy Mushroom Version: Add 8 oz of mixed mushrooms and finish with 1/2 cup heavy cream stirred in during the last 30 minutes. This creates an incredibly rich and luxurious sauce that pairs perfectly with chicken thighs with mushroom sauce.
Spicy Curry Twist: Transform your slow cooker braised chicken thighs into an aromatic curry by adding curry powder, coconut milk, and fresh cilantro. For more curry inspiration, check out this amazing chicken thigh curry recipe that uses similar techniques.
Storage & Reheating
Refrigerator Storage: Store leftover braised chicken thighs in an airtight container for up to 4 days. The flavors actually improve as they meld together overnight.
Freezer Storage: Freeze portions in freezer-safe containers for up to 3 months. Leave some headspace as the liquid will expand when frozen.
Reheating Instructions: Thaw overnight in the refrigerator if frozen. Reheat gently in a covered pan over medium-low heat, adding a splash of broth if needed to prevent sticking.
Microwave Reheating: Heat individual portions in 30-second intervals, covering to prevent splattering and maintain moisture.
Troubleshooting Common Issues
Problem: Chicken skin is soggy
Solution: Pat chicken completely dry before flouring and consider broiling briefly after slow cooking for crispy skin texture.
Problem: Gravy is too thin
Solution: Mix 2 tablespoons cornstarch with cold water and stir into the cooking liquid. Let sit 5 minutes to thicken naturally.
Problem: Chicken is tough
Solution: Continue cooking on LOW for another 1-2 hours. Chicken thighs need sufficient time to break down connective tissue for tenderness.
Problem: Too salty
Solution: Add a peeled potato to absorb excess salt during the last hour of cooking, then remove before serving.
Problem: Bland flavor
Solution: Season the finished dish with fresh herbs, a splash of lemon juice, or a pinch of salt to brighten the flavors before serving.
Equipment Essentials
- 6-quart slow cooker (minimum size for proper spacing)
- Large mixing bowl for flour coating
- Sharp chef’s knife for vegetable prep
- Cutting board
- Measuring cups and spoons
- Tongs for safe chicken handling
- Meat thermometer for doneness checking
- Serving platter
- Aluminum foil for keeping warm
Shopping List
Meat Counter
- Bone-in, skin-on chicken thighs (8 pieces, about 3 lbs)
Produce Section
- Yellow onions (1 large)
- Carrots (3 medium)
- Celery (2 stalks)
- Fresh garlic (1 head)
- Fresh thyme (1 package)
Pantry Items
- All-purpose flour
- Salt and black pepper
- Paprika and garlic powder
- Bay leaves
- Tomato paste
- Olive oil
Beverages
- Chicken broth (32 oz container)
- Dry white wine (1 bottle – use remainder for cooking or drinking)
Success Secrets
1. Always use bone-in, skin-on chicken thighs for maximum flavor and moisture retention. The bones add richness to the braising liquid while the skin protects the meat from drying out.
2. Don’t skip the flour coating – it not only adds flavor but naturally thickens the braising liquid as it cooks, creating a rich, restaurant-quality gravy.
3. Layer your aromatics on the bottom of the slow cooker to prevent the chicken from sticking and to build a flavorful foundation for your braising liquid.
4. Resist opening the lid during cooking. Each peek adds 15-20 minutes to your total cooking time and releases valuable moisture and heat.
5. Let the finished dish rest for 10 minutes before serving. This allows the juices to redistribute and the flavors to settle, resulting in more tender, flavorful slow cooker braised chicken thighs.