- Ready in just 90 minutes – perfect weeknight comfort food
- Loaded with 3 types of meat for incredible depth of flavor
- Perfectly balanced spices that won’t overwhelm your palate
- Make ahead friendly – tastes even better the next day!
The Secret to Perfect Chili Con Carne Every Time
Making Chili Con Carne at home should be simple, but too often it turns out bland, watery, or overspiced. This foolproof recipe solves all those problems with a step-by-step approach anyone can master.
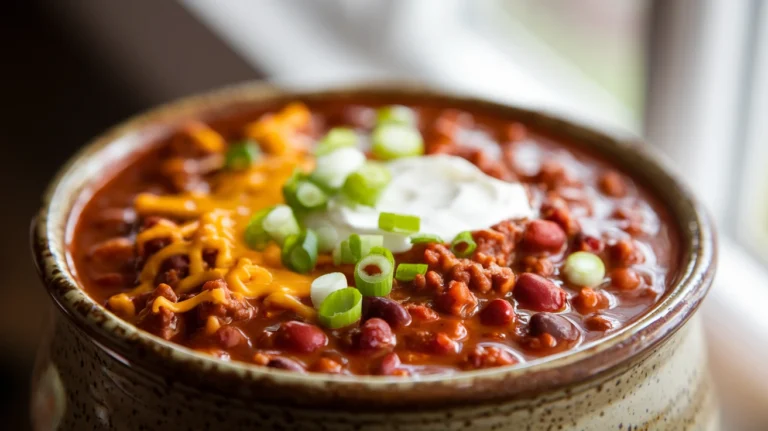
This Chili Con Carne recipe brings restaurant-quality flavor right to your kitchen with its rich, meaty goodness and balanced seasoning. You’ll love how the tender chunks of beef meld with smoky spices and beans for that classic Tex-Mex experience everyone craves.
Perfect for family dinners, game days, or meal prep, this Chili Con Carne serves exactly four people with generous portions. Let’s learn how to make a dish that will have everyone asking for seconds!
Nutrition Facts Per Serving
| Nutrient | Amount | % Daily Value |
|---|---|---|
| Calories | 520 | – |
| Protein | 35g | 70% |
| Carbohydrates | 32g | 11% |
| Fiber | 9g | 32% |
| Fat | 28g | 36% |
| Saturated Fat | 10g | 50% |
| Sodium | 820mg | 36% |
| Potassium | 950mg | 27% |
| Iron | 6mg | 33% |
Values based on a 2,000 calorie diet
Time Breakdown
- Prep Time: 25 minutes
- Cook Time: 65 minutes
- Total Time: 90 minutes
Equipment & Ingredients for Perfect Chili Con Carne
Kitchen Tools You’ll Need
| Tool | Purpose |
|---|---|
| Large Dutch oven or heavy pot | Main cooking vessel |
| Sharp chef’s knife | For precise cutting |
| Cutting board | Prep surface |
| Wooden spoon | Stirring without scratching pot |
| Measuring cups & spoons | Accurate measurements |
| Can opener | Opening canned goods |
| Small bowl | Mixing spices |
Ingredients List
| Ingredient | Amount | Notes |
|---|---|---|
| Ground beef (80/20) | 1 pound | Higher fat content for flavor |
| Beef chuck | ½ pound | Cut into ½-inch cubes |
| Bacon | 4 strips | Diced |
| Yellow onion | 1 large | Finely diced |
| Green bell pepper | 1 medium | Diced |
| Garlic | 4 cloves | Minced |
| Jalapeño | 1 medium | Seeds removed, minced |
| Tomato paste | 2 tablespoons | |
| Beef broth | 2 cups | Low sodium preferred |
| Canned diced tomatoes | 1 can (14 oz) | Don’t drain |
| Kidney beans | 1 can (15 oz) | Rinsed and drained |
| Chili powder | 3 tablespoons | |
| Ground cumin | 2 teaspoons | |
| Dried oregano | 1 teaspoon | |
| Smoked paprika | 1 teaspoon | |
| Cayenne pepper | ¼ teaspoon | Adjust to taste |
| Brown sugar | 1 tablespoon | Balances acidity |
| Salt | 1 teaspoon | Plus more to taste |
| Black pepper | ½ teaspoon | Freshly ground |
| Bay leaf | 1 | |
| Olive oil | 2 tablespoons | For sautéing |
| Masa harina (optional) | 2 tablespoons | For thickening |
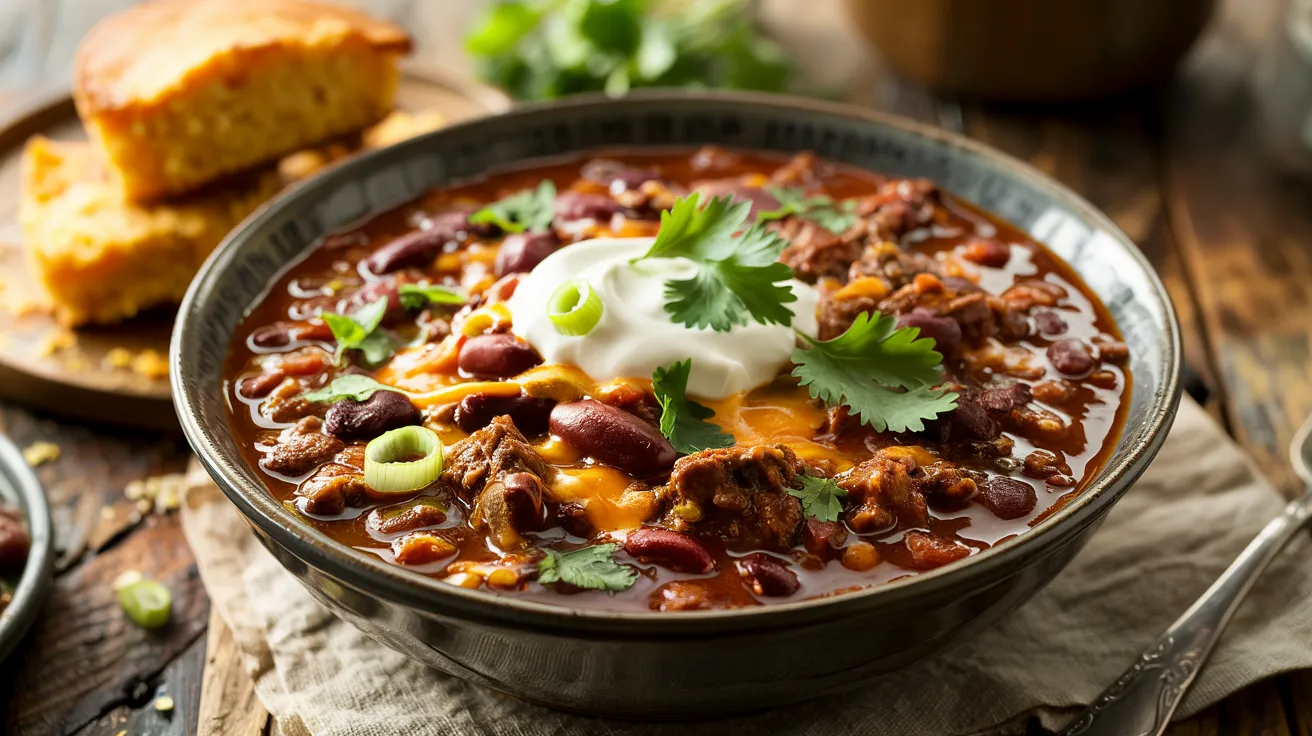
Optional Toppings for Your Chili Con Carne
- Shredded cheddar cheese
- Sour cream
- Sliced green onions
- Diced avocado
- Fresh cilantro
- Lime wedges
- Crushed tortilla chips
Common Substitutions
- Ground beef: Ground turkey or plant-based meat alternatives
- Kidney beans: Black beans or pinto beans
- Beef broth: Chicken broth or vegetable broth
- Fresh jalapeño: ¼ teaspoon of cayenne or red pepper flakes
- Masa harina: Cornmeal or a tablespoon of cornstarch mixed with water
If you love bold flavors in your cooking, check out our Sweet Chili Sauce recipe for another versatile staple that pairs beautifully with so many dishes.
Detailed Beginner-Friendly Instructions for Chili Con Carne
Preparation Phase (25 minutes)
1. Set Up Your Workspace (3 minutes)
- Clear enough counter space for comfortable food preparation.
- Place your cutting board on a stable surface.
- Set out all measuring cups and spoons.
- Have a few small bowls ready for prepped ingredients.
- Wash your hands thoroughly with soap and warm water.
2. Prepare Your Meat (7 minutes)
- Take beef chuck out of packaging and place on cutting board.
- Using a sharp knife, trim any excess fat from the edges.
- Cut beef into ½-inch cubes (about the size of dice) and set aside.
- Beginner tip: Partially freezing the beef for 15 minutes makes it easier to cut.
- Take bacon strips and stack them on the cutting board.
- Cut across the stack to create small pieces about ¼-inch wide.
- Set diced bacon aside in a small bowl.
3. Prepare Your Vegetables (10 minutes)
- Peel the outer skin from the onion and cut off the ends.
- Cut onion in half from top to bottom.
- Place flat side down and slice into strips, then turn and dice.
- Beginner tip: The finer you dice, the better they’ll integrate into the chili.
- For the bell pepper, cut off the top and remove the core and seeds.
- Cut the pepper into strips, then dice into ¼-inch pieces.
- For the jalapeño, wear gloves if available to avoid skin irritation.
- Cut jalapeño in half lengthwise and use a spoon to scrape out seeds and membrane.
- Dice jalapeño into very small pieces.
- Peel garlic cloves and mince finely with your knife.
- Beginner tip: Crush garlic with the flat side of knife first to make mincing easier.
4. Create Your Spice Blend (5 minutes)
- Take a small bowl and place it on your kitchen scale (if available).
- Measure out each spice one by one into the bowl:
- 3 tablespoons chili powder
- 2 teaspoons ground cumin
- 1 teaspoon dried oregano
- 1 teaspoon smoked paprika
- ¼ teaspoon cayenne pepper
- 1 teaspoon salt
- ½ teaspoon black pepper
- Mix thoroughly with a spoon until fully combined and uniform in color.
- Set aside within easy reach of your cooking area.
Cooking Phase (65 minutes)
Step 1: Cook the Bacon (5 minutes)
- Place your Dutch oven or heavy pot on the stove over medium heat.
- Allow the pot to heat up for 1-2 minutes (you should feel heat when holding your hand 3 inches above).
- Add the diced bacon to the pot, spreading it evenly across the bottom.
- Cook, stirring occasionally with a wooden spoon, until the bacon is crispy and brown.
- Watch for splattering oil – use a splatter screen if you have one.
- Once bacon is crispy (about 5 minutes), use a slotted spoon to transfer bacon to a paper towel-lined plate.
- Leave all the bacon fat in the pot – this is essential flavor for your Chili Con Carne.
Step 2: Brown the Beef (15 minutes)
- Increase the heat under your pot to medium-high.
- Once the bacon fat is hot and shimmering, add half of your beef chuck cubes.
- Beginner warning: Don’t crowd the pan – the meat won’t brown properly if it’s too crowded.
- Allow the beef to sit undisturbed for 2 minutes to develop a brown crust.
- Gently stir and flip the pieces to brown on all sides, about 3 more minutes.
- Remove the first batch of browned beef to a clean plate.
- Add the remaining beef chuck cubes and repeat the browning process.
- Remove all browned beef chuck to the plate.
- Add the ground beef to the pot, breaking it into smaller pieces with your wooden spoon.
- Sprinkle ground beef with ½ teaspoon salt and ¼ teaspoon pepper while cooking.
- Stir occasionally, continuing to break up large chunks, until no pink remains (6-7 minutes).
- Do not drain the fat – it adds crucial flavor to your Chili Con Carne.
Step 3: Sauté the Vegetables (8 minutes)
- Add diced onion and bell pepper directly to the pot with the cooked ground beef.
- Stir to combine, ensuring vegetables are coated with the flavorful fat.
- Cook for 5 minutes, stirring occasionally, until vegetables begin to soften.
- Beginner tip: Onions should become translucent but not brown.
- Add minced garlic and jalapeño to the pot.
- Stir continuously for 2-3 minutes.
- Beginner warning: Garlic burns easily and becomes bitter, so keep it moving in the pot.
- You’ll know it’s ready when you can smell the garlic’s aroma.
Step 4: Build the Flavor Base (7 minutes)
- Add tomato paste to the pot with vegetables and meat.
- Stir continuously, “toasting” the tomato paste for 1-2 minutes until it darkens slightly.
- Beginner tip: This step intensifies the tomato flavor and removes any tinny taste.
- Add your prepared spice blend all at once.
- Stir vigorously for 30 seconds to coat everything with spices.
- Beginner warning: Spices can burn quickly, so have your next ingredient ready.
- Pour in ½ cup of beef broth and use your wooden spoon to scrape the bottom of the pot.
- Beginner tip: This step is called “deglazing” and captures all the flavorful browned bits.
- Once the bottom of the pot is clean, add remaining 1½ cups beef broth.
- Add the entire can of diced tomatoes with their juice.
- Add 1 tablespoon brown sugar and stir to distribute.
- Return the browned beef cubes and cooked bacon to the pot.
- Add the bay leaf and gently stir to combine everything.
Step 5: Simmer to Perfection (30 minutes)
- Increase heat to high and bring the mixture to a boil.
- Beginner tip: A boil is when you see rapid bubbles breaking the surface.
- Once boiling, reduce heat to maintain a gentle simmer.
- Beginner tip: A simmer shows small bubbles occasionally breaking the surface.
- Cover the pot with its lid.
- Set a timer for 20 minutes.
- Stir your Chili Con Carne every 5 minutes to prevent sticking.
- Open the can of kidney beans, pour into a colander and rinse under cold water.
- After the 20-minute timer ends, add the drained kidney beans to the pot.
- Remove the lid and continue simmering for 10 more minutes, stirring occasionally.
- For thicker chili: In a small bowl, mix 2 tablespoons masa harina with ¼ cup water until smooth.
- Pour the masa slurry into the chili during the last 5 minutes of cooking, stirring well to incorporate.
- Use a spoon to locate and remove the bay leaf.
- Turn off the heat and allow the Chili Con Carne to rest for 5 minutes before serving.
- Taste and adjust seasoning if needed:
- Too bland? Add more salt, ¼ teaspoon at a time
- Not spicy enough? Add a pinch more cayenne
- Too acidic? Add 1 teaspoon more brown sugar
If you’re looking for the perfect side dish to serve with your chili, our Chili Cornbread Casserole is an amazing complement that will round out your meal beautifully.

Troubleshooting Your Chili Con Carne
| Problem | Cause | Solution |
|---|---|---|
| Too watery | Not enough simmering time | Continue simmering uncovered until desired thickness |
| Too thick | Overreduced | Add more beef broth, ¼ cup at a time |
| Too spicy | Too much cayenne or chili powder | Add 1 tbsp brown sugar or a dollop of sour cream |
| Too mild | Not enough spices | Add more chili powder or cayenne in small increments |
| Meat is tough | Not cooked long enough | Continue simmering until meat is tender |
| Beans too firm | Not cooked long enough | Simmer 10-15 minutes longer |
| Acidic taste | Tomatoes dominating | Add 1 tsp more brown sugar to balance |
| Burnt bottom | Heat too high | If burnt, transfer to a new pot without scraping the bottom |
| Greasy surface | Too much fat | Skim fat from surface with a large spoon |
Variations & Substitutions for Your Chili Con Carne
Vegetarian Chili Con Carne
- Replace all meat with 2 cups of mixed beans (black, pinto) and 8 oz of chopped mushrooms
- Use vegetable broth instead of beef broth
- Add 1 tbsp soy sauce for umami flavor
- Cook mushrooms thoroughly to develop meaty flavor
Spicy Chili Con Carne
- Add 1 extra jalapeño with seeds
- Increase cayenne to ½ teaspoon
- Add 1 teaspoon of hot sauce
- Try adding a diced chipotle pepper in adobo sauce
Low-Carb Chili Con Carne
- Omit beans completely
- Add 1 extra pound of ground beef
- Add 1 diced zucchini during the last 10 minutes of cooking
- Consider adding diced bell peppers for extra texture
Smoky Chili Con Carne
- Add 1 chopped chipotle pepper in adobo sauce
- Increase smoked paprika to 2 teaspoons
- Use fire-roasted diced tomatoes
- Consider adding ½ teaspoon liquid smoke
Storage & Reheating Your Chili Con Carne
Refrigerator Storage
- Cool completely before refrigerating
- Spread in a wide, shallow container to cool faster
- Do not place hot chili directly in the refrigerator
- Store in airtight containers
- Keeps for 3-4 days in the refrigerator
- Pro tip: Chili Con Carne often tastes better the next day as flavors meld overnight
Freezer Storage
- Portion into freezer-safe containers
- Leave ½-inch headspace for expansion
- Freeze for up to 3 months
- Label with date and contents
- Consider freezing in individual portions for easy meals
Reheating Instructions
- Refrigerated chili:
- Stovetop method: Place in a pot over medium-low heat, add 2-3 tablespoons of water or broth, cover, and stir every 2-3 minutes until heated through (about 10 minutes).
- Microwave method: Place in a microwave-safe bowl, add 1 tablespoon of water, cover with a microwave-safe lid or plate, and heat in 1-minute intervals, stirring between each, until heated through (about 2-3 minutes total).
- Frozen chili:
- Thawing method: Transfer from freezer to refrigerator 24 hours before you plan to eat it.
- Stovetop from thawed: Follow refrigerated chili instructions.
- Stovetop from frozen: Place frozen block in pot with ¼ cup water, cover, heat on low for 10 minutes, then break apart and stir frequently until heated through.
- Microwave from frozen: Use defrost setting for 5 minutes, stir, then heat on high in 1-minute increments until hot.
- Beginner warning: Never reheat straight from freezer in a glass container as it may crack.
For a fun twist on your leftover chili, try our Chili Cheese Fries recipe – it’s the perfect way to transform yesterday’s dinner into today’s crowd-pleasing snack!
Safety Notes & Tips for Chili Con Carne Success
Food Safety
- Always wash hands for 20 seconds with soap before and after handling raw meat
- Use separate cutting boards for meat and vegetables
- Sanitize all surfaces that come into contact with raw meat
- Cook ground beef to internal temperature of 160°F (71°C)
- Never leave Chili Con Carne at room temperature for more than 2 hours
- Reheat leftovers to 165°F (74°C) before eating
Beginner Cooking Tips
- Prep all ingredients first: Having everything ready before you start cooking (called “mise en place”) makes the process much smoother
- Toast your spices: For even more flavor, toast ground spices in the dry pot for 30 seconds before adding oil
- Brown in batches: Don’t overcrowd the pot when browning meat – it will steam instead of sear
- Low and slow: For the most tender meat, keep the simmer gentle and the lid on during the initial cooking phase
- Taste as you go: Sample your Chili Con Carne throughout cooking and adjust seasonings gradually
- Rest before serving: Let chili stand 10 minutes before serving to allow flavors to settle
Serving Suggestions
- Warm your bowls: Rinse them with hot water before serving to keep chili hot longer
- Set up a toppings bar: Let guests customize their bowls with various garnishes
- Complete the meal: Pair with cornbread, tortilla chips, or steamed rice
- Balance the menu: Add a fresh side salad with lime vinaigrette for contrast
Chef’s Notes on Chili Con Carne
The secret to exceptional Chili Con Carne lies in building layers of flavor. Take your time with the browning step – those caramelized bits on the bottom of the pot are pure gold for flavor development.
Don’t rush the simmering process. The longer your chili simmers, the more the flavors will develop and meld together. If you have the time, consider making this a day ahead – Chili Con Carne truly gets better with age!
Remember that chili is incredibly forgiving and adaptable. Once you master this base recipe, feel free to experiment with different meats, beans, and spice levels to create your perfect personal version.
Beginner cooks often worry about getting everything perfect, but Chili Con Carne is one of the most forgiving dishes you can make. Trust your instincts, taste as you go, and enjoy the process of creating this classic comfort food from scratch.