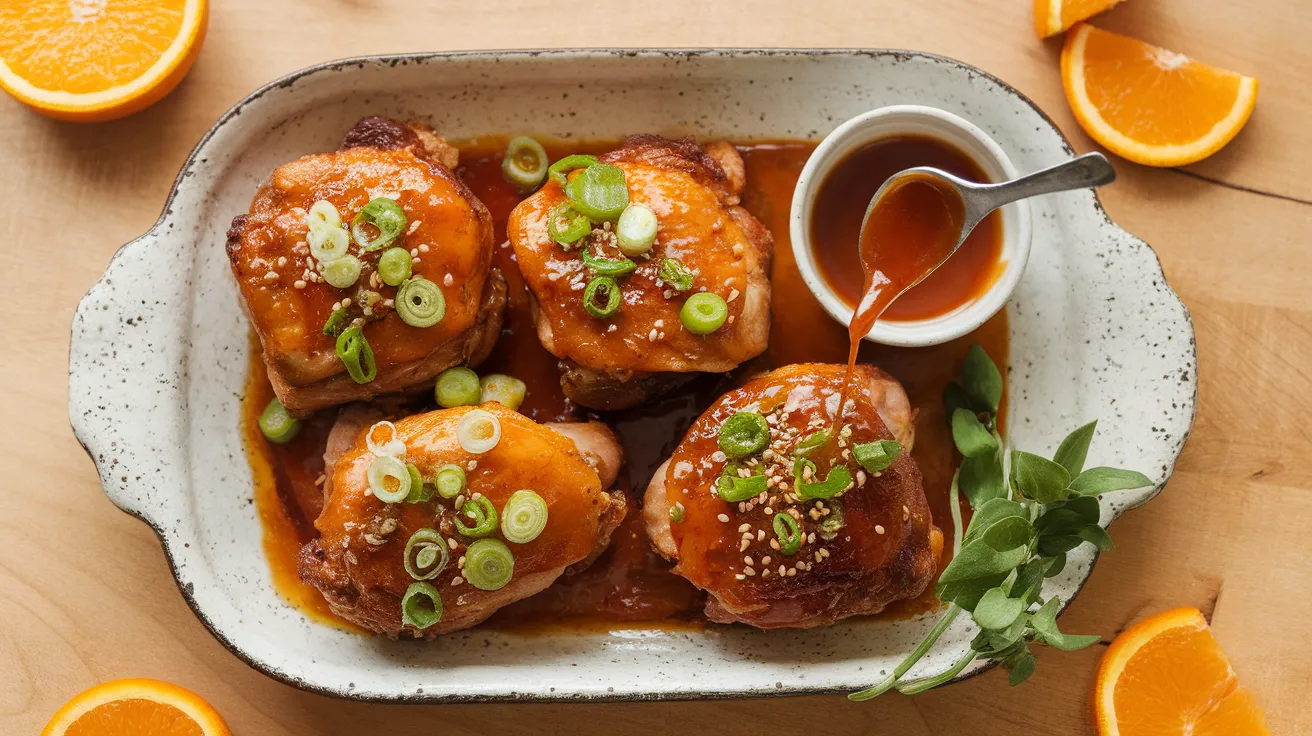
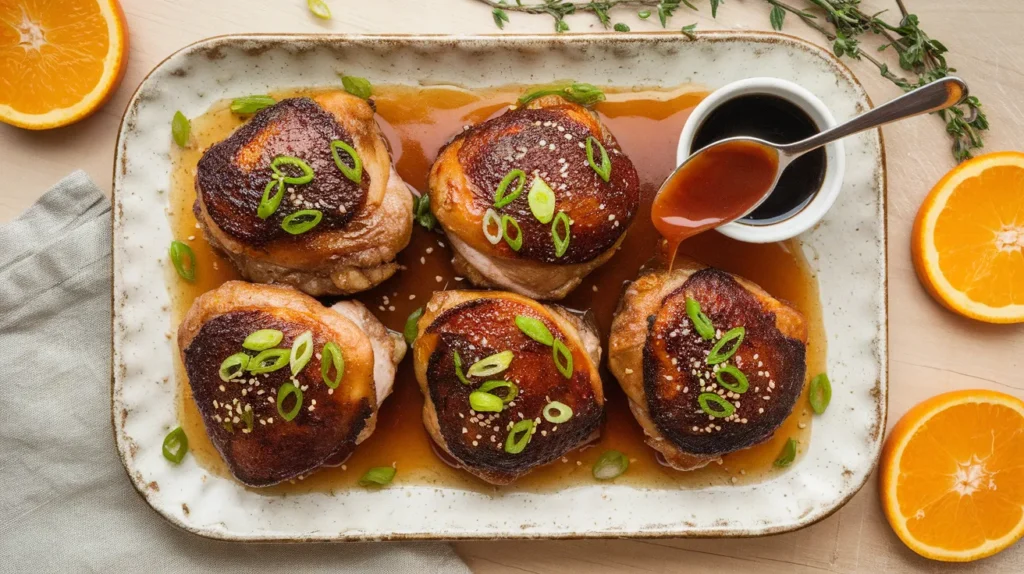
Crispy-skinned orange glazed chicken thighs with a sticky-sweet citrus coating that caramelizes into pure magic. This orange glazed chicken thighs recipe transforms basic ingredients into restaurant-quality comfort food in under 45 minutes.
SERVES: 4 | PREP: 15 MIN | COOK: 28 MIN | TOTAL: 43 MIN
Why This Orange Glazed Chicken Recipe Works
Forget dry, boring chicken. This method delivers crispy skin on the outside and juicy meat on the inside, all wrapped in a glossy orange glaze that hits sweet, tangy, and savory notes perfectly.
The secret? We’re searing first, then building the glaze in the same pan to capture all those caramelized flavor bits.
Ingredients You’ll Need
For the Chicken
| Ingredient | Amount | Notes |
|---|---|---|
| Bone-in, skin-on chicken thighs | 8 pieces (about 2.5 lbs) | Pat completely dry |
| Kosher salt | 1½ tsp | Don’t use table salt |
| Black pepper | ¾ tsp | Freshly ground is best |
| Garlic powder | ½ tsp | Not garlic salt |
| Olive oil | 1 tbsp | For searing |
For the Orange Glaze
| Ingredient | Amount | Notes |
|---|---|---|
| Fresh orange juice | ¾ cup | About 3 medium oranges |
| Orange zest | 1 tbsp | Zest before juicing |
| Honey | 3 tbsp | Can sub maple syrup |
| Soy sauce | 2 tbsp | Use low-sodium |
| Rice vinegar | 1 tbsp | White vinegar works too |
| Fresh ginger | 1 tbsp minced | Or ½ tsp ground ginger |
| Garlic cloves | 3 cloves, minced | About 1 tbsp |
| Cornstarch | 1 tbsp | For thickening |
| Water | 2 tbsp | To mix with cornstarch |
For Finishing
| Ingredient | Amount | Purpose |
|---|---|---|
| Sesame seeds | 1 tbsp | Toasted if possible |
| Green onions | 2, sliced thin | Garnish |
| Red pepper flakes | ¼ tsp | Optional heat |
Step-by-Step Instructions
Phase 1: Prep the Chicken (5 minutes)
Step 1: Take your chicken thighs out of the fridge 20 minutes before cooking. Room temperature chicken sears better and cooks more evenly. This step prevents that dreaded raw-in-the-middle situation.
Step 2: Pat each thigh completely dry with paper towels on both sides. This is crucial. Moisture is the enemy of crispy skin. Get aggressive with those paper towels.
Step 3: Mix salt, pepper, and garlic powder in a small bowl. Combining the seasonings first ensures every piece gets equal flavor.
Step 4: Season both sides of each thigh generously with your spice mixture. Don’t be shy. The skin needs bold seasoning. Press the spices into the meat slightly so they stick.
Phase 2: Make the Glaze Base (3 minutes)
Step 5: Zest your oranges into a medium bowl before juicing them. The zest contains essential oils that pack serious flavor punch. One tablespoon looks like a small pile.
Step 6: Squeeze your oranges to get ¾ cup of fresh juice, then add it to the bowl with zest. Fresh juice is non-negotiable here. Bottled juice tastes flat and won’t give you that bright citrus flavor.
Step 7: Add honey, soy sauce, rice vinegar, minced ginger, and minced garlic to the orange juice mixture. Whisk this together until the honey dissolves completely. You’re building layers of flavor—sweet from honey, salty from soy sauce, tangy from vinegar.
Step 8: In a separate small bowl, mix cornstarch and water into a smooth paste. This is your thickening agent. Mix it now so it’s ready when you need it. No lumps allowed.
Phase 3: Sear the Chicken (12 minutes)
Step 9: Heat a large oven-safe skillet or Dutch oven over medium-high heat for 2 minutes. You want the pan hot before adding oil. This prevents sticking.
Step 10: Add olive oil and swirl to coat the pan bottom. When the oil shimmers and flows like water, it’s ready.
Step 11: Place chicken thighs skin-side down in the pan without crowding. Work in batches if needed. Leave space between pieces. Crowding creates steam instead of that gorgeous crispy skin we’re after.
Step 12: Do not touch the chicken for 6-7 minutes. Seriously, don’t peek or move them. You’ll hear sizzling. The skin is releasing from the pan naturally as it browns. When it’s ready, it’ll release easily. If it sticks, it needs more time.
Step 13: Check one thigh by gently lifting a corner—you want deep golden brown skin. The color should remind you of a perfect pancake. If it’s pale, give it another minute.
Step 14: Flip each thigh and cook the other side for 4-5 minutes. This side won’t get as crispy, and that’s fine. You’re just cooking the meat through.
Step 15: Remove chicken to a plate and pour off all but 1 tablespoon of fat from the pan. Don’t wipe the pan clean. Those brown bits stuck to the bottom are flavor gold.
Phase 4: Build the Glaze (8 minutes)
Step 16: Reduce heat to medium and pour your orange juice mixture into the hot pan. It’ll sizzle and steam immediately. Use a wooden spoon to scrape up all those caramelized bits from the bottom. This is called deglazing, and it’s where magic happens.
Step 17: Let the glaze bubble and reduce for 3-4 minutes, stirring occasionally. You’ll notice it getting slightly thicker and darker. The kitchen will smell incredible.
Step 18: Stir your cornstarch mixture again (it settles), then pour it into the bubbling glaze while whisking. Keep whisking for 30 seconds. The glaze will transform from thin liquid to glossy, coating consistency.
Step 19: Reduce heat to medium-low and return chicken thighs to the pan, skin-side up. Nestle them into the glaze but keep the skin exposed so it stays crispy.
Phase 5: Final Cooking (8 minutes)
Step 20: Spoon glaze over the chicken thighs every 2 minutes while they simmer. This builds layers of sticky, caramelized coating. You want the glaze to cling to the skin.
Step 21: Cook for 6-8 minutes until the internal temperature reaches 165°F on an instant-read thermometer. Check the thickest part without touching bone. If you don’t have a thermometer, cut into the thickest thigh—juices should run clear, not pink.
Step 22: Remove from heat and let rest for 3 minutes. The glaze will thicken even more as it cools slightly. Resting also keeps the juices inside the meat.
Step 23: Transfer to a serving platter, spoon remaining glaze over top, and garnish with sesame seeds and sliced green onions. Add red pepper flakes if you want a spicy kick.
Chef’s Notes
Crispy skin secret: The key to incredible orange glazed chicken thighs is starting with bone-dry chicken and a hot pan. Don’t skip the paper towel step.
Glaze consistency: If your glaze gets too thick, thin it with a tablespoon of water. Too thin? Let it bubble for another minute.
Orange flavor boost: For extra citrus punch, add a few strips of orange peel to the glaze while it simmers, then remove them before serving.
Make it spicy: Add ½ teaspoon of sriracha or a pinch of cayenne to your orange glazed chicken thighs glaze mixture for heat that complements the sweet citrus.
Nutrition Information (Per Serving)
Calories: 385 | Protein: 32g | Carbs: 24g | Fat: 18g
Fiber: 1g | Sugar: 19g | Sodium: 640mg
Delicious Variations to Try
Asian-Style Orange Chicken Thighs: Add 1 teaspoon of five-spice powder to your seasoning mix and swap rice vinegar for rice wine. Serve over jasmine rice with steamed bok choy.
Spicy Orange-Chipotle Thighs: Mix 1 tablespoon of adobo sauce from canned chipotles into your glaze for smoky heat. This pairs perfectly with chicken with olives for a Mediterranean-fusion dinner spread.
Herb-Crusted Orange Thighs: Add 1 teaspoon of dried thyme and fresh rosemary to your seasoning. The herbs complement the citrus beautifully, similar to how prosciutto-wrapped chicken thighs balance savory and bright flavors.
Maple-Orange Glazed Thighs: Replace honey with pure maple syrup and add ¼ teaspoon of cinnamon to the glaze. Perfect for fall dinners.
Storage & Reheating
Refrigerator: Store cooled orange glazed chicken thighs in an airtight container for up to 4 days. Keep glaze separate if possible to maintain skin crispness.
Freezing: Freeze cooked thighs in freezer bags for up to 3 months. Thaw overnight in the fridge before reheating.
Reheating for crispy skin: Place thighs skin-side up on a baking sheet. Reheat at 375°F for 12-15 minutes until heated through and skin re-crisps. Warm glaze separately in a small pot and spoon over just before serving.
Microwave method: Works in a pinch but won’t keep skin crispy. Heat in 45-second intervals, covered with a damp paper towel.
Troubleshooting Common Problems
Problem 1: Skin isn’t crispy
Solution: Your chicken was too wet, or the pan wasn’t hot enough. Next time, pat the chicken even drier and let your pan preheat for a full 2 minutes. Don’t move the chicken while it sears.
Problem 2: Glaze is too thin and watery
Solution: Let it simmer longer to reduce, or add another teaspoon of cornstarch mixed with 2 teaspoons of water. Whisk it in and cook for another minute.
Problem 3: Chicken is dry
Solution: You overcooked it. Chicken thighs should hit exactly 165°F. Get an instant-read thermometer. Also, don’t skip the resting period—it redistributes juices.
Problem 4: Glaze tastes too sweet
Solution: Add another tablespoon of soy sauce or a squeeze of fresh lemon juice to balance the sweetness. Taste and adjust as you go.
Problem 5: Chicken sticks to the pan
Solution: The pan wasn’t hot enough, or you moved the chicken too soon. Let the skin develop a golden crust—it releases naturally when ready. Use a good-quality heavy-bottomed pan.
Equipment Essentials
- Large oven-safe skillet or Dutch oven (12-inch diameter minimum)
- Instant-read meat thermometer (game-changer for perfect doneness)
- Wooden spoon or heat-safe spatula (for scraping pan bits)
- Tongs (for flipping chicken safely)
- Microplane or zester (for orange zest)
- Whisk (for smooth glaze)
- Medium mixing bowl
- Paper towels (lots of them)
- Small bowl (for cornstarch slurry)
Shopping List by Store Section
Meat Counter:
- 8 bone-in, skin-on chicken thighs (about 2.5 lbs)
Produce:
- 3 medium oranges
- 1 piece fresh ginger (2-inch knob)
- 1 head garlic
- 2 green onions
Pantry/Baking:
- Kosher salt
- Black pepper
- Garlic powder
- Olive oil
- Honey
- Low-sodium soy sauce
- Rice vinegar
- Cornstarch
- Sesame seeds
- Red pepper flakes (optional)
5 Success Secrets for Perfect Orange Glazed Chicken Thighs
1. Temperature control is everything.
Start with room-temperature chicken and a properly preheated pan. Cold chicken in a cold pan equals rubbery skin and uneven cooking.
2. Fresh juice makes or breaks this dish.
Bottled orange juice won’t give you that bright, restaurant-quality flavor. The 5 minutes spent juicing oranges is worth it.
3. Don’t rush the sear.
That 6-7 minute hands-off searing time feels like forever, but it’s how you get skin so crispy it crackles when you bite it.
4. Layer your glaze.
Spooning glaze over the chicken multiple times in the final cooking phase creates a lacquered, sticky coating instead of a thin sauce.
5. Rest before serving.
Those 3 minutes of resting let the glaze set into a gorgeous shine and keep all the juices locked inside the meat. Skipping this step wastes all your hard work.
Serve your orange glazed chicken thighs over fluffy white rice or creamy mashed potatoes to soak up every drop of that incredible glaze. Add a simple green salad or roasted vegetables, and you’ve got a dinner that looks like it came from a fancy restaurant but took less than an hour to make.