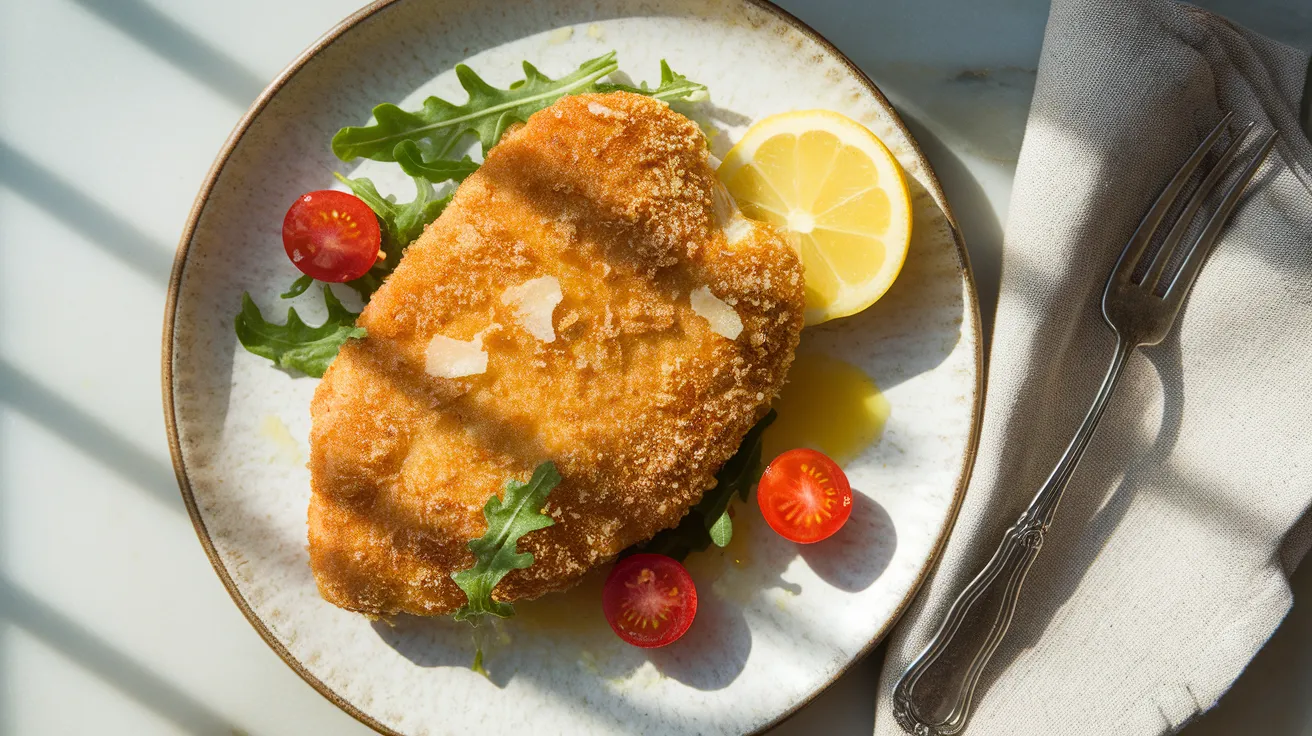
Discover how to make authentic Chicken Milanese with a golden, crispy panko crust that rivals your favorite Italian restaurant. This classic chicken Milanese recipe transforms simple ingredients into an elegant dinner that’s surprisingly easy to master in your own kitchen.
SERVES: 4 | PREP: 20 MIN | COOK: 15 MIN | TOTAL: 35 MIN
Ingredients
For the Chicken
| Ingredient | Amount |
|---|---|
| Boneless, skinless chicken breasts | 2 large (about 1.5 lbs) |
| Kosher salt | 1½ teaspoons |
| Black pepper | ½ teaspoon |
For the Breading Station
| Ingredient | Amount |
|---|---|
| All-purpose flour | ¾ cup |
| Large eggs | 3 |
| Whole milk | 2 tablespoons |
| Panko breadcrumbs | 2 cups |
| Parmesan cheese, finely grated | ½ cup |
| Dried oregano | 1 teaspoon |
| Garlic powder | ½ teaspoon |
For Cooking & Serving
| Ingredient | Amount |
|---|---|
| Vegetable oil | ½ cup |
| Unsalted butter | 2 tablespoons |
| Fresh lemon wedges | 1 lemon, quartered |
| Arugula (optional) | 4 cups |
| Cherry tomatoes (optional) | 1 cup, halved |
Step-by-Step Instructions
Phase 1: Preparing the Chicken (8 minutes)
Step 1: Place one chicken breast on a cutting board and position your hand flat on top. Using a sharp knife parallel to the board, carefully slice the breast horizontally to create two thin cutlets. This technique is called butterflying, and it ensures even cooking.
Step 2: Repeat with the second breast to create four cutlets total. Each cutlet should be roughly ½-inch thick. If your chicken came pre-sliced, skip to Step 3.
Step 3: Place each cutlet between two sheets of plastic wrap or parchment paper. Using a meat mallet or heavy skillet, gently pound from the center outward until each piece reaches ¼-inch thickness. This creates the signature thin profile that makes chicken Milanese so tender and quick-cooking.
Step 4: Season both sides of each cutlet with salt and black pepper. Press the seasoning gently into the meat with your fingertips. This step prevents bland chicken—a common mistake when rushing through prep.
Phase 2: Setting Up Your Breading Station (4 minutes)
Step 5: Arrange three shallow bowls or pie plates in a row on your counter. This assembly-line setup makes breading efficient and less messy. Keep a clean plate at the end for your breaded cutlets.
Step 6: In the first bowl, add the flour. In the second bowl, whisk together eggs and milk until completely smooth with no streaks. The milk helps the egg mixture coat more evenly.
Step 7: In the third bowl, combine panko breadcrumbs, Parmesan cheese, oregano, and garlic powder. Mix thoroughly with a fork to distribute the cheese and seasonings. The Parmesan adds nutty flavor and helps the crust brown beautifully.
Step 8: Set up your workspace with the chicken on your left, bowls in the middle, and empty plate on your right (reverse if left-handed). Keep one hand for dry ingredients and one for wet—this “wet hand, dry hand” method prevents clumping.
Phase 3: Breading the Chicken Milanese (6 minutes)
Step 9: Take one cutlet and coat it completely in flour, shaking off excess. The flour creates a dry surface that helps the egg mixture stick. Bare spots mean the breading will fall off during cooking.
Step 10: Dip the floured cutlet into the egg mixture, letting excess drip back into the bowl. Make sure every surface is covered—run your finger along any dry edges. The egg acts as glue for your breadcrumb layer.
Step 11: Transfer to the breadcrumb mixture and press firmly on both sides. Use your dry hand to pack crumbs onto the chicken, then flip and repeat. You want a thick, even coating with no chicken showing through.
Step 12: Place the breaded cutlet on your clean plate and repeat with remaining chicken. Let breaded cutlets rest for 5 minutes before cooking. This resting time helps the coating adhere better and reduces shedding in the pan.
Phase 4: Pan-Frying to Golden Perfection (12 minutes)
Step 13: Heat a large skillet (12-inch works best) over medium-high heat for 2 minutes. Add vegetable oil and butter, swirling to coat the pan. The butter adds flavor while the oil prevents burning—a classic Italian technique.
Step 14: Test oil temperature by dropping in a breadcrumb. It should sizzle immediately but not smoke. If it browns in under 3 seconds, reduce heat slightly. Too hot means burnt coating with raw chicken inside.
Step 15: Carefully place two cutlets in the pan without crowding. They should sizzle loudly on contact—if they don’t, your oil isn’t hot enough. Crowding drops the temperature and creates soggy breading.
Step 16: Cook undisturbed for 4 minutes. Resist the urge to move them—this is when the golden crust forms. You’ll see the edges turn golden brown as a visual cue.
Step 17: Flip carefully using tongs or a spatula. Cook the second side for 3-4 minutes until golden and the internal temperature reaches 165°F. The chicken should feel firm when pressed gently with tongs.
Step 18: Transfer cooked chicken Milanese to a wire rack set over a baking sheet. The rack prevents steam from making the bottom soggy. Keep warm in a 200°F oven while cooking the remaining cutlets.
Step 19: Add a bit more oil to the pan if needed and repeat with remaining cutlets. Wipe any burnt breadcrumbs from the pan between batches. These dark bits can make your oil bitter.
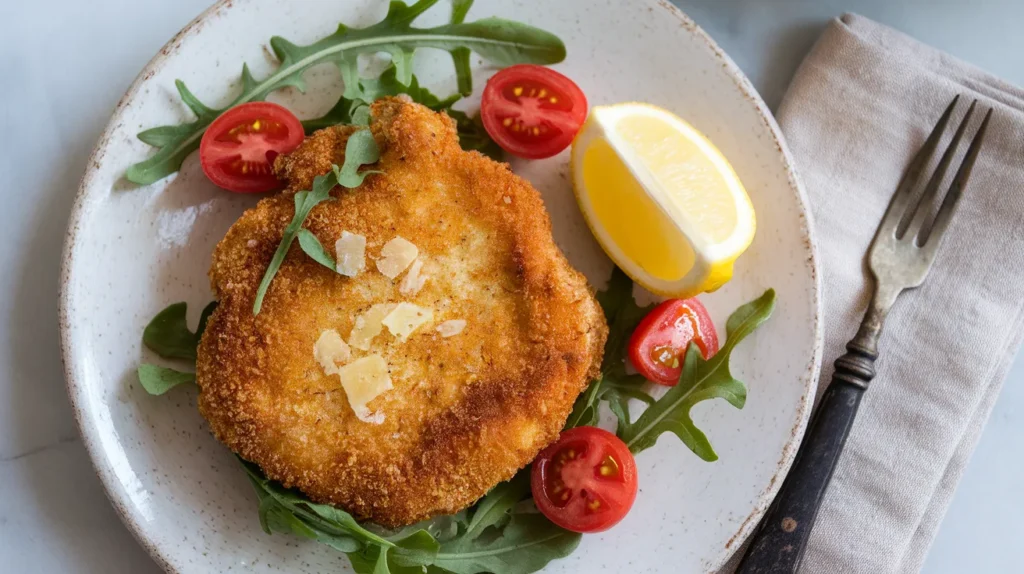
Step 20: Serve immediately with fresh lemon wedges. The bright acidity cuts through the rich, crispy coating perfectly. For a complete meal, top with arugula and cherry tomatoes, similar to how you might enjoy chicken parmigiana with fresh greens.
Chef’s Notes
The Pounding Matters: Many home cooks skip this step, but pounding the chicken Milanese to an even thickness ensures it cooks in under 4 minutes per side without drying out.
Panko Is Non-Negotiable: Regular breadcrumbs create a dense coating. Japanese panko breadcrumbs have larger, flakier pieces that create the airy, extra-crispy texture that defines chicken Milanese.
Temperature Control: If your first cutlet browns too quickly, reduce heat to medium. The oil temperature drops each time you add chicken, so you may need to increase heat slightly between batches.
Fresh Is Best: This dish loses its magic within 30 minutes of cooking. Unlike chicken francese which holds well, chicken Milanese must be served immediately for maximum crispiness.
Nutrition Facts (Per Serving)
Calories: 485 | Protein: 42g | Carbohydrates: 31g | Fat: 21g | Fiber: 1g | Sodium: 720mg
Delicious Variations
Chicken Milanese alla Parmigiana: After frying, top each cutlet with marinara sauce and mozzarella. Broil for 2-3 minutes until cheese melts and bubbles. This bridges the gap between classic Milanese and the beloved Parmesan version.
Lemon Herb Chicken Milanese: Add 2 tablespoons of fresh chopped parsley and 1 tablespoon of lemon zest to your breadcrumb mixture. The citrus brightens the entire dish and adds restaurant-quality flavor.
Spicy Chicken Milanese: Mix ½ teaspoon cayenne pepper and 1 teaspoon red pepper flakes into the breadcrumbs. This adds a gentle heat that doesn’t overpower the delicate chicken.
Gluten-Free Chicken Milanese: Replace flour with cornstarch and panko with gluten-free breadcrumbs. The texture stays remarkably crispy using this simple substitution.
Storage & Reheating
Refrigeration: Store cooled cutlets in an airtight container with parchment paper between layers. They’ll keep for 3 days, though the coating softens significantly.
Reheating for Best Results: Place cutlets on a wire rack over a baking sheet. Reheat at 375°F for 8-10 minutes until heated through. This method revives some crispiness, though nothing beats fresh.
Freezing: Bread the cutlets but don’t cook them. Freeze flat on a baking sheet, then transfer to freezer bags for up to 3 months. Cook from frozen, adding 2-3 minutes per side.
Not Recommended: Microwaving turns the crispy coating into a soggy, rubbery mess. Always use the oven method for leftovers.
Troubleshooting Common Problems
Problem 1: Breading Falls Off During Cooking Your chicken was too wet or you didn’t let the breaded cutlets rest. Pat cutlets completely dry before flouring and always rest breaded chicken for 5 minutes before frying.
Problem 2: Coating Burns Before Chicken Cooks Through Your oil is too hot or your cutlets are too thick. Reduce heat to medium and make sure chicken is pounded to ¼-inch thickness for even cooking.
Problem 3: Soggy, Greasy Coating Oil temperature was too low or you crowded the pan. Use a thermometer to maintain 350°F and cook only 2 cutlets at a time in a 12-inch skillet.
Problem 4: Dry, Tough Chicken You overcooked the cutlets or didn’t pound them thin enough. Thin cutlets need only 3-4 minutes per side—use a meat thermometer to check for 165°F.
Problem 5: Bland Flavor You under-seasoned the chicken or skipped the Parmesan. Season cutlets generously before breading and don’t skip the cheese in the breadcrumb mixture—it adds crucial flavor.
Equipment Essentials
- Meat mallet or heavy skillet (for pounding chicken)
- Sharp chef’s knife (for butterflying breasts)
- Three shallow bowls or pie plates (for breading station)
- 12-inch heavy-bottomed skillet (for even heat distribution)
- Wire cooling rack with baking sheet (keeps coating crispy)
- Kitchen tongs or fish spatula (for easy flipping)
- Instant-read thermometer (ensures proper doneness)
- Plastic wrap or parchment paper (for pounding chicken)
Shopping List
Meat Counter
- 2 large boneless, skinless chicken breasts (1.5 lbs total)
Dairy Section
- Large eggs (3)
- Whole milk (2 tablespoons)
- Parmesan cheese, block for grating (2 oz)
- Unsalted butter (2 tablespoons)
Pantry/Baking Aisle
- All-purpose flour (¾ cup)
- Panko breadcrumbs (2 cups)
- Vegetable oil (½ cup)
- Dried oregano (1 teaspoon)
- Garlic powder (½ teaspoon)
- Kosher salt
- Black pepper
Produce Section
- Fresh lemons (1)
- Arugula – optional (4 cups)
- Cherry tomatoes – optional (1 cup)
Success Secrets
1. Temperature Mastery: The difference between restaurant-quality and homemade chicken Milanese comes down to oil temperature. Maintain 350°F consistently—use a thermometer until you can judge by sight and sound.
2. The Double-Dip Trick: For an extra-thick, crunchy coating, dip cutlets in egg and breadcrumbs twice. This creates an almost armor-like crust that stays crispy longer.
3. Cheese Quality Counts: Pre-grated Parmesan contains anti-caking agents that prevent proper browning. Always grate fresh Parmesan from a block for superior flavor and texture.
4. Resting Is Critical: Let your cooked chicken Milanese rest on the wire rack for 2 minutes before serving. This allows steam to escape from the bottom while keeping the top crispy.
5. The Butter Finish: For next-level flavor, add a fresh tablespoon of butter to the pan in the last 30 seconds of cooking each batch. Spoon this foaming butter over the top of the cutlets—this Italian technique adds incredible richness.
Chicken Milanese proves that simple ingredients can create extraordinary results. The contrast between the shattering-crispy golden coating and the tender, juicy chicken inside makes every bite special. Serve it tonight and watch it become your new weeknight favorite!