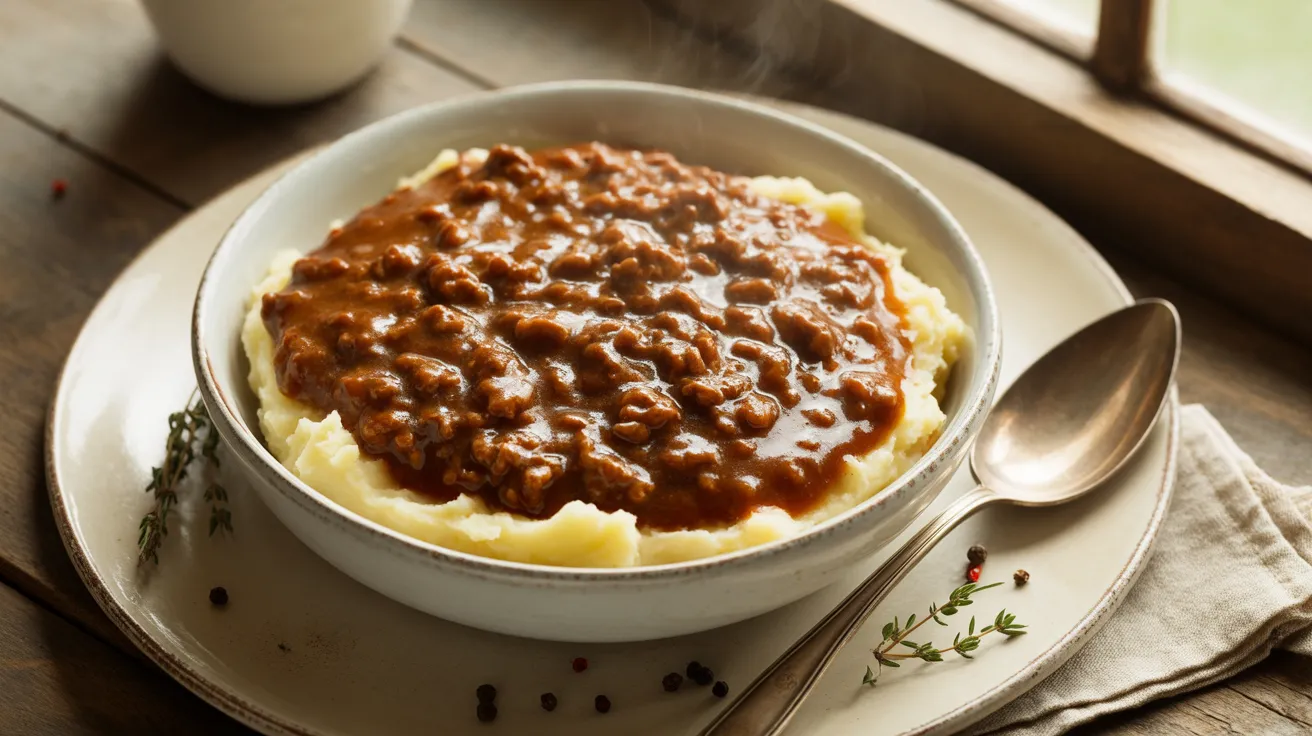
This ground beef brown gravy transforms simple ingredients into pure comfort. I’ve perfected this ground beef brown gravy over years of Sunday dinners, and it’s become my family’s most-requested recipe—rich, savory, and ready faster than ordering takeout.
SERVES: 4 | PREP: 10 MIN | COOK: 20 MIN | TOTAL: 30 MIN
Ingredients
Main Components
| Ingredient | Amount | Notes |
|---|---|---|
| Ground beef | 1 lb (80/20) | Higher fat = richer gravy |
| Yellow onion | 1 medium, diced | About 1 cup |
| Garlic | 3 cloves, minced | Fresh only |
| All-purpose flour | ¼ cup | For thickening |
Liquids & Seasonings
| Ingredient | Amount | Notes |
|---|---|---|
| Beef broth | 2½ cups | Low-sodium preferred |
| Worcestershire sauce | 2 tablespoons | Adds depth |
| Soy sauce | 1 tablespoon | Secret umami boost |
| Salt | 1 teaspoon | Adjust to taste |
| Black pepper | ½ teaspoon | Freshly ground |
| Dried thyme | ½ teaspoon | Optional but recommended |
| Vegetable oil | 1 tablespoon | If needed |
Step-by-Step Instructions
Phase 1: Building the Flavor Base (0-8 minutes)
Step 1: Heat your largest skillet over medium-high heat for 2 minutes.
You’ll know it’s ready when a drop of water sizzles immediately. This hot start creates better browning, which means deeper flavor in your ground beef brown gravy.
Step 2: Add the 1 lb ground beef to the hot skillet.
Break it into large chunks with a wooden spoon. Don’t stir yet—let it sit undisturbed for 2-3 minutes.
Step 3: Watch for the bottom to turn deep brown (not gray).
This is called the Maillard reaction. It’s where all the savory flavor comes from. Gray meat = bland gravy. Brown meat = delicious gravy.
Step 4: Break up the meat into smaller crumbles.
Use your spoon to chop larger pieces into pea-sized bits. Continue cooking for another 3-4 minutes, stirring occasionally. The meat should be 90% cooked through.
Step 5: Add the diced onion directly to the beef.
Stir well and cook for 3 minutes until the onion turns translucent. The onion will release moisture that helps scrape up all those tasty brown bits stuck to the pan.
Step 6: Add the minced garlic.
Stir constantly for 30 seconds. Garlic burns quickly, so keep it moving. You’ll smell an amazing aroma when it’s ready.
Phase 2: Creating the Roux (8-12 minutes)
Step 7: Reduce heat to medium.
This is important. Too hot and your flour will burn. Too cool and it won’t cook properly.
Step 8: Sprinkle the ¼ cup flour evenly over the meat mixture.
Stir immediately and constantly for 2 minutes. You’re making a roux, which will thicken your gravy. The mixture will look pasty and clumpy—that’s perfect.
Step 9: Keep stirring until the flour turns light golden brown.
This takes about 2 minutes. The raw flour smell will disappear and you’ll notice a nutty aroma. Don’t skip this step—raw flour tastes chalky.
Phase 3: Building the Ground Beef Brown Gravy (12-20 minutes)
Step 10: Add ½ cup beef broth first.
Pour it slowly while stirring vigorously. The mixture will seize up and look lumpy. Don’t panic—this is normal.
Step 11: Add the remaining 2 cups beef broth gradually.
Pour in ½ cup at a time, stirring constantly between additions. Watch the lumps disappear as each addition loosens the mixture. This gradual method prevents lumps in your final gravy.
Step 12: Add the Worcestershire sauce, soy sauce, salt, pepper, and thyme.
Stir well. The soy sauce is my secret ingredient—it adds a savory depth without making the gravy taste Asian.
Step 13: Increase heat to medium-high and bring to a boil.
You’ll see large bubbles breaking the surface. This should take 2-3 minutes.
Step 14: Reduce heat to medium-low and simmer for 8-10 minutes.
Stir every 2 minutes to prevent sticking. The gravy will thicken noticeably. It should coat the back of a spoon when ready.
Step 15: Taste and adjust seasoning.
Add more salt if needed (¼ teaspoon at a time). Remember, you can always add more but can’t take it away.
Step 16: Remove from heat and let rest for 2 minutes.
The gravy will thicken slightly more as it cools. If it’s too thick, add broth 2 tablespoons at a time. Too thin? Simmer another 3-4 minutes.
Chef’s Notes
Meat Matters: I always use 80/20 ground beef for this recipe. The fat content creates a richer ground beef brown gravy. Leaner meat (90/10) makes thin, less flavorful gravy. If you must use lean beef, add 2 tablespoons of butter in Step 2.
Roux Rules: The flour-cooking step isn’t optional. Raw flour creates a pasty, unpleasant texture. That golden-brown color and nutty smell tell you the starches have activated properly. Rush this step and you’ll taste the difference.
Consistency Control: Your gravy should coat a spoon but still pour easily. Think thick pancake batter. It’ll thicken more as it sits, so err on the slightly-thin side while cooking.
Make-Ahead Magic: This ground beef brown gravy actually tastes better the next day. The flavors meld overnight. Reheat gently and add a splash of broth to restore the perfect consistency.
Nutrition Information (Per Serving)
- Calories: 285
- Protein: 24g
- Carbohydrates: 11g
- Fat: 16g
- Fiber: 1g
- Sodium: 780mg
Delicious Variations
Mexican-Style Ground Beef Gravy
Add 1 tablespoon chili powder and 1 teaspoon cumin with the other seasonings. Swap half the beef broth for tomato sauce. Perfect over rice or with warm tortillas. If you love bold flavors, try this ground beef and chorizo tacos recipe for your next taco night.
Mushroom Lover’s Version
Add 8 oz sliced mushrooms with the onions in Step 5. They’ll release moisture and add earthy depth. Use half beef broth and half red wine for restaurant-quality flavor.
Spicy Comfort Gravy
Mix in 1 teaspoon red pepper flakes and ½ teaspoon cayenne with your seasonings. Add 2 tablespoons tomato paste in Step 12 for a slight tang that balances the heat.
Hearty Chili Gravy
Transform this into a thicker, chili-style topping by adding 1 can (15 oz) kidney beans and ½ cup diced tomatoes in Step 12. Simmer for 15 minutes instead of 10. This works beautifully over baked potatoes or as a base for this ground beef chili in a Dutch oven that feeds a crowd.
Storage & Reheating
Refrigerator Storage
Transfer cooled gravy to an airtight container within 2 hours of cooking. It’ll keep for 4-5 days in the fridge. The gravy thickens when cold—totally normal.
Freezer Storage
Freeze in 2-cup portions using freezer bags. Lay them flat for easy stacking. Frozen ground beef brown gravy lasts 3 months. Label with the date.
Reheating Instructions
Stovetop (best method): Pour into a saucepan over medium-low heat. Add ¼ cup beef broth per 2 cups of gravy. Stir frequently for 8-10 minutes until heated through.
Microwave (quick method): Use a microwave-safe bowl. Heat on 50% power for 2 minutes, stir, then heat in 1-minute intervals. Add broth as needed to thin.

Troubleshooting Common Problems
Problem 1: Lumpy Gravy
Solution: This happens when you add liquid too fast. Pour the lumpy gravy through a fine-mesh strainer into a clean pot. Press the lumps through with a spoon. Reheat gently. Prevention: Add broth gradually and stir constantly.
Problem 2: Gravy Too Thin
Solution: Mix 1 tablespoon flour with 2 tablespoons cold water in a small bowl. Whisk until smooth. Pour into the simmering gravy while stirring. Cook for 3-4 minutes. Never add dry flour directly—it creates instant lumps.
Problem 3: Gravy Too Thick
Solution: Whisk in warm beef broth 2 tablespoons at a time. Stir well between additions. The gravy should loosen immediately. Reheat gently for 2 minutes to blend flavors.
Problem 4: Burnt Flour Taste
Solution: Unfortunately, there’s no fix for burnt roux. You’ll need to start over. Prevention: Keep heat at medium (not medium-high) during the flour-cooking stage. Stir constantly and watch for light golden brown—not dark brown.
Problem 5: Bland Flavor
Solution: Add 1 teaspoon Worcestershire sauce, ½ teaspoon salt, and a pinch of black pepper. Stir and simmer for 2 minutes. Taste again. Sometimes a splash of soy sauce (½ teaspoon) works magic. Prevention: Don’t skimp on seasonings, and always use quality beef broth.
Equipment Essentials
- Large skillet (12-inch minimum) – Cast iron works beautifully
- Wooden spoon or heat-resistant spatula
- Whisk – For smooth gravy
- Measuring cups (dry and liquid)
- Measuring spoons
- Cutting board and sharp knife
- Small bowl – For mixing flour slurry if needed
- Fine-mesh strainer – Just in case of lumps
Shopping List by Store Section
Meat Counter
- 1 lb ground beef (80/20)
Produce Section
- 1 medium yellow onion
- 1 head garlic (need 3 cloves)
Pantry Aisle
- All-purpose flour
- Beef broth (low-sodium, 2½ cups)
- Worcestershire sauce
- Soy sauce
- Dried thyme
Spices (if needed)
- Salt
- Black pepper
Oils Section
- Vegetable oil
5 Success Secrets from My Kitchen
1. Don’t Drain the Fat
Keep about 2 tablespoons of fat in the pan after browning the beef. This is liquid gold for flavor. Only drain if there’s more than 3 tablespoons of grease pooling in your skillet.
2. Room Temperature Ingredients
Let your beef sit out for 15 minutes before cooking. Cold meat from the fridge drops your pan temperature, causing steaming instead of browning. Brown = flavor.
3. The Wooden Spoon Test
Your gravy is perfect when it coats a wooden spoon and you can draw a line through it with your finger that doesn’t immediately run back together. This happens around 8-10 minutes of simmering.
4. Season in Layers
Add half your salt with the onions (Step 5) and the rest at the end (Step 15). This builds deeper flavor than adding it all at once. Professional chefs call this “seasoning in layers.”
5. The Resting Period Matters
Those 2 minutes of resting in Step 16 aren’t optional. The gravy continues thickening, and the flavors settle. Skipping this step often means watery gravy on the plate.
This ground beef brown gravy has saved countless weeknight dinners at my house. Pour it over mashed potatoes, egg noodles, biscuits, or rice. Sometimes I make a double batch just to have extras in the freezer. There’s something magical about homemade gravy that no store-bought jar can match.
The best part? You probably have most of these ingredients already. No fancy techniques or hard-to-find items—just honest, delicious comfort food that comes together in 30 minutes.