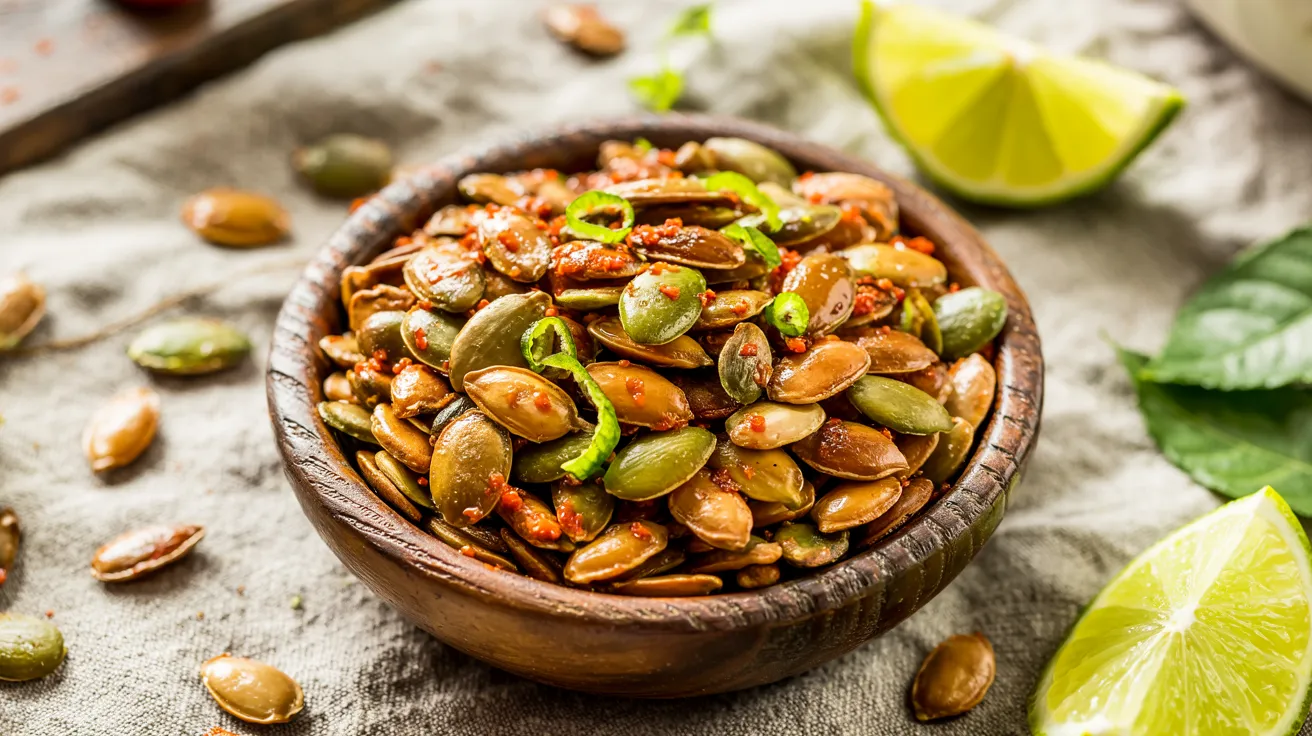
Key Takeaways:
- Transform leftover Halloween pumpkin seeds into a zesty, addictive snack in under 30 minutes
- Perfect balance of heat, tang and salt makes these Spicy Chili Lime Roasted Pumpkin Seeds impossible to stop eating
- Our fool-proof beginner method ensures perfectly crispy seeds every time
- Customize heat levels to suit your family’s preference (kid-friendly options included)
Prep Time: 20 minutes Cook Time: 20-25 minutes Total Time: 45 minutes Servings: 4
Turn Halloween Leftovers Into Your New Favorite Snack
Are you tired of throwing away those pumpkin seeds after carving?
Don’t toss them! With just a few simple ingredients, you can transform those forgotten seeds into a crave-worthy Spicy Chili Lime Roasted Pumpkin Seeds snack that’s both nutritious and addictive.
This recipe delivers the perfect balance of heat from chili powder, tanginess from fresh lime, and just enough salt to keep you reaching for more. Even better? The whole process takes less than 30 minutes of active time.
These Spicy Chili Lime Roasted Pumpkin Seeds make an excellent protein-packed snack for busy days, a crunchy topping for soups and salads, or a crowd-pleasing appetizer for your next gathering. Forget store-bought snacks – this homemade version delivers more flavor with less processing.
Let’s turn those pumpkin seeds into something spectacular!
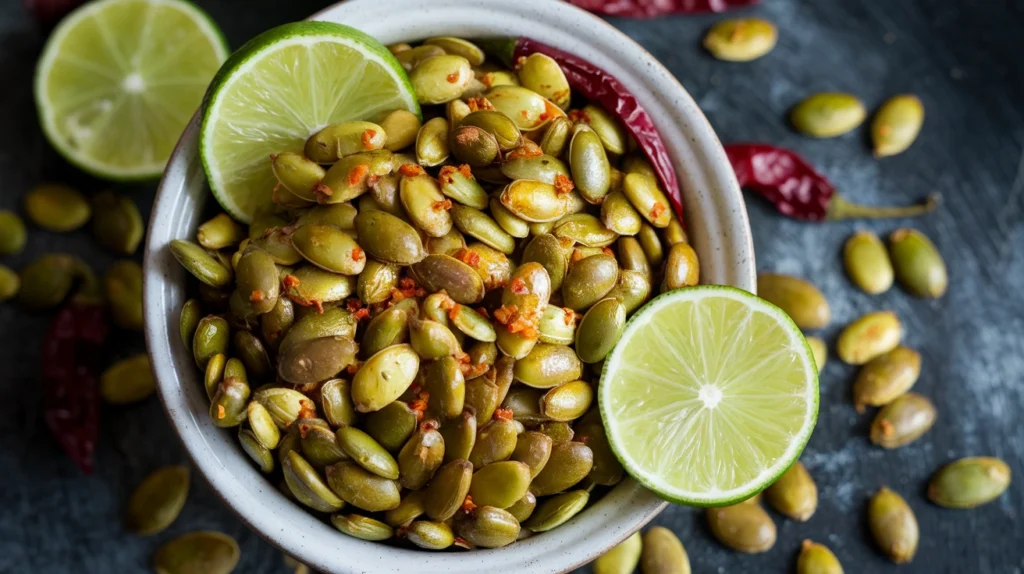
Nutrition Facts: Why Choose Spicy Chili Lime Roasted Pumpkin Seeds?
Before we dive into cooking, let’s look at why these zesty, crunchy treats deserve a spot in your snack rotation:
| Nutrient | Amount per 1/4 cup serving | % Daily Value |
|---|---|---|
| Calories | 180 | 9% |
| Protein | 9g | 18% |
| Fiber | 2g | 7% |
| Iron | 3mg | 16% |
| Magnesium | 190mg | 45% |
| Zinc | 2.5mg | 23% |
| Fat | 14g (mostly healthy unsaturated) | 18% |
Compared to other popular snacks:
| Snack (1oz serving) | Calories | Protein | Healthy Fats |
|---|---|---|---|
| Spicy Pumpkin Seeds | 160 | 8g | 12g |
| Potato Chips | 160 | 2g | 1g |
| Mixed Nuts | 170 | 5g | 15g |
| Pretzels | 110 | 3g | 1g |
What You’ll Need: Equipment & Ingredients for Spicy Chili Lime Roasted Pumpkin Seeds
Ingredients List (Serves 4)
| Ingredient | Amount | Notes |
|---|---|---|
| Raw pumpkin seeds (from 1-2 medium pumpkins) | 2 cups | Fresh from pumpkin, not store-bought |
| Olive oil | 1 tablespoon | Extra virgin preferred |
| Fresh lime juice | 2 tablespoons (about 1 medium lime) | Plus zest for extra flavor |
| Lime zest | 1 teaspoon | From organic lime if possible |
| Chili powder | 2 teaspoons | Adjust to taste |
| Ground cumin | 1/2 teaspoon | For earthy depth |
| Garlic powder | 1/2 teaspoon | Not garlic salt |
| Salt | 3/4 teaspoon | Kosher or sea salt preferred |
| Sugar | 1/2 teaspoon | Balances heat and acidity |
| Cayenne pepper (optional) | 1/4 teaspoon | For extra heat lovers |
Kitchen Tools
| Tool | Purpose |
|---|---|
| Colander/strainer | For cleaning seeds |
| Large bowl | For cleaning and mixing |
| Baking sheet | For roasting seeds |
| Parchment paper | Prevents sticking |
| Small mixing bowl | For spice mixture |
| Measuring spoons | For accurate seasoning |
| Zester/microplane | For lime zest |
| Citrus juicer (optional) | For extracting lime juice |
| Rubber spatula | For mixing and spreading seeds |
| Paper towels | For drying seeds |
Possible Substitutions
- Oil options: Avocado oil or melted butter can replace olive oil
- Lime alternatives: Lemon juice works in a pinch (flavor will be different but still good)
- Heat adjustments: Smoked paprika for a milder, smokier flavor or ancho chili powder for medium heat
- Sugar alternatives: Honey or maple syrup (use half the amount)
- Spice alternatives: Taco seasoning (2 teaspoons) can replace individual spices for a quick shortcut
Super Detailed Step-by-Step Instructions For Perfect Spicy Chili Lime Roasted Pumpkin Seeds
Preparation Phase (15 minutes)
Step 1: Preheat your oven
- Turn oven on to 300°F (150°C)
- Allow at least 10 minutes for it to fully preheat
- Use the middle rack position for most even heat distribution
- WHY THIS MATTERS: Lower temperature ensures the seeds roast evenly without burning the outsides before the insides get crispy
Step 2: Prepare your baking sheet
- Take out a rimmed baking sheet (the rim keeps seeds from sliding off)
- Cut a piece of parchment paper to fit the sheet
- Place parchment on sheet, making sure it lies flat
- BEGINNER TIP: If parchment curls up, crumple it lightly first, then smooth it out
- WHY THIS MATTERS: Parchment prevents seeds from sticking and makes cleanup much easier
Step 3: Extract seeds from pumpkin
- Place pumpkin on stable surface with newspaper or towel underneath
- Cut open the top of your pumpkin in a circle around the stem
- Remove the “lid” by lifting the stem
- Use a large metal spoon or ice cream scoop to scrape inside walls
- Scoop all seeds and stringy pulp into a large bowl
- BEGINNER TIP: A metal spoon with a slightly sharp edge works better than plastic
- SAFETY NOTE: Always cut away from your body and use caution with sharp knives
Step 4: Clean the seeds thoroughly (this is critical!)
- Fill the bowl containing seeds and pulp with room temperature water
- Use your fingers to gently separate seeds from stringy pulp
- Seeds will float to the top, pulp will sink to bottom
- Pick out clean seeds and transfer to colander/strainer
- Remove any large pieces of pulp you see
- Rinse seeds under cold running water, using your fingers to rub them clean
- Continue rinsing and rubbing until no slime remains on seeds
- BEGINNER TIP: Change water 2-3 times if needed for easier separation
- WHY THIS MATTERS: Any pulp left on seeds will burn during roasting and create bitter flavors
Step 5: Dry the seeds completely
- Shake colander vigorously to remove excess water
- Spread seeds on paper towels or clean kitchen towel
- Pat dry with additional paper towels
- Let air dry for 10-15 minutes, patting occasionally with fresh towels
- Seeds should feel dry to the touch, not slippery or wet
- BEGINNER TIP: Change paper towels if they become too wet
- WHY THIS MATTERS: Moisture is the enemy of crispiness! Wet seeds will steam instead of roast
Step 6: Make the spice mixture
- Take out a small bowl for mixing spices
- Measure each spice carefully using measuring spoons:
- 2 teaspoons chili powder
- 1/2 teaspoon ground cumin
- 1/2 teaspoon garlic powder
- 3/4 teaspoon salt
- 1/2 teaspoon sugar
- 1/4 teaspoon cayenne (optional, for extra heat)
- Mix thoroughly with a fork or small whisk until completely combined
- BEGINNER TIP: Mix on white paper to see if spices are evenly distributed
- WHY THIS MATTERS: Mixing spices before adding to seeds ensures even flavor distribution
Seasoning Phase (5 minutes)
Step 7: Prepare the lime ingredients
- Wash lime thoroughly under running water
- Pat dry with paper towel
- Using microplane or zester, gently grate just the green outer part of lime
- Continue until you have 1 teaspoon of zest, being careful not to include white pith
- Cut lime in half crosswise
- Squeeze each half to extract juice (should yield about 2 tablespoons)
- Remove any seeds from juice with spoon or fork
- BEGINNER TIP: Roll lime firmly on counter before cutting to release more juice
- WHY THIS MATTERS: Fresh lime zest contains aromatic oils that bring bright flavor
Step 8: Oil and season the seeds
- Transfer completely dried seeds to a clean, dry bowl
- Drizzle with 1 tablespoon olive oil
- Use hands or spatula to toss until every seed is lightly coated
- Add 2 tablespoons fresh lime juice and toss again
- Sprinkle prepared spice mixture over seeds
- Add teaspoon of lime zest
- Toss thoroughly for at least 30 seconds until every seed is evenly coated
- BEGINNER TIP: Use clean hands for most even coating, or two spoons if preferred
- WHY THIS MATTERS: Even coating ensures consistent flavor in every bite
Step 9: Taste test and adjust (optional)
- Take one seed and taste it for seasoning
- If too bland, add a pinch more salt or chili powder
- If too spicy, add a pinch more sugar to balance
- BEGINNER TIP: Remember flavors intensify when roasted, so slight adjustments are better
Cooking Phase (20-25 minutes)
Step 10: Arrange seeds on baking sheet
- Pour seasoned seeds onto prepared baking sheet
- Use rubber spatula to spread into single layer
- Ensure no seeds are stacked on top of each other
- Leave a little space between seeds if possible
- BEGINNER TIP: If seeds don’t fit in single layer, use two baking sheets rather than crowding
- WHY THIS MATTERS: Overcrowding causes uneven cooking and steaming instead of roasting
Step 11: Begin roasting
- Place baking sheet on middle rack of preheated oven
- Set timer for 10 minutes
- BEGINNER TIP: Write down start time as backup to timer
- WHY THIS MATTERS: Consistent timing prevents burning
Step 12: First check and stir
- After 10 minutes, carefully remove baking sheet using oven mitts
- Gently stir and flip seeds using rubber spatula or wooden spoon
- Spread back into single layer
- Return to oven
- Set timer for 5 minutes
- BEGINNER TIP: Place hot tray on heat-safe surface, not directly on counter
- WHY THIS MATTERS: Stirring ensures even browning on all sides
Step 13: Second check
- After 5 more minutes (15 minutes total), check seeds again
- Look for light golden brown color
- Gently stir once more
- Return to oven
- Set timer for 5 minutes
- BEGINNER TIP: Seeds should smell fragrant but not burnt
- WHY THIS MATTERS: Final cooking time varies by oven and seed size
Step 14: Final check
- After 5 more minutes (20 minutes total), check seeds for doneness
- They should be golden brown, not dark brown
- Remove one seed, let cool for 30 seconds, then taste
- Seed should be crispy, not chewy
- If still chewy, return to oven for 3-5 more minutes
- BEGINNER TIP: Seeds will continue to crisp as they cool
- WHY THIS MATTERS: Perfect Spicy Chili Lime Roasted Pumpkin Seeds should be crispy throughout
Finishing Phase (5 minutes)
Step 15: Cool completely
- Once seeds are done, remove baking sheet from oven
- Place on cooling rack or heat-safe surface
- Allow seeds to cool on baking sheet for at least 5 minutes
- Seeds will continue to crisp as they cool
- BEGINNER TIP: Don’t rush this step – patience leads to perfect crispness
- WHY THIS MATTERS: Hot seeds are still soft; they need to cool to reach final crispy texture
Step 16: Final flavor boost (optional but recommended)
- Once seeds are just warm (not hot), squeeze additional teaspoon of fresh lime juice over them
- Add tiny pinch of salt if desired
- Toss gently to combine
- BEGINNER TIP: This final touch brightens the flavor significantly
- WHY THIS MATTERS: Heat dulls some flavors, so adding a final touch of lime makes the Spicy Chili Lime Roasted Pumpkin Seeds taste fresher
Step 17: Final cooling and storage
- Allow seeds to cool completely before storing (about 30 minutes total)
- Once completely cool, transfer to serving bowl or storage container
- BEGINNER TIP: Warm seeds in closed container will create condensation and soften
- WHY THIS MATTERS: Proper cooling ensures your Spicy Chili Lime Roasted Pumpkin Seeds stay crispy for days
Troubleshooting: Common Issues & Solutions for Spicy Chili Lime Roasted Pumpkin Seeds
Problem: Seeds aren’t crispy after cooling
Solution: Return to oven for additional 5-minute intervals at 250°F until crispy. You may have had excess moisture on seeds before roasting. Next time, ensure seeds are completely dry before seasoning.
Problem: Seeds taste bitter
Solution: You may have roasted at too high temperature or left pulp on seeds. Next time, reduce heat to 275°F, extend cooking time by 5-10 minutes, and clean seeds more thoroughly.
Problem: Too spicy!
Solution: Mix in plain roasted pumpkin seeds to dilute heat, or serve with yogurt dip to cool the palate. Next time, reduce or omit cayenne pepper and cut chili powder in half.
Problem: Seeds burned before getting crispy
Solution: Your oven may run hot. Next time, reduce temperature by 25°F, place rack in middle position, and check seeds every 5 minutes.
Problem: Seasoning doesn’t stick to seeds
Solution: Make sure seeds are coated with oil before adding spices. The oil helps spices adhere. Toss longer to ensure even coating.
Problem: Seeds too salty
Solution: Mix with a batch of unseasoned roasted seeds. Next time, start with half the salt and add more after tasting.
Variations & Substitutions for Spicy Chili Lime Roasted Pumpkin Seeds
Want to try something different? Here are some flavor variations using the same cooking method:
- Sweet & Spicy: Add 1 tablespoon brown sugar and 1/4 teaspoon cinnamon to the spice mix for a dessert-like treat
- Ranch Style: Replace spice mix with 1 tablespoon dry ranch seasoning and 1/2 teaspoon dried dill for a classic American flavor
- Italian Herb: Use 1 teaspoon each of dried oregano, basil, and grated parmesan instead of chili-lime seasonings for a Mediterranean twist
- BBQ Flavor: Swap chili-lime seasonings for 1 tablespoon BBQ dry rub (pairs wonderfully with our smoked chili recipes)
- Curry Twist: Replace chili powder with 1 tablespoon curry powder for an Indian-inspired treat that will surprise your taste buds
Storage & Reheating Your Spicy Chili Lime Roasted Pumpkin Seeds
For maximum crispiness, store your Spicy Chili Lime Roasted Pumpkin Seeds properly:
- Cool completely before storing to prevent condensation (at least 30 minutes)
- Store at room temperature in an airtight container for up to 1 week
- Refrigerator storage extends freshness to 2-3 weeks
- Freezer storage works for up to 3 months (thaw at room temperature)
If seeds lose crispness:
- Preheat oven to 250°F
- Spread seeds on baking sheet in single layer
- Heat for 5-7 minutes until crisp again
- Cool completely before returning to storage container
- BEGINNER TIP: Don’t microwave to reheat – they’ll get chewy instead of crispy
Safety Notes & Tips for Spicy Chili Lime Roasted Pumpkin Seeds
- Allergy warning: Pumpkin seeds may trigger reactions in people with nut allergies
- Dental consideration: Seeds are hard and may not be suitable for young children or people with dental issues
- Low-sodium needs: Reduce salt to 1/4 teaspoon if watching sodium intake
- Heat sensitivity: The cayenne pepper is optional – leave it out for milder flavor
- Kitchen safety: Always use oven mitts when handling hot baking sheets
- Child safety: Adult supervision needed when children help with recipe
Pro Tips For Perfect Spicy Chili Lime Roasted Pumpkin Seeds Every Time
- Don’t skip the drying step – moisture is the enemy of crispiness
- Season seeds while still slightly damp for better spice adhesion
- Lower oven temperature works better than high heat for even cooking
- Make a double batch and freeze half for quick snacking later
- Save your seasoning mix in a small jar for next time or to sprinkle on popcorn
- Use fresh lime juice, not bottled, for brightest flavor
- Test one seed for doneness rather than risking the whole batch
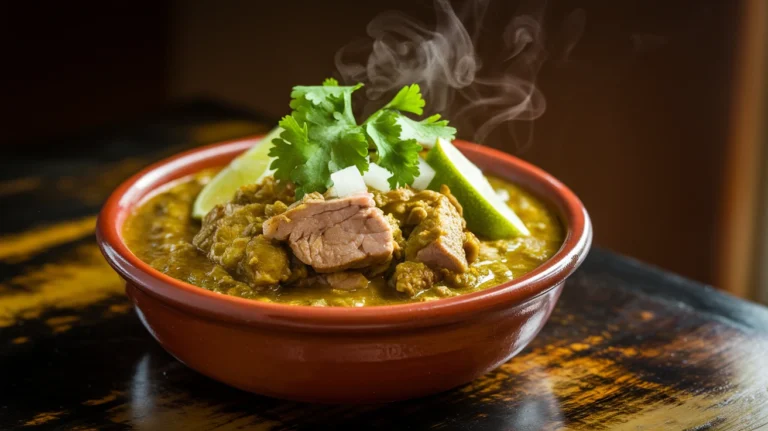
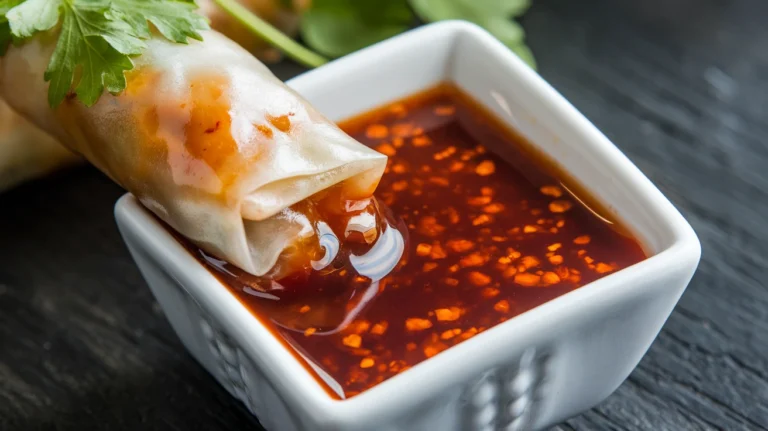
Looking for something to pair with your Spicy Chili Lime Roasted Pumpkin Seeds? Try our homemade sweet chili sauce for dipping, or sprinkle them on top of our hearty beef and dark beer chili for the perfect crunchy contrast!
Remember, these Spicy Chili Lime Roasted Pumpkin Seeds aren’t just a snack – they’re a conversation starter! Your friends will never believe you made something this addictive from Halloween pumpkin scraps.