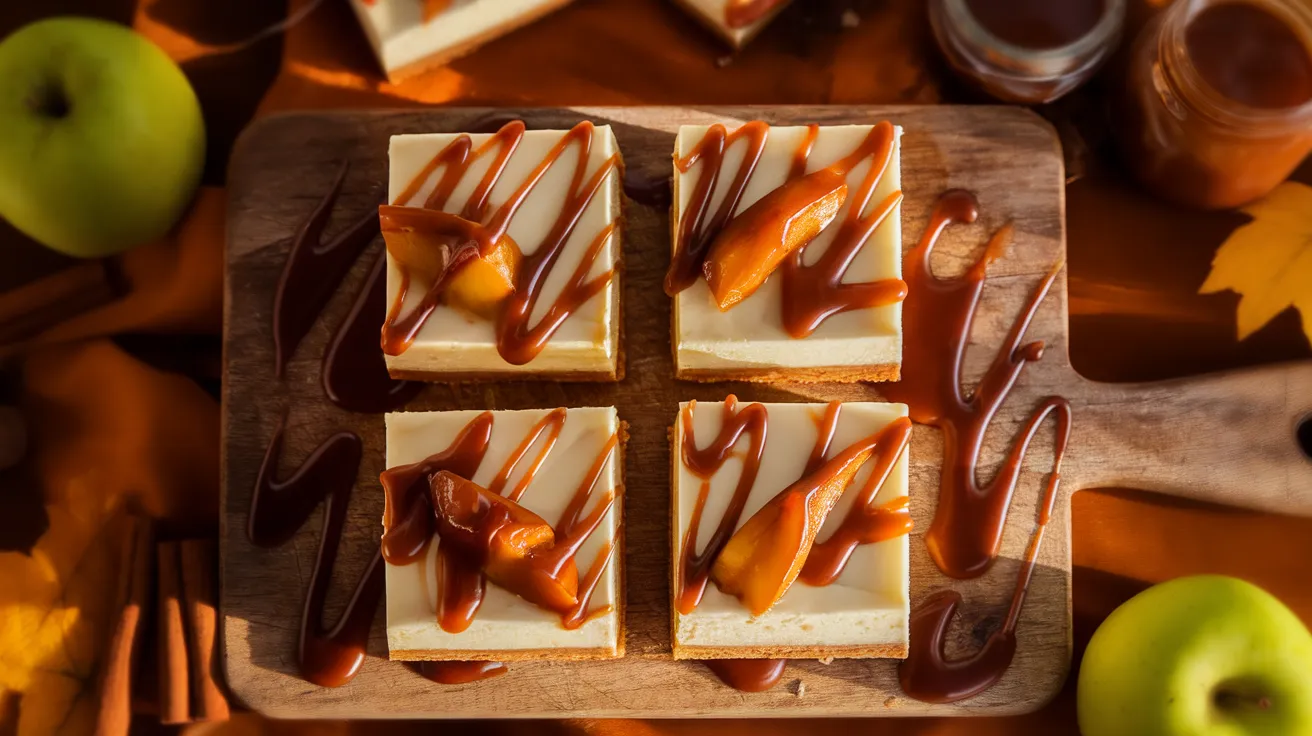
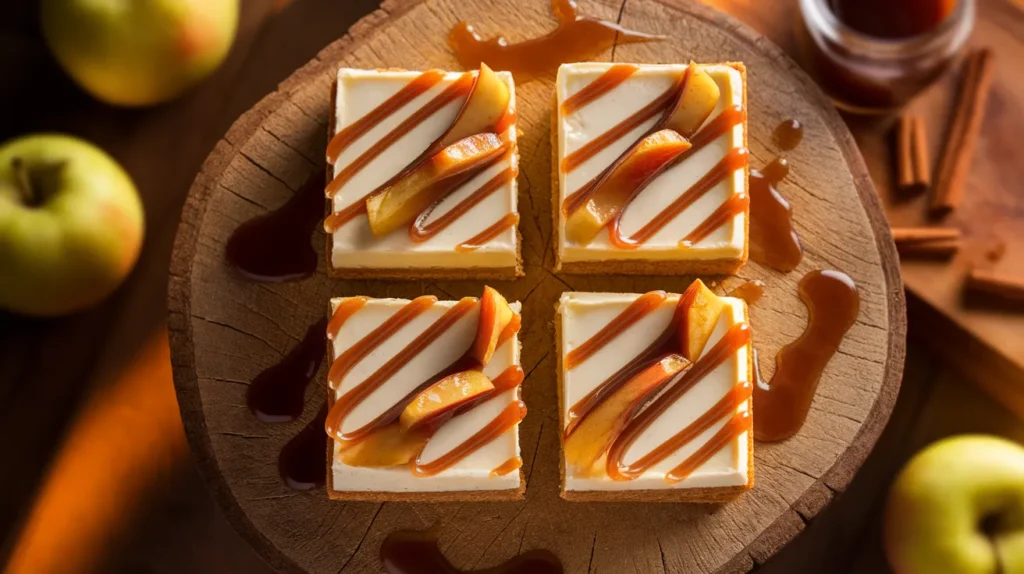
These Caramel Apple Cheesecake Bars combine everything you love about fall baking into one show-stopping dessert. With a buttery graham cracker crust, velvety cream cheese filling, cinnamon-spiced apples, and luscious caramel drizzle, these Caramel Apple Cheesecake Bars deliver bakery-quality results right from your home kitchen.
SERVES: 4 | PREP: 25 MIN | COOK: 45 MIN | TOTAL: 70 MIN (plus 4 hours chilling)
What Makes These Bars Special
Let me tell you why this recipe changed my dessert game forever.
The magic happens in three distinct layers. You’ve got that crispy-crunchy base holding everything together, a silky cheesecake middle that melts on your tongue, and tender apple pieces that taste like autumn in every bite.
The caramel sauce brings it all home with that sweet-salty finish.
Here’s what sets these apart from regular cheesecake. They’re portable, way easier to serve at parties, and you don’t need a fancy springform pan or water bath.
Plus, they slice cleaner than traditional round cheesecakes, which means picture-perfect portions every single time.
Ingredients You’ll Need
For the Crust
| Ingredient | Amount |
|---|---|
| Graham cracker crumbs | 1½ cups |
| Granulated sugar | 3 tablespoons |
| Unsalted butter, melted | 6 tablespoons |
| Ground cinnamon | ½ teaspoon |
For the Cheesecake Layer
| Ingredient | Amount |
|---|---|
| Cream cheese, softened | 16 ounces (2 blocks) |
| Granulated sugar | ½ cup |
| Large eggs | 2 |
| Vanilla extract | 1 teaspoon |
| Sour cream | ¼ cup |
| All-purpose flour | 2 tablespoons |
For the Apple Topping
| Ingredient | Amount |
|---|---|
| Granny Smith apples, peeled and diced | 2 medium |
| Light brown sugar | ¼ cup |
| Ground cinnamon | 1 teaspoon |
| Unsalted butter | 2 tablespoons |
| Lemon juice | 1 teaspoon |
For the Caramel Drizzle
| Ingredient | Amount |
|---|---|
| Caramel sauce | ½ cup (store-bought or homemade) |
Step-by-Step Instructions
Phase 1: Preparing Your Pan and Crust (10 minutes)
Step 1: Preheat your oven to 325°F and position the rack in the center.
This temperature is lower than most baking because cheesecake needs gentle, even heat to prevent cracks.
Step 2: Line an 8×8-inch baking pan with parchment paper, leaving overhang on two opposite sides.
The overhang acts as handles for easy lifting later—trust me, this saves so much frustration when you’re trying to cut perfect bars.
Step 3: In a medium mixing bowl, combine graham cracker crumbs, 3 tablespoons sugar, melted butter, and ½ teaspoon cinnamon.
Mix with a fork until the texture resembles wet sand. Every crumb should be coated with butter—dry spots will create a crumbly crust that falls apart.
Step 4: Pour the crumb mixture into your prepared pan and press firmly into an even layer using the bottom of a measuring cup.
Apply real pressure here. A loosely packed crust will crumble when you bite into the bars.
Step 5: Bake the crust for 8 minutes until it smells toasty and looks slightly darker around the edges.
Remove from oven and let it cool while you make the filling—this prevents the butter from melting when you add the cheesecake layer.
Phase 2: Creating the Cheesecake Filling (8 minutes)
Step 6: Place your softened cream cheese in a large bowl and beat with an electric mixer on medium speed for 2-3 minutes.
The cream cheese should look completely smooth with zero lumps. Those lumps won’t disappear during baking—they’ll create weird texture pockets in your finished bars.
Step 7: Add ½ cup sugar to the cream cheese and beat for another minute until fluffy and lighter in color.
You’re incorporating air here, which gives you that classic creamy cheesecake texture.
Step 8: Crack in your eggs one at a time, beating well after each addition on low speed.
Stop mixing as soon as each egg disappears into the batter. Overbeating after adding eggs creates too much air, which causes cracks during baking.
Step 9: Add vanilla extract, sour cream, and flour to the bowl, then mix on low speed just until combined—about 20 seconds.
The sour cream adds tanginess and keeps everything moist, while the flour gives structure so your bars hold their shape when sliced.
Step 10: Pour the cheesecake filling over your cooled crust and spread it into an even layer with a spatula.
Tap the pan gently on the counter 3-4 times to release any air bubbles trapped in the filling.
Phase 3: Cooking the Apple Topping (7 minutes)
Step 11: While your cheesecake layer sits, dice your peeled apples into ¼-inch pieces—small enough to soften quickly but large enough to maintain some texture.
Granny Smith apples are crucial here. Their tartness balances the sweet caramel and cheesecake, plus they hold their shape instead of turning to mush. If you’re looking for more apple dessert inspiration, check out this delicious apple crumb cake that uses similar flavor profiles.
Step 12: Melt 2 tablespoons butter in a medium skillet over medium heat, then add your diced apples.
Cook for 4-5 minutes, stirring occasionally, until the apples just start to soften. They should still have a slight bite—they’ll continue cooking in the oven.
Step 13: Sprinkle brown sugar and 1 teaspoon cinnamon over the apples, then add lemon juice.
Stir constantly for 1-2 minutes until the sugar melts and coats the apples in a glossy syrup. The lemon juice prevents browning and brightens the flavor.
Step 14: Remove the skillet from heat and let the apple mixture cool for 3 minutes.
Adding piping-hot apples directly to the cheesecake can create steam pockets and uneven baking.
Phase 4: Assembly and Baking (45 minutes)
Step 15: Spoon the cooled apple mixture evenly over the cheesecake layer, spreading gently to distribute without disturbing the filling underneath.
Leave a ¼-inch border around the edges—apples touching the pan sides can burn.
Step 16: Bake for 40-45 minutes until the edges are set but the center still has a slight jiggle (about 2 inches in diameter) when you gently shake the pan.
This jiggle is your friend. It means you’ve stopped baking at exactly the right moment—the residual heat will finish cooking the center as it cools.
Step 17: Turn off the oven, crack the door open about 4 inches, and let the bars cool inside for 30 minutes.
This gradual temperature change prevents the dreaded cheesecake crack that happens when you shock warm cheesecake with cold air.
Step 18: Remove from oven and cool completely at room temperature for 1 hour, then refrigerate for at least 4 hours or overnight.
Patience is non-negotiable here. Cutting into warm cheesecake bars will give you a gooey mess instead of clean slices.
Phase 5: Finishing Touches (5 minutes)
Step 19: Once fully chilled, use the parchment paper overhang to lift the entire block from the pan onto a cutting board.
Pro move: If the bars resist lifting, run a thin knife around the two sides without parchment to loosen them first.
Step 20: Warm your caramel sauce slightly (10-15 seconds in the microwave) until it’s pourable but not hot.
Drizzle over the top in a back-and-forth motion, letting it pool in some areas for visual interest.
Step 21: Use a sharp knife, wiped clean between each cut, to slice into 4 generous portions.
The secret to perfect cuts: Dip your knife in hot water, wipe it dry, then make one smooth slicing motion—no sawing back and forth.
Chef’s Notes
Temperature matters more than you think. Room temperature cream cheese blends smoothly without lumps, while cold cream cheese creates a grainy texture no amount of beating can fix. Set your cream cheese out 1-2 hours before starting, or microwave it in 10-second bursts (carefully!) until softened but not melted.
Apple variety changes everything. Granny Smith apples maintain their structure and provide tartness, but if you prefer sweeter bars, try mixing half Granny Smith with half Honeycrisp. Avoid Red Delicious or Gala—they turn to mush during cooking and make your Caramel Apple Cheesecake Bars watery.
Caramel quality makes or breaks the final result. Store-bought caramel works fine (I love Ghirardelli), but if you’re feeling ambitious, homemade salted caramel elevates these bars to restaurant-level. Just make sure it’s slightly runny—thick caramel won’t drizzle properly over the cold surface.
The overnight chill is your secret weapon. While 4 hours is the minimum, letting these Caramel Apple Cheesecake Bars sit overnight allows the flavors to marry and the texture to reach peak creaminess. They actually taste better on day two.
Nutrition Information (Per Serving)
| Nutrient | Amount |
|---|---|
| Calories | 485 |
| Protein | 8g |
| Carbohydrates | 52g |
| Fat | 28g |
| Fiber | 2g |
| Sugar | 38g |
Creative Variations
Pecan Praline Twist
Fold ½ cup chopped toasted pecans into your apple mixture and sprinkle another ¼ cup on top before baking. The nutty crunch adds amazing texture contrast and makes these bars feel even more indulgent.
Pumpkin Spice Version
Replace the apples with 1 cup pumpkin puree mixed with pumpkin pie spice. Swirl it into the cheesecake layer before baking for a fall dessert that combines two seasonal favorites. Speaking of seasonal apple treats, these apple snickerdoodle blondies offer another delicious way to use autumn’s best fruit.
Chocolate Lover’s Dream
Add ½ cup mini chocolate chips to your crust mixture and drizzle melted chocolate alongside the caramel. The chocolate-caramel-apple combination tastes like a gourmet candy bar in cheesecake form.
Streusel-Topped Decadence
Before baking, sprinkle a quick streusel (3 tablespoons each of butter, flour, and brown sugar mixed together) over the apple layer. It bakes into a crispy topping that adds another texture dimension.
Storage & Reheating
Refrigerator storage: Keep your Caramel Apple Cheesecake Bars covered in the pan or transfer to an airtight container. They’ll stay fresh for 5-6 days—the crust softens slightly over time, but the flavor actually improves.
Freezer instructions: Wrap individual bars tightly in plastic wrap, then aluminum foil. Freeze for up to 3 months. Thaw overnight in the refrigerator before serving—never at room temperature, as this creates condensation that makes the bars soggy.
Make-ahead strategy: Bake these bars completely up to 3 days before you need them. Add the caramel drizzle just before serving to keep it glossy and beautiful. This makes them perfect for stress-free entertaining.
Important note: Don’t leave these bars at room temperature for more than 2 hours. The cream cheese base requires refrigeration to stay food-safe, and warm environments cause the cheesecake layer to weep and separate.
Troubleshooting Common Problems
Problem 1: Cracked Cheesecake Top
Solution: Your oven temperature was too high or you overbaked. Use an oven thermometer to verify accuracy—many ovens run 25°F hotter than the dial shows. Remember that jiggle test: the center should still wobble slightly when you remove the pan. Also, never skip the gradual cooling step in the cracked-open oven.
Problem 2: Soggy Crust
Solution: You either didn’t press the crust firmly enough or skipped the pre-baking step. The crust needs those 8 minutes in the oven to set up and create a moisture barrier. If your crust still feels soft, you might be cutting into the bars before they’re fully chilled—warm cheesecake always feels wetter than cold.
Problem 3: Watery Apple Layer
Solution: Your apples released too much moisture during cooking. Next time, cook them 1-2 minutes longer to evaporate excess liquid, and make sure you’re using firm Granny Smith apples instead of softer varieties. Also, let the cooked apples cool completely before adding them to the cheesecake—steam creates condensation.
Problem 4: Lumpy Cheesecake Texture
Solution: Your cream cheese wasn’t properly softened before mixing. Cold cream cheese refuses to blend smoothly no matter how long you beat it. Set it out at room temperature for 1-2 hours, or warm it carefully in the microwave. Also, scrape down the bowl sides frequently while mixing to catch hidden lumps.
Problem 5: Bars Fall Apart When Slicing
Solution: You’re either cutting them too soon (they need a full 4-hour chill minimum) or using a dull knife. A sharp knife creates clean cuts, while a dull blade drags through the layers. Clean and re-warm your knife between each slice. If your crust crumbles, you might not have packed it firmly enough during preparation.
Equipment Essentials
You’ll need these tools:
- 8×8-inch square baking pan (metal works best for even heat distribution)
- Parchment paper (non-stick spray alone won’t give you clean lift-out)
- Electric mixer (hand or stand—beating by hand won’t achieve the right texture)
- Medium mixing bowls (at least 2)
- Medium skillet (for cooking apples)
- Rubber spatula (for scraping and spreading)
- Sharp chef’s knife (essential for clean cuts)
- Measuring cups and spoons (accuracy matters in baking)
Nice to have but not required:
- Offset spatula (makes spreading filling easier)
- Kitchen thermometer (to verify oven accuracy)
- Apple peeler/corer (saves prep time)
Shopping List
Dairy Section
- Cream cheese (16 oz)
- Unsalted butter (1 stick)
- Large eggs (2)
- Sour cream (small container)
Baking Aisle
- Graham crackers (1 box—you need about 12 crackers)
- Granulated sugar
- Light brown sugar
- All-purpose flour
- Vanilla extract
- Ground cinnamon
Produce Section
- Granny Smith apples (2 medium)
- Lemon (for juice)
Condiment Aisle
- Caramel sauce (8 oz jar)
Success Secrets
1. Room temperature ingredients blend smoother. Take your cream cheese, eggs, and sour cream out of the fridge 1-2 hours before starting. This single step prevents 90% of texture problems in cheesecake.
2. Don’t skip the crust pre-bake. Those 8 minutes create a moisture barrier that keeps your base crispy instead of soggy. A properly baked crust should smell toasty and look golden at the edges.
3. Use the jiggle test, not a timer. Every oven is different, so watch for that 2-inch center jiggle rather than relying solely on baking time. The bars will look slightly underdone—that’s exactly right.
4. Clean your knife between cuts. Dip your knife in hot water, wipe it completely dry, then make one smooth slice. This creates those Instagram-worthy clean edges that make your Caramel Apple Cheesecake Bars look professionally made.
5. Chill longer than you think necessary. Four hours is the absolute minimum, but overnight chilling produces bars with better texture and easier slicing. Cold cheesecake is firm cheesecake—there’s no rushing this step.
These bars disappear fast at every gathering I bring them to, and now you’ve got all the insider knowledge to make them perfectly every single time. The combination of creamy cheesecake, spiced apples, and that caramel drizzle creates something truly special—way better than anything you’d buy at a bakery.