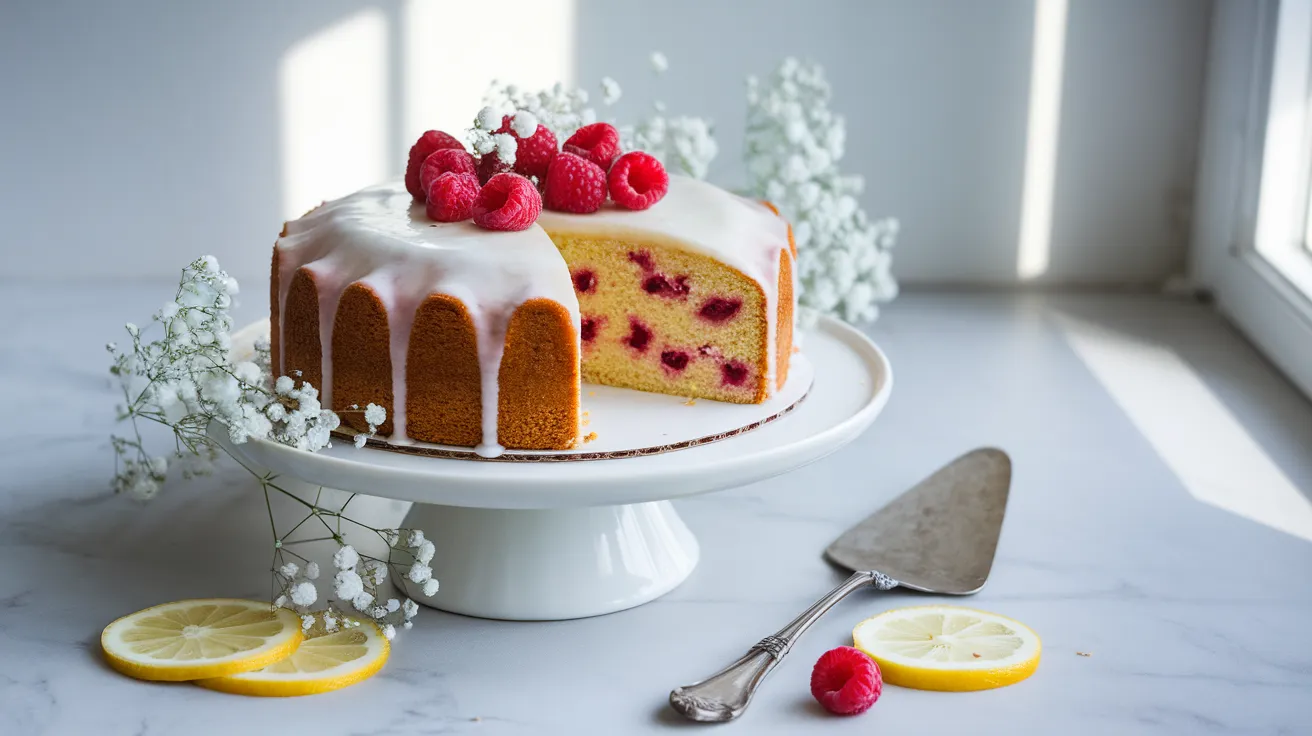
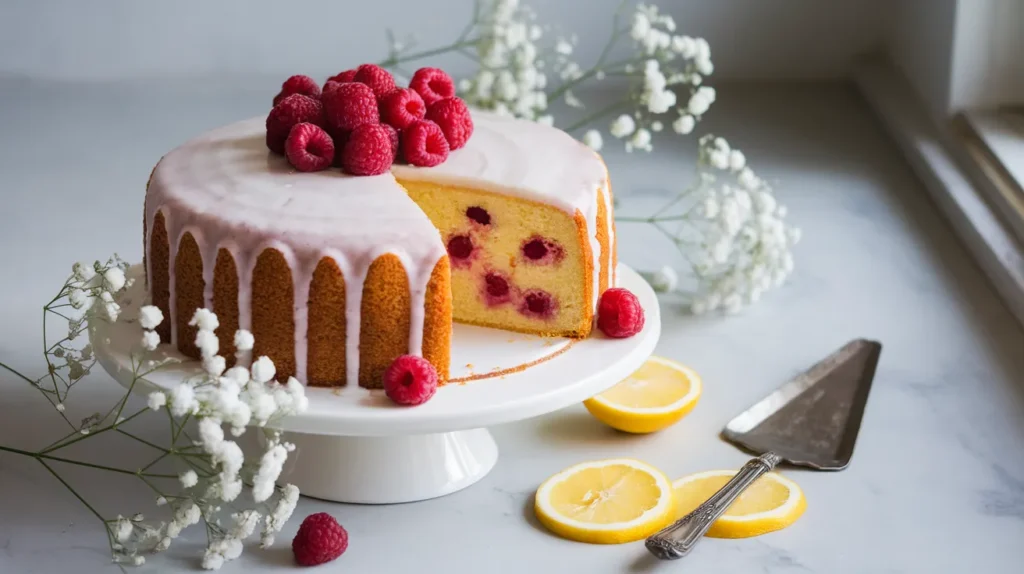
This lemon raspberry cake brings together bright citrus and sweet-tart berries in a moist, tender crumb that’s absolutely showstopping. Perfect for celebrations or weekend baking, this lemon raspberry cake features fresh raspberries folded into zesty lemon batter, topped with a silky glaze that makes every slice irresistible.
SERVES: 4 | PREP: 25 MIN | COOK: 35 MIN | TOTAL: 60 MIN
Ingredients You’ll Need
For the Cake Batter
| Ingredient | Amount |
|---|---|
| All-purpose flour | 1½ cups |
| Granulated sugar | ¾ cup |
| Baking powder | 1½ teaspoons |
| Fine sea salt | ¼ teaspoon |
| Unsalted butter, softened | ½ cup (1 stick) |
| Large eggs, room temperature | 2 |
| Whole milk | ½ cup |
| Fresh lemon juice | 3 tablespoons |
| Lemon zest | 2 tablespoons |
| Vanilla extract | 1 teaspoon |
| Fresh raspberries | 1 cup |
For the Lemon Glaze
| Ingredient | Amount |
|---|---|
| Powdered sugar | 1 cup |
| Fresh lemon juice | 2-3 tablespoons |
| Lemon zest | 1 teaspoon |
Step-by-Step Instructions
Phase 1: Preparation (5 minutes)
Step 1: Set your oven to 350°F and position the rack in the center. This ensures even heat distribution for your lemon raspberry cake.
Step 2: Grease an 8-inch round cake pan with butter, then dust lightly with flour. Tap out excess flour over the sink. Why this matters: This double coating prevents sticking and creates a golden crust.
Step 3: Take your eggs and butter out of the fridge 30 minutes before starting. Room temperature ingredients blend smoother and create better texture. Cold eggs can cause butter to seize up.
Phase 2: Dry Ingredients (3 minutes)
Step 4: In a medium bowl, whisk together flour, sugar, baking powder, and salt for 30 seconds. You want zero lumps. Pro tip: Sift the baking powder if it’s been sitting in your cabinet for months.
Step 5: Set this bowl aside. Don’t skip the whisking—it distributes the leavening agent evenly so your cake rises uniformly.
Phase 3: Wet Ingredients (8 minutes)
Step 6: In a large bowl, beat the softened butter with an electric mixer on medium speed for 2 minutes until it’s light and fluffy. It should look pale and almost doubled in volume. Visual cue: It’ll have a whipped appearance.
Step 7: Add the sugar to the butter and beat for another 3 minutes. Scrape down the sides of the bowl halfway through. The mixture should be creamy and no longer grainy when rubbed between your fingers.
Step 8: Crack in the eggs one at a time, beating for 30 seconds after each addition. The batter might look slightly curdled—that’s normal. Common mistake: Adding both eggs at once can cause the batter to separate.
Step 9: Stir in the vanilla extract, lemon juice, and lemon zest. The acid from the lemon will react slightly with the baking powder, creating tiny bubbles. That’s good!
Phase 4: Combining (4 minutes)
Step 10: Add one-third of the flour mixture to the wet ingredients. Stir gently with a spatula until just combined—you should still see some flour streaks.
Step 11: Pour in half the milk and fold until incorporated. Why we alternate: This technique prevents overmixing, which creates tough, dense cake.
Step 12: Repeat with another third of flour, the remaining milk, then the final third of flour. Stop mixing as soon as you don’t see dry flour. 10-15 gentle folds should do it.
Step 13: Gently toss the fresh raspberries in 1 tablespoon of flour (this prevents sinking). Fold them into the batter with 5-6 strokes. Some will break slightly and create pink swirls—that’s beautiful!
Phase 5: Baking (35 minutes)
Step 14: Pour batter into your prepared pan and smooth the top with an offset spatula. Tap the pan on the counter twice to release air bubbles.
Step 15: Bake for 32-35 minutes until a toothpick inserted in the center comes out with just a few moist crumbs. Temperature check: The internal temp should hit 210°F for perfect doneness.
Step 16: Let the cake cool in the pan for 15 minutes on a wire rack. Safety tip: The cake needs this time to firm up or it’ll break when you remove it.
Phase 6: Glazing (5 minutes)
Step 17: While the cake cools slightly, whisk together powdered sugar, lemon juice, and zest in a small bowl. Start with 2 tablespoons of juice, adding more if needed. Consistency check: It should be thick but pourable, like honey.
Step 18: Run a knife around the cake edges, then invert onto a serving plate. Let it cool completely before glazing—about 15 more minutes.
Step 19: Drizzle the glaze over the top, letting it cascade down the sides naturally. Some pooling at the base looks rustic and delicious.
Step 20: Let the glaze set for 10 minutes before slicing. Garnish with extra lemon zest and fresh raspberries if desired.
Chef’s Notes
Fresh vs. Frozen Berries: Fresh raspberries work best for this lemon raspberry cake because frozen berries release too much moisture and turn the batter purple. If you must use frozen, don’t thaw them first.
Lemon Intensity: For maximum lemon flavor, use both zest and juice. The zest contains essential oils that give that bright, aromatic punch.
Butter Temperature: Your butter should leave a slight indent when pressed but not be greasy. About 65-68°F is perfect.
Storage Secret: This cake stays moist for up to 3 days at room temperature when covered. The raspberries actually help keep it tender.
Nutrition Facts Per Serving
- Calories: 485
- Protein: 7g
- Carbohydrates: 68g
- Fat: 21g
- Fiber: 2g
- Sugar: 45g
Creative Variations to Try
Blueberry Lemon Version
Swap raspberries for blueberries and add ½ teaspoon almond extract. The flavor profile becomes more subtle and nutty.
Strawberry Lemon Twist
Use diced fresh strawberries instead of raspberries. This pairs perfectly with the strawberry shortcake approach of layering fruit and cream.
Pineapple Upside-Down Style
Skip the raspberries and arrange pineapple rings on the bottom of the pan before adding batter. For more tropical inspiration, check out this upside down cake technique.
Meyer Lemon Luxury
Use Meyer lemons for a sweeter, more floral citrus note. Reduce sugar to ⅔ cup since Meyer lemons are less tart.
Storage & Reheating Guide
Room Temperature Storage
Cover the cake loosely with foil or place in an airtight container. It’ll stay fresh for 3 days on your counter. Don’t refrigerate unless it’s very humid—cold temps dry out the crumb.
Freezing Instructions
Wrap individual slices in plastic wrap, then aluminum foil. Freeze for up to 2 months. Thaw at room temperature for 1 hour before serving.
Reheating Tips
Microwave individual slices for 15 seconds to restore that just-baked warmth. Don’t overdo it or the raspberries will become mushy.
Make-Ahead Strategy
Bake the cake the night before and glaze it 2-3 hours before serving. The flavors actually deepen overnight.
Troubleshooting Common Problems
Problem 1: Cake Sinks in the Middle
Cause: Oven temperature too low or opening the door too early. Solution: Use an oven thermometer to verify actual temperature. Don’t peek until the 25-minute mark. The cake needs uninterrupted heat to set its structure.
Problem 2: Raspberries All Sink to Bottom
Cause: Batter too thin or berries too wet. Solution: Toss berries in flour before folding them in. This coating helps them float. Also, ensure you’re measuring flour correctly—spoon it into the cup, don’t pack it.
Problem 3: Dry, Crumbly Texture
Cause: Overbaking or too much flour. Solution: Check doneness at 32 minutes. Your toothpick should have moist crumbs, not come out completely clean. Also, measure flour by spooning and leveling, never scooping directly.
Problem 4: Glaze Too Runny
Cause: Too much lemon juice or cake still warm. Solution: Add powdered sugar 1 tablespoon at a time until thickened. Make sure the cake is completely cool—heat causes glaze to slide off.
Problem 5: Tough, Dense Crumb
Cause: Overmixing the batter after adding flour. Solution: Mix until you barely see flour streaks, then stop immediately. Gluten develops quickly with overmixing, creating a chewy texture instead of tender cake.
Equipment Essentials
- 8-inch round cake pan (metal works better than glass)
- Electric hand mixer or stand mixer
- Medium and large mixing bowls
- Measuring cups and spoons (dry and liquid)
- Fine-mesh sieve for dusting pan
- Rubber spatula for folding
- Microplane or zester for lemon zest
- Wire cooling rack
- Toothpick for testing doneness
- Offset spatula for smoothing and glazing
Shopping List by Store Section
Baking Aisle
- All-purpose flour
- Granulated sugar
- Powdered sugar
- Baking powder
- Vanilla extract
Dairy Section
- Unsalted butter
- Large eggs
- Whole milk
Produce Section
- Fresh lemons (4-5 for zest and juice)
- Fresh raspberries (6-ounce container)
Spices/Seasonings
- Fine sea salt
Success Secrets from the Test Kitchen
1. Zest Before Juicing: Always zest your lemons before cutting them open. It’s nearly impossible to zest a halved lemon. Use light pressure and only get the yellow part—the white pith is bitter.
2. The Toothpick Test Trick: Insert the toothpick about 1 inch from the center, not dead center. The very middle is the last part to set and can give false readings.
3. Room Temperature Hack: Forgot to take eggs out early? Place them in a bowl of warm (not hot) water for 5 minutes. They’ll warm up safely.
4. Glaze Timing Is Everything: Wait until the cake is completely cool. A warm cake will absorb the glaze instead of letting it create that gorgeous shiny coating on top.
5. Slice with Confidence: Use a sharp serrated knife and wipe it clean between cuts. Warm the blade under hot water, dry it, then slice. This prevents raspberry smearing and gives you bakery-perfect slices.
This lemon raspberry cake proves that impressive doesn’t have to mean complicated. With tender crumb, bright citrus, and jewel-toned berries, you’ve got a dessert that tastes like it came from a fancy bakery. The best part? You made it yourself.