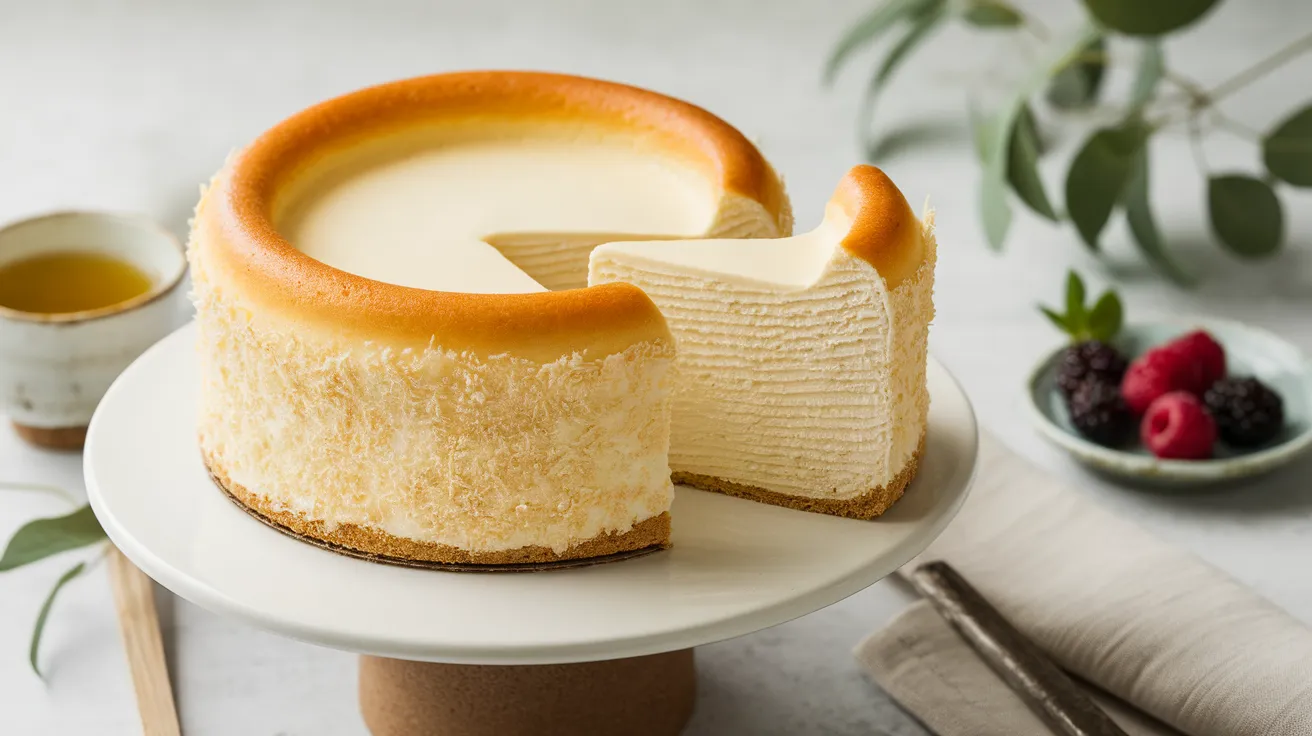
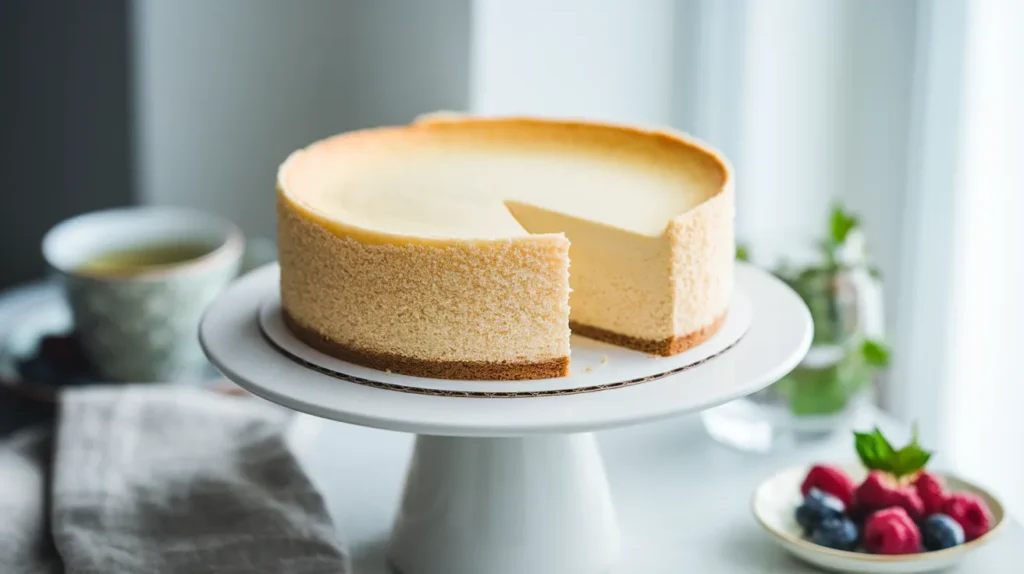
This Japanese cotton cheesecake delivers an impossibly light, jiggly texture that’s part soufflé, part cheesecake. With cream cheese, eggs, and just a hint of lemon, this cloud-like japanese cotton cheesecake wobbles when you shake the pan and practically dissolves on your tongue. It’s the gentle, not-too-sweet dessert that’ll have everyone asking for seconds.
SERVES: 4 | PREP: 25 MIN | COOK: 65 MIN | TOTAL: 90 MIN
Ingredients for Japanese Cotton Cheesecake
Cream Cheese Base
| Ingredient | Amount |
|---|---|
| Cream cheese (full-fat, room temp) | 4 oz (113g) |
| Unsalted butter | 2 tbsp (28g) |
| Whole milk | 3 tbsp (45ml) |
| Egg yolks | 3 large |
Flour Mixture
| Ingredient | Amount |
|---|---|
| Cake flour (sifted) | 3 tbsp (24g) |
| Cornstarch | 1 tbsp (8g) |
Meringue
| Ingredient | Amount |
|---|---|
| Egg whites | 3 large (room temp) |
| Granulated sugar | ¼ cup (50g) |
| Cream of tartar | ¼ tsp |
| Fresh lemon juice | 1 tsp |
| Vanilla extract | ½ tsp |
Step-by-Step Instructions
Phase 1: Prep Work (5 minutes)
Step 1: Position your oven rack to the lower-middle slot and preheat to 320°F (160°C). Why lower rack? Heat from below creates gentle, even baking that prevents cracking.
Step 2: Line a 6-inch round cake pan with parchment paper on the bottom and sides, letting paper extend 2 inches above the rim. Safety tip: Grease the pan first so parchment sticks and doesn’t slide around.
Step 3: Prepare a water bath by finding a larger pan (9-inch works great) that your cake pan fits inside with at least 1 inch of space around it. The water bath is your secret weapon—it creates steam that keeps the japanese cotton cheesecake moist and prevents cracks.
Phase 2: Cream Cheese Mixture (8 minutes)
Step 4: Cut cream cheese into small cubes (about ½-inch pieces) and place in a heatproof bowl with butter and milk.
Step 5: Create a double boiler by setting the bowl over a pot of barely simmering water (water shouldn’t touch the bowl bottom). Temperature check: The water should steam gently, not bubble vigorously.
Step 6: Stir constantly with a silicone spatula for 3-4 minutes until completely smooth with no lumps. Visual cue: Mixture should look like thick, pourable cream and coat the spatula.
Step 7: Remove from heat and let cool for 3 minutes while stirring occasionally. Why cool it? Hot mixture will cook the egg yolks and create scrambled bits.
Step 8: Add egg yolks one at a time, whisking thoroughly after each addition until glossy and uniform.
Step 9: Sift in cake flour and cornstarch together, then fold gently with the spatula using a J-motion. Beginner tip: Folding means cutting down through the center, scraping along the bottom, and lifting up the side—this keeps it airy.
Step 10: Stir in vanilla and lemon juice until just combined, then set aside. Texture check: Batter should be thick but pourable, like pancake batter.
Phase 3: The Critical Meringue (7 minutes)
Step 11: In a completely clean, dry mixing bowl, beat egg whites and cream of tartar on medium speed until foamy (about 45 seconds). Critical mistake to avoid: Any trace of yolk, water, or grease will prevent proper whipping.
Step 12: With mixer running, add sugar 1 tablespoon at a time, waiting 15 seconds between additions. Why go slow? Gradual sugar addition creates stable, fine-textured bubbles.
Step 13: Increase speed to medium-high and beat until meringue reaches soft peaks (2-3 minutes total). The test: When you lift the beater, peaks should curl over gently at the tips, not stand straight up. Warning: Don’t over-beat to stiff peaks or your cheesecake will crack and be dense.
Phase 4: The Delicate Fold (5 minutes)
Step 14: Add one-third of the meringue to the cream cheese mixture and fold vigorously to lighten it. This first addition can be rough—you’re just loosening the thick base.
Step 15: Pour the lightened cream cheese mixture back into the remaining meringue bowl.
Step 16: Fold extremely gently using broad strokes, rotating the bowl quarter-turns. Count your strokes: Stop at 25-30 folds maximum, even if you see a few white streaks. Why stop? Over-folding deflates those precious air bubbles you just created.
Phase 5: Baking the Japanese Cotton Cheesecake (65 minutes)
Step 17: Pour batter into prepared pan and tap firmly on the counter 3-4 times to release large air bubbles. You’ll see bubbles pop to the surface—this is good!
Step 18: Place cake pan inside the larger pan, then carefully pour hot (not boiling) water into the outer pan until it reaches halfway up the sides of your cake pan. Safety first: Do this with both pans already positioned on the oven rack to avoid spilling.
Step 19: Bake at 320°F for 25 minutes undisturbed (no peeking—this lets it set).
Step 20: After 25 minutes, reduce temperature to 285°F (140°C) and bake for another 40 minutes. Visual cue at this point: Top should be golden brown with a slight wobble in the center when you gently shake the pan.
Step 21: Turn off the oven, crack the door open about 4 inches, and let the cheesecake cool inside for 15 minutes. Why this matters: Sudden temperature changes cause dramatic shrinking and cracks.
Step 22: Remove from oven and water bath, then cool on a wire rack for 30 minutes before refrigerating for at least 4 hours. Patience pays off: The texture firms up and flavors develop during chilling.
Chef’s Notes
Temperature is everything. Room temperature eggs whip higher, and room temperature cream cheese blends smoother without lumps in your japanese cotton cheesecake.
The wobble test works. When done, the center should jiggle like Jell-O when gently shaken—it will set more as it cools.
Serve it chilled. This japanese cotton cheesecake tastes best cold from the fridge when the texture is at its fluffiest.
Use a hot, wet knife. For clean slices, dip your knife in hot water and wipe it between each cut.
Nutrition Facts (Per Serving)
| Nutrient | Amount |
|---|---|
| Calories | 185 |
| Protein | 7g |
| Carbohydrates | 16g |
| Fat | 11g |
| Saturated Fat | 6g |
| Fiber | 0g |
| Sugar | 13g |
Creative Variations
Matcha Japanese Cotton Cheesecake: Sift 1½ tablespoons of matcha powder with the flour for an earthy, beautiful green color that pairs perfectly with the delicate texture.
Chocolate Swirl Version: After pouring batter into the pan, drizzle 2 tablespoons of melted dark chocolate on top and swirl with a toothpick. If you love creative desserts, check out this pumpkin roll for another show-stopping treat.
Lemon Lovers Edition: Double the lemon juice to 2 teaspoons and add ½ teaspoon of lemon zest to the cream cheese mixture for bright, tangy flavor.
Mini Japanese Cotton Cheesecakes: Divide batter among 8 muffin cups lined with paper liners and bake at 320°F for just 20-25 minutes. For more individual-sized dessert inspiration, try these no-bake mini cheesecakes.
Storage & Reheating Guide
Refrigerator storage: Cover loosely with plastic wrap (don’t press directly on surface) and keep for up to 4 days. The texture stays incredibly soft and jiggly throughout.
Freezing instructions: Wrap individual slices tightly in plastic wrap, then aluminum foil, and freeze for up to 1 month. Thaw overnight in the fridge—the texture bounces back beautifully.
Serving temperature: Always serve cold or at cool room temperature (let it sit out for 10 minutes max). This cheesecake loses its signature texture if too warm.
Not recommended: Don’t reheat this japanese cotton cheesecake—it’s meant to be enjoyed chilled, and warming destroys the delicate, fluffy structure.
Troubleshooting Common Problems
Problem 1: Cheesecake cracked on top The oven was too hot or temperature dropped too suddenly. Make sure your oven temperature is accurate (use an oven thermometer), and always cool gradually by leaving it in the turned-off oven with the door cracked.
Problem 2: Dense, rubbery texture instead of fluffy You over-mixed after adding meringue or beat meringue to stiff peaks instead of soft peaks. The meringue should still curl over when you lift the beater, and folding should stop after 25-30 strokes even if you see small streaks.
Problem 3: Cheesecake sank dramatically in the center Either your meringue was under-beaten (didn’t reach soft peaks), or you opened the oven door during the first 25 minutes of baking. The structure needs time to set before any temperature fluctuation.
Problem 4: Lumpy batter that won’t smooth out Cream cheese wasn’t fully softened to room temperature before mixing. Next time, cut it into small cubes and let it sit out for 1 hour, or microwave for 10 seconds at a time until soft but not melted.
Problem 5: Eggy smell or taste The cream cheese mixture was too hot when you added the egg yolks, partially cooking them. Always let the cream cheese mixture cool for at least 3 minutes after removing from the double boiler, and it should feel just warm to the touch.
Equipment Essentials
- 6-inch round cake pan (springform works but isn’t necessary)
- 9-inch or larger baking pan (for water bath)
- Electric hand mixer or stand mixer (meringue won’t whip properly by hand)
- Heatproof bowl (glass or metal)
- Medium pot (for double boiler)
- Fine-mesh sieve (for sifting flour)
- Silicone spatula (gentler for folding than wooden)
- Parchment paper
- Wire cooling rack
- Oven thermometer (highly recommended for accuracy)
Shopping List by Store Section
Dairy Case:
- Cream cheese (4 oz, full-fat)
- Unsalted butter (2 tbsp)
- Whole milk (3 tbsp)
- Eggs (6 total—you need 3 yolks and 3 whites)
Baking Aisle:
- Cake flour (or all-purpose if substituting)
- Cornstarch
- Granulated sugar
- Cream of tartar
- Vanilla extract
Produce Section:
- Fresh lemon (for 1 tsp juice)
5 Success Secrets from Professional Bakers
1. Room temperature is non-negotiable. Take eggs and cream cheese out of the fridge 1-2 hours before starting. Cold ingredients don’t incorporate smoothly and create lumps or deflate meringue.
2. Sift your flour twice, not once. This removes any clumps and aerates the flour so it folds in without deflating your carefully whipped meringue.
3. Check your oven temperature with a thermometer. Most home ovens run 15-25°F off from the dial setting, and even a small difference causes cracks or uneven baking in delicate japanese cotton cheesecake.
4. The water bath must have HOT water. Cold or lukewarm water creates steam too slowly, leaving the top of your cheesecake exposed to direct heat, which causes cracking.
5. Don’t skip the gradual cooling. Leaving it in the turned-off oven with the door cracked prevents thermal shock—the number one cause of sinking and cracking in cotton cheesecakes.
This japanese cotton cheesecake takes patience and gentle handling, but the pillowy, cloud-like result is absolutely worth it. The first time you see it wobble on the plate, you’ll understand why it’s called cotton cheesecake.