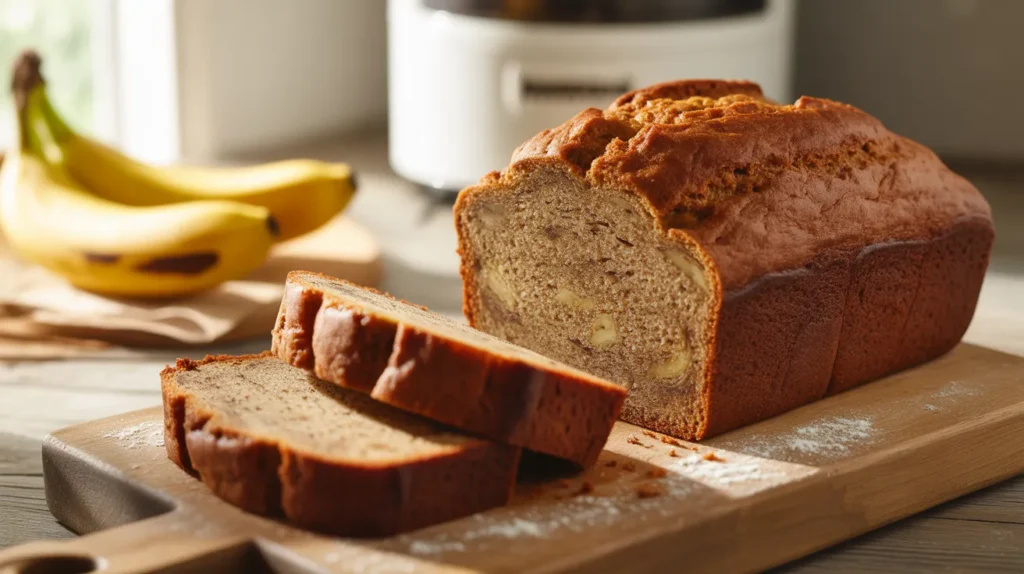
I never knew my bread machine whole wheat yeasted banana bread could turn out this perfectly moist until I discovered the secret timing for adding those ripe bananas. This bread machine whole wheat yeasted banana bread combines the wholesome goodness of whole wheat flour with sweet banana flavor, creating a tender loaf that’s healthier than store-bought versions but just as delicious. The bread machine does most of the work while you get that amazing homemade aroma filling your kitchen.
SERVES: 4 | PREP: 10 MIN | COOK: 3 HRS | TOTAL: 3 HRS 10 MIN
Ingredients
Wet Ingredients
| Ingredient | Measurement |
|---|---|
| Ripe bananas (mashed) | 1 cup (about 2 large) |
| Warm water | 1/2 cup |
| Vegetable oil | 2 tablespoons |
| Honey | 3 tablespoons |
| Egg (lightly beaten) | 1 large |
Dry Ingredients
| Ingredient | Measurement |
|---|---|
| Whole wheat flour | 2 1/2 cups |
| Vital wheat gluten | 1 tablespoon |
| Salt | 1 teaspoon |
| Ground cinnamon | 1 teaspoon |
| Active dry yeast | 2 teaspoons |
Optional Add-ins
| Ingredient | Measurement |
|---|---|
| Chopped walnuts | 1/3 cup |
| Mini chocolate chips | 1/4 cup |
Step-by-Step Instructions
Phase 1: Preparing Your Ingredients (5 minutes)
Step 1: Take your bananas and peel them onto a clean plate. Use a fork to mash them completely until you have a smooth puree with just a few small lumps. You want 1 cup total, which usually equals 2 large bananas. The riper your bananas (with brown spots), the sweeter your bread will taste.
Step 2: Measure your warm water carefully—it should feel like bathwater when you dip your finger in (around 110°F). Water that’s too hot will kill your yeast, while cold water won’t activate it properly.
Step 3: Crack your egg into a small bowl and beat it lightly with a fork for about 15 seconds. This helps it distribute evenly throughout your dough.
Step 4: Measure all your remaining wet ingredients (vegetable oil and honey) and set them next to your bread machine. Having everything ready makes the process smooth.
Phase 2: Loading the Bread Machine (3 minutes)
Step 5: Check your bread machine manual to confirm the loading order. Most machines want liquids first, but some prefer dry ingredients at the bottom. I’m using the liquid-first method here, which works for most brands.
Step 6: Pour your mashed banana directly into the bread machine pan. Spread it around a bit so it covers the bottom evenly—this helps it mix better later.
Step 7: Add your warm water, beaten egg, vegetable oil, and honey on top of the banana. Pour them in gently so they don’t splash up the sides of the pan.
Step 8: Now add your whole wheat flour. Pour it carefully to create an even layer that covers all the wet ingredients completely. This creates a barrier that keeps the yeast dry until mixing starts.
Step 9: Sprinkle the vital wheat gluten over the flour. This ingredient is your secret weapon for whole wheat bread—it helps create a lighter, less dense texture.
Step 10: Add your salt and cinnamon to one corner of the flour layer. Keep the salt away from where you’ll add the yeast because direct contact can slow down yeast activation.
Phase 3: Adding Yeast and Starting the Cycle (2 minutes)
Step 11: Make a small well (shallow hole) in the center of your flour using your finger. This well should reach down close to the flour surface but not touch the wet ingredients below. Pour your active dry yeast into this well.
Step 12: Close your bread machine lid firmly. Select the “Whole Wheat” or “Basic” cycle, choose your preferred crust color (medium works great for banana bread), and select a 1.5-pound loaf size.
Step 13: If your machine has a mix-in alarm and you’re adding walnuts or chocolate chips, wait for the beep (usually after the first kneading cycle). If there’s no alarm, add them 10 minutes into the mixing cycle by opening the lid briefly and sprinkling them in.
Phase 4: The Waiting Game (3 hours)
Step 14: Press Start and let your machine work its magic. You’ll hear it mixing for about 15 minutes, then it’ll rest. Don’t open the lid during the rising phases—this releases heat and can cause your bread to collapse.
Step 15: About 15 minutes in, check the dough through your machine’s window. It should form a smooth, slightly sticky ball. If it’s too dry and crumbly, add water 1 teaspoon at a time. If it’s too wet and sticking to the sides, add flour 1 tablespoon at a time.
Phase 5: Finishing and Cooling (40 minutes)
Step 16: When your machine beeps that it’s done, open the lid carefully—hot steam will escape. The bread should be golden brown on top and smell amazing. Use oven mitts to lift the pan out of the machine.
Step 17: Let the bread sit in the pan for 10 minutes. This cooling period makes it much easier to remove without breaking.
Step 18: Turn the pan upside down over a wire cooling rack and gently shake it. The loaf should slide out easily. If it sticks, use a plastic spatula to loosen the edges (never use metal—it scratches your pan’s coating).
Step 19: Let your bread machine whole wheat yeasted banana bread cool on the rack for at least 30 minutes before slicing. I know it’s tempting to cut into it right away, but warm bread compresses and tears easily.
Step 20: Slice using a serrated bread knife with a gentle sawing motion. Cut pieces about 3/4 inch thick for the perfect serving size.
Chef’s Notes
Banana Ripeness Matters: Those bananas sitting on your counter with brown spots? They’re perfect for this recipe. The darker the peel, the sweeter your bread machine whole wheat yeasted banana bread will be. I actually let mine get almost completely brown before using them.
Vital Wheat Gluten is Key: This ingredient makes whole wheat bread rise higher and gives it a better texture. Without it, your loaf might turn out dense like a brick. Find it in the baking aisle or natural foods section of your grocery store.
Listen to Your Machine: Every bread machine has its own personality. My first loaf came out slightly overdone, so now I use the “light” crust setting. Pay attention to how your machine bakes and adjust for next time.
Room Temperature Matters: If your kitchen is cold (below 70°F), your bread might take longer to rise properly. On hot days (above 85°F), it might rise too fast and collapse. The bread machine adjusts automatically, but results vary by season.
Nutrition Information (Per Serving)
| Nutrient | Amount |
|---|---|
| Calories | 385 |
| Protein | 12g |
| Carbohydrates | 68g |
| Dietary Fiber | 8g |
| Sugars | 18g |
| Fat | 9g |
| Saturated Fat | 1g |
| Cholesterol | 47mg |
| Sodium | 595mg |
Delicious Variations
Chocolate Banana Bread: Add 1/4 cup cocoa powder to your dry ingredients and reduce flour by 1/4 cup. Throw in 1/2 cup chocolate chips at the mix-in beep. This version tastes like dessert for breakfast. If you love chocolate in your baking, check out this bread machine whole wheat peanut butter bread that also incorporates sweet flavors beautifully.
Tropical Paradise Bread: Replace half the banana with 1/2 cup crushed pineapple (drained well) and add 1/3 cup shredded coconut plus 1/4 cup chopped macadamia nuts. It’s like vacation in bread form.
Maple Walnut Version: Swap the honey for 3 tablespoons pure maple syrup and add 1/2 cup toasted walnuts at the mix-in signal. Toast the walnuts first by spreading them on a baking sheet at 350°F for 5 minutes—this brings out amazing nutty flavor.
Protein-Packed Power Bread: Add 1/4 cup vanilla protein powder and reduce flour by 1/4 cup. Mix in 2 tablespoons chia seeds and 2 tablespoons ground flaxseed for extra nutrition. Perfect post-workout fuel. For another protein-rich bread option, try this bread machine zopf Swiss egg bread that’s loaded with eggs.
Storage & Reheating
Room Temperature: Wrap your cooled bread tightly in plastic wrap or aluminum foil. It’ll stay fresh on your counter for 3-4 days. Don’t store it in the bread machine pan—condensation builds up and makes it soggy.
Refrigerator: I don’t recommend refrigerating this bread because the cold temperature makes it dry out faster. If you must, wrap it well and use within 5 days.
Freezer Storage: This bread freezes beautifully. Slice it first, then wrap individual slices in plastic wrap. Put all wrapped slices in a freezer bag and freeze for up to 3 months. This way you can grab single servings for toast or snacks.
Reheating: Pop frozen slices directly into your toaster on medium heat. For a whole loaf, thaw it overnight on the counter, then warm wrapped in foil at 300°F for 15 minutes. A 10-second microwave zap works for individual slices—just don’t overdo it or they’ll get rubbery.
Pro Tip: Freeze slices with pieces of parchment paper between them so they don’t stick together. Pull out just what you need without waiting for the whole loaf to thaw.
Troubleshooting Common Problems
Problem: My bread turned out dense and heavy like a brick. Your yeast might be old or dead. Always check the expiration date before starting. Also, make sure your water temperature was correct (around 110°F)—too hot kills yeast, too cold doesn’t activate it. Try using fresh yeast and a thermometer next time. Dense texture can also mean you added too much flour or not enough liquid.
Problem: The top of my loaf caved in or has a giant crater. This happens when the bread rises too much and then collapses. You probably used too much yeast, or your kitchen was very warm causing over-rising. Reduce yeast by 1/4 teaspoon next time. Also, make sure you measured flour correctly by spooning it into your measuring cup rather than scooping (which packs it down and adds too much).
Problem: My bread didn’t rise at all and came out flat. Check if your yeast touched salt or liquid before mixing started—direct contact can kill yeast activity. Also verify your yeast is fresh by testing it: dissolve 1 teaspoon sugar in 1/4 cup warm water, add yeast, and wait 10 minutes. If it doesn’t foam up, your yeast is dead and needs replacing.
Problem: The bread stuck to the pan and tore apart when I tried removing it. Next time, let it cool in the pan for the full 10 minutes but no longer than 15. If it still sticks, lightly spray your pan with cooking spray before adding ingredients, or replace your bread machine pan—the non-stick coating wears out over time.
Problem: The bread tastes too “wheaty” or bitter. Whole wheat flour has a naturally stronger flavor that some people find bitter. Use white whole wheat flour instead of regular whole wheat—it’s milder tasting. You can also replace up to half the whole wheat flour with bread flour for a lighter flavor and texture.
Equipment Essentials
- Bread machine (1.5 to 2-pound capacity)
- Liquid measuring cup (for water and oil)
- Dry measuring cups (for flour and banana)
- Measuring spoons (for smaller ingredients)
- Mixing bowl (for mashing bananas)
- Fork (for mashing bananas and beating egg)
- Wire cooling rack (prevents soggy bottom)
- Serrated bread knife (for clean slicing)
- Oven mitts (for handling hot pan)
- Kitchen thermometer (optional but helpful for water temperature)
Shopping List
Baking Aisle
- Whole wheat flour
- Vital wheat gluten
- Active dry yeast
- Vegetable oil
- Honey
- Ground cinnamon
- Walnuts (optional)
- Chocolate chips (optional)
Produce Section
- Bananas (very ripe, with brown spots)
Refrigerated Section
- Eggs
Pantry Staples
- Salt
Success Secrets
1. Use Overripe Bananas: Your bananas should be heavily spotted or even mostly brown. At this stage, the starches have converted to sugars, giving you the sweetest flavor and best moisture. Underripe yellow bananas make bland, dry bread.
2. Measure Flour Correctly: Always spoon flour into your measuring cup and level it off with a knife. Never scoop directly from the bag—this packs the flour and you’ll end up using 25% more than the recipe calls for, resulting in dry, dense bread.
3. Check Dough Consistency Early: Peek at your dough after 10 minutes of mixing. It should form a smooth ball that’s slightly tacky but not sticky. Whole wheat flour absorbs moisture differently depending on humidity, so you might need tiny adjustments.
4. Don’t Skip the Vital Wheat Gluten: I tried making this bread machine whole wheat yeasted banana bread without it once—big mistake. The loaf barely rose and had a crumbly texture. This ingredient costs about $5 and lasts for months in your pantry.
5. Resist Cutting Hot Bread: I know the smell is torture, but cutting into hot bread releases all the steam that’s still cooking the center. You’ll end up with a gummy texture. Wait the full 30 minutes and your patience will be rewarded with perfect slices.
This bread machine whole wheat yeasted banana bread has become my weekly staple because it’s genuinely healthier than regular bread but doesn’t taste like cardboard. The whole wheat flour adds 8g of fiber per serving, keeping you full longer than white bread ever could. My favorite way to enjoy it is toasted with a thin spread of butter—the caramelized edges are incredible.