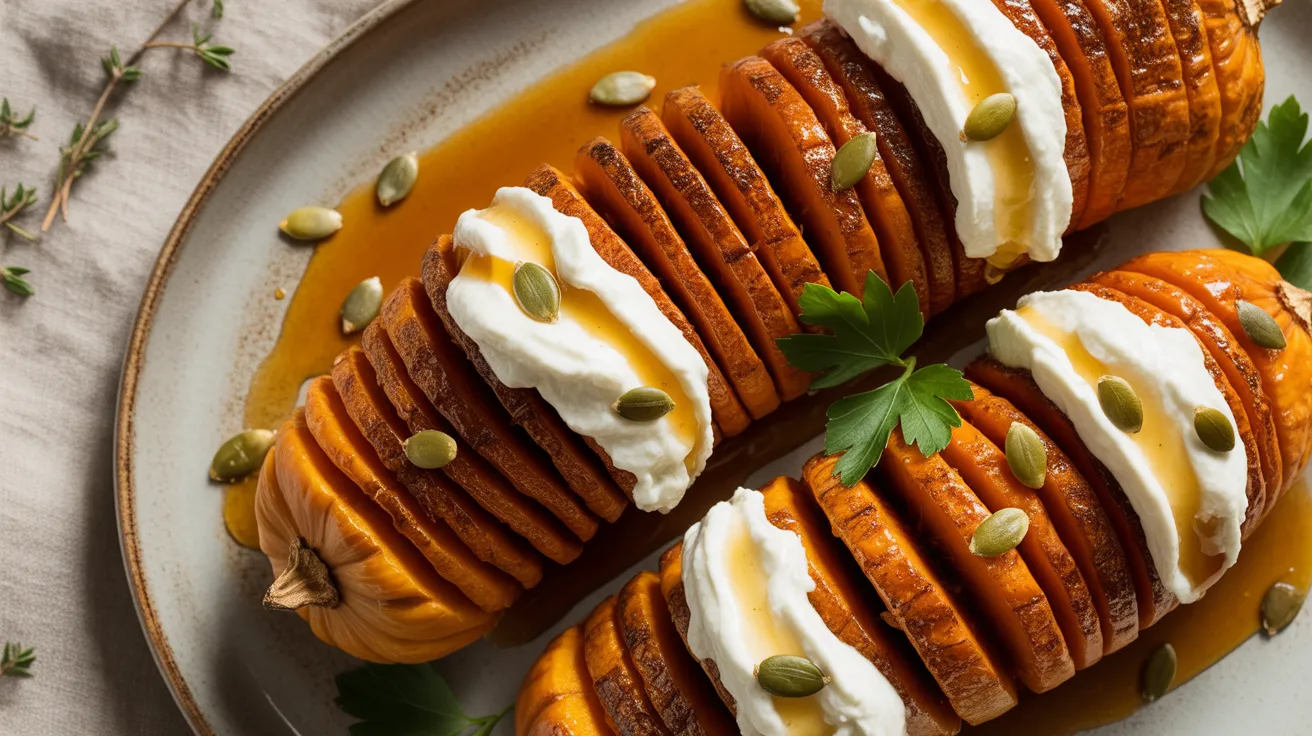
This hasselback garlic-maple butternut squash with whipped ricotta & goat cheese turns a simple vegetable into a showstopping centerpiece. The accordion-style slices soak up sweet maple and savory garlic, while creamy whipped ricotta & goat cheese creates the perfect contrast. I’ve made hasselback garlic-maple butternut squash with whipped ricotta & goat cheese dozens of times, and each slice is pure comfort.
SERVES: 4 | PREP: 20 MIN | COOK: 55 MIN | TOTAL: 1 HR 15 MIN
Ingredients
For the Squash
| Ingredient | Amount |
|---|---|
| Butternut squash | 1 medium (2-3 lbs) |
| Olive oil | 3 tablespoons |
| Pure maple syrup | 3 tablespoons |
| Garlic cloves, minced | 4 large |
| Fresh thyme leaves | 1 tablespoon |
| Sea salt | 1 teaspoon |
| Black pepper | ½ teaspoon |
| Red pepper flakes | ¼ teaspoon |
For the Whipped Cheese
| Ingredient | Amount |
|---|---|
| Whole milk ricotta | 1 cup (8 oz) |
| Goat cheese, softened | 4 oz |
| Heavy cream | 2 tablespoons |
| Lemon zest | 1 teaspoon |
| Fresh parsley, chopped | 2 tablespoons |
| Salt | ¼ teaspoon |
For Finishing
| Ingredient | Amount |
|---|---|
| Toasted pumpkin seeds | ¼ cup |
| Fresh thyme sprigs | For garnish |
| Extra maple syrup | 1 tablespoon |
How to Make Hasselback Garlic-Maple Butternut Squash with Whipped Ricotta & Goat Cheese
Phase 1: Preparation (15 minutes)
1. Prep your workspace and squash. Position your oven rack in the center and heat to 400°F. Line a large baking sheet with parchment paper. This prevents sticking and makes cleanup easier. Peel the butternut squash completely—use a Y-peeler for better control on the curved surfaces.
2. Create the hasselback cuts. Cut the squash in half lengthwise and scoop out all seeds with a spoon. Place each half cut-side down on your cutting board. Here’s the trick: place a wooden spoon handle along one long side of the squash half. Make cuts every ¼ inch straight down, stopping when your knife hits the spoon handle. The spoon prevents you from cutting all the way through. You want the slices to fan open but stay connected at the bottom.
3. Make the garlic-maple glaze. In a small bowl, whisk together 3 tablespoons olive oil, 3 tablespoons maple syrup, 4 minced garlic cloves, 1 tablespoon fresh thyme, 1 teaspoon salt, ½ teaspoon black pepper, and ¼ teaspoon red pepper flakes. The mixture should smell incredible—sweet, garlicky, and herbaceous. If your maple syrup is cold and thick, warm it for 10 seconds in the microwave first.
4. Coat the squash thoroughly. Place both squash halves cut-side up on your prepared baking sheet. Brush half the garlic-maple mixture all over the tops and between the slices. Use your fingers to gently fan open the cuts so the glaze gets inside. This is important—the flavor needs to penetrate every layer.
Phase 2: Baking (55 minutes)
5. Start the roasting process. Slide the baking sheet into your preheated oven. Set a timer for 30 minutes. During this first phase, the squash softens and the sugars start caramelizing. You’ll smell the maple and garlic after about 15 minutes.
6. Apply the second coating. After 30 minutes, pull the baking sheet out carefully. The squash should be starting to soften. Brush on the remaining garlic-maple glaze, again working it between the slices. The cuts will have opened up more, making this easier. Return to the oven immediately.
7. Finish roasting until caramelized. Roast for another 25 minutes. You’re looking for deep golden-brown edges and a knife that slides through the thickest part like butter. The slices should fan open beautifully, and the edges should look slightly crispy and caramelized. If yours isn’t quite there at 55 minutes total, give it another 5-10 minutes.
Phase 3: Whipped Cheese & Assembly (10 minutes)
8. Create the whipped ricotta mixture. While the squash finishes roasting, add 1 cup ricotta, 4 oz softened goat cheese, 2 tablespoons heavy cream, 1 teaspoon lemon zest, 2 tablespoons chopped parsley, and ¼ teaspoon salt to a medium bowl. The goat cheese must be at room temperature or it won’t blend smoothly.
9. Whip until light and fluffy. Using a hand mixer on medium speed, beat the cheese mixture for 2-3 minutes. You want it airy and spreadable, like soft whipped cream. If you don’t have a mixer, use a fork and some serious elbow grease for about 5 minutes. The texture should be silky and smooth with no lumps.
10. Toast the pumpkin seeds. Heat a small dry skillet over medium heat. Add ¼ cup pumpkin seeds and toast for 3-4 minutes, shaking the pan frequently. You’ll hear them start to pop. They’re done when golden and fragrant. Transfer to a plate immediately so they don’t burn.
11. Assemble your masterpiece. Transfer the roasted squash halves to your serving platter. Spoon generous dollops of the whipped ricotta & goat cheese into the natural curves of each squash half. Don’t be shy—use all the cheese.
12. Add final touches. Drizzle with an extra 1 tablespoon maple syrup over everything. Sprinkle the toasted pumpkin seeds on top for crunch. Tuck fresh thyme sprigs between the cheese dollops for a pop of color and herbaceous flavor.
Chef’s Notes
Temperature matters for the cheese. Room temperature ricotta and goat cheese whip much better than cold. Pull them from the fridge 30 minutes before you start cooking.
The wooden spoon trick is foolproof. I’ve taught this hasselback technique to dozens of people, and the wooden spoon guide makes perfect cuts every time. You can also use chopsticks placed on either side of the squash.
Adjust sweetness to your taste. Some butternut squash are naturally sweeter than others. If yours tastes very sweet raw, reduce the maple syrup to 2 tablespoons in the glaze. You can always drizzle more at the end.
Don’t skip the second glaze application. That mid-roasting baste is what creates the gorgeous caramelized coating. The first application helps the squash cook through; the second creates the showstopping finish.
Nutrition Information (Per Serving)
Calories: 385 | Protein: 12g | Carbohydrates: 42g | Fat: 20g | Fiber: 5g | Sugar: 16g | Sodium: 580mg
Delicious Variations
Cranberry-Balsamic Version: Replace maple syrup with 3 tablespoons balsamic glaze and add ¼ cup dried cranberries between the slices before baking. This creates a tangy-sweet profile perfect for holiday meals.
Spicy Harissa Style: Mix 2 tablespoons harissa paste into your garlic-maple glaze for a North African twist. Top with crumbled feta instead of the ricotta mixture. If you enjoy bold flavors, try this approach with baked butternut squash fries as a side.
Sage Brown Butter Upgrade: Replace olive oil with 3 tablespoons brown butter infused with fresh sage leaves. The nutty, herbaceous flavor pairs beautifully with the sweet squash. This technique also works wonderfully with spicy maple butternut squash with brussels and bacon.
Vegan Cashew Cream: Substitute the whipped ricotta & goat cheese with cashew cream made from 1 cup soaked raw cashews blended with ¼ cup water, 2 tablespoons lemon juice, and ½ teaspoon salt until silky smooth.
Storage & Reheating
Refrigerator: Store the roasted squash and whipped cheese separately in airtight containers for up to 4 days. The squash texture holds up well, but keep the cheese separate to maintain its fluffy texture.
Reheating: Place squash on a baking sheet and warm at 350°F for 12-15 minutes until heated through. The cheese is best served at room temperature—pull it from the fridge 20 minutes before serving.
Freezing: The roasted squash freezes well for up to 3 months wrapped tightly in plastic wrap then foil. Thaw overnight in the refrigerator before reheating. Don’t freeze the whipped cheese—the texture separates and becomes grainy.
Make-Ahead Tip: Prep the squash with hasselback cuts up to 1 day ahead, cover with plastic wrap, and refrigerate. Make the glaze and store it separately. This cuts your day-of cooking time significantly.
Troubleshooting Common Problems
Problem: My squash cuts went all the way through. The slices will still taste great but won’t fan open as dramatically. Next time, use the wooden spoon trick or cut slightly thicker (⅜ inch instead of ¼ inch). For this batch, overlap the cut pieces on your serving platter—it’ll still look beautiful.
Problem: The squash isn’t tender after 55 minutes. Butternut squash sizes vary wildly. A larger squash (over 3 lbs) needs 70-80 minutes total. Test with a knife in the thickest part—it should slide through with zero resistance. Cover loosely with foil if the top browns too much before the inside cooks through.
Problem: My whipped cheese is grainy and won’t smooth out. The goat cheese wasn’t soft enough. Microwave it for 10-15 seconds to soften (watch carefully—you want soft, not melted). Then beat again vigorously. You can also add another 1 tablespoon heavy cream to help it come together.
Problem: The garlic burned and tastes bitter. Minced garlic burns easily at high heat. Next time, add the first glaze at 400°F as directed, but for the second application, turn the oven down to 375°F for the final 25 minutes. The lower temperature prevents burning while still caramelizing the maple syrup.
Problem: The squash tastes bland. You might not have gotten enough glaze between the slices, or your squash may have had less natural sweetness. After roasting, drizzle with additional 1-2 tablespoons maple syrup mixed with ½ teaspoon salt. Also make sure you’re using pure maple syrup, not pancake syrup—the flavor difference is huge.
Equipment Essentials

- Large baking sheet (rimmed to catch drips)
- Parchment paper (prevents sticking)
- Sharp chef’s knife (for clean hasselback cuts)
- Wooden spoon (cutting guide)
- Y-shaped vegetable peeler (best for curved squash)
- Small mixing bowl (for glaze)
- Medium mixing bowl (for cheese)
- Hand mixer or whisk (for whipping)
- Pastry brush (for glaze application)
- Small skillet (for toasting seeds)
Shopping List
Produce Section
- 1 medium butternut squash (2-3 lbs)
- 1 lemon (for zest)
- Fresh thyme (1 bunch)
- Fresh parsley (1 small bunch)
- 4 large garlic cloves
Dairy Section
- Whole milk ricotta (8 oz container)
- Goat cheese log (4 oz)
- Heavy cream (small carton)
Pantry & Baking
- Olive oil
- Pure maple syrup (not pancake syrup)
- Sea salt
- Black pepper
- Red pepper flakes
- Raw pumpkin seeds (pepitas)
Success Secrets
1. Choose the right squash. Look for a butternut that’s long and straight rather than bulbous. The cylindrical shape creates more uniform slices and better presentation. It should feel heavy for its size—that means it’s fresh and not dried out inside.
2. Make cuts at an angle. Instead of cutting straight down, angle your knife slightly toward the center (about 15 degrees). This creates slices that fan open more dramatically when roasted, giving you that impressive accordion look.
3. Let the cheese breathe. After whipping the ricotta mixture, let it sit at room temperature for 5-10 minutes before serving. This allows the flavors to meld and the texture to settle into that perfect creamy consistency.
4. Use the pan drippings. After roasting, those caramelized bits stuck to the parchment are flavor gold. Scrape them up with a spatula and drizzle the concentrated garlic-maple mixture over your finished dish for extra intensity.
5. Serve immediately for best texture. The hasselback garlic-maple butternut squash with whipped ricotta & goat cheese is best right after assembly while the squash is warm and the cheese is cool. The temperature contrast creates an incredible eating experience that makes this dish truly special.