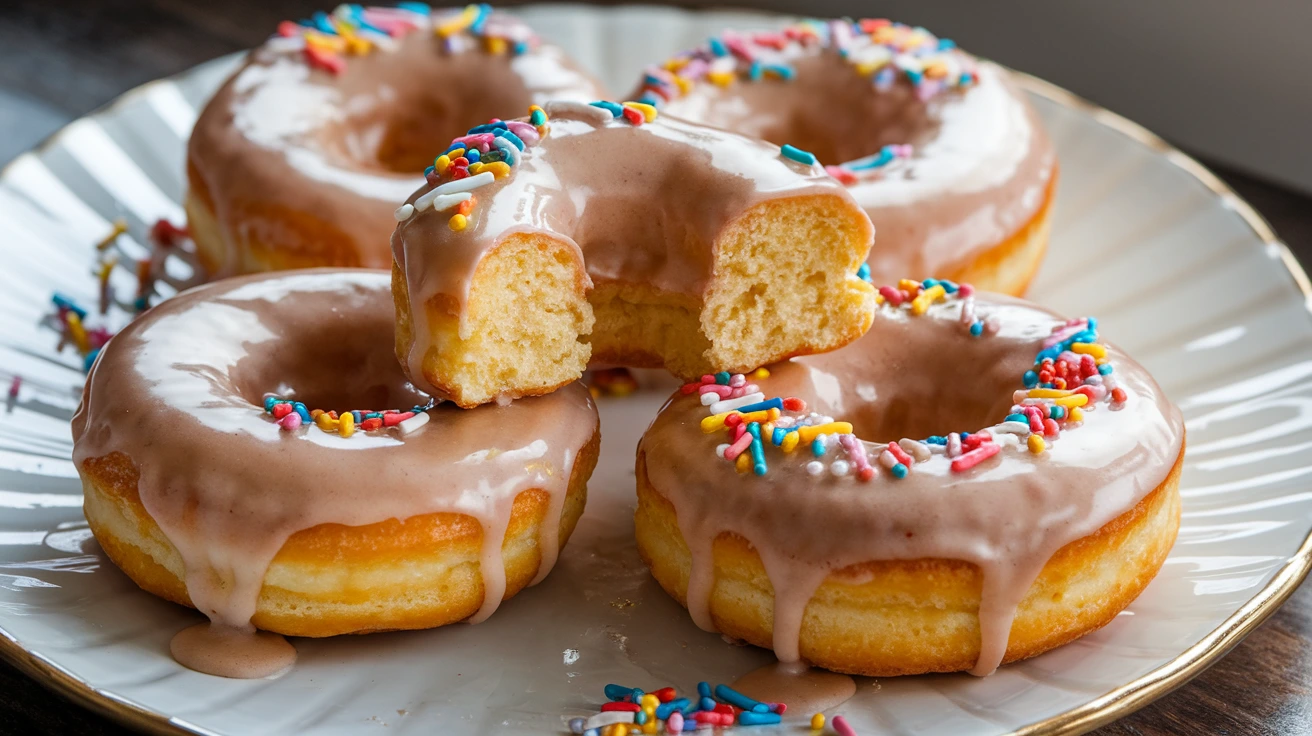
Imagine biting into a golden-brown donut that tastes exactly like your favorite fluffy pancake. These pancake donuts are the breakfast mashup that’ll make your mornings exciting. They’re baked, not fried, so you can enjoy donut-shaped happiness without the guilt. Perfect for lazy Sundays or when you want to surprise your family with something different.
SERVES: 4 | PREP: 15 MIN | COOK: 12 MIN | TOTAL: 27 MIN
Why Pancake Donuts Are Your New Breakfast Obsession
I stumbled onto pancake donuts by accident when I had leftover pancake batter and a donut pan collecting dust. The result? Pure magic. You get that familiar pancake taste with a fun donut shape that makes breakfast feel like a celebration.
The best part is how forgiving this recipe is. Unlike traditional donuts that need perfect frying temperatures, these bake in your oven while you make coffee.
Ingredients You’ll Need
Dry Ingredients
| Ingredient | Amount |
|---|---|
| All-purpose flour | 1½ cups |
| Granulated sugar | ⅓ cup |
| Baking powder | 2 teaspoons |
| Baking soda | ½ teaspoon |
| Salt | ¼ teaspoon |
| Ground cinnamon | ½ teaspoon |
Wet Ingredients
| Ingredient | Amount |
|---|---|
| Buttermilk | ¾ cup |
| Large eggs | 2 |
| Melted butter | ¼ cup |
| Vanilla extract | 1 teaspoon |
Topping
| Ingredient | Amount |
|---|---|
| Melted butter | 3 tablespoons |
| Granulated sugar | ½ cup |
| Ground cinnamon | 1 tablespoon |
Step-by-Step Instructions
Phase 1: Prep Work (5 minutes)
Step 1: Preheat your oven to 375°F (190°C). This temperature is crucial because it’s hot enough to create a golden exterior but gentle enough to keep the inside fluffy. Set your oven rack to the middle position for even heat distribution.
Step 2: Spray your donut pan generously with non-stick cooking spray. Pay special attention to the center posts because that’s where pancake donuts stick most often. If you don’t have cooking spray, brush melted butter into every crevice.
Step 3: Grab two medium mixing bowls. Keep them separate because combining wet and dry ingredients too early creates tough, dense donuts instead of fluffy ones.
Phase 2: Mix the Batter (5 minutes)
Step 4: In the first bowl, whisk together flour, sugar, baking powder, baking soda, salt, and cinnamon. Mix for about 30 seconds until you see the cinnamon distributed evenly throughout. The cinnamon gives these pancake donuts that classic pancake flavor.
Step 5: Create a well in the center of your dry ingredients by pushing them to the sides with your whisk. This well is where you’ll pour the wet ingredients, and it helps everything combine more evenly.
Step 6: In your second bowl, whisk together buttermilk, eggs, melted butter, and vanilla extract until completely combined. The mixture should look pale yellow and slightly frothy. Beat it for a full minute to incorporate air, which makes fluffier pancake donuts.
Step 7: Pour the wet ingredients into the well you created in the dry ingredients. Stir gently with a wooden spoon or rubber spatula using a folding motion. Stop mixing as soon as you don’t see dry flour anymore. You should still see small lumps, and that’s perfect. Overmixing develops gluten, which makes your donuts chewy instead of tender.
Phase 3: Fill and Bake (12 minutes)
Step 8: Transfer your batter to a piping bag or a large zip-top bag with one corner snipped off. If you don’t have either, use a spoon, but a bag gives you much better control and less mess.
Step 9: Pipe the batter into each donut cavity, filling them about two-thirds full. This is important because the batter will rise as it bakes. If you fill them to the top, they’ll overflow and create mushroom-shaped tops instead of pretty rings.
Step 10: Gently tap the pan on your counter three times. This releases air bubbles trapped in the batter that could create holes in your finished pancake donuts.
Step 11: Slide the pan into your preheated oven and bake for 10-12 minutes. They’re done when the tops spring back when you lightly press them, and a toothpick inserted into the thickest part comes out clean or with just a few moist crumbs.
Step 12: Let the donuts cool in the pan for 3 minutes. This brief rest time helps them firm up enough to remove without breaking. If you try to remove them immediately, they’ll tear apart.
Phase 4: Coating (5 minutes)
Step 13: While your pancake donuts cool slightly, melt 3 tablespoons of butter in a small microwave-safe bowl. Heat it in 15-second bursts until completely liquid.
Step 14: In a shallow bowl, mix together ½ cup sugar and 1 tablespoon cinnamon. Use a fork to break up any cinnamon clumps so you get an even coating.
Step 15: Carefully turn the donut pan upside down over a cooling rack. The donuts should pop right out. If they stick, run a butter knife around the edges gently.
Step 16: Brush each pancake donut with melted butter on all sides. Work quickly while they’re still warm because the butter soaks in better and helps the cinnamon sugar stick.
Step 17: Roll each buttered donut in the cinnamon-sugar mixture, pressing gently so the coating adheres. You want a generous coating that looks like freshly fallen snow.
Step 18: Place finished pancake donuts on a serving plate. They’re best enjoyed warm, within 10 minutes of coating, when the outside is slightly crispy and the inside is impossibly soft.
Chef’s Notes
The Buttermilk Secret: Buttermilk is the key ingredient that gives these pancake donuts their authentic pancake flavor. The acidity reacts with the baking soda to create extra fluffiness and a subtle tang. Don’t skip it.
Temperature Matters: Room temperature eggs and buttermilk mix more easily with melted butter, creating a smoother batter. Cold ingredients can cause the butter to solidify into small lumps.
Donut Pan Essential: You really need a proper donut pan for this recipe. Muffin tins won’t give you the classic donut shape or the texture contrast between the thin edges and fluffy body.
Fresh is Best: These pancake donuts are at their absolute peak within 2 hours of baking. The coating stays crispy, and the interior remains fluffy. After that, they’re still delicious but lose some textural magic.
Nutrition Information (Per Donut)
Calories: 245 | Protein: 5g | Carbohydrates: 38g | Fat: 8g | Fiber: 1g | Sugar: 22g | Sodium: 280mg
Creative Variations to Try
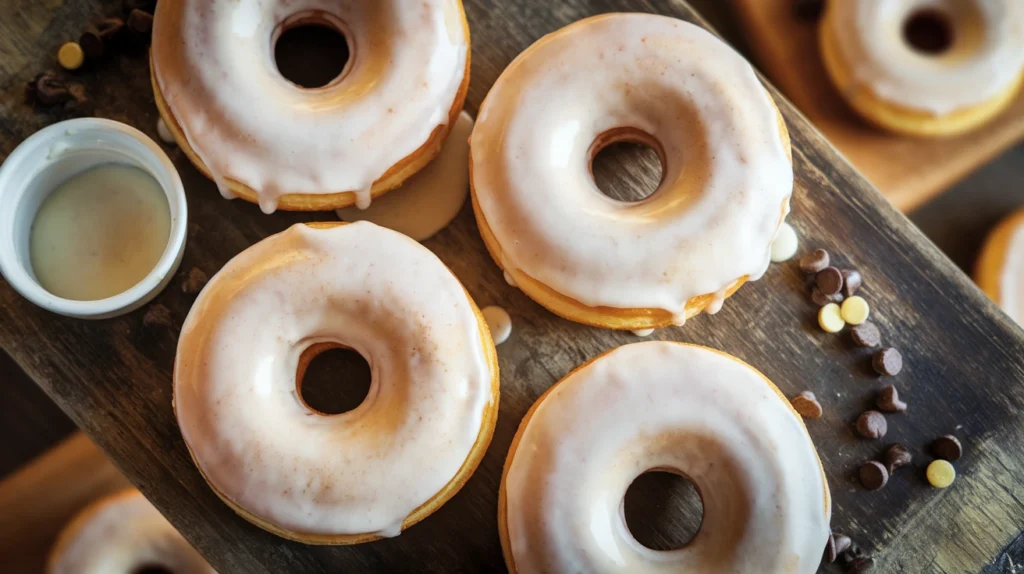
Maple Glazed Pancake Donuts: Skip the cinnamon-sugar coating and dip cooled donuts into a glaze made from 1 cup powdered sugar, 3 tablespoons maple syrup, and 1 tablespoon milk. Let them set on a cooling rack for 10 minutes before serving.
Blueberry Burst: Fold ½ cup fresh or frozen blueberries into the batter after mixing. The berries create little pockets of jammy sweetness throughout. For more fruity breakfast inspiration, check out our matcha tea pancakes that offer a unique twist on traditional pancakes.
Chocolate Chip Pancake Donuts: Stir ½ cup mini chocolate chips into your finished batter. The chips melt slightly during baking, creating chocolate ribbons throughout each bite.
Dutch-Inspired Mini Donuts: Make these in a mini donut pan and reduce baking time to 6-8 minutes for bite-sized treats similar to Dutch poffertjes, those adorable mini pancakes that inspired this whole donut adventure.
Storage & Reheating
Room Temperature: Store pancake donuts in an airtight container at room temperature for up to 2 days. Place parchment paper between layers to prevent sticking.
Refrigeration: These will keep for up to 5 days in the fridge, though the coating may soften. Store them in a covered container.
Freezing: Freeze uncoated donuts in a freezer bag for up to 2 months. Thaw at room temperature for 30 minutes, then warm in a 300°F oven for 5 minutes before coating with butter and cinnamon sugar.
Reheating: Microwave individual donuts for 10-15 seconds to restore their just-baked softness. Avoid overheating, which dries them out.
Troubleshooting Common Problems
Problem: Donuts Stick to the Pan Your pan wasn’t greased enough. Next time, use a pastry brush to apply melted butter or cooking spray into every corner. Make sure you get the center posts thoroughly coated.
Problem: Donuts Are Dense Instead of Fluffy You overmixed the batter, which developed too much gluten. Mix only until the flour disappears. Lumpy batter makes fluffy pancake donuts.
Problem: Tops Are Domed Instead of Flat You filled the cavities too full. The batter needs room to expand. Fill only two-thirds of the way, and the donuts will rise to the perfect height with flat tops.
Problem: Donuts Taste Bland Check your baking powder expiration date. Old leavening agents lose potency and don’t provide the flavor lift you need. Also, make sure you’re using real vanilla extract, not imitation.
Problem: Coating Won’t Stick The donuts cooled too much before coating. Coat them while still warm, within 5 minutes of removing from the pan. The residual heat helps the butter soak in and the sugar adhere.
Equipment Essentials
- 6-cavity donut pan (essential for shape)
- Two medium mixing bowls
- Whisk and rubber spatula
- Piping bag or zip-top bag
- Cooling rack
- Pastry brush (for butter application)
- Shallow bowl (for cinnamon sugar)
- Measuring cups and spoons
Shopping List
Baking Aisle
- All-purpose flour
- Granulated sugar
- Baking powder
- Baking soda
- Ground cinnamon
- Vanilla extract
Dairy Section
- Buttermilk
- Eggs
- Butter
Pantry Staples
- Salt
- Non-stick cooking spray
Success Secrets
1. Measure flour correctly. Spoon it into your measuring cup and level it off with a knife. Scooping directly from the bag packs in too much flour, making dense pancake donuts.
2. Don’t open the oven door during the first 8 minutes of baking. Temperature fluctuations prevent proper rising and create uneven textures.
3. Use fresh baking powder. Test it by dropping a spoonful into hot water. If it fizzes vigorously, it’s good. No fizz means no rise.
4. Room temperature ingredients blend more smoothly. Set your eggs and buttermilk on the counter 30 minutes before starting.
5. Coat immediately after baking. The window for perfect coating is narrow. Warm donuts + melted butter + cinnamon sugar = crispy, flavorful perfection that fades as they cool.