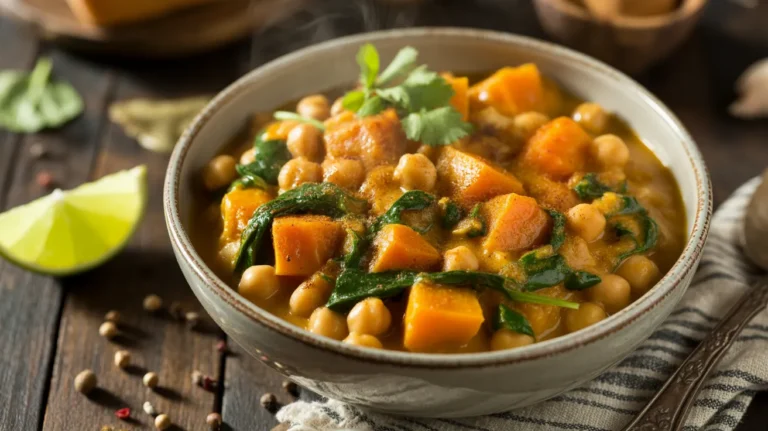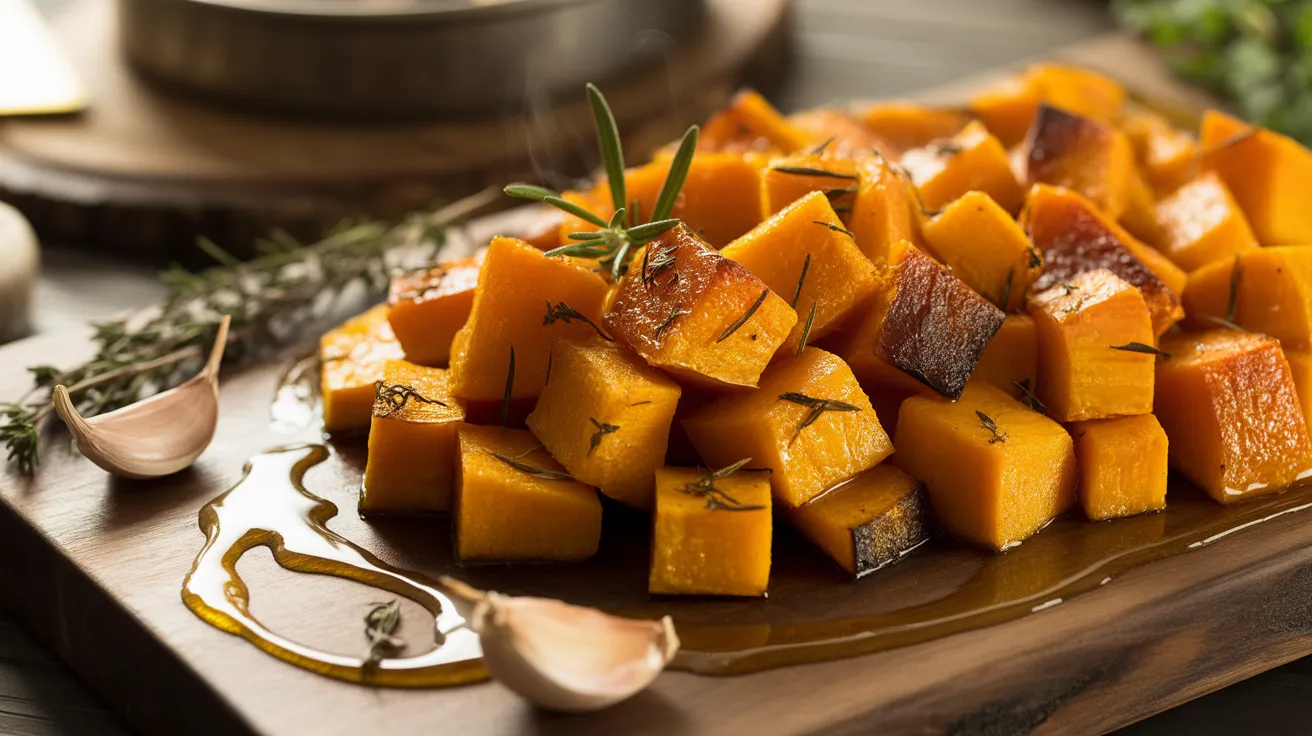
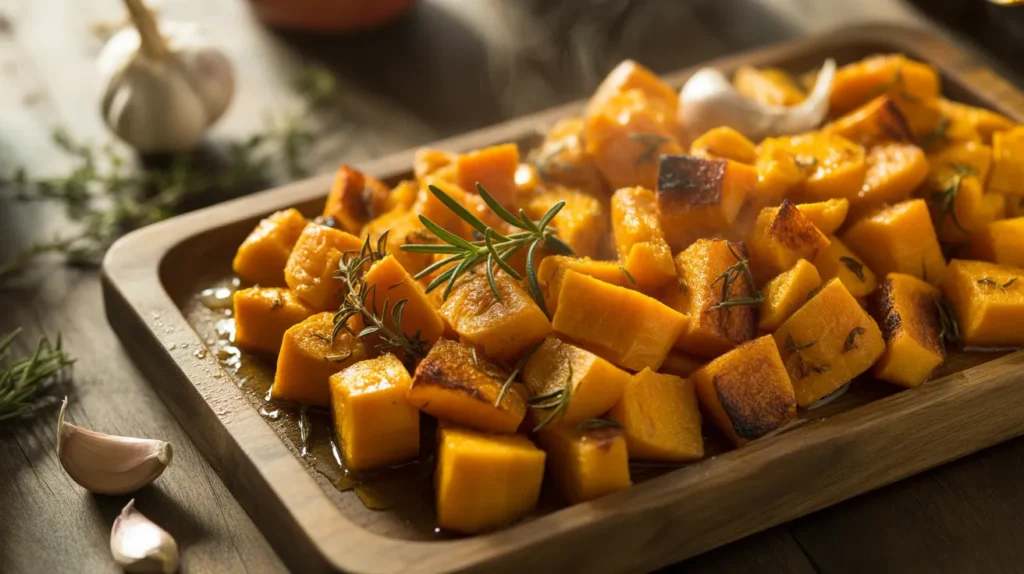
This oven-baked butternut squash recipe transforms a simple winter vegetable into a caramelized, herb-infused side dish that’s crispy on the edges and tender inside. Perfect for weeknight dinners or holiday gatherings, this oven-baked butternut squash takes just minutes to prep and fills your kitchen with the warm aroma of roasted garlic and fresh rosemary.
SERVES: 4 | PREP: 15 MIN | COOK: 35 MIN | TOTAL: 50 MIN
Ingredients
Main Ingredients
| Ingredient | Amount |
|---|---|
| Butternut squash (peeled, seeded) | 2 pounds |
| Olive oil | 3 tablespoons |
| Fresh rosemary (chopped) | 2 tablespoons |
| Fresh thyme leaves | 1 tablespoon |
| Garlic cloves (minced) | 4 cloves |
Seasonings
| Ingredient | Amount |
|---|---|
| Sea salt | 1 teaspoon |
| Black pepper (freshly ground) | ½ teaspoon |
| Smoked paprika | ½ teaspoon |
| Honey (optional) | 1 tablespoon |
Step-by-Step Instructions
Phase 1: Preparation (10 minutes)
Step 1: Preheat your oven to 425°F (220°C) and position the rack in the center. This high temperature creates those beautiful caramelized edges while keeping the inside tender. Line a large baking sheet with parchment paper to prevent sticking.
Step 2: Cut the butternut squash into 1-inch cubes. Keep the pieces uniform so they cook evenly—smaller pieces will burn while larger ones stay raw. You should have about 6 cups of cubed squash.
Step 3: Transfer the cubed squash to a large mixing bowl. Make sure the bowl is big enough to toss everything without spilling—this makes coating much easier.
Step 4: Add 3 tablespoons olive oil to the bowl. I use extra virgin for the best flavor, but regular olive oil works fine. The oil helps the squash caramelize and prevents drying out during roasting.
Phase 2: Seasoning (5 minutes)
Step 5: Add the minced garlic, chopped rosemary, and thyme leaves directly to the bowl. Fresh herbs are key here—dried herbs won’t give you the same aromatic punch. The heat will mellow the garlic and make the herbs fragrant.
Step 6: Sprinkle in 1 teaspoon sea salt, ½ teaspoon black pepper, and ½ teaspoon smoked paprika. The paprika adds a subtle smokiness that complements the natural sweetness of the squash.
Step 7: Toss everything together using your hands or two large spoons. Make sure every piece gets coated with oil and herbs. I prefer using my hands—you can feel when everything is evenly distributed.
Step 8: If you want a hint of sweetness to balance the herbs, drizzle 1 tablespoon honey over the mixture now. This is optional but creates an amazing sweet-savory contrast.
Phase 3: Roasting (35 minutes)
Step 9: Spread the seasoned squash in a single layer on your prepared baking sheet. Don’t overcrowd—the pieces should have space between them. Crowding creates steam instead of roasting, giving you mushy squash instead of crispy edges.
Step 10: Place the baking sheet in the preheated oven on the center rack. Set a timer for 20 minutes—this is when we’ll flip the pieces.
Step 11: After 20 minutes, use a spatula to flip each piece of squash. You should see golden-brown edges forming on the bottom. If they’re not browning, your oven might not be hot enough—give it another 5 minutes before flipping.
Step 12: Return the pan to the oven for another 15 minutes. The squash is done when you can easily pierce it with a fork and the edges are deeply caramelized and crispy.
Phase 4: Finishing (2 minutes)
Step 13: Remove the baking sheet from the oven and let the squash rest for 2 minutes. This brief rest allows the caramelization to set and makes the pieces easier to handle.
Step 14: Taste one piece and adjust seasoning if needed. I often add a pinch more salt right before serving—the roasting process can dull the saltiness slightly.
Step 15: Transfer to a serving platter and garnish with fresh rosemary sprigs if desired. Serve immediately while the edges are still crispy.
Chef’s Notes
Squash Selection: Choose a butternut squash that feels heavy for its size with no soft spots. The longer, thinner neck portion has fewer seeds and more usable flesh—perfect for this oven-baked butternut squash recipe.
Oil Temperature: Make sure your oil isn’t ice cold from the pantry. Room temperature oil coats more evenly and helps the herbs stick better to every piece.
Herb Variations: While rosemary and thyme create a classic combination, sage works beautifully too. Just use less sage—about 1 tablespoon—since it’s more potent than rosemary.
Crispiness Factor: For extra-crispy edges, flip the squash pieces twice during roasting—at 15 minutes and again at 30 minutes. This creates more caramelized surfaces and deeper flavor.
Nutrition Information (Per Serving)
Calories: 145 | Protein: 2g | Carbohydrates: 23g | Fat: 7g | Fiber: 4g | Sugar: 5g | Sodium: 595mg
Variations
Maple-Cinnamon Version: Replace the herbs with 1 tablespoon maple syrup and 1 teaspoon cinnamon. This sweet version pairs perfectly with pork dishes or works as a holiday side.
Spicy Kick: Add ½ teaspoon cayenne pepper and 1 teaspoon cumin to the seasoning mix. The heat balances the squash’s natural sweetness and creates a more complex flavor profile.
Parmesan-Crusted: Toss the roasted squash with ½ cup grated Parmesan cheese during the last 5 minutes of cooking. The cheese melts and creates a golden crust that’s absolutely irresistible. If you love cheesy vegetables, check out this caramelized butternut squash for another rich option.
Mediterranean Style: Replace rosemary with 2 tablespoons fresh oregano and add ½ cup crumbled feta cheese after roasting. Finish with a squeeze of lemon juice for brightness. For more squash preparation ideas, explore this baked butternut squash recipe that showcases different cutting techniques.
Storage & Reheating
Refrigerator Storage: Cool the oven-baked butternut squash completely before transferring to an airtight container. It keeps for 4-5 days in the fridge. The flavors actually deepen overnight as the herbs marinate the squash.
Freezing: This recipe freezes well for up to 3 months. Spread cooled pieces on a baking sheet and freeze until solid, then transfer to freezer bags. This prevents the pieces from sticking together in one giant clump.
Reheating Methods: The oven is your best friend for reheating. Spread the squash on a baking sheet and warm at 375°F for 10-12 minutes. This restores the crispy edges better than microwaving, which makes everything soggy.
Meal Prep: This oven-baked butternut squash holds up great for meal prep. Make a double batch on Sunday and add it to grain bowls, salads, or pasta throughout the week.
Troubleshooting Common Problems
Problem 1: Squash is mushy and not caramelized Your pan was overcrowded. Squash needs space to roast properly—when pieces touch, they steam each other. Use two baking sheets if needed, and make sure pieces are at least ½ inch apart.
Problem 2: Edges are burning before center cooks through Your pieces are too small or your oven runs hot. Cut the squash into larger 1½-inch cubes and reduce temperature to 400°F. Add 5-10 minutes to cooking time.
Problem 3: Squash sticks to the pan You either skipped the parchment paper or didn’t use enough oil. Always line your pan and make sure every piece is well-coated with oil before roasting.
Problem 4: Herbs are burning and taste bitter The herbs got too much direct heat. Next time, add half the herbs before roasting and toss the remaining fresh herbs with the cooked squash right before serving.
Problem 5: Flavors taste flat or bland Salt is crucial for bringing out the squash’s natural sweetness. Don’t be shy—1 teaspoon for 2 pounds might seem like a lot, but the large surface area needs adequate seasoning. Taste and adjust before serving.
Equipment Essentials
- Large baking sheet (18×13 inches minimum)
- Parchment paper or silicone baking mat
- Chef’s knife for cutting squash
- Vegetable peeler for removing skin
- Large mixing bowl for tossing
- Measuring spoons and cups
- Metal spatula for flipping
Shopping List
Produce Section
- Butternut squash (2 pounds)
- Fresh rosemary bunch
- Fresh thyme bunch
- Garlic bulb
Pantry/Baking Aisle
- Extra virgin olive oil
- Sea salt
- Black peppercorns
- Smoked paprika
- Honey (optional)
Paper Products
- Parchment paper
Success Secrets
1. Room Temperature Matters: Take the squash out of the fridge 30 minutes before roasting. Cold squash releases moisture when it hits the hot pan, creating steam instead of that coveted caramelization.
2. Sharp Knife is Essential: Butternut squash has tough skin. A dull knife slips and creates dangerous cutting situations. Sharpen your knife first or use a heavy chef’s knife for better control.
3. Don’t Skip the Flip: Flipping at the halfway point ensures even browning on multiple sides. It takes just 2 minutes but doubles the amount of caramelized, crispy surface area you get.
4. Taste as You Go: Ovens vary wildly in temperature accuracy. Start checking your oven-baked butternut squash at 30 minutes instead of waiting the full 35. You want fork-tender with golden edges—not burnt corners and raw centers.
5. Fresh Herbs Make the Difference: Dried herbs work in a pinch, but fresh rosemary and thyme create aromatic oils when heated that dried versions simply can’t match. The investment pays off in flavor depth and that restaurant-quality aroma that fills your kitchen.