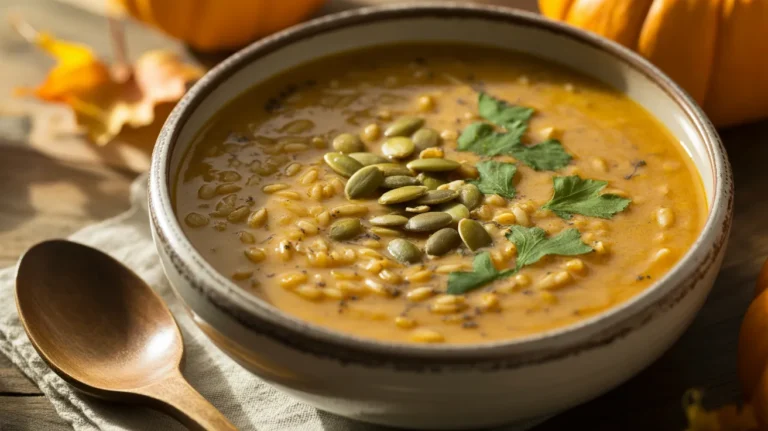
There’s something magical about a bowl of pumpkin and sweet potato soup on a chilly evening. This pumpkin and sweet potato soup combines the natural sweetness of roasted vegetables with warm autumn spices, creating a velvety texture that feels like a warm hug in a bowl. I’ve been making this recipe for years, and it never fails to impress dinner guests or satisfy my family’s comfort food cravings.
SERVES: 4 | PREP: 20 MIN | COOK: 45 MIN | TOTAL: 65 MIN
Ingredients
Main Vegetables
| Ingredient | Amount | Notes |
|---|---|---|
| Pumpkin (peeled, cubed) | 3 cups | Sugar pumpkin or pie pumpkin works best |
| Sweet potatoes (peeled, cubed) | 2 large | About 3 cups cubed |
| Yellow onion (diced) | 1 medium | Sweet onions work great too |
| Garlic cloves (minced) | 4 cloves | Fresh is essential here |
Liquids & Fats
| Ingredient | Amount | Notes |
|---|---|---|
| Vegetable broth | 4 cups | Low-sodium preferred |
| Coconut milk (full-fat) | 1 cup | Creates that creamy texture |
| Olive oil | 2 tablespoons | For sautéing |
Seasonings & Spices
| Ingredient | Amount | Notes |
|---|---|---|
| Ground ginger | 1 teaspoon | Fresh grated works too |
| Ground cinnamon | ½ teaspoon | Adds warmth |
| Ground nutmeg | ¼ teaspoon | Don’t skip this! |
| Smoked paprika | ½ teaspoon | For depth |
| Salt | 1½ teaspoons | Adjust to taste |
| Black pepper | ½ teaspoon | Freshly ground |
| Maple syrup | 2 tablespoons | Balances the flavors |
Garnish Options
| Ingredient | Amount | Notes |
|---|---|---|
| Roasted pumpkin seeds | ¼ cup | For crunch |
| Fresh thyme | 2 sprigs | Optional but lovely |
| Coconut cream | Drizzle | For presentation |
Step-by-Step Instructions
Phase 1: Vegetable Preparation (15 minutes)
Step 1: Start by peeling your pumpkin with a sharp vegetable peeler or paring knife. Cut the pumpkin in half, scoop out all the seeds and stringy bits, then cut the flesh into 1-inch cubes. This size ensures even cooking and makes blending easier later.
Step 2: Peel your sweet potatoes using a vegetable peeler, working from top to bottom in long strokes. Cut them into 1-inch cubes, matching your pumpkin size. Keeping the vegetables the same size means they’ll cook at the same rate, preventing some pieces from being mushy while others are still firm.
Step 3: Dice your onion into ¼-inch pieces. I like to cut the onion in half through the root, peel it, then make horizontal cuts followed by vertical cuts before slicing across. This gives you perfectly uniform pieces that will caramelize beautifully.
Step 4: Mince your garlic cloves finely with a sharp knife. I press each clove with the flat side of my knife first to loosen the skin, then rock the knife back and forth to create a fine mince. The finer you mince it, the more evenly the garlic flavor will distribute through your soup.
Phase 2: Building Flavor (10 minutes)
Step 5: Heat 2 tablespoons of olive oil in a large, heavy-bottomed pot or Dutch oven over medium heat. Wait until the oil shimmers and moves easily across the pan—this takes about 2 minutes. If you drop a tiny piece of onion in, it should sizzle immediately.
Step 6: Add your diced onion to the hot oil and stir to coat. Cook for 5-7 minutes, stirring every minute or so, until the onions turn translucent and start to develop golden edges. You’ll smell a sweet, caramelized aroma when they’re ready. Don’t rush this step—it builds the flavor foundation for your entire soup.
Step 7: Add your minced garlic to the pot and stir constantly for 30-45 seconds. You want the garlic to become fragrant but not brown. Browned garlic tastes bitter, so keep it moving in the pan and watch it carefully. The moment you smell that amazing garlic aroma filling your kitchen, move to the next step.
Step 8: Sprinkle in your ground ginger, cinnamon, nutmeg, smoked paprika, salt, and pepper. Stir the spices into the onion mixture and cook for 30 seconds. This process, called blooming, wakes up the spices’ essential oils and intensifies their flavors. You’ll notice the aroma becomes much more complex and fragrant.
Phase 3: Cooking the Vegetables (35 minutes)
Step 9: Add your cubed pumpkin and sweet potatoes to the pot, stirring everything together so the vegetables get coated with the spiced oil mixture. Let them cook for 3-4 minutes without stirring, allowing the bottom surfaces to develop a light golden color. This caramelization adds another layer of flavor to your soup.
Step 10: Pour in 4 cups of vegetable broth, making sure to scrape the bottom of the pot with a wooden spoon to release any browned bits stuck there. These bits (called fond) are pure flavor gold. Bring the mixture to a boil over high heat, which should take about 5 minutes.
Step 11: Once boiling, reduce the heat to medium-low so the soup maintains a gentle simmer. You should see small bubbles breaking the surface but not a rolling boil. Cover the pot with a lid and let it cook for 25-30 minutes, stirring every 10 minutes to prevent sticking.
Step 12: Test your vegetables for doneness by piercing them with a fork. They should be completely tender and fall apart easily—almost melting. If there’s any resistance, cook for another 5 minutes and test again. Perfectly soft vegetables are crucial for achieving that silky-smooth texture.
Phase 4: Creating the Creamy Base (5 minutes)
Step 13: Turn off the heat and let the soup cool for 5 minutes. This prevents dangerous splashing when you blend hot liquid. I’ve learned this lesson the hard way—hot soup exploding from a blender is no joke!
Step 14: Use an immersion blender to puree the soup directly in the pot, blending for 2-3 minutes until completely smooth with no vegetable chunks remaining. Move the blender in circles and up and down to catch every piece. If you don’t have an immersion blender, carefully transfer the soup in batches to a regular blender, filling it only halfway each time and holding the lid down with a kitchen towel.
Step 15: Pour in 1 cup of full-fat coconut milk and 2 tablespoons of maple syrup. The coconut milk adds incredible creaminess without dairy, and the maple syrup balances the earthiness of the vegetables with just a hint of sweetness. Stir everything together until fully incorporated.
Step 16: Taste your soup and adjust the seasonings. I usually add a pinch more salt and a grind of fresh pepper at this stage. The flavors should be balanced—sweet, savory, and slightly spiced. If it tastes flat, add more salt. If it’s too sweet, add a squeeze of lemon juice.
Phase 5: Final Touches (5 minutes)
Step 17: Gently reheat the soup over medium-low heat for 3-4 minutes, stirring occasionally, until it’s steaming hot but not boiling. You want it hot enough to serve immediately but not so hot that it boils and potentially splits the coconut milk.
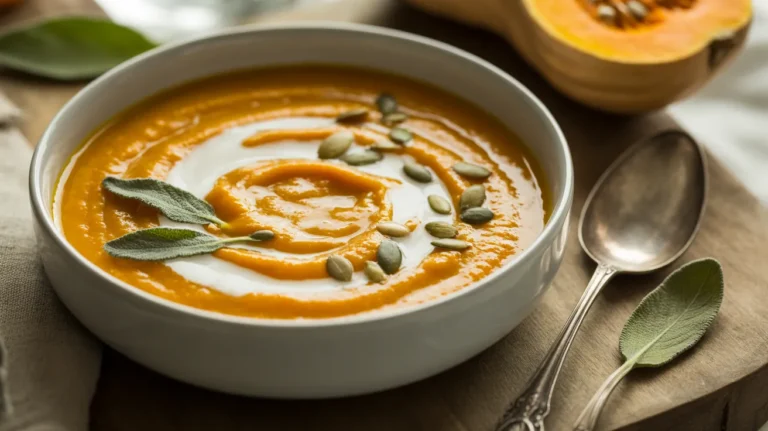
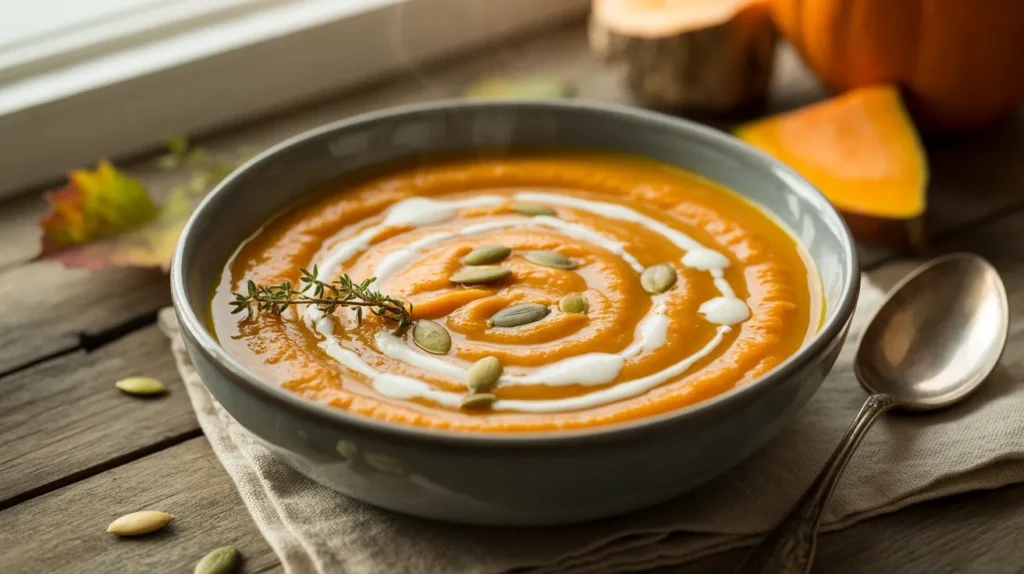
Step 18: Ladle the pumpkin and sweet potato soup into bowls and garnish with roasted pumpkin seeds, a drizzle of coconut cream, and fresh thyme leaves if using. The contrast of crunchy seeds against velvety soup is absolutely perfect.
Chef’s Notes
Temperature Matters: I always cook this soup at a gentle simmer rather than a hard boil. Aggressive boiling can cause the vegetables to break down unevenly and may cause the coconut milk to separate when you add it later.
Pumpkin Selection: Use sugar pumpkins (also called pie pumpkins), not carving pumpkins. Sugar pumpkins have denser, sweeter flesh that’s perfect for cooking. If you’re looking for more ways to use this wonderful squash, try my roasted pumpkin soup for a slightly different flavor profile.
Coconut Milk Substitution: Full-fat coconut milk gives this soup its luxurious texture, but if you prefer a lighter version, use half-and-half or heavy cream instead. The flavor will be slightly different but still delicious.
Make-Ahead Magic: This soup actually tastes better the next day after the flavors have had time to marry together. I often make it on Sunday for easy weeknight dinners.
Nutrition Information (Per Serving)
- Calories: 285
- Protein: 5g
- Carbohydrates: 38g
- Fat: 14g
- Fiber: 6g
- Sugar: 12g
- Sodium: 920mg
Delicious Variations
1. Curry-Spiced Version
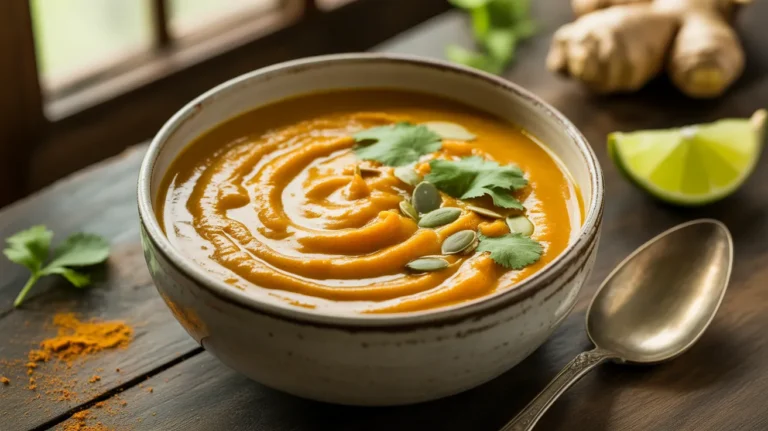
Add 2 tablespoons of curry powder in Step 8 along with the other spices. The warm curry notes complement the sweet vegetables beautifully. Top with a dollop of plain yogurt and fresh cilantro for an Indian-inspired twist.
2. Thai-Inspired Style
Replace the cinnamon and nutmeg with 1 tablespoon of Thai red curry paste and add 1 tablespoon of fish sauce (or soy sauce for vegetarian). Finish with fresh basil, lime juice, and a drizzle of sriracha for those who like heat.
3. Roasted Vegetable Version
Instead of simmering the vegetables, roast them first at 425°F for 30 minutes until caramelized. This intensifies their natural sweetness and adds a deeper, smokier flavor. For another delicious squash soup option, check out my butternut squash pumpkin soup that uses a similar roasting technique.
4. Protein-Packed Addition
Stir in 2 cups of cooked white beans or chickpeas during Step 15 for added protein and texture. This transforms the soup from a side dish into a complete meal that’ll keep you satisfied for hours.
Storage & Reheating
Refrigerator Storage
Let the soup cool completely before transferring to airtight containers. It will keep in the refrigerator for 4-5 days. The flavors actually deepen and improve after a day or two, making this perfect for meal prep.
Freezer Storage
This soup freezes beautifully! Pour cooled soup into freezer-safe containers, leaving 1 inch of headspace for expansion. Freeze for up to 3 months. Label each container with the date so you’ll know how long it’s been stored.
Reheating Instructions
From refrigerator: Reheat gently on the stovetop over medium-low heat, stirring frequently. Add a splash of broth or water if the soup has thickened too much. It should take 5-7 minutes to heat through.
From frozen: Thaw overnight in the refrigerator, then reheat as above. In a pinch, you can reheat from frozen—just use very low heat and stir frequently to prevent scorching on the bottom. This method takes about 15-20 minutes.
Microwave method: Heat individual portions in microwave-safe bowls at 50% power in 2-minute intervals, stirring between each interval, until hot throughout.
Troubleshooting Common Problems
Problem 1: Soup Is Too Thick
Solution: Simply stir in additional vegetable broth ¼ cup at a time until you reach your desired consistency. Reheat gently after adding liquid. Remember that soup thickens as it sits, so it’s normal to add liquid when reheating leftovers.
Problem 2: Soup Tastes Bland
Solution: You probably need more salt! Start by adding ¼ teaspoon at a time, tasting after each addition. Also try a squeeze of fresh lemon juice or a splash of apple cider vinegar—acid brightens all the other flavors. Finally, check your spices—old spices lose potency and won’t deliver much flavor.
Problem 3: Soup Has Lumps After Blending
Solution: Keep blending! If using an immersion blender, blend for at least 3-4 minutes, moving the blender all around the pot. If lumps persist, strain the soup through a fine-mesh sieve, pushing on the solids with a spoon to extract all the liquid. This extra step guarantees silky-smooth results.
Problem 4: Vegetables Aren’t Cooking Evenly
Solution: Make sure all your vegetable pieces are cut to the same size—about 1 inch. Larger pieces take longer to cook, leaving you with some mushy and some firm pieces. If you notice uneven cooking during simmering, use a spoon to break up any larger chunks, then continue cooking until everything is tender.
Problem 5: Soup Is Too Sweet
Solution: Balance the sweetness with acid and salt. Add 1 tablespoon of lemon juice or 1 teaspoon of apple cider vinegar and ¼ teaspoon of salt. Taste and adjust. You can also add a pinch of cayenne pepper or more black pepper to add complexity that balances the sweet notes.
Equipment Essentials
- Large Dutch oven or heavy-bottomed pot (at least 5-quart capacity)
- Sharp chef’s knife for chopping vegetables
- Vegetable peeler for pumpkin and sweet potatoes
- Wooden spoon for stirring and scraping
- Immersion blender or regular blender for pureeing
- Measuring cups and spoons for accuracy
- Cutting board (preferably large)
- Ladle for serving
Shopping List
Produce Section
- 1 medium pumpkin (about 2-3 pounds)
- 2 large sweet potatoes
- 1 medium yellow onion
- 1 head of garlic
- Fresh thyme (optional)
Canned/Boxed Goods Aisle
- 1 carton vegetable broth (32 ounces)
- 1 can full-fat coconut milk (13.5 ounces)
Oils & Condiments
- Olive oil
- Maple syrup
Spice Aisle
- Ground ginger
- Ground cinnamon
- Ground nutmeg
- Smoked paprika
- Black pepper
- Salt
Bulk or Snack Section
- Roasted pumpkin seeds (pepitas)
Success Secrets
1. Don’t Skip the Blooming: Cooking your spices in oil for 30 seconds before adding liquid releases their essential oils and creates a more complex, layered flavor that raw spices can’t match.
2. Cut Consistently: Taking the time to cut all vegetables to the same 1-inch size ensures even cooking. This means every spoonful of soup will have the same perfect texture and flavor.
3. Taste and Adjust: Always taste your soup before serving and adjust the seasonings. Soup should never taste flat—it needs enough salt to make the other flavors pop. I taste at least three times during cooking: after sautéing the onions, after adding the broth, and right before serving.
4. Cool Before Blending: Hot liquids expand when blended, creating pressure that can cause dangerous explosions. Always let the soup cool for 5 minutes before blending, and never fill a blender more than halfway with hot liquid.
5. Use Quality Broth: Since broth makes up a significant portion of this soup, its quality matters. Choose a low-sodium vegetable broth with a short ingredient list. If you have homemade broth, even better! The depth of flavor will shine through in the final dish.
This pumpkin and sweet potato soup brings together the best flavors of fall in one comforting bowl. The natural sweetness of roasted vegetables combines with warm spices to create something truly special. Whether you’re serving it as a starter for Thanksgiving dinner or making a big batch for weeknight meals, this recipe never disappoints. I hope you love it as much as my family does!