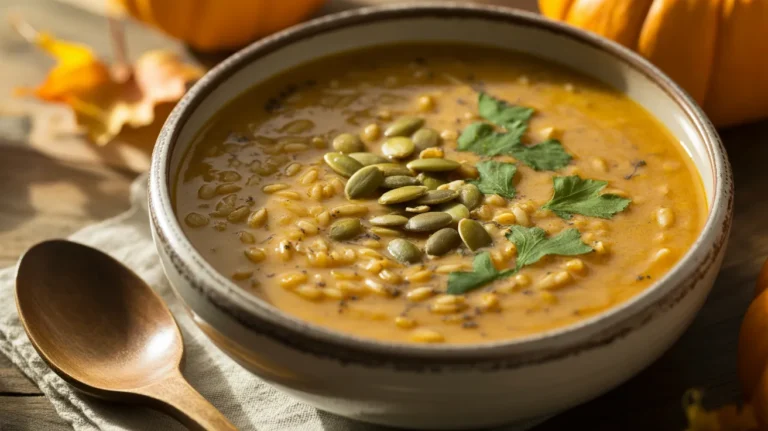
This 30 minute creamy pumpkin soup transforms simple ingredients into silky, restaurant-quality comfort in your own kitchen. I’ve perfected this 30 minute creamy pumpkin soup through countless fall evenings, and it’s become my go-to when I need something warm, satisfying, and surprisingly easy. The secret? High-quality ingredients and a few smart shortcuts that don’t compromise on flavor.
SERVES: 4 | PREP: 10 MIN | COOK: 20 MIN | TOTAL: 30 MIN
Ingredients
Base Ingredients
| Ingredient | Amount | Notes |
|---|---|---|
| Unsalted butter | 3 tablespoons | Divided |
| Yellow onion (medium) | 1 whole | Finely diced |
| Garlic cloves | 4 cloves | Minced |
| Fresh ginger | 1 tablespoon | Grated |
| Pumpkin puree (canned) | 29 ounces (1 large can) | Not pie filling |
| Vegetable broth | 3 cups | Low-sodium preferred |
| Heavy cream | 1 cup | Full-fat |
| Maple syrup | 2 tablespoons | Pure, not pancake syrup |
Seasonings
| Ingredient | Amount |
|---|---|
| Ground cinnamon | 1 teaspoon |
| Ground nutmeg | ¼ teaspoon |
| Ground cumin | ½ teaspoon |
| Kosher salt | 1 teaspoon |
| Black pepper | ½ teaspoon |
| Cayenne pepper | ⅛ teaspoon (optional) |
Garnish
| Ingredient | Amount |
|---|---|
| Pumpkin seeds (pepitas) | ¼ cup |
| Fresh sage leaves | 8-10 leaves |
| Extra heavy cream | For drizzling |
Step-by-Step Instructions
Phase 1: Building the Flavor Base (5 minutes)
Step 1: Place a large Dutch oven or heavy-bottomed pot over medium heat. Add 2 tablespoons of butter and let it melt completely until it stops foaming, about 1-2 minutes.
The butter should coat the bottom of the pot evenly but shouldn’t brown. If it starts to brown, reduce your heat immediately.
Step 2: Add the finely diced onion to the melted butter. Stir to coat every piece with butter, then let cook for 3-4 minutes, stirring every 30 seconds.
You’re looking for the onions to become translucent and soft, not browned. They should smell sweet, not caramelized.
Step 3: Add the minced garlic and grated ginger to the pot. Stir constantly for 60 seconds.
The garlic should become fragrant but not browned—burnt garlic tastes bitter and will ruin your soup. Keep that spoon moving!
Phase 2: Creating the Pumpkin Base (3 minutes)
Step 4: Pour the entire 29-ounce can of pumpkin puree directly into the pot. Use a wooden spoon to break it up and mix it thoroughly with the aromatics.
Stir for 1-2 minutes until the pumpkin darkens slightly in color. This cooking step removes the raw canned taste and deepens the flavor.
Step 5: Sprinkle in the cinnamon, nutmeg, cumin, salt, black pepper, and cayenne (if using). Stir everything together for 30 seconds.
Toasting the spices in the pumpkin mixture releases their essential oils and makes them more fragrant. You’ll smell the difference immediately.
Phase 3: Building the Soup (7 minutes)
Step 6: Pour in 3 cups of vegetable broth, stirring as you add it. The mixture will be thick at first, but keep stirring until it’s completely smooth.
Use a whisk if needed to eliminate any lumps. The consistency should resemble a thick milkshake at this point.
Step 7: Increase heat to medium-high and bring the soup to a gentle boil. You’ll see bubbles breaking the surface consistently.
This should take about 3-4 minutes. Watch carefully so it doesn’t boil over.
Step 8: Once boiling, reduce heat to low and let simmer for 5 minutes, stirring occasionally.
This simmering time allows the flavors to marry together. The soup should reduce slightly and thicken just a bit.
Phase 4: Creating Creaminess (3 minutes)
Step 9: Remove the pot from heat. This is important—adding cream to boiling soup can cause it to curdle.
Let the soup cool for 30 seconds before proceeding to the next step.
Step 10: Slowly pour in 1 cup of heavy cream while stirring gently. Add it in a steady stream, not all at once.
The soup will immediately become lighter in color and silkier in texture. Stir until completely incorporated.
Step 11: Add 2 tablespoons of maple syrup and stir to combine.
Taste the soup now. It should be perfectly balanced—creamy, slightly sweet, with warm spices. Add more salt if needed (I usually add another ¼ teaspoon).
Step 12: For an ultra-smooth texture, use an immersion blender directly in the pot. Blend for 30-60 seconds until completely silky.
If you don’t have an immersion blender, the soup is already smooth enough to serve. This step just makes it restaurant-quality velvety.
Phase 5: Crispy Garnish Preparation (5 minutes)
Step 13: While the soup stays warm on low heat, place a small skillet over medium heat. Add the remaining 1 tablespoon of butter.
Let it melt and start to foam slightly.
Step 14: Add the pumpkin seeds to the skillet. Toast them, stirring frequently, for 2-3 minutes until they start to pop and turn golden brown.
They’ll smell nutty and delicious. Remove from heat immediately when golden—they can burn quickly.
Step 15: In the same skillet (no need to clean it), add the fresh sage leaves. Fry for 30-45 seconds per side until they become crispy and translucent.
They’ll sizzle dramatically when they hit the butter. Remove them carefully as they’ll be fragile when crispy.
Phase 6: Serving (2 minutes)
Step 16: Ladle the hot 30 minute creamy pumpkin soup into four bowls. Each bowl should hold about 1½ cups of soup.
Leave about an inch at the top for garnishes.
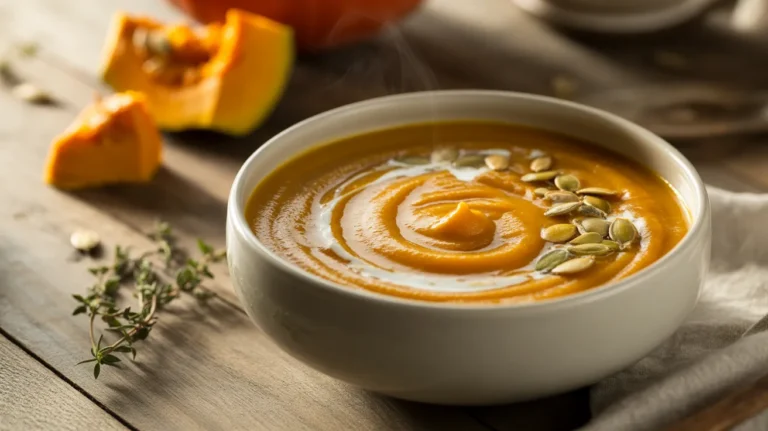
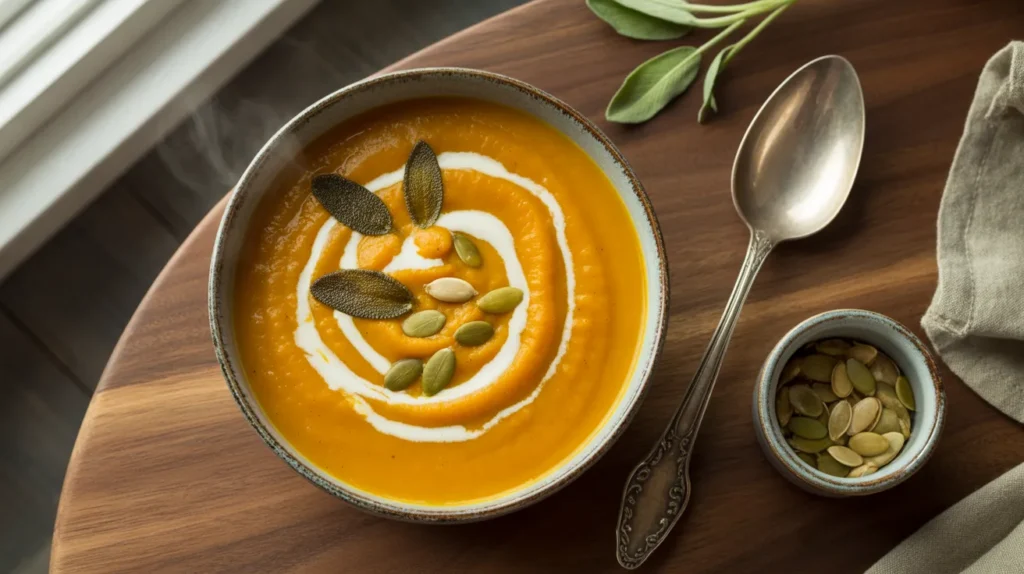
Step 17: Drizzle each bowl with a swirl of heavy cream. Use a toothpick or knife tip to drag through the cream and create a decorative pattern if desired.
This adds visual appeal and an extra touch of richness.
Step 18: Top each serving with the toasted pumpkin seeds and 2-3 crispy sage leaves.
Serve immediately while the soup is piping hot and the garnishes are still crispy.
Chef’s Notes
Temperature Control Is Everything: The key to this 30 minute creamy pumpkin soup is managing your heat carefully. Too high and your cream will separate; too low and your flavors won’t develop properly. Medium heat for sautéing, medium-high for boiling, low for simmering.
Pumpkin Puree vs. Pie Filling: Always use plain pumpkin puree, never pumpkin pie filling. Pie filling contains added sugars and spices that will throw off the entire flavor balance. Check the ingredient list—it should only say “pumpkin.”
Make It Your Own: This recipe is incredibly flexible. Want it spicier? Double the cayenne. Prefer it sweeter? Add another tablespoon of maple syrup. The beauty of this quick soup is that you can adjust it to your taste easily.
Cream Alternatives: While heavy cream creates the best texture, you can substitute coconut cream for a dairy-free version. Half-and-half works too, though the soup will be slightly less rich. Avoid milk—it’s too thin and can curdle.
Nutrition Information (Per Serving)
- Calories: 285
- Protein: 5g
- Carbohydrates: 28g
- Fat: 18g
- Fiber: 6g
- Sugar: 12g
- Sodium: 720mg
Delicious Variations
Thai-Inspired Coconut Version: Replace heavy cream with coconut cream and add 1 tablespoon of red curry paste in step 5. Finish with fresh cilantro instead of sage. This creates an entirely different flavor profile that’s equally amazing. If you love pumpkin-based soups with unique twists, try my warm vegan pumpkin rice soup for another creative take.
Roasted Red Pepper Addition: Blend in 1 cup of roasted red peppers (jarred works great) with the broth in step 6. This adds a subtle sweetness and gorgeous color depth. The peppers complement the pumpkin beautifully without overwhelming it.
Apple Cider Twist: Replace 1 cup of vegetable broth with apple cider. Add 1 diced apple with the onions in step 2. This creates a harvest-style soup that’s perfect for Thanksgiving. The apple adds texture and a bright, fruity note.
Smoked Paprika & Bacon: Add 1 teaspoon of smoked paprika with the other spices and top each bowl with crumbled bacon instead of sage. This transforms the soup into something heartier and smokier. For more fall pumpkin soup inspiration, check out my autumn spiced roasted pumpkin soup which features different warming spices.
Storage & Reheating
Refrigerator Storage: Let the soup cool completely before transferring to an airtight container. It will keep for 5-6 days in the refrigerator.
The soup will thicken as it sits. This is normal—just add a splash of broth or water when reheating.
Freezer Storage: This soup freezes beautifully for up to 3 months. I recommend freezing in individual portions using freezer-safe containers or heavy-duty zip-top bags.
Leave about an inch of headspace as the soup will expand when frozen. Label with the date and reheat from frozen or thaw overnight in the refrigerator.
Reheating Instructions: For stovetop reheating, pour the soup into a pot over medium-low heat. Stir frequently and add ¼ cup of broth or cream to restore the original consistency. Heat for 5-7 minutes until steaming hot.
For microwave reheating, use a microwave-safe bowl and heat in 1-minute intervals, stirring between each interval. Add liquid as needed to prevent it from becoming too thick.
Make-Ahead Strategy: This soup actually tastes better the next day as the flavors continue to develop. Make it through step 12, then refrigerate. Reheat and prepare the crispy garnishes fresh when ready to serve.
Troubleshooting Guide
Problem 1: Soup Is Too Thick
This happens when the soup reduces too much during simmering or after refrigeration. Simply add vegetable broth or cream in ¼-cup increments, stirring after each addition, until you reach your desired consistency. Heat gently as you thin it out so everything stays warm.
Problem 2: Soup Tastes Bland
Usually this means you need more salt. Add it ¼ teaspoon at a time, stirring and tasting after each addition. Also check your spices—if they’re old (more than a year), they lose potency. A squeeze of fresh lemon juice can also brighten the flavors dramatically.
Problem 3: Cream Separated or Looks Curdled
This happens when cream is added to soup that’s too hot. Unfortunately, you can’t fix separated cream, but you can prevent it by always removing the pot from heat and letting it cool for 30 seconds before adding cream. If it’s already separated, an immersion blender can sometimes save it by emulsifying everything together.
Problem 4: Soup Is Too Sweet
If you accidentally added too much maple syrup, balance it with salt and black pepper. Add ¼ teaspoon of salt and taste. You can also add a squeeze of lemon juice or a splash of apple cider vinegar—acid cuts through sweetness beautifully. As a last resort, double the batch without adding more maple syrup.
Problem 5: Burnt Garlic Smell
Garlic burns quickly and creates a bitter, acrid flavor that permeates the entire soup. If you catch it early (the moment you smell burning), immediately remove the pot from heat and transfer only the unburnt portions to a clean pot. If the burnt flavor has already mixed in, unfortunately you’ll need to start over—there’s no fixing burnt garlic.
Equipment Essentials
- Large Dutch oven or heavy-bottomed pot (5-6 quart capacity): Essential for even heat distribution. A thin pot will cause hot spots and burning.
- Wooden spoon or silicone spatula: For stirring without scratching your pot. Metal spoons can scrape non-stick coatings.
- Immersion blender (optional): Makes the soup ultra-velvety smooth. A regular blender works but requires working in batches.
- Small skillet: For toasting pumpkin seeds and crisping sage leaves. A 10-inch skillet is perfect.
- Whisk: Helpful for eliminating any lumps when adding the broth. Not essential but makes life easier.
- Fine-mesh grater: For the fresh ginger. A microplane works beautifully.
- Ladle: For serving the soup neatly into bowls without spills.
- Measuring cups and spoons: Accurate measurements matter in soup—eyeballing can throw off the balance.
Shopping List by Store Section
Produce Section
- 1 medium yellow onion
- 1 head garlic (need 4 cloves)
- 1 piece fresh ginger (1 tablespoon grated)
- 1 bunch fresh sage
Canned Goods Aisle
- 1 large can (29 oz) pumpkin puree (NOT pie filling)
- 1 container (32 oz) vegetable broth
Dairy Section
- 1 stick unsalted butter
- 1 pint (16 oz) heavy cream
Baking Aisle
- 1 bottle pure maple syrup
Spice Aisle
- Ground cinnamon
- Ground nutmeg
- Ground cumin
- Cayenne pepper (optional)
- Kosher salt
- Black pepper
Bulk Section or Snack Aisle
- Pumpkin seeds (pepitas) – ¼ cup needed
Success Secrets
1. Use Room Temperature Ingredients: Take your butter and cream out of the refrigerator 30 minutes before cooking. Room temperature ingredients blend more smoothly and are less likely to cause temperature shock that leads to separation.
2. Don’t Skip the Aromatics Sauté: Those first few minutes of cooking the onion, garlic, and ginger create the flavor foundation. Rushing this step by cranking up the heat produces an entirely different (inferior) soup. Low and slow wins here.
3. Toast Your Spices: Adding spices directly to the hot pumpkin mixture before adding liquid “blooms” them. This technique releases oils and compounds that make the spices taste fuller and more complex. It takes 30 seconds and makes a huge difference.
4. The Maple Syrup Balance: The 2 tablespoons called for might seem like a lot, but it’s essential for balancing the earthy pumpkin and warm spices. It’s not about making the soup sweet—it’s about creating depth. Trust the recipe on your first try, then adjust to taste next time.
5. Garnish Just Before Serving: Those crispy sage leaves and toasted pumpkin seeds will get soggy if they sit on the soup for more than a few minutes. Prepare them while the soup stays warm, then add them at the very last second before bringing bowls to the table. This keeps them crunchy and impressive.
This 30 minute creamy pumpkin soup proves that speed and quality aren’t mutually exclusive. The silky texture comes from proper technique, not hours of cooking time.
I make this recipe at least twice a month during fall and winter. It’s my answer to busy weeknights when I want something comforting but don’t have time for complicated cooking.
The best part? Everyone thinks I spent hours on it. Let them believe that—I won’t tell if you won’t!