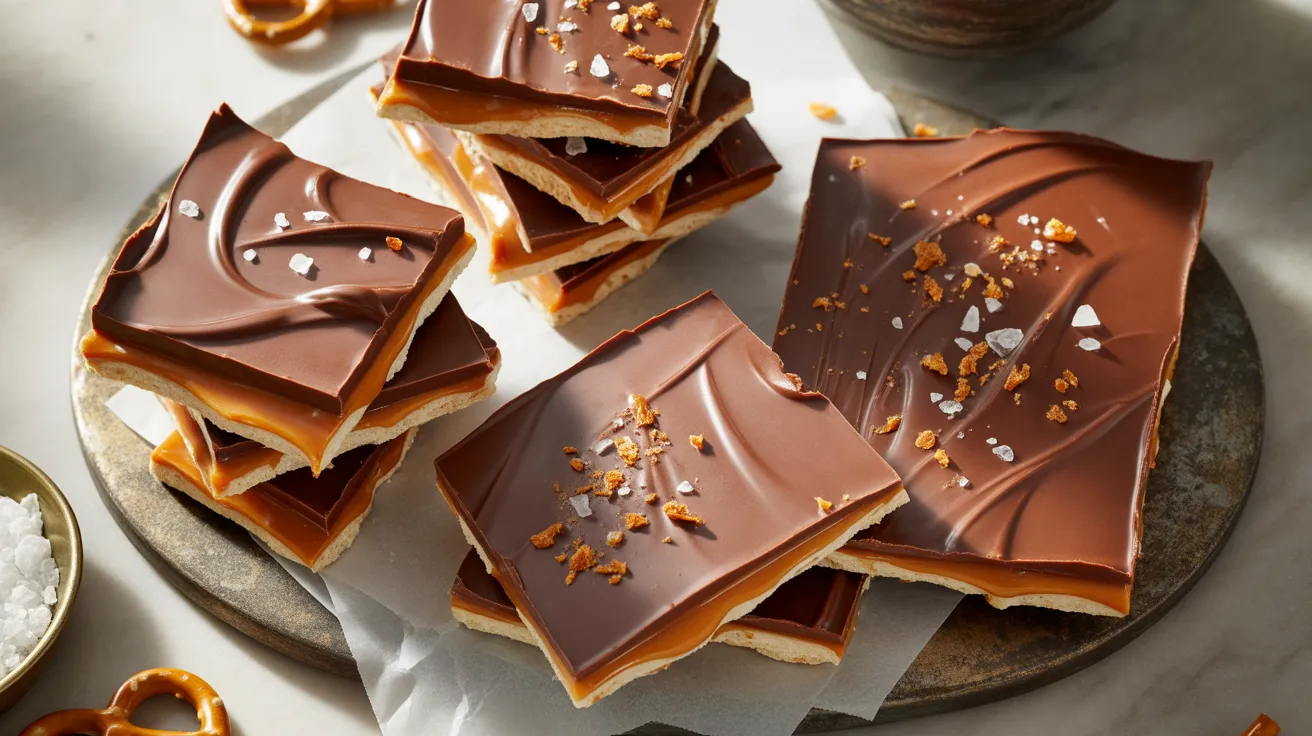
This salted caramel pretzel bark combines sweet, salty, and crunchy textures that’ll have everyone asking for seconds. I’ve perfected this salted caramel pretzel bark recipe over dozens of batches, and it’s become my go-to gift for holidays and parties because it looks impressive but comes together in under 30 minutes.
SERVES: 4 | PREP: 15 MIN | COOK: 12 MIN | TOTAL: 27 MIN (plus cooling time)
Ingredients
Base Layer
| Ingredient | Amount | Notes |
|---|---|---|
| Pretzel twists or sticks | 2 cups | Mini pretzels work too |
| Semi-sweet chocolate chips | 1 cup | Can substitute dark chocolate |
| Coconut oil | 1 tablespoon | Makes chocolate smoother |
Caramel Layer
| Ingredient | Amount | Notes |
|---|---|---|
| Granulated sugar | ¾ cup | White sugar only |
| Heavy cream | ¼ cup | Room temperature |
| Unsalted butter | 3 tablespoons | Cut into pieces |
| Sea salt | ½ teaspoon | For mixing in |
| Vanilla extract | ½ teaspoon | Pure extract preferred |
Topping
| Ingredient | Amount | Notes |
|---|---|---|
| Flaky sea salt | ¼ teaspoon | Maldon or similar |
| Crushed pretzels | 2 tablespoons | For garnish |
Step-by-Step Instructions
Phase 1: Prep Work (5 minutes)
Step 1: Line a 9×9-inch baking pan with parchment paper, leaving overhang on two sides. This creates handles for easy removal later. Press the paper into corners and smooth out wrinkles so your bark sets evenly.
Step 2: Arrange 2 cups pretzel twists in a single layer on the parchment. Pack them close together but don’t overlap—you want complete coverage so the chocolate doesn’t seep through. Break larger pretzels to fill gaps.
Step 3: Place your lined pan near the stove. Once you start the caramel, you’ll need to work quickly, so having everything within arm’s reach prevents the caramel from hardening before you spread it.
Phase 2: Making the Caramel (10 minutes)
Step 4: Add ¾ cup granulated sugar to a heavy-bottomed saucepan. Use a light-colored pan if possible—it lets you see the caramel color develop. Spread the sugar in an even layer without stirring.
Step 5: Heat the sugar over medium heat without stirring for 4-5 minutes. You’ll see the edges start melting first. Gently swirl the pan (don’t stir!) to distribute heat evenly. The sugar will clump and look weird—this is normal.
Step 6: Continue cooking until all sugar melts into a deep amber liquid, about 2-3 more minutes. Watch carefully now. You want the color of an old penny. If it smokes or smells burnt, you’ve gone too far—start over.
Step 7: Remove from heat and immediately add 3 tablespoons butter pieces. The mixture will bubble violently—stand back! Whisk constantly until butter melts completely, about 30 seconds. The violent bubbling stops the cooking process.
Step 8: Pour in ¼ cup heavy cream while whisking constantly. It’ll bubble up again—keep whisking through it. The caramel might seize and harden slightly. Keep whisking over low heat for 1 minute until smooth.
Step 9: Stir in ½ teaspoon vanilla extract and ½ teaspoon sea salt. Remove from heat. Your caramel should coat the back of a spoon and drip slowly. If it’s too thick, whisk in 1 teaspoon cream at a time.
Phase 3: Assembly (7 minutes)
Step 10: Pour the hot caramel evenly over the pretzel layer. Work quickly—caramel thickens as it cools. Use a silicone spatula to spread it into corners and fill gaps between pretzels. Some pretzel tops will peek through—that’s perfect.
Step 11: Let the caramel layer cool for 5 minutes until it’s warm but not hot. Touch testing: it should feel like bath water, not steaming. This prevents the chocolate from melting into the caramel layer.
Step 12: Melt 1 cup chocolate chips with 1 tablespoon coconut oil in a microwave-safe bowl. Microwave in 20-second bursts, stirring between each, until 90% melted. Stir the residual heat melts the remaining chips for smooth, glossy chocolate.
Step 13: Pour melted chocolate over the caramel layer. Use an offset spatula or the back of a spoon to spread it edge to edge. Work quickly but gently to avoid disturbing the caramel underneath.
Step 14: Immediately sprinkle ¼ teaspoon flaky sea salt and 2 tablespoons crushed pretzels over the wet chocolate. Press them gently into the surface so they stick after cooling.
Phase 4: Setting & Cutting (5 minutes active, 2+ hours passive)
Step 15: Transfer the pan to your refrigerator. Let it set for 2 hours minimum or until the chocolate layer is completely firm when touched. Don’t rush this—soft chocolate will smear when you cut it.
Step 16: Use the parchment overhang to lift the entire bark out onto a cutting board. Let it sit at room temperature for 5 minutes so the chocolate isn’t too brittle to cut cleanly.
Step 17: Use a large, sharp knife to cut the salted caramel pretzel bark into 16 pieces (4 servings of 4 pieces each). Wipe the knife between cuts for clean edges. Press down firmly rather than sawing back and forth.
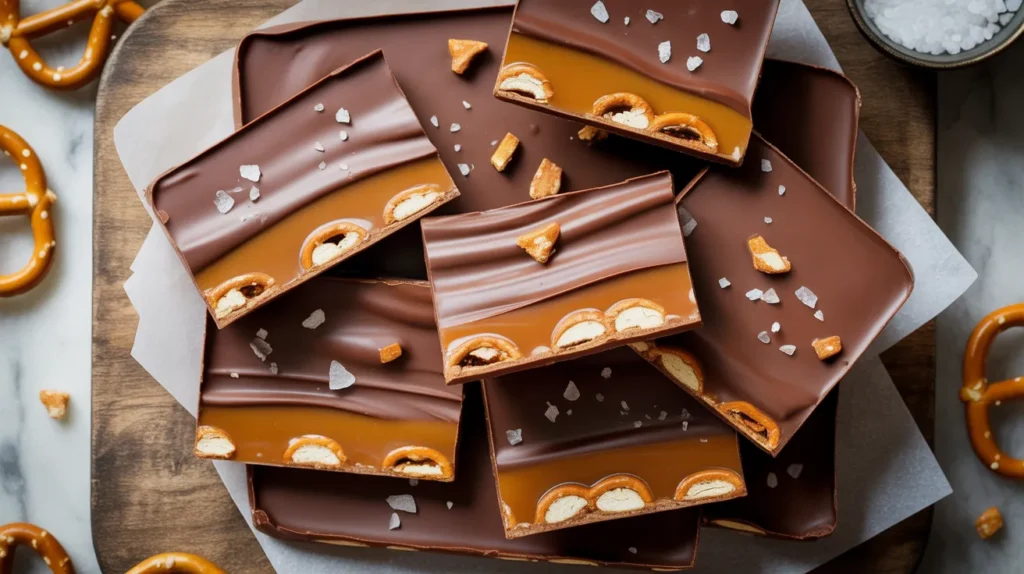
Step 18: Arrange your salted caramel pretzel bark on a serving plate. The layers should be distinct: crunchy pretzel base, chewy caramel center, and smooth chocolate top with salty pretzel garnish.
Chef’s Notes
Caramel Temperature Matters: If your caramel is too light in color, it’ll taste bland and sugary. Too dark, and it’ll be bitter. Aim for the exact color of an old copper penny. Practice makes perfect—I wasted three batches learning this.
Pretzel Positioning Strategy: I arrange pretzels with the rounded parts facing up. This creates interesting texture on the bottom of each piece when you bite in. The salt from the pretzels also intensifies the sweet-salty contrast.
Chocolate Quality Impact: Using chocolate chips with coconut oil gives that perfect snap when you bite into the salted caramel pretzel bark. Bar chocolate works too, but chips melt more consistently for beginners.
Make-Ahead Advantage: This bark actually tastes better the next day after flavors meld. The caramel softens slightly, making each bite less tooth-cracking and more chewy-crunchy.
Nutrition Information (Per Serving – 4 pieces)
- Calories: 385
- Protein: 4g
- Carbohydrates: 52g
- Fat: 19g
- Fiber: 2g
- Sugar: 38g
- Sodium: 420mg
Variations to Try
Dark Chocolate Espresso Bark: Swap semi-sweet chips for dark chocolate and add 1 teaspoon espresso powder to the melted chocolate. The coffee amplifies chocolate flavor without tasting like coffee. Top with chocolate-covered espresso beans for extra crunch.
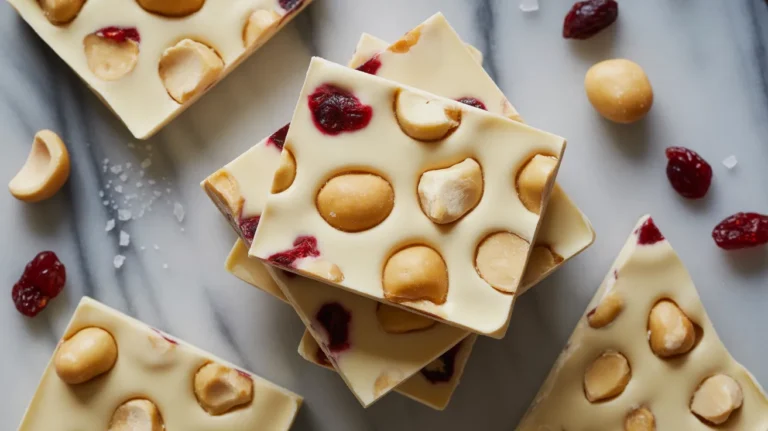
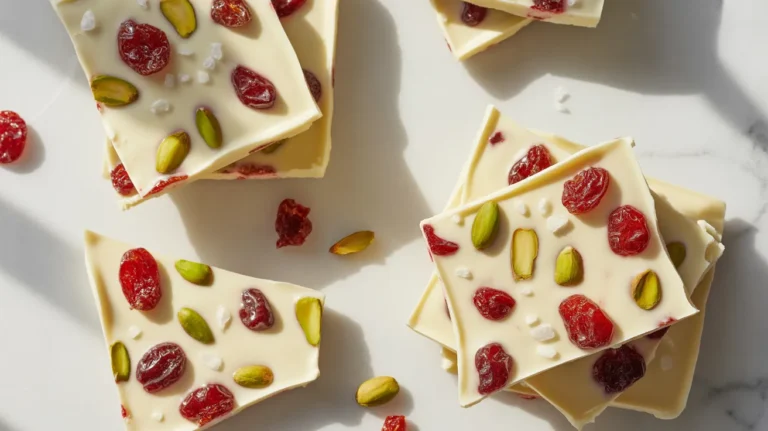
White Chocolate Cranberry Version: Use white chocolate chips instead and add ⅓ cup dried cranberries pressed into the caramel before adding chocolate. The tartness cuts through sweetness beautifully. If you love fruity chocolate combinations, try my cherry cashew chocolate bark for another creative flavor pairing.
Peanut Butter Pretzel Bark: Add ¼ cup creamy peanut butter to your caramel during Step 9. Swirl 2 tablespoons melted peanut butter into the chocolate layer for extra richness. Chopped peanuts on top complete the combination.
Spiced Autumn Bark: Mix ½ teaspoon pumpkin pie spice into the caramel and top with candied pecans instead of crushed pretzels. This seasonal twist pairs perfectly with fall entertaining—serve it alongside my pumpkin spice dip at your next gathering.
Storage & Reheating
Room Temperature Storage: Keep your salted caramel pretzel bark in an airtight container at room temperature for up to 5 days. Layer parchment between pieces to prevent sticking. The caramel stays chewy while chocolate maintains its snap.
Refrigerator Storage: For longer keeping, refrigerate in an airtight container for up to 2 weeks. Let pieces sit at room temperature for 10 minutes before serving so the chocolate isn’t too hard and the caramel softens to perfect chewiness.
Freezer Storage: Wrap individual pieces in plastic wrap, then store in a freezer bag for up to 3 months. Thaw in the refrigerator overnight before serving. The texture stays remarkably consistent after freezing.
Gifting Storage: Layer pieces in decorative tins with parchment between layers. Store in cool, dry places away from heat sources. The bark ships well if temperatures stay below 70°F—I’ve successfully mailed it across the country.
Troubleshooting Common Problems
Problem 1: Caramel Seized and Became Grainy Your cream was too cold or you stirred the sugar instead of swirling. Next time, bring cream to room temperature and only swirl the pan during sugar melting. If it happens, add 2 tablespoons hot water and whisk vigorously over low heat until smooth again.
Problem 2: Chocolate Layer Melted Into Caramel You poured chocolate before the caramel cooled enough. The caramel should feel warm to touch, not hot. Wait the full 5 minutes in Step 11. If this happens, refrigerate immediately to firm up layers—they’ll taste fine even if not perfectly distinct.
Problem 3: Bark Won’t Release From Pan You didn’t leave enough parchment overhang or the chocolate wasn’t fully set. Use the parchment handles to lift straight up—if it resists, refrigerate 30 more minutes. Running a knife around edges helps too.
Problem 4: Pieces Shatter When Cutting The bark was too cold from the refrigerator. Let it sit at room temperature for 10 minutes before cutting. Use a large, heavy knife and press straight down rather than sawing. Warming the knife blade under hot water (then drying it) between cuts also helps.
Problem 5: Caramel Layer is Too Thin or Thick Too thin means you spread it beyond the pretzel boundary—keep caramel just over pretzels. Too thick means uneven pouring. Pour caramel in a spiral pattern from center outward for even distribution, then spread to fill gaps.
Equipment Essentials
- Heavy-bottomed saucepan (2-quart minimum)
- 9×9-inch baking pan (metal or glass)
- Parchment paper (for easy removal)
- Silicone spatula (heat-resistant)
- Whisk (for smooth caramel)
- Offset spatula (for spreading chocolate)
- Sharp chef’s knife (for clean cuts)
- Cutting board (for portioning)
- Microwave-safe bowl (for melting chocolate)
- Measuring cups and spoons (for accuracy)
Shopping List
Baking Aisle
- Granulated sugar
- Semi-sweet chocolate chips
- Vanilla extract
- Parchment paper
Snack Aisle
- Pretzel twists or sticks
Refrigerated Section
- Heavy cream
- Unsalted butter
Specialty Foods
- Flaky sea salt (Maldon brand)
- Coconut oil
Success Secrets
1. Temperature Control is Everything: Use a candy thermometer if you’re nervous about caramel color. You want 350°F for perfect amber caramel. Under-cooked caramel won’t set properly; over-cooked tastes burnt. Watch it like a hawk during those final 2 minutes.
2. Quality Chocolate Makes the Difference: I always use Ghirardelli semi-sweet chips because they melt smoothly and have rich flavor. Cheap chocolate chips contain stabilizers that prevent smooth melting and create dull, waxy bark.
3. The Swirl, Don’t Stir Rule: When making caramel, stirring creates sugar crystals that make grainy caramel. Gently swirling the pan distributes heat without creating crystals. Keep a damp pastry brush nearby to wash down any sugar crystals from pan sides.
4. Perfect Pretzel Coverage: Breaking some pretzels into pieces helps fill gaps better than whole pretzels alone. I use 80% whole pretzels for presentation and 20% broken pieces as filler. This creates complete coverage without gaps for caramel to seep through.
5. Patience During Setting: Rushing the refrigeration step causes layers to blend and chocolate to look streaky. The full 2-hour chill time lets chocolate crystallize properly for that satisfying snap. I usually make this before dinner and let it set while we eat.