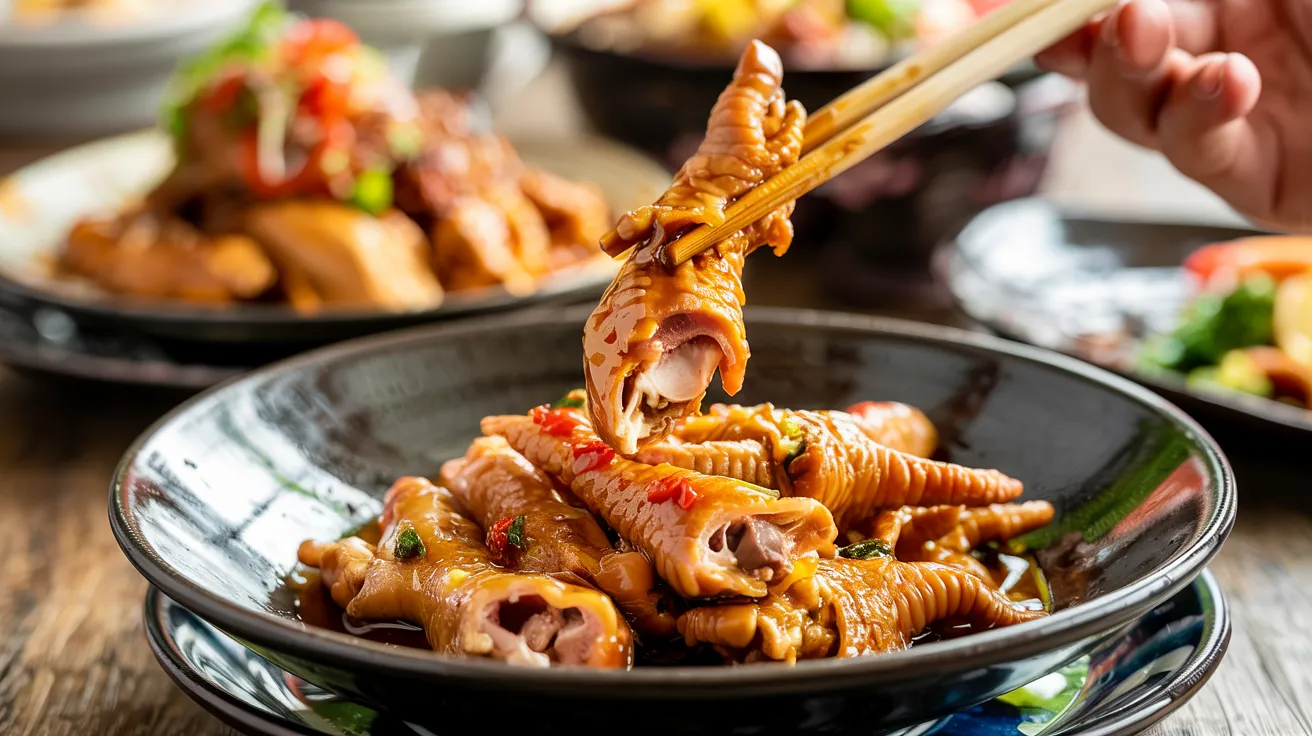
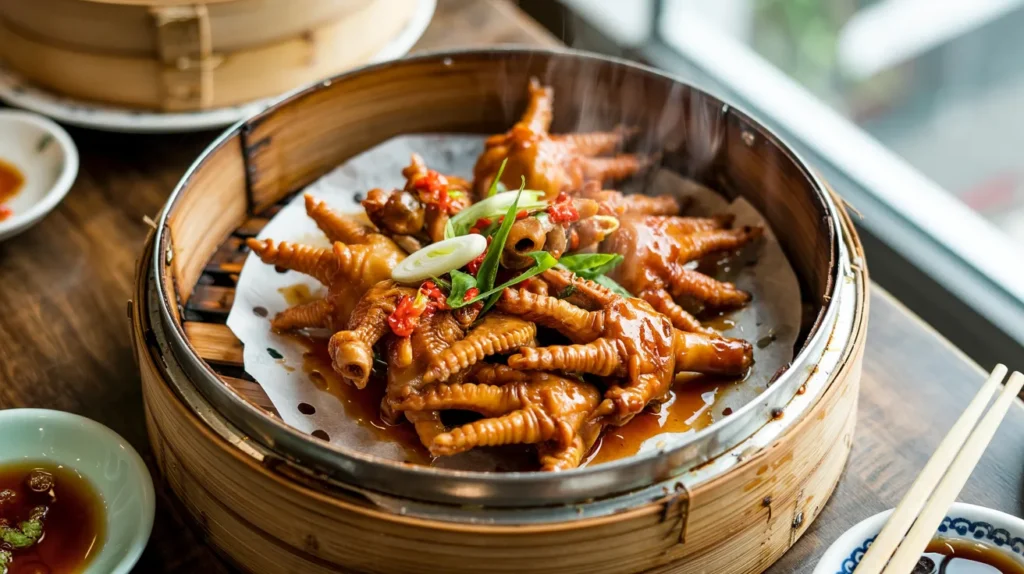
- Restaurant-quality Chinese chicken feet dim sum made at home
- Beginner-friendly steps make this classic dim sum dish achievable for anyone
- Rich flavor profile with the perfect balance of sweet, savory, and spicy notes
- Authentic technique broken down into manageable steps for home cooks
Why You’ll Love This Chinese Chicken Feet Dim Sum Recipe
Ever tasted the amazing Chinese chicken feet dim sum at your favorite restaurant and wished you could make it at home? Many home cooks avoid this classic dish because they think it’s too complicated.
I’m here to help! This Chinese chicken feet dim sum recipe breaks down every step so you can create this delicious treat right in your kitchen.
Perfect for beginners, this recipe serves 4 people and takes just 60 minutes of active cooking time (plus optional marinating). Let’s discover how to make authentic Chinese chicken feet dim sum that rivals your favorite restaurant!
Nutrition Information
| Nutrient | Amount per serving |
|---|---|
| Calories | 215 |
| Protein | 18g |
| Fat | 14g |
| Carbohydrates | 6g |
| Sodium | 680mg |
| Sugar | 3g |
What You’ll Need
Ingredients
| Ingredient | Amount | Notes |
|---|---|---|
| Chicken feet | 2 pounds | Cleaned and nails removed |
| Ginger | 3-inch piece | Sliced |
| Green onions | 4 stalks | Cut into 2-inch pieces |
| Star anise | 3 whole | – |
| Garlic | 6 cloves | Smashed |
| Soy sauce | 1/4 cup | Low sodium preferred |
| Dark soy sauce | 2 tablespoons | For color |
| Rice wine (Shaoxing) | 1/4 cup | Dry sherry works as substitute |
| Brown sugar | 2 tablespoons | – |
| Chinese five-spice powder | 1 teaspoon | – |
| White pepper | 1/2 teaspoon | – |
| Red chili flakes | 1 teaspoon | Adjust to taste |
| Sesame oil | 1 tablespoon | – |
| Chicken broth | 3 cups | Low sodium |
Kitchen Tools
| Tool | Purpose |
|---|---|
| Large pot | For boiling and braising |
| Cutting board | For prep work |
| Sharp knife | For trimming chicken feet |
| Kitchen scissors | For removing nails if needed |
| Slotted spoon | For removing chicken feet |
| Tongs | For handling hot chicken feet |
| Measuring cups and spoons | For accurate measurements |
| Large bowl | For ice bath |
| Steamer basket | For final steaming |
| Paper towels | For patting chicken feet dry |
Ingredient Substitutions
- Rice wine: Use dry sherry or sake
- Dark soy sauce: Regular soy sauce with 1/2 teaspoon molasses
- Chinese five-spice: Mix equal parts cinnamon, cloves, fennel, star anise, and Sichuan peppercorns
- Chicken broth: Vegetable broth or water with chicken bouillon
Preparation Time
- Prep time: 20 minutes
- Cook time: 40 minutes
- Total time: 1 hour (plus optional marinating time)
- Servings: 4
Extremely Detailed Step-by-Step Instructions
Preparation Phase
- Source your chicken feet properly
- Purchase chicken feet from an Asian grocery store or butcher shop
- Look for plump, yellowish feet without bruising or discoloration
- If possible, ask for chicken feet that have already been cleaned (saves time)
- Make sure they’re fresh – there should be no strong odor
- Inspect and clean the chicken feet
- Unwrap chicken feet and place them on your cutting board
- Examine each foot carefully for any remaining nails/claws
- Using kitchen scissors, clip off any nails still attached at the tips
- Look for any tough patches of skin or calluses and trim them away with a sharp knife
- Rinse each foot thoroughly under cold running water
- Pat lightly with paper towels and set aside
- Prepare the blanching pot
- Choose a pot large enough to hold all chicken feet with room to move
- Fill the pot with enough cold water to completely cover the chicken feet by at least 2 inches
- Add 1-inch of the sliced ginger (save the rest for later)
- Add 2 of the green onions, roughly chopped (save the rest for later)
- Do not add salt at this stage
- Place pot on stove over high heat and bring to a rolling boil
- Blanch the chicken feet
- Once water is at a full boil, carefully lower chicken feet into the pot using tongs
- Don’t overcrowd – work in batches if necessary
- Allow water to return to a boil (about 1-2 minutes)
- Using a spoon, skim off any foam or impurities that rise to the surface
- Boil for exactly 5 minutes – set a timer to be precise
- This step is crucial for removing impurities and excess fat
- Prepare ice bath
- While chicken feet are blanching, fill a large bowl with cold water
- Add 2 cups of ice cubes to create an ice bath
- Place the bowl near your stove for easy transfer
- Transfer to ice bath
- After the 5-minute blanching, use a slotted spoon to carefully remove chicken feet
- Transfer immediately to the prepared ice bath
- The contrast between hot and cold helps tighten the skin
- Let them sit in the ice bath for 5 minutes, occasionally stirring to ensure even cooling
- This step stops the cooking process and gives a better texture
- Remove and dry thoroughly
- After 5 minutes in the ice bath, drain chicken feet in a colander
- Transfer to a paper towel-lined tray
- Pat each foot completely dry with additional paper towels
- Thorough drying is essential for the next steps – don’t skip this!
- Let stand at room temperature for 5 minutes
Cooking Phase
- Prepare your aromatics and sauce ingredients
- Gather all remaining ingredients and measure them out
- Slice the remaining ginger into thin rounds (about 1/8-inch thick)
- Cut remaining green onions into 2-inch segments
- Peel garlic cloves and gently smash with the flat side of a knife
- Combine soy sauce, dark soy sauce, rice wine, and brown sugar in a small bowl
- Stir until sugar dissolves completely
- Set aside near your cooking area
- Make the braising liquid
- Select a clean, heavy-bottomed pot (preferably with a lid)
- Add chicken broth, prepared ginger slices, green onion segments, and smashed garlic
- Add star anise, five-spice powder, white pepper, and chili flakes
- Pour in the prepared soy sauce mixture
- Stir to combine everything thoroughly
- Heat the braising liquid
- Place pot over medium heat
- Bring liquid to a gentle simmer (small bubbles just breaking the surface)
- Stir occasionally to ensure spices are evenly distributed
- Allow to simmer for 5 minutes to let flavors begin to meld
- The liquid should become fragrant and slightly darker in color
- Add the chicken feet to the braising liquid
- Carefully add the dried chicken feet to the pot
- Use a wooden spoon to gently submerge them in the liquid
- Make sure all feet are covered by the braising liquid
- If necessary, add a bit more chicken broth to cover
- Braise the chicken feet
- Bring the liquid back to a gentle boil
- Immediately reduce heat to low
- Cover the pot with a lid
- Simmer gently for 25-30 minutes
- Occasionally stir very gently to ensure even cooking
- Check tenderness at 25 minutes by piercing the thickest part with a fork
- The feet should be tender but still hold their shape
- If not tender enough, continue cooking for 5-10 more minutes
- Check for doneness
- Remove one chicken foot and allow to cool slightly
- Test by gently pulling on one of the bones
- The meat should cling to the bone but come off easily when pulled
- The skin should be slightly gelatinous but not falling apart
- If not done, continue braising for additional 5-minute intervals
- Remove chicken feet and reduce sauce
- Once chicken feet reach desired tenderness, use a slotted spoon to transfer them to a clean bowl
- Cover loosely with foil to keep warm
- Increase heat under the braising liquid to medium-high
- Allow sauce to reduce, stirring occasionally to prevent burning
- Reduce for 5-7 minutes until sauce thickens enough to coat the back of a spoon
- You should end up with about 1 cup of reduced sauce
- Return feet and finish cooking
- Lower heat to medium-low
- Return chicken feet to the pot with reduced sauce
- Add 1 tablespoon of sesame oil
- Gently toss to coat every foot evenly in the glossy sauce
- Simmer for an additional 2-3 minutes
- The chicken feet should look shiny and glazed
Final Steaming Phase (Optional but Recommended)
- Prepare for steaming
- Transfer the chicken feet and sauce to a heat-proof dish that will fit in your steamer
- Distribute them evenly in a single layer if possible
- Pour any remaining sauce over the top
- Set up your steamer by filling the bottom portion with about 2 inches of water
- Make sure the water level doesn’t touch the steamer basket
- Bring water to a boil over high heat
- Steam the Chinese chicken feet dim sum
- Once water is boiling, carefully place the dish with chicken feet in the steamer basket
- Cover with a tight-fitting lid
- Reduce heat to medium to maintain a steady steam
- Steam for 10-15 minutes
- This final step makes the Chinese chicken feet dim sum extremely tender
- The collagen in the skin becomes soft and the feet absorb more flavor
- Check final results
- After steaming, the chicken feet should be:
- Extremely tender with a slight bite
- Coated in a glossy, thick sauce
- The skin should be soft and gelatinous
- The meat should easily come away from the bone when eaten
- After steaming, the chicken feet should be:
- Prepare for serving
- Turn off heat and carefully remove lid (pointing away from you to avoid steam burns)
- Let the Chinese chicken feet dim sum rest for 5 minutes before serving
- This allows the flavors to settle and prevents burning your mouth
- Serve your Chinese chicken feet dim sum
- Transfer to a serving plate, arranging them attractively
- Spoon extra sauce over the top
- Garnish with thinly sliced green onions and a sprinkle of sesame seeds (optional)
- Serve hot as part of a dim sum meal
- Provide small plates and napkins for bones
Troubleshooting Tips
Problem: Chicken feet are tough
Solution: Increase braising time by 10-15 minutes. The feet should be tender enough that the meat easily comes off the bone when eaten. Next time, make sure your simmer is gentle – a hard boil can toughen the meat.
Problem: Sauce is too thin
Solution: Remove chicken feet and continue reducing sauce on higher heat until it reaches desired consistency. For an immediate fix, mix 1 teaspoon cornstarch with 1 tablespoon cold water, then stir into the simmering sauce.
Problem: Sauce is too salty
Solution: Add 1/4 cup water and 1 teaspoon sugar to balance flavors. You can also add a small amount of butter to mellow the saltiness.
Problem: Feet are bland
Solution: After cooking, let chicken feet marinate in the sauce overnight in the refrigerator to absorb more flavor. Next time, increase the amount of five-spice and soy sauce by 25%.
Problem: Skin is slipping off the feet
Solution: Your blanching or braising temperature was likely too high. Make sure to maintain a gentle simmer rather than a rolling boil during the braising process.
Variations & Substitutions
Spicy Chinese Chicken Feet Dim Sum
Add 2-3 dried red chilies or 1-2 tablespoons of chili oil to the braising liquid for extra heat. This variation is popular in Sichuan-style Chinese chicken feet dim sum.
Sweet Version
Double the brown sugar and add 1 tablespoon honey for a sweeter glaze, similar to what you might find at chicken tenders restaurants.
Black Bean Sauce Version
Add 2 tablespoons of fermented black beans (rinsed and mashed) to the braising liquid for a traditional dim sum restaurant variation.
Instant Pot Chinese Chicken Feet Dim Sum
Use pressure cooking function for 20 minutes with natural release instead of braising on stovetop. Follow the same preparation steps, then pressure cook instead of braising.
Storage & Reheating
Refrigeration
- Store in an airtight container with sauce for up to 3 days
- The flavor actually improves after a day in the refrigerator
- Make sure chicken feet are completely covered in sauce for best results
Freezing
- Can be frozen for up to 1 month
- Freeze with some sauce in a freezer-safe container
- Label with date and contents
- Thaw overnight in refrigerator before reheating
- Never refreeze previously frozen chicken feet
Reheating
- Steamer method: Steam for 8-10 minutes (preferred method)
- Set up steamer with 1 inch of water
- Place chicken feet in steamer basket
- Steam until completely heated through
- Microwave: 1-2 minutes on medium power with a damp paper towel cover
- Place chicken feet in a microwave-safe dish
- Cover with a damp paper towel to prevent drying
- Heat in 30-second intervals until hot
- Stovetop: Gently reheat in a covered pan with a splash of water
- Add 2 tablespoons of water to a pan
- Add chicken feet and cover
- Heat on low for 5-7 minutes, turning occasionally
Safety Notes & Tips
- Always ensure chicken feet are completely cooked (internal temperature of 165°F/74°C)
- Be careful handling hot chicken feet as they retain heat well
- Purchase chicken feet from reputable sources
- For beginners: Chicken feet have many small bones – eat carefully!
- If serving to guests unfamiliar with the dish, consider mentioning this aspect
- Store any leftovers within 2 hours of cooking
- Always wash hands and surfaces after handling raw chicken
Expert Tips for Perfect Chinese Chicken Feet Dim Sum
- For maximum flavor, marinate the braised chicken feet in the refrigerator overnight before the final steaming
- The collagen in chicken feet makes them naturally gelatinous when cool – this is normal and desired
- To save time, ask your butcher to clean and prepare the chicken feet
- Pair with other dim sum favorites or a protein shake for a complete meal, like this delicious chicken shake recipe for a balanced approach
- Chinese chicken feet dim sum is typically eaten by putting the whole piece in your mouth, then removing the bones as you eat
- Don’t skip the blanching step – it’s crucial for removing impurities and achieving the right texture
- Serve with small dishes of chili oil or Chinese black vinegar for dipping
- Traditional dim sum service includes Chinese chicken feet dim sum alongside items like har gow (shrimp dumplings) and siu mai
Why This Chinese Chicken Feet Dim Sum Recipe Works
The secret to perfect Chinese chicken feet dim sum is in the multiple cooking stages. The blanching removes impurities, the braising adds depth of flavor, and the optional final steaming creates that melt-in-your-mouth texture that makes restaurant-quality dim sum so special.
If you enjoy this recipe, you might also like my crack chicken penne – another crowd-pleasing chicken dish with rich flavors!
Don’t be intimidated by this classic dish. With these clear steps, you’ll create authentic Chinese chicken feet dim sum that will impress family and friends alike!