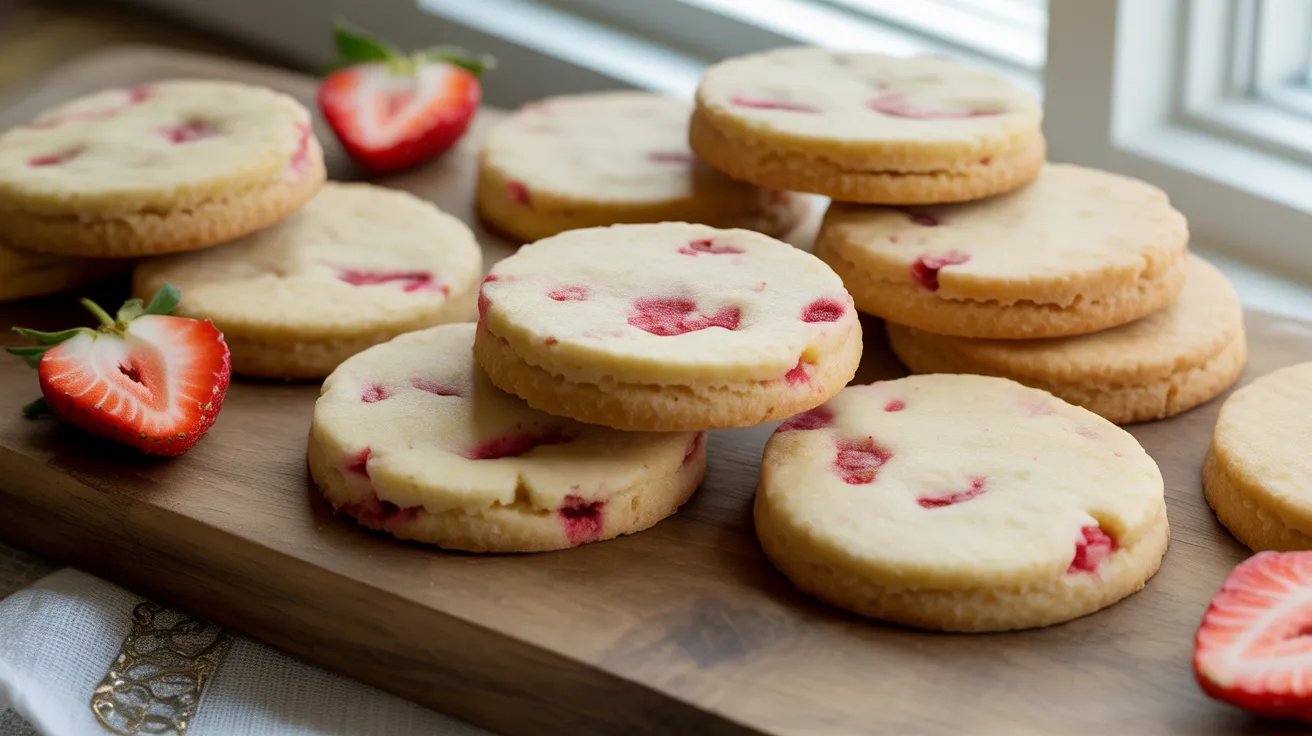
I still remember the first time I made strawberry shortbread—buttery, crumbly cookies studded with sweet-tart strawberry pieces that literally melted on my tongue. This strawberry shortbread recipe transforms classic Scottish shortbread into a fruity, colorful treat that’s perfect for spring gatherings, Mother’s Day brunches, or whenever you’re craving something special. The dried strawberries add natural sweetness and a gorgeous pink hue, while the traditional buttery base keeps that signature crumbly texture we all love.
SERVES: 4 | PREP: 20 MIN | COOK: 18 MIN | TOTAL: 38 MIN
Ingredients
Dry Ingredients
| Ingredient | Amount |
|---|---|
| All-purpose flour | 1 cup (120g) |
| Powdered sugar | ¼ cup (30g) |
| Cornstarch | 2 tablespoons |
| Salt | ⅛ teaspoon |
Wet Ingredients
| Ingredient | Amount |
|---|---|
| Unsalted butter, cold | ½ cup (113g) |
| Vanilla extract | ½ teaspoon |
Add-Ins
| Ingredient | Amount |
|---|---|
| Freeze-dried strawberries, crushed | ¼ cup (10g) |
| Fresh strawberries for topping (optional) | 4 large berries |
Step-by-Step Instructions
Phase 1: Prepare Your Strawberries (5 minutes)
Step 1: Place ¼ cup freeze-dried strawberries in a zip-top bag and seal it completely. Using a rolling pin or the bottom of a measuring cup, crush the strawberries into small pieces about the size of rice grains. You want some texture here—not powder—because these little bits will create beautiful pink streaks and bursts of strawberry flavor throughout your shortbread. If you crush them too fine, you’ll lose that visual appeal and concentrated flavor pockets.
Step 2: Measure out 1 cup all-purpose flour and 2 tablespoons cornstarch. The cornstarch is your secret weapon for ultra-tender shortbread that practically dissolves in your mouth. It reduces the protein content in your dough, which means less gluten development and more of that signature crumbly texture.
Phase 2: Mix the Dry Foundation (3 minutes)
Step 3: In a medium mixing bowl, whisk together 1 cup flour, ¼ cup powdered sugar, 2 tablespoons cornstarch, and ⅛ teaspoon salt. Whisking for at least 30 seconds ensures everything is evenly distributed. You’ll notice the powdered sugar lightens the color of the flour slightly—that’s exactly what you want to see.
Step 4: Add your crushed freeze-dried strawberries to the flour mixture and stir gently with a fork for about 15 seconds. This coats each strawberry piece with flour, which prevents them from clumping together and ensures even distribution throughout your dough.
Phase 3: Cut in the Butter (5 minutes)
Step 5: Remove ½ cup butter from the refrigerator and cut it into 8 equal pieces (about 1 tablespoon each). Cold butter is absolutely critical here—it creates those flaky layers as it melts during baking. If your butter is too soft, pop it back in the fridge for 5 minutes.
Step 6: Add the cold butter pieces to your flour mixture. Using a pastry cutter, two knives, or your fingertips, work the butter into the flour mixture for 3-4 minutes. You’re aiming for a texture that looks like coarse sand with some pea-sized butter chunks remaining. These larger butter pieces will create extra flaky spots in your finished shortbread. Your hands will warm the butter, so work quickly and don’t overmix.
Step 7: Drizzle ½ teaspoon vanilla extract over the mixture and toss with a fork to distribute. The vanilla adds depth and enhances the strawberry flavor without overpowering it.
Phase 4: Form the Dough (3 minutes)
Step 8: Use your hands to gather the mixture and press it together. It will seem dry and crumbly at first—this is normal and exactly what you want. Keep pressing and kneading gently for about 1-2 minutes, and the warmth of your hands will help the butter soften just enough to bind everything together. The dough should eventually hold together when squeezed but still look a bit shaggy.
Step 9: Form the dough into a ball, then flatten it into a disc about 1 inch thick. If you notice any large dry patches, sprinkle ½ teaspoon cold water over them and knead briefly. Too much water will make your shortbread tough, so add it sparingly—only if absolutely needed.
Phase 5: Shape and Chill (15 minutes total)
Step 10: Preheat your oven to 325°F (163°C). This lower temperature is perfect for shortbread because it allows the cookies to dry out and become crisp without browning too quickly or burning.
Step 11: Place the dough disc between two sheets of parchment paper. Roll it out to ½-inch thickness using a rolling pin. Rolling between parchment prevents sticking without adding extra flour, which would make your shortbread dry and tough. Aim for even thickness throughout—use a ruler if you want to be precise.
Step 12: Remove the top parchment sheet. Using a 2-inch round cookie cutter (or a glass), cut out 8 rounds from the dough. Place them 1 inch apart on a parchment-lined baking sheet. Gather the scraps, press them together gently, re-roll, and cut additional shapes until you’ve used all the dough. You should get 10-12 cookies total, which gives you 2-3 cookies per person when serving 4.
Step 13: Place the baking sheet in the refrigerator for 10 minutes. This crucial chilling step re-solidifies the butter, which prevents the cookies from spreading too much during baking and helps them keep their shape.
Phase 6: Bake to Perfection (18 minutes)
Step 14: Remove the chilled cookies from the refrigerator. Use a fork to prick each cookie 3 times across the surface. These little holes aren’t just decorative—they allow steam to escape during baking, preventing the cookies from puffing up and losing that classic flat shortbread appearance.
Step 15: Bake for 16-18 minutes, rotating the pan halfway through (at the 9-minute mark) for even baking. The edges should be just barely starting to turn golden, and the tops should remain pale with a few pink streaks from the strawberries showing through. If they’re browning too quickly, reduce the temperature to 300°F. The cookies will still feel slightly soft when you remove them—they firm up as they cool.
Phase 7: Cool and Finish (20 minutes)
Step 16: Let the cookies cool on the baking sheet for 5 minutes. They’re very fragile when hot, and moving them too soon will cause them to break. You’ll know they’re ready to move when the bottoms have set and they slide easily on the parchment.
Step 17: Transfer the shortbread to a wire cooling rack using a thin spatula. Let them cool completely for 15-20 minutes. As they cool, you’ll notice them becoming firmer and developing that signature crumbly texture. If you’re serving them immediately, slice 4 fresh strawberries and place one on top of each cookie for garnish.
Chef’s Notes
Butter Quality Matters: Since butter is the star ingredient in strawberry shortbread, use the best quality unsalted butter you can find. European-style butter with higher fat content creates even more flavor and tenderness. I always reach for butter with at least 82% butterfat when making shortbread.
Freeze-Dried vs. Fresh Strawberries: Never use fresh strawberries in the dough itself—their moisture content will make your shortbread soggy and prevent that crispy-crumbly texture. Freeze-dried strawberries concentrate the flavor and add just the right amount of tartness without any moisture. You can find them in the dried fruit section or online.
Temperature Control: Keep your kitchen cool while making these. If your kitchen is warm (above 75°F), chill your mixing bowl and work surface for 10 minutes before starting. Warm dough equals spread-out, greasy cookies instead of the thick, tender rounds you want.
Storage Extends Shelf Life: These cookies actually taste better the next day as the strawberry flavor develops. Store them in an airtight container with parchment paper between layers to prevent sticking. They’ll stay fresh for 5-7 days at room temperature.
Nutrition Information (Per Serving of 2-3 cookies)
Calories: 285
Protein: 2g
Carbohydrates: 28g
Fat: 18g
Fiber: 1g
Sugar: 7g
Sodium: 45mg
Creative Variations
Mixed Berry Shortbread: Replace half the freeze-dried strawberries with freeze-dried raspberries or blueberries for a more complex berry flavor. This creates beautiful color variation and adds different layers of tartness. The combination works particularly well if you’re looking for something similar to the flavor profiles in my rose shortbread, which also plays with delicate floral and fruit notes.
Chocolate-Dipped Strawberry Version: Once your shortbread has cooled completely, melt 4 ounces dark chocolate and dip half of each cookie. Place them on parchment paper to set. This transforms them into an elegant dessert that rivals my heart-shaped chocolate shortbread for special occasions.
Lemon-Strawberry Twist: Add 1 teaspoon lemon zest to the dry ingredients and replace the vanilla with lemon extract. The citrus brightens the strawberry flavor and adds a refreshing spring note that’s perfect for afternoon tea or Mother’s Day brunch.
Gluten-Free Alternative: Substitute the all-purpose flour with a 1:1 gluten-free baking flour that contains xanthan gum. Increase the cornstarch to 3 tablespoons and add an extra 1 tablespoon butter. The texture won’t be identical to traditional shortbread, but it’ll still be delicious and crumbly.
Storage & Reheating
Room Temperature Storage: Place cooled shortbread in an airtight container with parchment paper between layers. They’ll maintain their crisp texture for 5-7 days. Don’t stack them directly on top of each other or they’ll stick together.
Freezing for Later: Wrap individual cookies in plastic wrap, then place them in a freezer-safe container or bag. They’ll keep for 2 months. To serve, let them thaw at room temperature for 20 minutes—no reheating needed.
Dough Freezing: You can also freeze the shaped, unbaked cookies on a baking sheet until solid (1 hour), then transfer to a freezer bag. Bake directly from frozen, adding 2-3 minutes to the baking time. This is perfect for making ahead for parties or when you want fresh-baked cookies on demand.
Reviving Softened Shortbread: If your cookies lose their crispness due to humidity, place them on a baking sheet in a 300°F oven for 3-4 minutes. Let them cool completely before serving. They’ll be just as crispy as when first baked.
Troubleshooting Common Problems
Problem 1: Cookies Spreading Too Much
Your butter was too warm when you mixed it in, or you skipped the chilling step before baking. The dough needs cold butter and a refrigerator rest to maintain its shape. If this happens, immediately chill your remaining dough for 15 minutes before baking the next batch.
Problem 2: Dry, Crumbly Dough That Won’t Hold Together
You either over-mixed the butter (breaking it down too much) or your measurements were off. Add ½ teaspoon cold water at a time, kneading gently after each addition until the dough just holds together. Don’t add more than 2 teaspoons total or you’ll make the cookies tough.
Problem 3: Cookies Browning Too Quickly
Your oven temperature is running hot. Reduce the heat to 300°F and bake for 20-22 minutes instead. Consider using an oven thermometer to check accuracy—most home ovens run 15-25°F hotter or cooler than the dial indicates.
Problem 4: Strawberry Pieces Turned Brown
The freeze-dried strawberries oxidized from too much handling or the dough sat too long before baking. Always add them as one of the last steps, and bake within 30 minutes of mixing. If you need to wait longer, refrigerate the shaped cookies until ready to bake.
Problem 5: Cookies Are Tough Instead of Tender
You either over-mixed the dough (developing gluten) or added too much liquid. Shortbread should be mixed just until it comes together. If your cookies turned out tough this time, make sure to work the dough minimally next time and measure your ingredients precisely.
Equipment Essentials

- Mixing bowls (medium and large)
- Whisk and fork
- Pastry cutter (or two knives, or clean hands)
- Rolling pin
- Parchment paper (at least 2 sheets)
- 2-inch round cookie cutter (or drinking glass)
- Baking sheet
- Wire cooling rack
- Measuring cups and spoons
- Ruler (optional, for even rolling)
- Oven thermometer (recommended)
Shopping List
Baking Aisle
- All-purpose flour
- Powdered sugar
- Cornstarch
- Vanilla extract
Dairy Section
- Unsalted butter (cold)
Dried Fruit/Snack Aisle
- Freeze-dried strawberries
Spices/Seasonings
- Salt
Produce Section (Optional)
- Fresh strawberries for garnish
5 Success Secrets
1. Measure by Weight for Consistency: If you have a kitchen scale, weigh your flour (120g) instead of measuring by volume. Scooping flour directly from the bag can pack it down, giving you up to 25% more flour than needed, which results in dry, tough cookies.
2. Keep Everything Cold: From the butter to the bowl to your hands, temperature control makes the difference between good and amazing shortbread. If your hands run warm, rinse them under cold water and dry them before handling the dough.
3. Don’t Skip the Fork Pricks: Those decorative holes serve a real purpose. Without them, steam gets trapped inside the cookies, causing them to puff up and lose their flat, traditional shortbread shape. Three pricks per cookie is the magic number.
4. Judge Doneness by Touch, Not Color: Perfectly baked strawberry shortbread should be just barely firm around the edges when you gently press them. They’ll continue firming as they cool. If they’re hard when you take them out, they’re overbaked and will be too dry.
5. Rotate Your Pan Halfway Through: Every oven has hot spots that cause uneven baking. Rotating the pan at the halfway mark ensures all your cookies bake evenly, with consistent color and texture across the entire batch.
This strawberry shortbread recipe proves that a few simple ingredients can create something truly special. The buttery base melts on your tongue, while those little bursts of tangy strawberry add just enough sweetness and color to make these cookies stand out at any gathering. Whether you’re making them for a spring celebration or just treating yourself to something homemade, these delicate cookies deliver big flavor without complicated techniques.