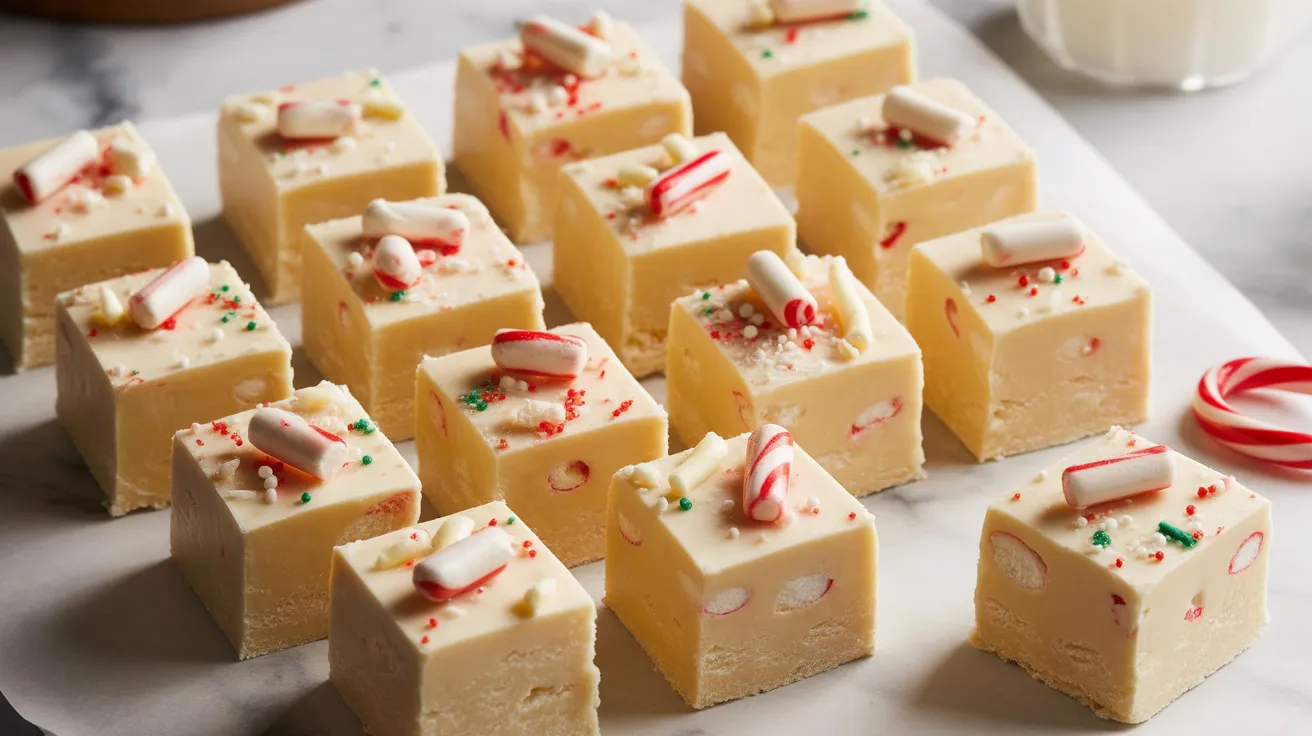
Rich, creamy Christmas fudge transforms your holiday table into something magical. This Christmas fudge recipe delivers perfect squares every single time, with a melt-in-your-mouth texture that’ll have everyone asking for your secret. I’ve made this for years, and it never fails to impress.
SERVES: 4 | PREP: 10 MIN | COOK: 8 MIN | TOTAL: 18 MIN (plus 2 hours chilling)
Ingredients
Base Ingredients
| Ingredient | Amount |
|---|---|
| White chocolate chips | 2 cups |
| Sweetened condensed milk | ¾ cup |
| Unsalted butter | 3 tablespoons |
| Pure vanilla extract | 1 teaspoon |
| Fine sea salt | ¼ teaspoon |
Festive Mix-Ins
| Ingredient | Amount |
|---|---|
| Mini candy canes (crushed) | ½ cup |
| Red and green sprinkles | 3 tablespoons |
| White chocolate shavings | 2 tablespoons (for topping) |
Step-by-Step Instructions
Phase 1: Preparation (5 minutes)
Step 1: Line an 8×8-inch square baking pan with parchment paper, letting the edges hang over the sides by about 2 inches. This overhang becomes your handles later, making it super easy to lift out the finished fudge without breaking it. Press the paper into the corners firmly so there are no air pockets.
Step 2: Crush your candy canes into small pieces using a rolling pin and a sealed plastic bag. You want pieces about the size of rice grains—not powder, not chunks. Too fine and they’ll dissolve, too big and they’ll make cutting difficult.
Step 3: Set out all your ingredients on the counter in the order you’ll use them. This matters because once the chocolate starts melting, things move fast and you can’t step away to search for something.
Phase 2: Creating the Fudge Base (8 minutes)
Step 4: Place a medium saucepan over low heat—and I mean truly low. High heat is the enemy here and will seize your chocolate into a grainy mess. Add the butter first and let it melt completely, about 1 minute.
Step 5: Pour in the sweetened condensed milk and stir constantly with a wooden spoon or silicone spatula. Keep the heat low and stir for 2 minutes until the mixture is warm to the touch but not bubbling. You’re just warming it, not cooking it.
Step 6: Add the white chocolate chips all at once. Turn off the heat completely but leave the pan on the burner. The residual heat is enough. Stir continuously in a figure-eight pattern for 3-4 minutes. You’ll see the chips start to soften and become glossy.
Step 7: Keep stirring until every single chip has melted and the mixture looks like thick cream—completely smooth with no lumps. If you see any stubborn chips, turn the heat back on for just 10 seconds, then off again. Never rush this step.
Step 8: Stir in the vanilla extract and salt. The salt might seem like a small amount, but it balances the sweetness and makes the chocolate flavor pop. Mix for 30 seconds until fully incorporated.
Phase 3: Adding Festive Elements (3 minutes)
Step 9: Fold in two-thirds of the crushed candy canes (save the rest for topping). Use a folding motion rather than stirring—this keeps the candy cane pieces from breaking down further. You want visible red and white streaks throughout.
Step 10: Gently fold in 2 tablespoons of the sprinkles. Don’t overmix or the colors will bleed. Just a few turns of the spatula is enough. The mixture should look festive and colorful.
Phase 4: Setting and Finishing (2 minutes active, 2 hours passive)
Step 11: Pour the fudge into your prepared pan immediately—it starts to set fast. Use your spatula to spread it evenly into all corners. The surface doesn’t need to be perfectly smooth; a slightly rustic look is charming.
Step 12: Tap the pan firmly on the counter 5 times to release any air bubbles trapped inside. You’ll actually hear them pop. This prevents holes in your finished fudge.
Step 13: While the surface is still tacky, sprinkle the remaining crushed candy canes across the top, pressing them gently into the surface. Add the remaining 1 tablespoon of sprinkles and the white chocolate shavings for a professional finish.
Step 14: Refrigerate uncovered for 2 hours. Don’t cover it or condensation will form and make the top soggy. After 1 hour, you can cover it loosely if needed.
Step 15: Lift the fudge out using the parchment paper handles. Place it on a cutting board. Let it sit at room temperature for 5 minutes before cutting—this prevents cracking.
Step 16: Use a large, sharp knife to cut into 16 squares (4 pieces per person). Wipe the blade clean between each cut for neat edges. If the fudge is too hard to cut cleanly, let it sit another 5 minutes.
Chef’s Notes
Temperature Control: The difference between smooth fudge and grainy fudge is heat management. Always use low heat and remove from heat before you think you need to. The pan retains enough warmth to finish the job.
Candy Cane Timing: Add crushed candy canes while the fudge is still warm so they stick, but not so hot that they melt completely. You want texture and flavor, not just peppermint streaks.
Yield Flexibility: This recipe makes 16 generous squares (4 per person for a rich dessert). Each piece is substantial, perfect for satisfying that Christmas fudge craving without overdoing it.
Make-Ahead Magic: Prepare this up to 5 days ahead. The flavors actually deepen after a day or two. Just wait to add the decorative toppings until the day you’re serving so they stay crisp.
Nutrition Information (Per Serving – 4 squares)
- Calories: 520
- Protein: 6g
- Carbohydrates: 68g
- Fat: 26g
- Saturated Fat: 16g
- Sugar: 64g
- Fiber: 0g
Creative Variations
Dark Chocolate Peppermint: Swap white chocolate for dark chocolate chips and reduce condensed milk to ½ cup. This creates a richer, less sweet version that pairs beautifully with coffee. The darker chocolate makes the peppermint really stand out.
Caramel Swirl Holiday: Add 3 tablespoons of caramel sauce in ribbons across the top before it sets. If you love that sweet, buttery combination, try my caramel coffee fudge for another festive twist on this classic technique.
Tropical Christmas: Replace candy canes with ½ cup toasted coconut and add ½ teaspoon coconut extract. Top with more toasted coconut instead of sprinkles. For more coconut inspiration, check out this coconut fudge that uses similar methods.
Gingerbread Spice: Add 1 teaspoon ground ginger, ½ teaspoon cinnamon, and ¼ teaspoon ground cloves to the melted chocolate. Skip the candy canes and sprinkles. Top with crushed ginger snap cookies instead.
Storage & Reheating
Refrigerator Storage: Keep in an airtight container between layers of parchment paper for up to 2 weeks. Don’t stack pieces directly on top of each other or they’ll stick together.
Freezer Storage: Wrap individual pieces in plastic wrap, then place in a freezer bag. Freeze for up to 3 months. Thaw in the refrigerator overnight, then bring to room temperature before serving for best texture.
Room Temperature: In cool weather (below 70°F), you can store covered at room temperature for 3 days. In warmer conditions, the fudge will soften too much and lose its structure.
Gift Giving: Package in clear cellophane bags tied with ribbon. Add a label that says to refrigerate. The fudge ships well if you include a cold pack and overnight delivery.
Troubleshooting
Problem: Fudge Won’t Set
Your mixture was too hot when you added the chocolate, or you didn’t cook it long enough. Return the mixture to the pan, add 2 tablespoons more chocolate chips, heat gently until melted, then re-chill. It should firm up within 3 hours.
Problem: Grainy Texture
The chocolate seized from too-high heat or moisture. Unfortunately, this can’t be fixed, but you can repurpose it: break it into chunks and fold into cookie dough, or melt it into hot chocolate. For your next batch, keep heat low and work quickly.
Problem: Fudge Is Too Hard to Cut
You over-chilled it or used too much chocolate. Let it sit at room temperature for 15 minutes before cutting. Warm your knife under hot water, dry it, then cut. The warmth helps the blade glide through.
Problem: Candy Canes Melted
You added them while the mixture was too hot. The fudge is still delicious—you’ve just created peppermint swirls instead of crunchy pieces. Next time, let the base cool for 2-3 minutes before adding candy.
Problem: Toppings Fell Off
You added decorations after the surface had already set. Press toppings into the fudge within 5 minutes of pouring. If they’ve already fallen off, make a simple glaze with 2 tablespoons melted white chocolate and use it as edible glue.
Equipment Essentials

- 8×8-inch square baking pan (metal or glass)
- Medium heavy-bottomed saucepan (prevents hot spots)
- Wooden spoon or silicone spatula (won’t scratch your pan)
- Parchment paper (makes removal foolproof)
- Large sharp knife (for clean cuts)
- Cutting board
- Rolling pin (for crushing candy canes)
- Plastic bag (for mess-free candy crushing)
Shopping List
Baking Aisle
- White chocolate chips (2 cups)
- Pure vanilla extract (1 teaspoon)
Dairy Section
- Sweetened condensed milk (¾ cup)
- Unsalted butter (3 tablespoons)
Seasonal/Candy Aisle
- Mini candy canes (½ cup crushed)
- Red and green sprinkles (3 tablespoons)
Baking Supplies
- Fine sea salt (¼ teaspoon)
- Parchment paper
Optional Garnish
- White chocolate bar (for shavings)
Success Secrets
1. Quality Chocolate Matters: Use real white chocolate chips (like Ghirardelli), not white baking chips. Check the ingredients—it should contain cocoa butter. The real stuff melts smoother and tastes richer.
2. Don’t Skip the Salt: That ¼ teaspoon of salt transforms this from one-dimensional sweet to complex and crave-worthy. It enhances the vanilla and makes the peppermint pop.
3. The Figure-Eight Stir: This stirring pattern ensures even heat distribution and prevents scorching in the pan’s center. It’s a professional pastry chef technique that makes a real difference.
4. Room Temperature Matters: Serve fudge at cool room temperature (65-68°F), not straight from the fridge. Cold fudge is too hard and the flavors are muted. The texture and taste transform after 10 minutes out.
5. Clean Cuts Every Time: For magazine-perfect squares, chill your knife in ice water between cuts, then dry it. A cold, clean blade slices through without dragging or creating ragged edges.