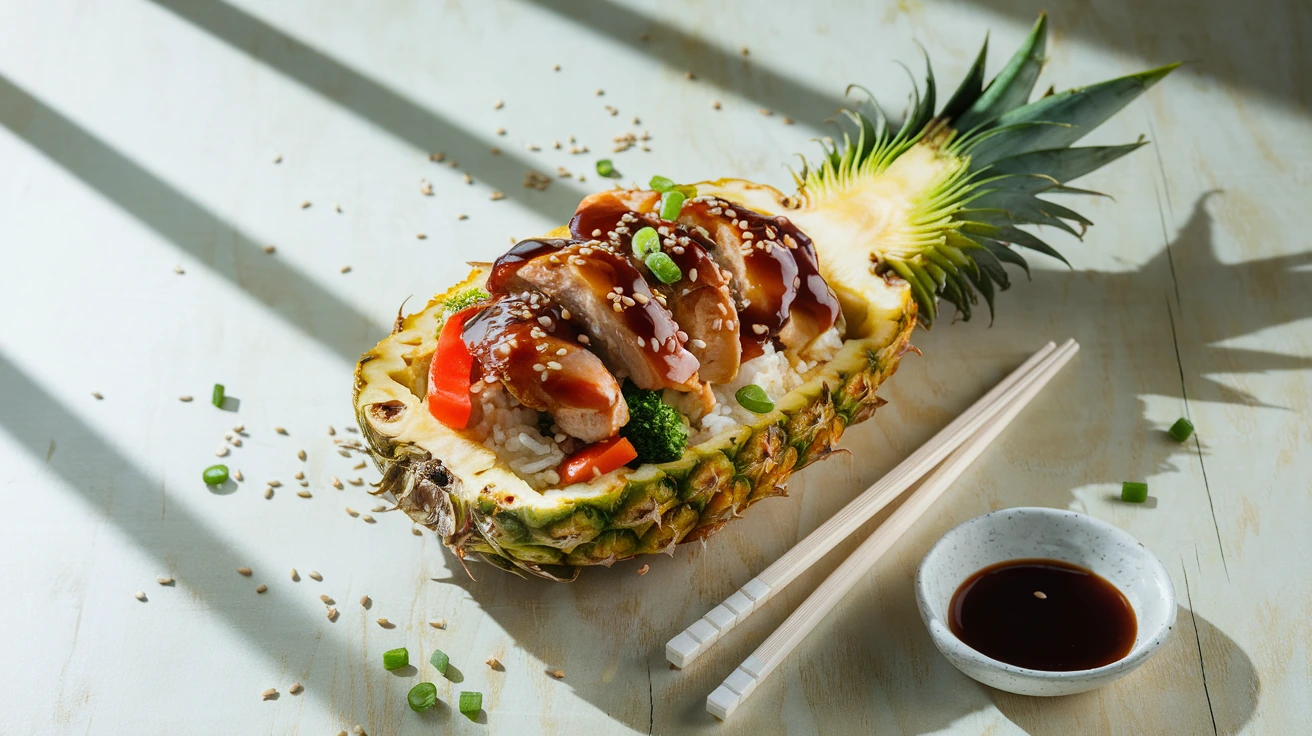
Craving restaurant-quality Teriyaki Chicken Pineapple Bowls at home? This recipe transforms simple ingredients into a stunning tropical meal that serves 4 people. Fresh pineapple boats cradle juicy chicken glazed in homemade teriyaki sauce, creating a dish that looks impressive but takes just 45 minutes. These Teriyaki Chicken Pineapple Bowls deliver the perfect sweet-savory balance home cooks love.
SERVES: 4 | PREP: 20 MIN | COOK: 25 MIN | TOTAL: 45 MIN
Ingredients for Teriyaki Chicken Pineapple Bowls
For the Teriyaki Sauce
| Ingredient | Amount | Notes |
|---|---|---|
| Soy sauce | 1/2 cup | Low sodium preferred |
| Pineapple juice | 1/4 cup | Fresh from pineapple |
| Brown sugar | 3 tablespoons | Light or dark both work |
| Garlic | 2 cloves | Minced |
| Fresh ginger | 1 tablespoon | Grated |
| Cornstarch | 1 tablespoon | For thickening |
| Water | 2 tablespoons | For cornstarch slurry |
For the Bowls
| Ingredient | Amount | Notes |
|---|---|---|
| Whole ripe pineapples | 2 | Medium size |
| Chicken breasts | 1.5 pounds | Cut into 1-inch cubes |
| Jasmine rice | 2 cups | Uncooked |
| Red bell pepper | 1 | Sliced |
| Broccoli florets | 2 cups | Bite-size pieces |
| Cooking oil | 2 tablespoons | Neutral flavor |
| Sesame seeds | 1 tablespoon | For garnish |
| Green onions | 3 | Chopped for garnish |
Step-by-Step Instructions for Teriyaki Chicken Pineapple Bowls
Phase 1: Preparing the Pineapple Bowls (15 minutes)
Step 1: Clear a large workspace and place a sturdy cutting board on your counter. Put a damp kitchen towel underneath to prevent slipping while you work with the pineapple. Have a large bowl ready for collecting the pineapple flesh.
Step 2: Select two fresh pineapples that feel heavy for their size with green, fresh leaves. Wash them thoroughly under cold running water and pat completely dry with paper towels. A wet pineapple becomes slippery and dangerous to cut!
Step 3: Place one pineapple on its side on the cutting board. Hold it firmly with your non-dominant hand, keeping your fingers curled away from the cutting path. Using a sharp chef’s knife, position the blade about 1/4 inch off-center at the leafy crown.
Step 4: Press down firmly and steadily through the crown, cutting lengthwise through the entire pineapple. Use a gentle sawing motion if needed. SAFETY TIP: Never force the knife—if it sticks, withdraw and restart the cut from a slightly different angle.
Step 5: Lay the pineapple halves cut-side up. Use the tip of your knife to score a line about 1/2 inch from the edge all around, pressing just deep enough to cut through the flesh but not the skin. Think of it like drawing a smaller pineapple shape inside the larger one.
Step 6: Create a grid pattern by making parallel lengthwise cuts about 1 inch apart through the flesh. Then make crosswise cuts to form squares. Cut only through the flesh, not the skin. VISUAL CUE: You’ll see the yellow squares clearly defined against the pineapple skin.
Step 7: Use a large metal spoon with a sharp edge to scoop out the flesh. Slide the spoon along the inside of the skin, following your border cut. Work from one end to the other with gentle, firm movements, scooping the freed chunks into your bowl. This step takes 3-5 minutes per half.
Step 8: Look through the scooped pieces for the tough core—it’s lighter in color and much harder. Remove and discard any core pieces. Check for brown spots and remove them. Cut any large pieces into 1/2-inch chunks. Set aside 2 cups for the recipe.
Phase 2: Making the Homemade Teriyaki Sauce (10 minutes)
Step 9: Take about 1 cup of the diced pineapple pieces and place them in a fine mesh strainer over a bowl. Press firmly with the back of a spoon to extract juice until you have precisely 1/4 cup of fresh pineapple juice. This natural juice creates authentic flavor.
Step 10: Prepare your aromatics. For the garlic, place cloves on the cutting board, press with the flat side of your knife to crush, peel off skin, and mince into very small pieces. For the ginger, scrape off the brown skin with a spoon edge and grate using the finest side of a grater. TIP: Frozen ginger is actually easier to grate!
Step 11: In a small saucepan off the heat, combine 1/2 cup soy sauce, the fresh pineapple juice, 3 tablespoons brown sugar, minced garlic, and grated ginger. Whisk gently to begin dissolving the sugar. This base creates the foundation of your teriyaki flavor.
Step 12: In a separate small bowl, create a perfect cornstarch slurry by combining 1 tablespoon cornstarch with 2 tablespoons cold water (must be cold!). Stir vigorously with a fork until completely smooth. BEGINNER TIP: If you see any lumps, start over—lumps won’t dissolve later and will create grainy sauce.
Step 13: Place the saucepan over medium heat and stir occasionally. When the mixture begins to simmer (small bubbles appear at edges), re-stir your cornstarch slurry since it settles quickly. While whisking constantly, slowly pour in the cornstarch slurry in a thin stream.
Step 14: Continue whisking for 1-2 minutes as the sauce thickens. VISUAL CUE: The sauce is ready when it coats the back of a spoon and has a glossy appearance. Run your finger through the sauce on the back of a spoon—if the line stays clear, it’s perfectly thickened. Remove from heat and set aside.
Phase 3: Cooking the Rice (20 minutes)
Step 15: Rinse 2 cups jasmine rice in a fine mesh strainer under cold running water. Swirl with your hand while the water runs over it, continuing until the water runs mostly clear rather than cloudy. This removes excess starch that makes rice gummy.
Step 16: If using a rice cooker, add the rinsed rice and 3 cups water (1.5:1 ratio for jasmine rice). Press start and let it cook undisturbed. If using a pot, bring rice and water to a boil over high heat, then reduce to low, cover, and simmer for 15 minutes.
Step 17: When rice is done, let it rest covered for 5 minutes off the heat. Then fluff gently with a fork by running it through the rice from the edges to center. This releases steam and separates the grains for fluffy texture.
Phase 4: Cooking the Chicken and Vegetables (15 minutes)
Step 18: Cut 1.5 pounds chicken breasts into uniform 1-inch cubes. Pat them completely dry with paper towels—this step is critical for browning! Wet chicken steams instead of browning and won’t develop that delicious golden exterior.
Step 19: Slice one red bell pepper into thin strips. Cut 2 cups broccoli florets into bite-sized pieces. TIP: Don’t discard the broccoli stems—peel them and slice for extra vegetables.
Step 20: Heat a large skillet or wok (12-inch minimum) over medium-high heat for 2-3 minutes. Test readiness by flicking a tiny drop of water—it should sizzle and evaporate instantly. Add 2 tablespoons cooking oil and swirl to coat. The oil is ready when it shimmers but doesn’t smoke.
Step 21: Divide chicken into two equal portions. Add the first batch to the hot pan in a single layer with space between pieces—they should not touch. Let cook undisturbed for 2-3 minutes until golden brown on the bottom. WHY THIS MATTERS: Overcrowding causes chicken to steam instead of brown, resulting in pale, rubbery meat.
Step 22: Flip each piece and cook an additional 2-3 minutes. Check doneness by cutting one piece open—it should be white throughout with no pink. The internal temperature should reach 165°F. Remove the first batch to a clean plate and repeat with the second batch.
Step 23: After removing all chicken, add the vegetables to the same pan. Stir frequently with a wooden spoon or tongs and cook 3-4 minutes until vegetables brighten in color. Broccoli should turn vibrant green and peppers should soften slightly but still have crispness. VISUAL CUE: Vegetables are done when they’re bright colored and crisp-tender.
Step 24: Return all cooked chicken to the pan with vegetables. Pour the prepared teriyaki sauce over everything and gently stir to coat all pieces evenly. Cook for 1-2 minutes until everything is hot and the sauce is bubbling. Reserve 3-4 tablespoons of sauce for final drizzling if desired.
Phase 5: Final Assembly (5 minutes)
Step 25: Place hollowed pineapple boats on serving plates. If they wobble, cut a very thin slice from the bottom to create a stable base. BEGINNER TIP: Place a small piece of folded paper towel under any wobbly spots for extra stability.
Step 26: Start with a bed of hot rice (about 1 cup per bowl). Spoon the chicken-vegetable mixture over the rice. Arrange reserved pineapple chunks decoratively around the edges. VISUAL TIP: Create color contrast by grouping similar colored ingredients together.
Step 27: Sprinkle sesame seeds evenly over each bowl and scatter chopped green onions on top. If you reserved some sauce, drizzle it over everything for extra gloss and flavor. PRESENTATION TIP: Use a small squeeze bottle for precise sauce drizzling.
Step 28: Serve these beautiful Teriyaki Chicken Pineapple Bowls immediately while everything is hot. Provide forks or chopsticks depending on preference. These bowls look stunning on a table with small side dishes of extra sauce for dipping.
Chef’s Notes for Perfect Teriyaki Chicken Pineapple Bowls
Fresh is Best: Using fresh pineapple juice in your teriyaki sauce makes a noticeable difference compared to bottled juice. The natural enzymes in fresh pineapple also help tenderize the chicken slightly, giving you more succulent meat in your Teriyaki Chicken Pineapple Bowls.
Temperature Control: The secret to glossy, restaurant-quality sauce is maintaining medium heat throughout the cooking process. Too high and the sugar burns; too low and the sauce won’t thicken properly. Watch for that gentle simmer.
Batch Cooking Chicken: I cannot stress enough how important it is to cook chicken in batches. When I first started making Teriyaki Chicken Pineapple Bowls, I crowded the pan and ended up with pale, steamed chicken instead of golden, caramelized pieces. Give each piece space to breathe!
Make-Ahead Strategy: You can hollow out the pineapple bowls up to 6 hours ahead and keep them refrigerated covered with plastic wrap. Prepare the sauce up to 2 days ahead and store in an airtight container in the refrigerator. This makes dinner assembly super quick on busy weeknights.
Nutrition Information Per Serving
| Nutrient | Amount | % Daily Value |
|---|---|---|
| Calories | 520 | – |
| Protein | 35g | 70% |
| Carbohydrates | 65g | 22% |
| Fat | 12g | 18% |
| Fiber | 5g | 20% |
| Sugar | 25g | 28% |
| Sodium | 850mg | 35% |
Based on a 2,000 calorie diet. Nutritional values are approximate and will vary based on specific ingredients used.
Variations for Your Teriyaki Chicken Pineapple Bowls
Protein Swaps: Swap chicken for pressed firm tofu (press for 30 minutes, then cube) for a vegetarian version. Use shrimp instead, cooking for just 1-2 minutes per side until pink. Try thinly sliced beef sirloin, cooking only 2-3 minutes total for tender results.
Rice Alternatives: Brown rice works beautifully (increase cooking time to 35-40 minutes). For a low-carb option, use cauliflower rice and sauté 4-5 minutes. Quinoa creates a protein-packed base—rinse well before cooking and use a 1:2 ratio with water.
Vegetable Mix-Ins: Add sugar snap peas for extra crunch (add in the last 2 minutes of cooking). Include sliced carrots cut thin for quicker cooking. Mix in mushrooms for umami depth—they pair perfectly with teriyaki flavors. If you enjoy Asian-style dumplings, try my chicken momos recipe for another flavorful option!
Spicy Kick: Stir in 1-2 teaspoons sriracha or red pepper flakes to the teriyaki sauce for heat lovers. You can also garnish with sliced fresh jalapeños for those who want extra spice.
Pineapple Alternatives: No fresh pineapples? Use regular bowls and add canned pineapple chunks (drain well before using). Hollowed bell peppers make excellent alternative serving vessels—just cut off the tops and remove seeds.
If your family loves crispy chicken dishes, my chicken tenders and fries recipe makes another quick weeknight dinner everyone will enjoy.
Storage & Reheating Guide
Proper Storage
Store components separately in airtight containers for best results. The pineapple boats should be wrapped in plastic wrap. Refrigerate everything within 2 hours of cooking (within 1 hour if the room temperature exceeds 90°F).
Keep the teriyaki sauce in a separate small container—this prevents the rice from getting too soggy. Rice should be refrigerated within 1 hour to prevent bacterial growth.
Refrigeration Guidelines
These Teriyaki Chicken Pineapple Bowls components last 3-4 days in the refrigerator when stored properly. The chicken-vegetable mixture maintains its best quality for 3 days. Rice is best within 2 days but safe for 3-4 days.
Freezing Instructions
The chicken and sauce mixture freezes beautifully for up to 2 months. Portion into individual freezer-safe containers for easy weeknight meals. Rice can be frozen separately in freezer bags—squeeze out air before sealing.
Do not freeze the pineapple boats or fresh pineapple chunks, as the texture deteriorates significantly. Label all containers with the date and contents.
Reheating Methods
Microwave Method: Reheat individual portions for 1-2 minutes, stirring halfway through. Add 1 tablespoon water to rice before reheating to restore moisture. Cover with a damp paper towel to prevent drying.
Stovetop Method: Reheat in a skillet with a splash of water over medium heat, stirring frequently to distribute heat evenly. This method works best for maintaining texture.
Add fresh garnishes (sesame seeds and green onions) only after reheating—they’ll taste much fresher this way.
Troubleshooting Common Issues
Problem: Sauce Too Thin
Solution: Mix an additional 1 teaspoon cornstarch with 1 tablespoon cold water. Add this slurry to the simmering sauce while whisking constantly. Let it cook for another minute to thicken. If the sauce is still thin, repeat with another small slurry.
Problem: Pineapple Bowls Not Stable
Solution: Cut a thin slice from the bottom to create a completely flat surface. Alternatively, place the pineapple boat on a bed of rice on the plate for stability. You can also use crumpled foil underneath as support.
Problem: Chicken Sticking to Pan
Solution: Ensure your pan is fully heated before adding oil, and the oil must be hot (shimmering) before adding chicken. Pat chicken completely dry before cooking. Don’t try to flip chicken too early—it releases naturally when properly browned.
Problem: Rice Too Sticky or Gummy
Solution: This usually means you didn’t rinse the rice enough before cooking. For future batches, rinse until water runs clear. Also verify your water-to-rice ratio is correct (1.5:1 for jasmine rice). Use a rice cooker for consistent results.
Problem: Chicken Cooking Unevenly
Solution: Cut all chicken pieces to uniform 1-inch size. Use an instant-read thermometer to check doneness—chicken is safe at 165°F internal temperature. If pieces are different sizes, remove smaller ones first as they cook faster.
Equipment Essentials

Must-Have Tools
Sharp Chef’s Knife: Essential for cutting through pineapple cleanly and safely. A dull knife is actually more dangerous because it requires more force and can slip.
Cutting Board: Large, sturdy board that won’t slip. Place a damp towel underneath for stability when cutting pineapple.
Large Skillet or Wok: 12-inch minimum diameter needed to cook chicken without overcrowding. Non-stick or well-seasoned cast iron works best.
Small Saucepan: For making the teriyaki sauce. A 2-quart size is perfect.
Fine Mesh Strainer: For rinsing rice and extracting pineapple juice. This is worth having for multiple cooking uses.
Helpful Equipment
Rice Cooker: Takes the guesswork out of cooking perfect rice every time. Not essential but makes life easier.
Instant-Read Thermometer: Ensures chicken reaches safe internal temperature of 165°F without cutting it open.
Squeeze Bottle: Makes drizzling sauce look professional and controlled.
Substitutions for Missing Equipment
No Wok? A large skillet works perfectly fine. Just make sure it’s at least 12 inches in diameter.
No Rice Cooker? A medium pot with a tight-fitting lid works just as well—just watch your timing and heat.
No Fine Mesh Strainer? For extracting pineapple juice, you can pulse pineapple chunks in a blender and strain through cheesecloth.
Shopping List by Store Section
Produce Section
- 2 medium whole ripe pineapples
- 1 red bell pepper
- 2 cups broccoli florets (or one head)
- 3 green onions
- 2 cloves garlic
- 1-inch piece fresh ginger
Meat Department
- 1.5 pounds boneless, skinless chicken breasts
Asian/International Aisle
- Low-sodium soy sauce (1/2 cup needed)
- Jasmine rice (2 cups needed)
- Sesame seeds (1 tablespoon)
Baking Aisle
- Brown sugar (3 tablespoons)
- Cornstarch (1 tablespoon)
Oils & Condiments
- Neutral cooking oil like vegetable or canola (2 tablespoons)
Shopping Tip: Choose pineapples that smell sweet at the stem end but aren’t soft—this indicates perfect ripeness for both eating and using as serving bowls.
Success Secrets for Restaurant-Quality Results
1. Room Temperature Chicken: Let chicken rest at room temperature for 15 minutes before cooking. This ensures more even cooking throughout and prevents cold centers when the outside is perfectly browned.
2. Toast Your Sesame Seeds: Place sesame seeds in a dry pan over medium heat for 2-3 minutes, shaking frequently until golden and fragrant. This simple step amplifies their nutty flavor dramatically.
3. Reserve Sauce for Drizzling: Hold back 3-4 tablespoons of your finished teriyaki sauce before tossing everything together. Drizzle this over the completed bowls at serving time for extra visual appeal and fresh sauce flavor.
4. Sesame Oil Finish: Add 1 teaspoon toasted sesame oil to your sauce at the very end of cooking (off heat). This adds incredible depth and authentic Asian restaurant flavor that bottled teriyaki sauces can’t match.
5. Marinate for Maximum Flavor: If you have time, marinate the chicken cubes in 2 tablespoons of the teriyaki sauce for 30 minutes before cooking. Pat dry before adding to the hot pan—this builds extra flavor layers while maintaining that crucial browning.
These Teriyaki Chicken Pineapple Bowls prove that restaurant-quality meals don’t require professional training or expensive ingredients. The combination of fresh pineapple, homemade teriyaki sauce, and perfectly cooked chicken creates a meal that impresses every single time. Serve these at your next dinner party and watch your guests’ faces light up!