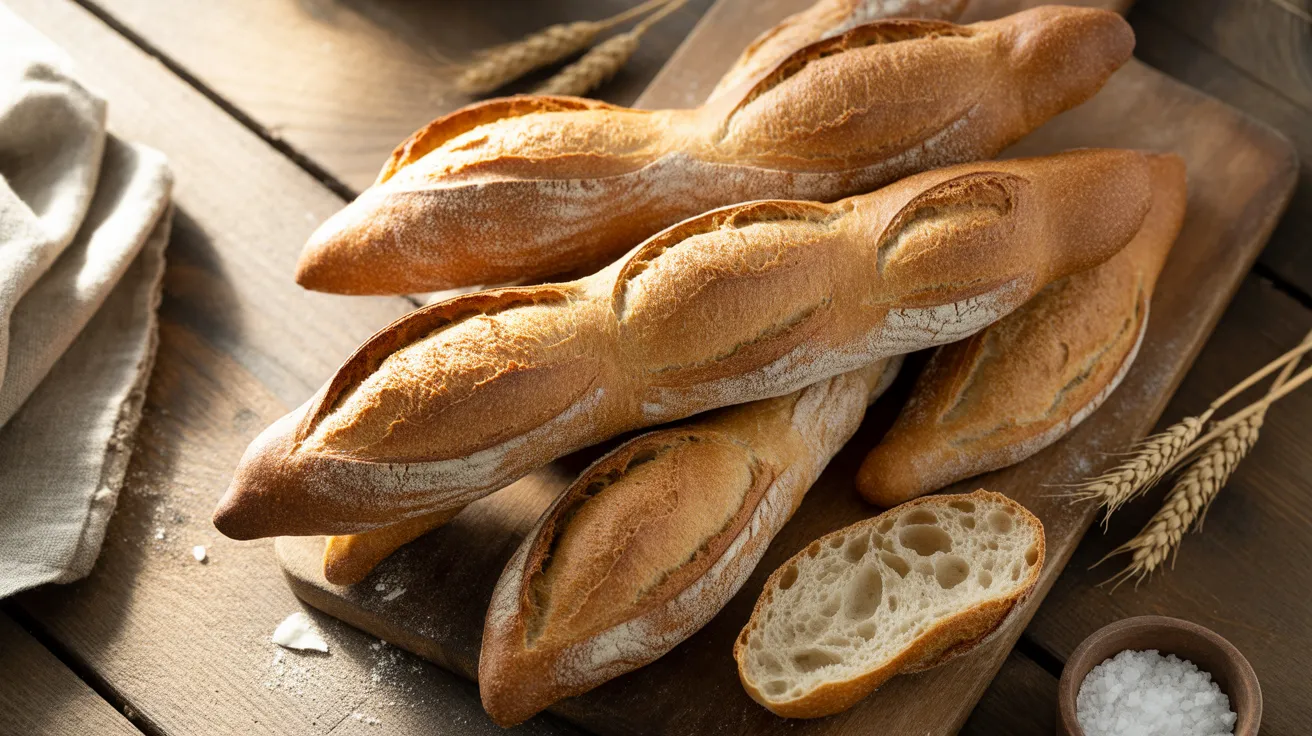
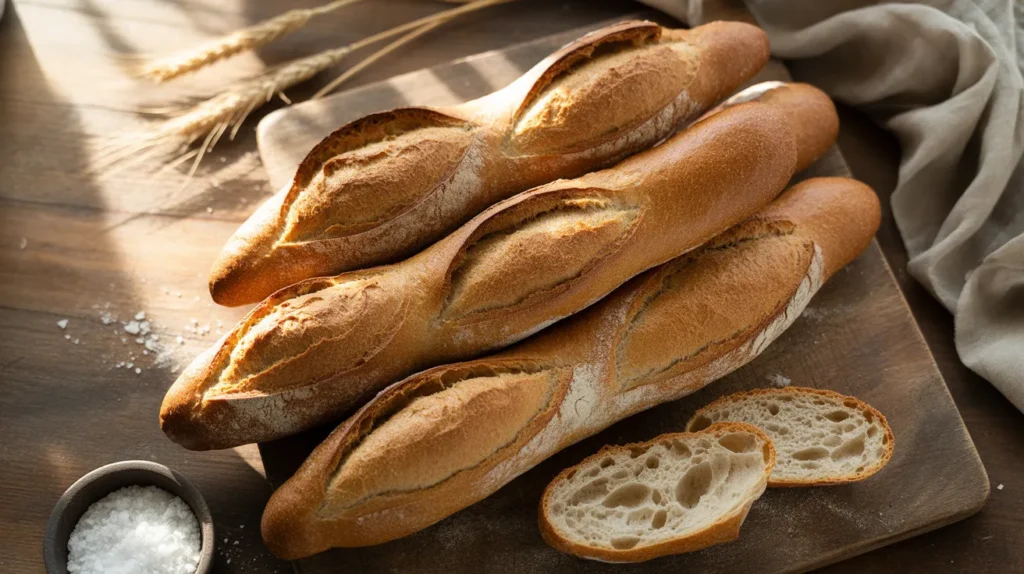
There’s something magical about pulling a fresh sourdough baguette from your oven with that perfect golden crust that shatters when you bite into it. Making a sourdough baguette at home might seem challenging, but I’m breaking down every step so you can create these classic French loaves with a crispy exterior and chewy, tangy interior that rivals any artisan bakery.
SERVES: 4 | PREP: 30 MIN (plus 12-16 hours fermentation) | COOK: 25 MIN | TOTAL: 13-17 HOURS
Ingredients
For the Dough
| Ingredient | Amount | Notes |
|---|---|---|
| Active sourdough starter | 200g (1 cup) | Fed and bubbly, at peak |
| Bread flour | 500g (4 cups) | High protein 12-14% |
| Water | 325g (1⅓ cups) | Room temperature |
| Fine sea salt | 10g (2 tsp) | Not table salt |
For Baking
| Ingredient | Amount | Notes |
|---|---|---|
| Water for steam | 1 cup | For oven humidity |
| Rice flour | 2 tbsp | For dusting banneton |
Step-by-Step Instructions
Phase 1: Mixing the Dough (15 minutes)
Step 1: Check that your sourdough starter has doubled in size and shows lots of bubbles on top. This usually happens 4-6 hours after feeding. To test if it’s ready, drop a small spoonful into water—if it floats, you’re good to go.
Step 2: Pour 325g of room temperature water into a large mixing bowl. Add your 200g of active starter and use your fingers to break it apart in the water until it looks milky and slightly frothy. This helps distribute the starter evenly through your dough.
Step 3: Add 500g of bread flour all at once to the starter mixture. Use a wooden spoon or your hands to mix everything together until no dry flour remains visible. The dough will look shaggy and rough—that’s exactly what you want at this stage.
Step 4: Cover the bowl with a damp kitchen towel and let it rest for 30 minutes. This resting period (called autolyse) lets the flour fully hydrate and makes the dough easier to work with. You’ll notice it becomes smoother and more extensible.
Step 5: Sprinkle 10g of sea salt over the dough surface. Wet your hands slightly and pinch the salt into the dough, squeezing it between your fingers repeatedly for about 3-4 minutes. The dough will feel slippery at first, then come back together as the salt incorporates.
Phase 2: Bulk Fermentation (4-5 hours)
Step 6: Perform your first “stretch and fold” by grabbing one edge of the dough, stretching it upward about 8-10 inches, then folding it over to the opposite side. Rotate the bowl 90 degrees and repeat this motion four times total (north, south, east, west). This builds gluten structure without kneading.
Step 7: Cover the bowl and let the dough rest for 30 minutes at room temperature (68-72°F is ideal). You’ll perform this stretch and fold sequence four more times over the next 2 hours, spacing them 30 minutes apart. After the final fold, leave the dough untouched for the remaining fermentation time.
Step 8: Watch for these signs that bulk fermentation is complete: the dough should increase in volume by about 30-50%, show bubbles on the surface and sides, and feel pillowy when gently poked. The total time varies with room temperature but typically takes 4-5 hours.
Phase 3: Shaping (20 minutes)
Step 9: Lightly flour your work surface and gently turn out the dough. Divide it into four equal pieces (about 250g each) using a bench scraper. Let these pieces rest uncovered for 15 minutes—this relaxation period makes shaping much easier.
Step 10: Take one dough piece and pat it gently into a rough rectangle about 6 inches wide. Fold the bottom third up toward the center and press along the seam with your fingertips. Fold the top third down and seal this seam the same way, creating a tight log.
Step 11: Turn the log seam-side down and use both hands to gently roll it back and forth, applying light pressure and moving your hands from the center outward. Keep rolling until you have a 14-16 inch baguette with tapered ends. The key is even, gentle pressure—don’t rush this step.
Step 12: Place each shaped baguette seam-side up in a floured baguette pan or between folds of a heavily floured kitchen towel (creating walls to support them). Dust the tops with rice flour to prevent sticking. Repeat the shaping process with the remaining three pieces.
Phase 4: Final Proof (1-2 hours or overnight)
Step 13: Cover the baguettes loosely with plastic wrap or a clean towel. Let them proof at room temperature for 1-2 hours if baking the same day, or place them in the refrigerator for an 8-12 hour cold proof if baking the next morning. They’re ready when they’ve puffed up noticeably but still spring back slowly when gently pressed.
Phase 5: Scoring and Baking (30 minutes)
Step 14: Place a metal baking pan on the bottom oven rack and preheat your oven to 475°F for at least 30 minutes. Position your main baking rack in the center of the oven. If using a baking stone or steel, preheat it as well.
Step 15: Carefully flip each baguette seam-side down onto parchment paper or directly onto your preheated baking surface. Using a very sharp blade or lame held at a 30-degree angle, make 3-4 diagonal slashes about ¼ inch deep along the length of each baguette. Work quickly and confidently—hesitation creates ragged cuts.
Step 16: Immediately slide the baguettes into the oven and pour 1 cup of boiling water into the preheated pan on the bottom rack (be careful of the steam burst). Quickly close the oven door to trap the steam. This humidity is critical for developing that signature crispy crust.
Step 17: Bake for 10 minutes with the steam, then carefully remove the water pan and reduce temperature to 450°F. Continue baking for another 12-15 minutes until the baguettes turn deep golden brown and sound hollow when tapped on the bottom. The internal temperature should reach 205-210°F.
Step 18: Transfer the baguettes to a wire cooling rack immediately. Let them cool for at least 20 minutes before slicing—I know this is torture, but cutting too early releases all the steam and makes the interior gummy instead of chewy.
Chef’s Notes
Starter Strength: Your sourdough baguette success depends heavily on using starter at its absolute peak activity. I feed mine in the morning and use it by late afternoon when it’s doubled and super bubbly.
Hydration Matters: This recipe uses 65% hydration, which creates easier-to-shape dough while still producing an open crumb. If you’re comfortable with wetter doughs, increase water to 350g for larger holes.
Steam is Non-Negotiable: That crackling crust comes from steam during the first 10 minutes of baking. Without it, you’ll get a thick, leathery crust instead of the thin, crispy shell that makes baguettes special.
Scoring Depth: Many beginners score too shallow. Aim for ¼ inch deep and hold your blade at an angle (not straight down) to create that classic “ear” along each slash.
Nutrition Information (Per Baguette)
- Calories: 485
- Protein: 18g
- Carbohydrates: 98g
- Fat: 2g
- Fiber: 4g
- Sodium: 975mg
Creative Variations
1. Whole Wheat Sourdough Baguette
Replace 100g of bread flour with whole wheat flour for a nuttier flavor and denser texture. Add an extra 15-20g of water since whole wheat absorbs more liquid. This version pairs perfectly with hearty soups and stews.
2. Seeded Baguette
After shaping, brush the baguettes with water and roll them in a mixture of sesame seeds, poppy seeds, and flax seeds. The seeds toast during baking and add incredible crunch and flavor—similar to the seeded variations you might enjoy in sourdough focaccia.
3. Herb and Garlic Baguette
Fold 2 tbsp of minced fresh rosemary and 4 cloves of minced garlic into the dough during the final stretch and fold. The aroma while baking is absolutely intoxicating, and these are perfect for serving alongside pasta.
4. Olive and Sun-Dried Tomato Baguette
Mix ½ cup of chopped Kalamata olives and ⅓ cup of chopped sun-dried tomatoes into the dough after the autolyse period. These Mediterranean-inspired baguettes work beautifully for sandwiches or served with cheese, and the technique is similar to adding toppings to sourdough pizza crust.
Storage & Reheating
Room Temperature: Store baguettes in a paper bag (never plastic) for up to 2 days. They’ll stay crusty on the outside while keeping the interior soft.
Freezing: These freeze beautifully for up to 3 months. Let them cool completely, wrap tightly in plastic wrap, then place in a freezer bag. Squeeze out all the air before sealing.
Reheating from Frozen: Don’t thaw first! Run frozen baguettes briefly under water, shake off excess, and bake at 375°F for 12-15 minutes. The crust will crisp up perfectly, and the interior becomes soft and warm again.
Reviving Day-Old Bread: Spritz the surface with water and bake at 350°F for 5-7 minutes. This refreshes the crust and warms the interior, making yesterday’s bread taste fresh again.
Troubleshooting Common Problems
Problem 1: Flat, Spread-Out Baguettes
Cause: Under-proofed dough or weak gluten development.
Solution: Make sure you complete all five stretch and folds during bulk fermentation. The dough should feel strong and elastic before shaping. Also, proof until the dough springs back slowly when pressed—rushing this step results in flat loaves.
Problem 2: Dense, Gummy Interior
Cause: Cutting the bread before it’s fully cooled.
Solution: I know waiting is hard, but that cooling time lets the crumb structure set properly. Wait at least 20-30 minutes after removing from the oven. Also check that your starter is active enough—weak starter creates dense bread.
Problem 3: Pale, Thick Crust
Cause: Insufficient steam in the oven.
Solution: Use the full cup of boiling water and make sure your steam pan is screaming hot before adding water. Keep the oven door closed for those first 10 minutes—every time you peek, you lose steam. Some bakers spray water directly on the oven walls for extra humidity.
Problem 4: Baguettes Stick to Proofing Surface
Cause: Inadequate flouring during shaping and proofing.
Solution: Use rice flour instead of regular flour for dusting—it doesn’t absorb into the dough and prevents sticking better. Apply a generous dusting to your banneton or couche (kitchen towel). If you don’t have rice flour, use 50/50 all-purpose and semolina flour.
Problem 5: Scoring Tears Instead of Opens Cleanly
Cause: Dull blade or wrong angle.
Solution: Use a fresh razor blade or very sharp lame for each baking session. Hold it at a shallow 30-degree angle to the surface, not straight up and down. Score with one swift, confident motion—hesitating creates raggedy cuts. Some bakers lightly mist the baguette surface before scoring to help the blade glide.
Equipment Essentials
- Large mixing bowl (at least 4-quart capacity)
- Kitchen scale (measuring by weight is crucial for consistency)
- Bench scraper (for dividing dough and cleaning your work surface)
- Baguette pan or baker’s couche (floured kitchen towels work in a pinch)
- Bread lame or razor blade (for scoring clean, professional slashes)
- Baking stone or steel (optional but improves bottom crust)
- Metal baking pan (for creating steam)
- Instant-read thermometer (to check internal temperature)
- Wire cooling rack (essential for proper cooling)
- Spray bottle (for misting if needed)
Shopping List by Store Section
Baking Aisle
- Bread flour (high protein 12-14%)
- Rice flour (for dusting)
Pantry Staples
- Fine sea salt
Already Have at Home
- Active sourdough starter (fed and maintained)
- Water
Success Secrets
1. Temperature Control is Everything
Keep your room between 68-72°F during bulk fermentation. Warmer temps speed things up but can create overly sour bread. Cooler temps slow fermentation and develop more complex flavors.
2. Master the Poke Test
Gently press your finger into the dough during final proof. If it springs back immediately, keep proofing. If it springs back slowly and leaves a slight indentation, it’s ready to bake. If it doesn’t spring back at all, you’ve over-proofed.
3. Practice Your Shaping Technique
The difference between professional-looking baguettes and home-baked ones usually comes down to shaping. Practice creating even tension along the entire length without degassing the dough too much. It takes a few tries to get the feel right.
4. Don’t Skip the Preheat
Your oven and baking surface need a full 30 minutes at temperature. This ensures the baguettes get that immediate blast of heat that creates oven spring (the dramatic rise in the first few minutes).
5. Embrace the Cold Retard
While you can bake these same-day, an overnight cold proof in the refrigerator develops much deeper flavor and makes the dough easier to score. The cold firms up the exterior, so your blade cuts cleanly instead of dragging.
I’ve baked hundreds of sourdough baguettes over the years, and each batch teaches me something new. The beauty of this recipe is that it’s forgiving enough for beginners but delivers bakery-quality results when you nail the technique. Start with the basic version, get comfortable with the process, then experiment with the variations to make these baguettes your own.