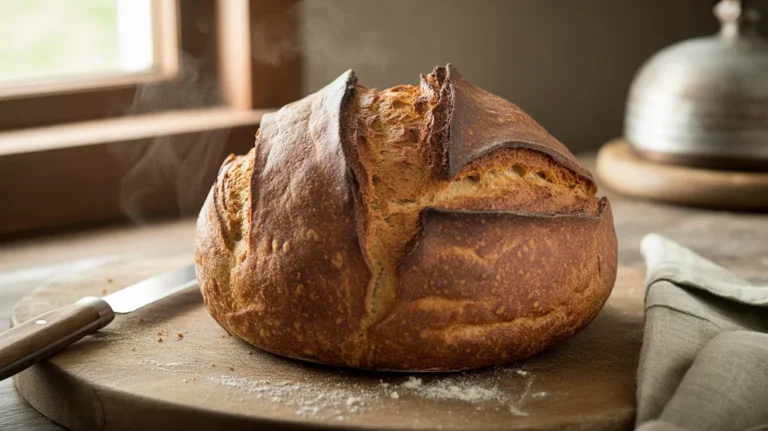
There’s something magical about making your own sourdough pizza crust at home—the crackling edges, the chewy interior, and that unmistakable tangy flavor that makes every bite memorable. This sourdough pizza crust recipe transforms your active starter into restaurant-quality pizza that’ll have everyone asking for your secret, and the best part is you only need a few simple ingredients and about 24 hours of patience to create four perfect personal pizzas.
SERVES: 4 | PREP: 20 MIN | RISE TIME: 18-24 HRS | COOK: 12 MIN | TOTAL: 24 HRS 32 MIN
Ingredients
For the Dough
| Ingredient | Amount | Notes |
|---|---|---|
| Active sourdough starter | 1 cup (240g) | Fed and bubbly |
| Warm water | 1 cup (240ml) | 90-100°F |
| Bread flour | 3½ cups (420g) | High protein preferred |
| Extra virgin olive oil | 2 tablespoons | Plus more for coating |
| Fine sea salt | 2 teaspoons | Table salt works too |
| Honey | 1 teaspoon | Optional, feeds the starter |
For Assembly
| Ingredient | Amount | Notes |
|---|---|---|
| Semolina flour | ¼ cup | For dusting |
| Your favorite toppings | As needed | Per your preference |
Step-by-Step Instructions
Phase 1: Building the Dough (Day 1, Evening – 10 minutes)
Step 1: Check your sourdough starter to make sure it’s active and bubbly. You want to see it doubled in size with lots of air bubbles throughout—this tells you the wild yeast is alive and ready to work its magic. If your starter hasn’t been fed recently, feed it 4-6 hours before starting this recipe and wait until it passes the float test (a small spoonful should float in water).
Step 2: Pour 1 cup warm water into a large mixing bowl. The water should feel warm to the touch but not hot—around 90-100°F is perfect. Too hot and you’ll kill the yeast; too cold and fermentation will take forever.
Step 3: Add 1 cup active sourdough starter to the warm water and whisk them together until the mixture looks milky and slightly frothy. This step distributes the starter evenly so every bit of dough gets fermented properly.
Step 4: Stir in 2 tablespoons olive oil and 1 teaspoon honey (if using). The oil creates a tender crumb and helps the crust crisp up in the oven, while the honey gives the wild yeast a little extra food to munch on during the long fermentation.
Step 5: Add 3½ cups bread flour and 2 teaspoons salt to the bowl. Use a wooden spoon or your hands to mix everything until no dry flour remains and you have a shaggy, sticky dough. Don’t worry about it looking messy—that’s exactly what you want at this stage.
Phase 2: Developing Gluten (Day 1, Evening – 5 minutes active time)
Step 6: Turn the dough out onto a clean counter (no flour needed yet). Knead the dough for 5-7 minutes using a push-fold-turn motion: push the dough away with the heel of your hand, fold it back over itself, turn it 90 degrees, and repeat. The dough will transform from sticky and rough to smooth and elastic—you’ll feel it become more cohesive under your hands.
Step 7: Perform the windowpane test to check gluten development. Tear off a small piece of dough and gently stretch it between your fingers. If it stretches thin enough to see light through it without tearing, you’ve built enough gluten structure. If it tears easily, knead for another 2-3 minutes.
Step 8: Coat a large bowl with 1 tablespoon olive oil and place your dough ball inside, turning it to coat all surfaces. This prevents drying and makes the dough easier to handle later.
Phase 3: Bulk Fermentation (Day 1 into Day 2 – 18-24 hours)
Step 9: Cover the bowl tightly with plastic wrap or a damp kitchen towel. Place it in a cool spot in your kitchen—ideally 65-70°F. This slow, cold fermentation is where the sourdough pizza crust develops its signature tangy flavor and creates those beautiful air pockets you see in professional pizzerias.
Step 10: Let the dough rise for 18-24 hours. You’ll know it’s ready when it’s doubled in size, looks puffy, and jiggles slightly when you shake the bowl. The surface should have visible bubbles, and when you press a finger into it, the indent should slowly spring back halfway.
Phase 4: Dividing and Shaping (Day 2, Afternoon – 10 minutes)
Step 11: Lightly flour your work surface with bread flour. Turn the dough out gently to preserve as many air bubbles as possible—these create the airy, open crumb you want in your crust.
Step 12: Divide the dough into 4 equal pieces using a bench scraper or sharp knife. Each piece should weigh approximately 210-220g. Weigh them for accuracy if you want perfectly consistent pizzas.
Step 13: Shape each piece into a tight ball by pulling the edges toward the center, then flipping it over and rolling it under your cupped hand in small circles. The tension you create on the surface helps the dough hold its shape during the final rise.
Step 14: Place the dough balls on a lightly oiled baking sheet, spacing them 3-4 inches apart. Cover loosely with plastic wrap that’s been lightly oiled on the underside so it doesn’t stick.
Phase 5: Final Proof (Day 2, Afternoon – 2-4 hours)
Step 15: Let the dough balls rest at room temperature for 2-4 hours until they’re puffy, relaxed, and noticeably larger. They should feel soft and pillowy when you gently poke them. This final rise makes the dough easier to stretch and creates a lighter, airier crust.
Phase 6: Stretching and Baking (Day 2, Evening – 12 minutes per pizza)
Step 16: Preheat your oven to its highest setting—usually 500-550°F—for at least 30 minutes before baking. Place a pizza stone or heavy baking sheet on the middle rack to preheat too. This blazing heat mimics a professional pizza oven and creates that crispy bottom crust.
Step 17: Generously dust your work surface with semolina flour (it’s coarser than regular flour and prevents sticking better). Place one dough ball in the center and gently press it with your fingertips, starting from the center and working outward, leaving a ½-inch border for the crust.
Step 18: Pick up the dough and let gravity help you stretch it. Hold the edge with both hands and slowly rotate the dough, letting it hang and stretch naturally. Keep working around the circle until you have a 10-12 inch round that’s thin in the center with a slightly thicker edge. If it resists stretching, let it rest for 5 minutes and try again.
Step 19: Transfer the stretched dough to a piece of parchment paper dusted with semolina. Add your toppings quickly—don’t overload it or the center will be soggy. Less is more with pizza.
Step 20: Slide the pizza (still on parchment) onto your preheated stone or baking sheet. Bake for 10-12 minutes until the edges are deep golden brown with charred spots and the bottom is crispy when you lift it with a spatula. The cheese should be bubbling and starting to brown.
Chef’s Notes
Starter Strength Matters: Your sourdough pizza crust will only be as good as your starter. Make sure it’s been fed regularly and shows strong fermentation activity before using it. A weak starter will give you dense, flat crust that won’t rise properly.
Temperature Control is Key: The long fermentation time works best at cooler room temperatures. If your kitchen is warm (above 75°F), reduce the bulk fermentation to 12-16 hours or move the dough to a cooler spot. I’ve found that fermenting near a basement door or in an unheated mudroom gives the best flavor development.
Don’t Skip the Windowpane Test: This simple check tells you when you’ve kneaded enough. Proper gluten development is what creates that satisfying chew in your crust—it’s the difference between cardboard and perfection.
High Heat is Non-Negotiable: Your oven needs to be screaming hot for authentic pizza. If you have a convection setting, use it. The intense heat causes rapid oven spring and creates those beautiful leopard spots on the crust that professional pizzerias are known for.
Nutrition Information (Per Serving – One Pizza Crust)
- Calories: 385
- Protein: 12g
- Carbohydrates: 72g
- Fat: 5g
- Fiber: 3g
- Sugar: 1g
- Sodium: 585mg
Note: Nutrition values are for the crust only and do not include toppings.
Variations
Whole Wheat Sourdough Crust: Substitute 1 cup (120g) of the bread flour with whole wheat flour for a nuttier flavor and heartier texture. The whole wheat adds fiber and creates a more rustic crust similar to what you’d find in sourdough baguette recipes. You may need to add an extra 2-3 tablespoons water since whole wheat absorbs more liquid.
Herb-Garlic Crust: Mix 2 tablespoons dried Italian herbs and 4 cloves minced garlic into the dough during the initial mixing stage. This creates an aromatic crust that’s incredible even without sauce—just brush with olive oil and sprinkle with sea salt.
Thin & Crispy Roman Style: After dividing, roll each dough ball with a rolling pin instead of hand-stretching to create ultra-thin 14-inch rounds. Bake these on perforated pizza pans at 550°F for 6-8 minutes until deeply golden and crisp like a cracker.
Sweet Breakfast Pizza Base: Replace 1 cup of bread flour with all-purpose flour and increase the honey to 3 tablespoons for a slightly sweeter dough. This base works beautifully for breakfast pizzas topped with ricotta, fruit, and honey—the same way you might use sourdough English muffins for a sweet breakfast treat.
Storage & Reheating
Refrigerator Storage: Unbaked dough balls can be stored in an airtight container for up to 3 days. Bring them to room temperature for 1-2 hours before stretching and baking.
Freezer Storage: Wrap each shaped dough ball tightly in plastic wrap, then place in a freezer bag. Freeze for up to 3 months. Thaw overnight in the refrigerator, then let rest at room temperature for 2 hours before using.
Baked Pizza Storage: Store leftover baked pizza in an airtight container in the refrigerator for up to 4 days.
Reheating Method: Never use the microwave—it makes the crust chewy and sad. Instead, reheat slices in a 400°F oven for 8-10 minutes or in a covered skillet over medium heat for 5-7 minutes. The skillet method keeps the bottom crispy while the covered top reheats the toppings.
Par-Baking for Later: Bake crusts without toppings for 6-7 minutes, let cool completely, then freeze. When you want pizza, top the frozen par-baked crust and bake at 450°F for 10-12 minutes.
Troubleshooting
Problem: Dough won’t stretch and keeps springing back Solution: Your gluten is too tight and needs to relax. Cover the dough and let it rest for 10-15 minutes at room temperature, then try stretching again. This gives the gluten strands time to loosen up. Cold dough straight from the fridge is especially prone to this—always let it warm up first.
Problem: Crust is too dense and doesn’t have air bubbles Solution: This usually means your starter wasn’t active enough or the fermentation time was too short. Make sure you see clear doubling and lots of bubbles before shaping. If you’re in a rush, you can add ¼ teaspoon instant yeast to the dough as insurance, though purists won’t love this shortcut.
Problem: Bottom stays pale and doesn’t crisp up Solution: Your oven or baking surface isn’t hot enough. Preheat for a full 45 minutes instead of 30, and make sure your stone or steel is on the lowest rack where heat is most intense. You can also try broiling for the last 1-2 minutes to add color.
Problem: Dough tears when stretching Solution: You’ve either overworked the gluten or didn’t let it rest enough after shaping. Use a lighter touch when stretching and let the dough relax between attempts. Pushing the dough outward with your fingertips works better than pulling it, which causes tears.
Problem: Crust tastes bland or too sour Solution: Bland means under-fermented (shorten your starter feeding time or extend bulk fermentation), while too sour means over-fermented (reduce the fermentation time or use a cooler spot). The sweet spot for balanced flavor is usually 20-22 hours at 68°F. Keep notes on your timing and room temperature to dial in your perfect flavor.
Equipment Essentials

- Large mixing bowl (at least 4-quart capacity)
- Kitchen scale (for accurate measurements)
- Bench scraper (for dividing dough)
- Pizza stone or baking steel (preheats for crispy bottom)
- Pizza peel or rimless baking sheet (for transferring)
- Rolling pin (optional, for thin crust variation)
- Instant-read thermometer (to check water temperature)
- Plastic wrap or damp towels (for covering dough)
- Parchment paper (makes transfer easier)
- Stand mixer with dough hook (optional, for hands-free kneading)
Shopping List
Baking Aisle
- Bread flour (3½ cups)
- Semolina flour (¼ cup)
- Fine sea salt
- Honey
Refrigerated Section
- Active sourdough starter (1 cup – or maintain your own)
Oil & Vinegar Aisle
- Extra virgin olive oil
If Needed
- Instant yeast (optional backup)
- Your preferred pizza toppings
Success Secrets
1. Plan Ahead: This isn’t a same-day recipe. Start your dough the evening before you want pizza, which means if you want Friday night pizza, mix your dough Thursday evening. The long fermentation can’t be rushed without sacrificing flavor.
2. Use a Scale: Volume measurements for flour are notoriously inaccurate because of how you scoop and pack it. Weighing your ingredients eliminates guesswork and gives you consistent results every single time.
3. Keep It Simple: When you’ve invested 24 hours into making perfect dough, don’t bury it under a mountain of toppings. Three to four ingredients max lets the crust shine—think fresh mozzarella, San Marzano tomatoes, basil, and a drizzle of good olive oil.
4. Preheat Longer Than You Think: That 30-minute preheat I mentioned? Make it 45 minutes if you have the time. A properly heated oven and stone create the thermal shock that gives you those gorgeous air bubbles and charred spots.
5. Master the Hand Stretch: Using a rolling pin pops all those beautiful air bubbles you spent 24 hours creating. Learn to hand-stretch your dough—it takes practice, but the difference in texture is worth it. Start by pressing the dough flat with your fingers, then let gravity do most of the work as you rotate it in your hands.
This sourdough pizza crust recipe proves that the best things in life are worth waiting for. That 24-hour fermentation creates complex flavors and textures that no quick pizza dough can match, and once you taste the difference, you’ll never go back to store-bought crusts again.