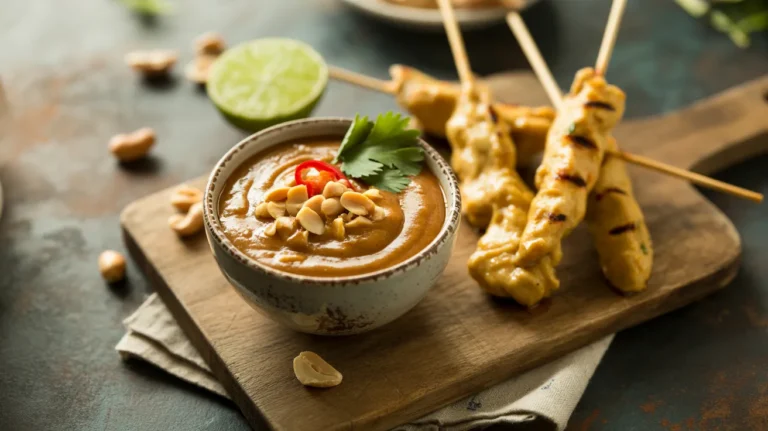
This Thai fish sauce dipping sauce with lime and garlic recipe is one of those magic condiments that makes everything taste better. You get salty, tangy, garlicky, and just a little spicy all in one small bowl. Once you try this Thai fish sauce dipping sauce with lime and garlic, you’ll want to put it on grilled chicken, spring rolls, rice dishes, and so much more.
SERVES: 4 | PREP: 10 MIN | COOK: 0 MIN | TOTAL: 10 MIN
What Makes This Thai Fish Sauce Dipping Sauce So Good
This sauce is a staple at Thai dinner tables. It’s called Nam Jim in Thai, which simply means “dipping sauce.”
The beauty of this sauce is that it takes less than 10 minutes to make. You don’t need a stove. You don’t need any special equipment.
Just a knife, a cutting board, and a bowl.
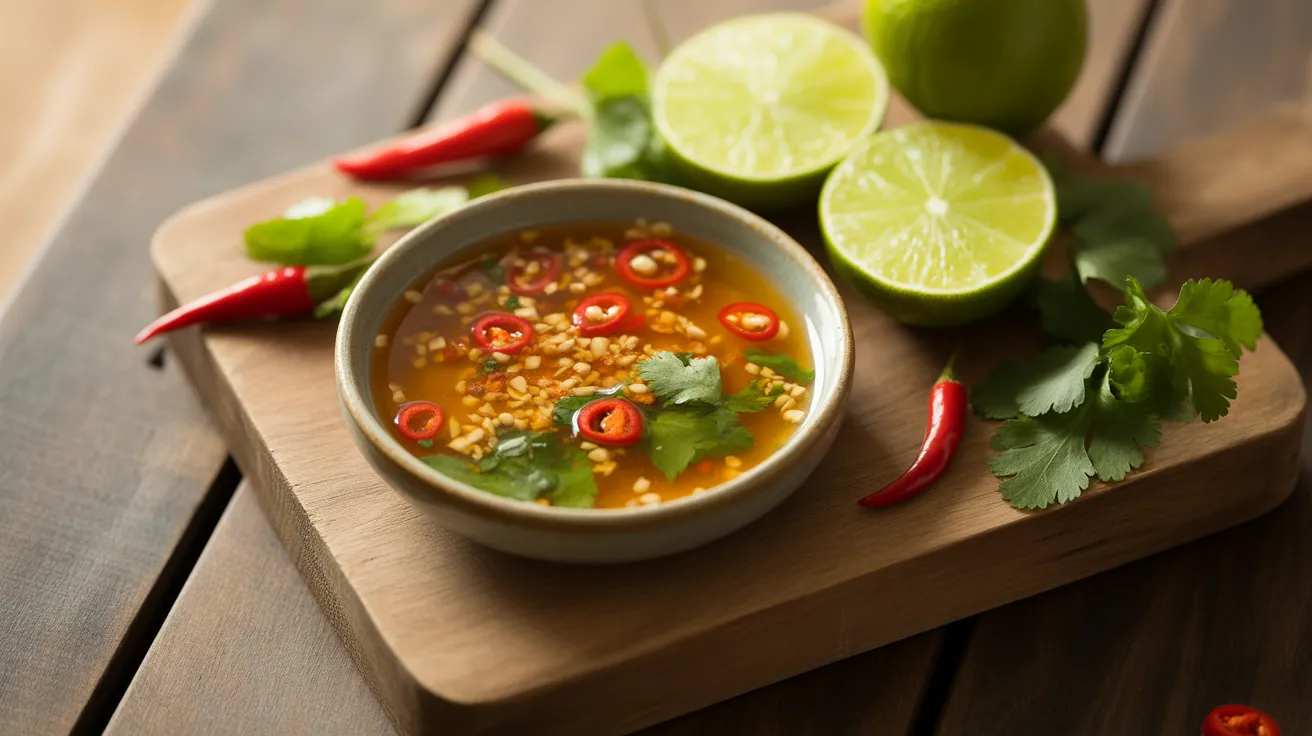
The combination of fish sauce, fresh lime juice, garlic, and Thai chilies creates a perfectly balanced flavor. Every ingredient has a job to do — the fish sauce brings saltiness and depth, the lime adds bright acidity, the garlic adds punch, and the chilies bring heat.
This is the kind of sauce that turns a simple meal into something special.
Ingredients
Main Sauce Ingredients
| Ingredient | Amount |
|---|---|
| Fish sauce (Nam Pla) | 3 tablespoons |
| Fresh lime juice | 3 tablespoons (about 2 limes) |
| Garlic cloves, minced | 3 large cloves |
| Thai bird’s eye chilies | 2–4 (adjust to taste) |
| Granulated white sugar | 1 tablespoon |
| Water | 1 tablespoon |
Optional Garnish
| Ingredient | Amount |
|---|---|
| Fresh cilantro, chopped | 1 tablespoon |
| Green onion, thinly sliced | 1 tablespoon |
Step-by-Step Instructions
Phase 1: Gather and Prep Your Ingredients
Step 1: Read the full recipe before you start.
Take two minutes to read through all the steps before touching anything. This is the most important habit any beginner cook can build. You’ll know exactly what’s coming and you won’t feel rushed.
Step 2: Set up your workspace.
Clear a small section of your counter. Place your cutting board, a sharp knife, a small bowl for mixing, a small spoon for measuring and stirring, and a citrus juicer if you have one.
Keep a damp towel nearby to wipe your hands and the board between ingredients. A clean workspace makes cooking feel calm and easy.
Step 3: Choose your fish sauce carefully.
Not all fish sauce is created equal. Look for a brand that has a deep amber color when you hold the bottle up to light. Popular reliable brands include Tiparos, Megachef, or Tra Chang.
Avoid bottles with very dark, almost black liquid — that can mean the sauce is old or lower quality. Good fish sauce smells strong but not rotten. The smell mellows out once it mixes with lime juice and sugar.
Step 4: Pick and prep your limes.
You need 3 tablespoons of fresh lime juice. That’s roughly 2 medium limes. Never use bottled lime juice for this sauce — fresh lime juice has a brightness that bottled juice simply can’t match.
Before cutting, roll each lime firmly on the counter with your palm for 15–20 seconds. This breaks up the juice pockets inside and gives you more juice per lime.
Cut each lime in half crosswise (across the middle, not lengthwise). Use a citrus juicer or squeeze firmly with your hand over the bowl, catching any seeds with your other hand. Measure to make sure you have exactly 3 tablespoons.
Step 5: Peel and mince your garlic.
You need 3 large garlic cloves. Peel each one by placing it flat on the cutting board and pressing the flat side of your knife firmly down on top. This splits the skin and makes it easy to peel off.
Now finely mince the garlic. Chop it as small as you can — pieces should be about the size of a grain of rice or smaller. Small pieces distribute evenly through the sauce and give better flavor in every bite.
Pro tip: If you find raw garlic too sharp, you can soak the minced garlic in the lime juice for 2–3 minutes before adding the other ingredients. This softens its bite slightly.
Phase 2: Handle the Chilies
Step 6: Decide how spicy you want your sauce.
Thai bird’s eye chilies are small but very hot. For a mild sauce, use 2 chilies. For medium heat, use 3. For a spicy sauce that brings real heat, use 4 or more.
If you’ve never cooked with Thai chilies before, start with 2 and taste the finished sauce. You can always add more.
Step 7: Slice or chop the chilies safely.
Safety tip: The oils in Thai chilies are strong. Wash your hands thoroughly with soap and water after handling them. Avoid touching your eyes or face until you’ve washed up.
Remove the stem end of each chili with a quick slice. For a moderately spicy sauce, slice the chilies into thin rounds. For a slightly milder heat, remove the seeds by slicing the chili open lengthwise and scraping out the seeds with a small spoon before slicing.
The seeds and white membrane inside the chili hold the most heat. Removing them gives you chili flavor without as much burn.
Set the sliced chilies aside on the cutting board.
Phase 3: Mix the Sauce
Step 8: Add the fish sauce to your mixing bowl.
Measure 3 tablespoons of fish sauce directly into your small bowl. The smell at this stage will be strong — that’s completely normal. The lime juice you’re adding next will immediately tone it down.
Step 9: Add the fresh lime juice.
Pour your 3 tablespoons of fresh lime juice into the same bowl. Stir briefly with a small spoon. Notice how the sharp fish sauce smell softens right away when it meets the acid in the lime.
Step 10: Add the sugar.
Measure 1 tablespoon of granulated white sugar into the bowl. Add 1 tablespoon of water at the same time — this helps the sugar dissolve quickly.
Stir continuously for about 30 seconds until you no longer see or feel sugar granules at the bottom of the bowl. Run your spoon along the bottom to check. Undissolved sugar makes the sauce grainy and uneven in flavor.
Why add sugar? Sugar does more than add sweetness. It softens the sharp edges of the fish sauce and lime, creating a rounder, more balanced flavor. Traditional Thai cooks often use palm sugar, which has a slightly richer, caramel-like taste. White sugar works perfectly as a substitute.
Step 11: Add the garlic.
Drop in your minced garlic and stir to combine. The garlic will start to release its flavor into the sauce right away.
Step 12: Add the sliced chilies.
Add your sliced Thai chilies and stir gently. The heat from the chilies will infuse into the sauce over the next few minutes.
Phase 4: Taste and Adjust
Step 13: Taste the sauce and check the balance.
Dip a clean spoon into the sauce and taste it carefully. A well-balanced Thai fish sauce dipping sauce with lime and garlic recipe should hit four notes almost at once — salty, sour, sweet, and spicy.
Here’s how to fix common balance problems:
- Too salty? Add a little more lime juice and a pinch more sugar.
- Too sour? Add a tiny pinch more sugar or a few drops of water.
- Not salty enough? Add fish sauce in ½ teaspoon increments.
- Not spicy enough? Add another sliced chili or a small pinch of chili flakes.
Step 14: Let the sauce rest for 5 minutes.
After mixing, let the sauce sit for 5 minutes before serving. This short rest time lets the garlic and chilies fully bloom into the liquid, making the flavor much more developed and cohesive.
Don’t skip this step. It takes no effort and makes a real difference.
Step 15: Add optional garnishes.
If you’re using fresh cilantro or sliced green onion, stir them in right before serving. These garnishes add a fresh, herbal note that makes the sauce look and taste even better.
Chef’s Notes
1. Fresh lime juice is non-negotiable. The bright acidity of fresh lime is what makes this Thai fish sauce dipping sauce with lime and garlic sing. Bottled lime juice tastes flat and artificial by comparison. Always squeeze your limes fresh.
2. Quality fish sauce matters more than you think. A high-quality fish sauce has a complex, savory depth that cheaper versions lack. Spending a few extra dollars on a good brand makes a noticeable difference in the finished sauce.
3. Make it your own. Traditional recipes vary from region to region across Thailand. Some cooks add a small amount of palm sugar. Others add a splash of water to lighten the sauce. Once you’ve made it a couple of times, you’ll find your own preferred ratios.
4. Garlic size matters. Thai garlic cloves are often much smaller than American garlic cloves. If you’re using small Thai garlic, use 5–6 cloves to match the flavor of 3 large Western garlic cloves.
Nutrition Information (Per Serving)
| Nutrient | Amount |
|---|---|
| Calories | 38 |
| Total Fat | 0g |
| Sodium | 1,020mg |
| Total Carbohydrates | 8g |
| Sugars | 6g |
| Protein | 1g |
| Vitamin C | 8% DV |
Nutrition is calculated for approximately 1.5 tablespoons of sauce per person.
Variations
1. Classic Nam Pla Prik (No Sugar Version)
Some Thai home cooks skip the sugar entirely for a sharper, more intense sauce. This version is especially popular as a table condiment for rice and grilled dishes. If you love bold flavors, try it this way first.
For another version of this classic, check out this Nam Pla Prik Thai fish sauce chili lime dipping sauce that uses a few extra chilies for serious heat lovers.
2. Garlic-Heavy Version
Double the garlic to 6 cloves for a sauce that’s bold and deeply savory. This version pairs perfectly with grilled meats, especially pork belly and chicken thighs. The extra garlic makes it feel more like a marinade than a dipping sauce.
3. Sweet and Mild Version
Add an extra ½ tablespoon of sugar and reduce the chilies to just 1. This softer, sweeter version works beautifully with crispy spring rolls, fried tofu, and steamed dumplings. It’s also perfect if you’re serving guests who don’t love spicy food.
4. Herb-Forward Version
Stir in 2 tablespoons of finely chopped fresh cilantro and 1 tablespoon of fresh mint leaves right before serving. This bright, herbal version is outstanding with summer rolls, fresh rice paper wraps, and cold noodle salads.
For even more ideas on how to use and customize your Thai fish sauce dipping sauce with lime and garlic recipe, visit this full guide: Thai fish sauce dipping sauce with lime and garlic recipe.
Storage and Reheating
How long does it last? This sauce keeps well in the refrigerator for up to 5 days when stored in a sealed glass jar or airtight container. The flavors actually deepen after a day or two in the fridge.
Storage tips:
- Always use a clean spoon when taking sauce out of the jar
- Keep it away from the door of the fridge where temperatures fluctuate
- Label the jar with the date you made it
Does it freeze? Freezing is not recommended. The fresh lime juice loses its brightness after thawing and the garlic can develop an unpleasant texture. Since this sauce takes only 10 minutes to make, it’s always better to make a fresh batch.
Serving temperature: This sauce is best served at room temperature. If you’ve just pulled it from the fridge, let it sit on the counter for 5 minutes before serving.
Troubleshooting
Problem 1: The sauce tastes too fishy and sharp. Solution: Add more fresh lime juice, one teaspoon at a time, and a small pinch of extra sugar. The acid and sweetness will immediately soften the sharp, pungent notes. Too much fish sauce is the most common beginner mistake — measure carefully.
Problem 2: The sugar won’t dissolve. Solution: The water you add with the sugar is key. If the sugar still won’t dissolve after stirring for 30–40 seconds, try warming the water slightly (not hot — just warm) before adding it to the bowl. Never heat the entire sauce — you’ll lose the fresh flavor of the lime.
Problem 3: The garlic tastes too raw and sharp. Solution: Soak your minced garlic in the lime juice for 3–5 minutes before adding the other ingredients. This is called “blooming” the garlic in acid, and it tames the sharp raw bite while keeping the flavor. You can also use a fine microplane grater instead of mincing — grated garlic disperses more evenly and feels less sharp.
Problem 4: The sauce is too spicy to eat. Solution: Add more lime juice and sugar in small amounts. You can also add a splash of cold water to dilute the heat. If it’s still too hot, make a new, milder batch and combine the two — this brings the heat level down quickly.
Problem 5: The sauce tastes flat and one-dimensional. Solution: This usually means you need more lime juice. Fresh lime juice brightens all the other flavors and makes the sauce come alive. Add it one teaspoon at a time and taste after each addition. A flat-tasting sauce can also mean your fish sauce is old — check the bottle’s expiration date.
Equipment Essentials
- Cutting board — a medium-sized wooden or plastic board works well
- Sharp chef’s knife — a sharp knife makes mincing garlic and slicing chilies much easier and safer
- Small mixing bowl — glass or ceramic works best; plastic can absorb fish sauce smell
- Measuring spoons — accurate measuring makes balancing flavors much easier
- Citrus juicer — a hand-held juicer is cheap and gets far more juice from your limes
- Small glass jar with lid — for storing any leftover sauce in the fridge
Shopping List
Produce Section
- [ ] 2 fresh limes
- [ ] 3 large garlic cloves (or 1 small head of garlic)
- [ ] 2–4 Thai bird’s eye chilies (fresh)
- [ ] Fresh cilantro (optional)
- [ ] Green onions (optional)
Condiments and Pantry Aisle
- [ ] Fish sauce (Nam Pla) — look for Tiparos, Megachef, or Tra Chang brand
- [ ] Granulated white sugar
5 Success Secrets
1. Always use fresh lime, never bottled. The flavor difference is dramatic. Fresh lime juice is brighter, more complex, and more aromatic. It’s the single most important ingredient in this sauce.
2. Mince your garlic as fine as possible. Small, even pieces of garlic distribute better through the sauce and give you garlic flavor in every bite rather than one big hit all at once.
3. Let it rest before you serve it. Five minutes of resting time lets the garlic and chili fully infuse into the liquid. A sauce that rests tastes far more complete than one served immediately.
4. Taste as you go, not just at the end. The balance of salty, sour, sweet, and spicy is something you develop a feel for over time. Taste after adding each ingredient so you understand how each one changes the overall flavor.
5. Start with less chili than you think you need. You can always add more heat. You can’t take it away. Start with 2 chilies, taste the finished sauce, and add more only if you want it spicier. This habit will save you from many ruined batches.
Made this recipe? Leave a comment below and tell us how you served it — we love hearing what dishes you paired it with!