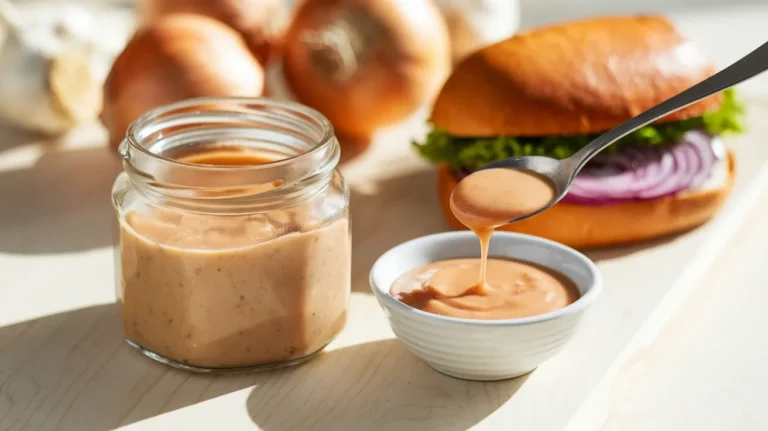
If you’ve ever squeezed a bottle of store-bought hot sauce and thought “I could make this better at home,” this homemade Thai sriracha sauce from Si Racha style recipe is exactly what you need. This is the real deal — bright red, tangy, gently sweet, and built from the coastal Thai town of Si Racha where this sauce was born. You’ll have a fresh batch of homemade Thai sriracha sauce from Si Racha style ready in under 30 minutes, and it tastes nothing like the bottle.
SERVES: 4 (makes approx. 1 cup / 240 ml) | PREP: 10 MIN | COOK: 15 MIN | TOTAL: 25 MIN
What Makes Si Racha Style Different?
Most people know the thick, garlicky American-style hot sauce sold in the rooster bottle. But the Thai sriracha sauce born in Si Racha, a coastal city in Chonburi Province, is a different animal entirely.
The original Si Racha version is thinner and brighter. It has a milder heat, a clean vinegar tang, and a gentle sweetness that doesn’t knock you sideways. It’s made to drizzle, not to dab.
When you make this homemade Thai sriracha sauce from Si Racha style recipe, you’re getting back to the roots — and back to something far fresher than anything in a bottle.
Ingredients
Chilies & Aromatics
| Ingredient | Amount | Notes |
|---|---|---|
| Red Fresno chilies | 250 g (about 10–12 chilies) | Stems removed, roughly chopped |
| Garlic cloves | 3 cloves | Peeled |
Liquids & Seasonings
| Ingredient | Amount | Notes |
|---|---|---|
| White vinegar | ½ cup (120 ml) | Plain distilled or rice vinegar |
| Water | ¼ cup (60 ml) | Room temperature |
| Granulated sugar | 2 tablespoons | White sugar or palm sugar |
| Fine sea salt | 1 teaspoon |
Step-by-Step Instructions
Phase 1 — Prep Your Chilies (5 Minutes)
Step 1 — Choose your chilies carefully. Red Fresno chilies are the best pick for this recipe. They’re medium-heat, bright red, and easy to find at most grocery stores.
If you can’t find Fresnos, red jalapeños work well. Avoid very thin Thai bird’s eye chilies for this recipe — they’re too hot and will overpower the Si Racha-style balance you’re going for.
Step 2 — Wash the chilies under cold running water. Rub each one gently with your fingers to remove any dirt or wax. Pat them dry with a paper towel.
Step 3 — Remove the stems. Use a sharp knife and cut the stem end off each chili. You want a clean, flat cut about ¼ inch (0.5 cm) from the top.
Leave the seeds in. The seeds carry heat and a little bitterness that balances the sugar later. If you prefer a very mild sauce, you can scrape half the seeds out with a small spoon.
⚠️ Safety tip: Wear food-safe gloves when handling this many chilies. Chili oils can irritate your eyes and skin. Wash your hands well before touching your face.
Step 4 — Roughly chop the chilies. Cut each chili into 3–4 large chunks. You don’t need tiny pieces — the blender will do the work.
Step 5 — Peel and lightly crush the garlic. Use the flat side of your knife to press down on each garlic clove. The skin will loosen and slip right off. Give each clove one firm press to lightly crush it. This helps the garlic blend more evenly.
Phase 2 — Blend (3 Minutes)
Step 6 — Add chilies, garlic, and water to the blender. Place the chopped chilies and crushed garlic into a standard blender or a small food processor. Pour in the ¼ cup (60 ml) of water.
The water thins the mixture just enough to help the blender move smoothly without burning the motor.
Step 7 — Blend until smooth. Put the lid on firmly and blend on high speed for 45–60 seconds. Stop and scrape down the sides with a rubber spatula, then blend for another 30 seconds.
You’re looking for a smooth, even red paste with no large chili chunks remaining. It will look thick and slightly foamy — that’s normal.
Step 8 — Check the texture. Hold a spoon of the blended paste up to the light. You should not see big chili seeds or skin pieces. If you do, blend for another 30 seconds.
Phase 3 — Cook the Sauce (12–15 Minutes)
Step 9 — Pour the blended paste into a small saucepan. Use a medium-low heat setting. In most kitchens, that means setting your burner to level 3 out of 10.
Step 10 — Add the vinegar, sugar, and salt. Pour in the ½ cup (120 ml) of white vinegar, then stir in the 2 tablespoons of sugar and 1 teaspoon of salt.
Give everything a good stir with a wooden spoon or silicone spatula until the sugar and salt start to dissolve.
Step 11 — Bring the sauce to a gentle simmer. Watch for small bubbles forming around the edges of the pan. This takes about 3–4 minutes on medium-low heat. Don’t rush it by cranking the heat up — the sauce can scorch on the bottom very easily.
Step 12 — Cook at a simmer for 10 minutes, stirring often. Set a timer. Stir the sauce every 90 seconds to stop it sticking. The sauce will deepen in color from bright red to a darker, richer red. It will also start to reduce and thicken slightly.
You’ll notice the sharp raw smell of the chilies mellowing out. That’s exactly what you want — cooking tames the raw edge and builds a rounder, more balanced flavor.
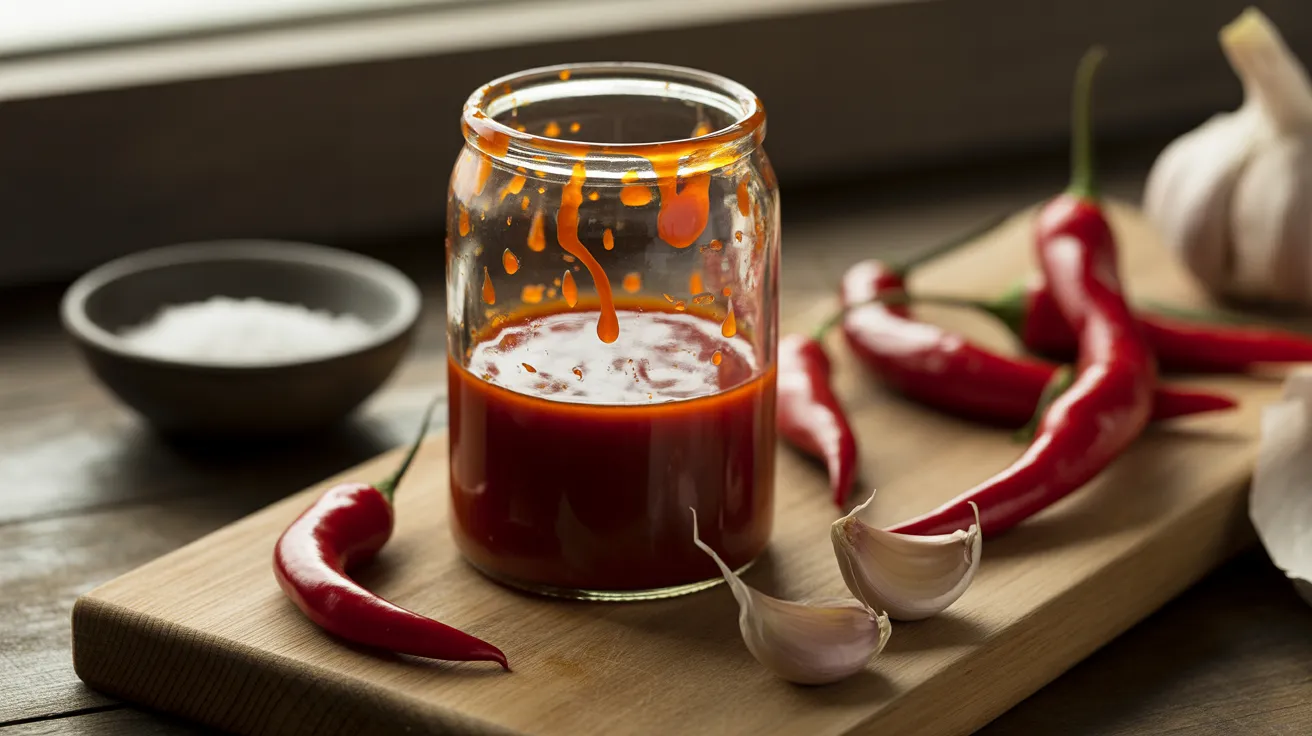
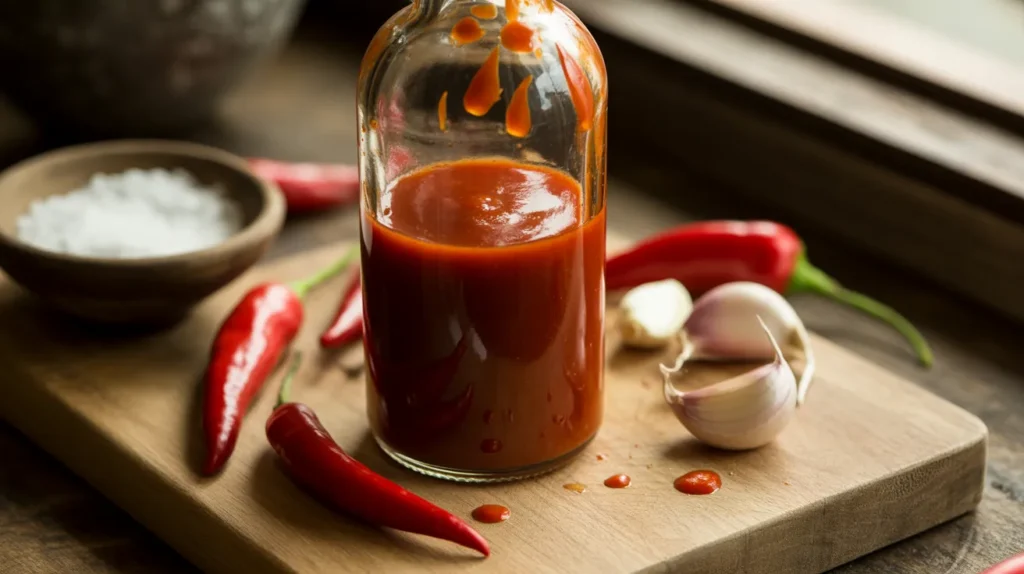
Step 13 — Test the consistency. After 10 minutes, drag a spoon through the sauce. It should coat the spoon lightly and flow slowly off the edge — not watery, but not jam-thick either. This is the classic Si Racha pour.
If it seems too thin, cook for another 3–4 minutes. If it looks too thick, stir in 1 tablespoon of water at a time.
Phase 4 — Strain and Finish (5 Minutes)
Step 14 — Set up a fine-mesh strainer over a bowl. A fine-mesh strainer (the kind used for rinsing quinoa or straining tea) works perfectly here. Set it over a medium bowl or a 2-cup measuring jug.
Step 15 — Pour the cooked sauce through the strainer. Work in batches if needed. Use the back of a spoon to press the sauce through the mesh. Push firmly and in circular motions.
This step removes the chili skins and any remaining seed fragments. The result is the smooth, pourable texture that defines this Si Racha style recipe.
Step 16 — Taste and adjust the seasoning. Dip a clean spoon into the strained sauce and taste it carefully — it will still be hot in temperature. Check for three things:
- Too tangy? Stir in ½ teaspoon more sugar.
- Too sweet? Add ¼ teaspoon more vinegar.
- Needs more punch? Add a small pinch more salt.
Step 17 — Let the sauce cool completely before bottling. Pour the finished sauce into a clean glass jar or squeeze bottle. Let it cool at room temperature for 20 minutes before sealing and refrigerating.
Hot sauce put into a sealed container while still warm can develop condensation and affect shelf life.
Chef’s Notes
Tip 1 — Fresh chilies beat frozen every time. For your homemade Thai sriracha sauce, always start with firm, glossy red chilies. Soft or wrinkled chilies have lost moisture and will give you a dull, flat-tasting sauce.
Tip 2 — Palm sugar is worth finding. White sugar works well, but palm sugar (found at most Asian grocery stores) gives the sauce a slightly caramel-like depth. Start with the same 2 tablespoon measurement and adjust from there.
Tip 3 — Rice vinegar makes it milder. White distilled vinegar gives a sharp, clean tang. Rice vinegar makes the sauce a little softer and rounder. Either works — it just comes down to personal preference.
Tip 4 — Cook it low and slow. Rushing the cooking phase by turning up the heat is the most common mistake people make with this Thai sriracha sauce. High heat scorches the sugars and turns the sauce bitter. Patience here pays off every time.
Nutrition Per Serving (2 tablespoons)
| Nutrient | Amount |
|---|---|
| Calories | 28 kcal |
| Total Carbohydrates | 6 g |
| Sugars | 5 g |
| Total Fat | 0.2 g |
| Protein | 0.5 g |
| Sodium | 290 mg |
| Fiber | 0.8 g |
Calculated based on 4 equal servings of approx. 2 tablespoons each. Values are estimates.
Variations
1 — Garlic-Forward Version
Double the garlic to 6 cloves for a punchier, more aromatic sauce. This version tastes closer to the rooster-bottle style but with the cleaner, brighter base of this Si Racha style recipe. Pair it with grilled meats and rice dishes.
2 — Smoked Chili Version
Swap half of the Fresno chilies for dried, rehydrated guajillo chilies. Soak the dried chilies in hot water for 15 minutes, then drain and blend alongside the fresh Fresnos. The result is a smoky, complex sauce that works beautifully on tacos and roasted vegetables.
3 — Fermented Thai Sriracha
If you love a deeper, more funky flavor, you can ferment the chili-garlic paste before cooking. This method takes 3–5 days but produces a sauce with real depth and probiotic benefit. Check out this fermented chili garlic version for a full step-by-step guide.
4 — Citrus-Bright Version
Add the juice of 1 fresh lime (about 2 tablespoons) to the sauce right after straining. This gives the sauce a zingy citrus lift that works especially well as a dipping sauce for spring rolls and grilled shrimp. You can also find more inspiration for variations at the full homemade Thai sriracha sauce from Si Racha style recipe guide.
Storage & Reheating
Refrigerator: Pour cooled sauce into a clean, airtight glass jar. It keeps well for up to 3 weeks in the fridge. The vinegar acts as a natural preservative.
Freezer: Pour sauce into ice cube trays and freeze solid, then transfer the cubes to a zip-lock bag. Frozen cubes last up to 3 months and thaw in minutes.
Signs it’s gone bad: Watch for any mold growth, off smells, or a change in color to brown or grey. If anything looks or smells wrong, throw it out.
To reheat: Place the jar in a bowl of warm water for a few minutes, or microwave the sauce in a small bowl for 15–20 seconds. Stir well before using.
Troubleshooting
Problem 1 — My sauce is too thin and watery. You likely didn’t cook it long enough. Pour the sauce back into the pan and simmer for another 5 minutes, stirring constantly. Most sauces thicken noticeably after this extra time.
Problem 2 — My sauce is bitter. Bitterness usually comes from two places: the chili seeds or burnt sugar. If you kept all the seeds in and have sensitive taste buds, try making your next batch with half the seeds removed. If the sauce scorched, there’s no fixing it — you’ll need to start over with lower heat.
Problem 3 — My sauce is too spicy. Add 1 extra tablespoon of sugar and stir it in while the sauce is still warm. Sugar balances heat without dulling the other flavors. You can also thin the sauce with a splash more water to spread the heat out.
Problem 4 — My sauce has separated in the jar. This is completely normal. The liquid and solids settle at different rates. Just give the jar a good shake before using it. If you want a more stable sauce, blend the strained sauce for an additional 20 seconds before cooling.
Problem 5 — The color looks dull or brownish. This means the sauce cooked at too high a heat, or the chilies were not fully red when you bought them. For the brightest red color, use deeply red, ripe Fresno chilies and keep the heat on medium-low throughout. A pinch of paprika can boost the color in a pinch without changing the flavor.
Equipment Essentials
- Blender or food processor — A standard countertop blender works best. A mini food processor is fine for this batch size.
- Small saucepan (1.5–2 quart) — Heavy-bottomed pans distribute heat evenly and reduce the risk of scorching.
- Fine-mesh strainer — Essential for the smooth, pourable Si Racha texture.
- Rubber spatula — For scraping the blender and pressing the sauce through the strainer.
- Glass jar with lid — A 1-cup mason jar is perfect for storage.
- Food-safe gloves — Optional but strongly recommended when handling a large batch of chilies.
No blender? You can use a mortar and pestle to pound the chilies and garlic into a rough paste, then push that through the strainer after cooking. The texture won’t be as silky, but the flavor will be just as good.
Shopping List
Produce Aisle
- [ ] Red Fresno chilies — 250 g (about 10–12 chilies)
- [ ] Garlic — 1 small head (you need 3 cloves)
Condiments & Baking Aisle
- [ ] White distilled vinegar — ½ cup needed (standard 16 oz bottle works great)
- [ ] Granulated white sugar — 2 tablespoons needed
Spices & Salt Aisle
- [ ] Fine sea salt — 1 teaspoon needed
International / Asian Foods Aisle (optional upgrades)
- [ ] Rice vinegar — swap for white vinegar for a milder taste
- [ ] Palm sugar — swap for white sugar for deeper flavor
5 Success Secrets for This Homemade Thai Sriracha Sauce
1. Always taste raw before you cook. Try a tiny piece of your chili before blending. If it’s very hot, use slightly fewer chilies. If it tastes mild, add one or two more. Every batch of fresh chilies is a little different.
2. Keep the heat low and steady. This is the number one rule of this homemade Thai sriracha sauce from Si Racha style recipe. Medium-low heat the whole way through. If the pan ever starts to spit or pop, turn it down immediately.
3. Press hard through the strainer. Don’t just let gravity do the work. Use a spoon and press firmly in circular motions to get every drop of sauce through the mesh. You can lose up to 25% of your sauce if you don’t push it through properly.
4. Season after straining, not before. The flavor concentrates as the sauce cooks and strains. If you salt and sweeten before straining, you may end up with a sauce that’s too salty or too sweet. Always do your final taste test on the finished, strained sauce.
5. Let it rest overnight. This Si Racha style recipe tastes even better on day two. The flavors settle and mellow as the sauce sits in the fridge overnight. If you can hold off, the patience is worth it.