Perfect your pizza game with this foolproof Pizza Crust recipe that serves four
Key Takeaways:
- Makes 2 medium (12-inch) crusts with chewy centers and crispy edges
- Ready from start to finish in under 2 hours
- No pizza stone needed – just basic kitchen tools
- Freezer-friendly Pizza Crust for pizza night anytime
Why Your Pizza Crust Makes All the Difference
Let’s face it – store-bought pizza dough never gives that authentic pizzeria taste. The Pizza Crust is the foundation of every great pizza, and mastering it at home puts you in control.
No more disappointment! This recipe creates the perfect balance of crispy exterior and chewy interior. Plus, nothing beats the smell of fresh Pizza Crust baking in your own kitchen.
Nutrition Comparison
| Nutrition Facts | Homemade Pizza Crust | Store-Bought Dough | Delivery Pizza Crust |
|---|---|---|---|
| Calories | 215 per serving | 230 per serving | 260 per serving |
| Carbohydrates | 42g | 46g | 48g |
| Fat | 3g | 4g | 6g |
| Protein | 6g | 5g | 5g |
| Sodium | 440mg | 520mg | 680mg |
Nutrition based on 1/4 of recipe (1 slice of 12-inch pizza)
Equipment & Ingredients for Perfect Pizza Crust
Ingredients
| Ingredient | Amount | Notes |
|---|---|---|
| Bread flour | 3½ cups (440g) | For chewier texture |
| Active dry yeast | 2¼ tsp (1 packet) | Room temperature |
| Salt | 1½ tsp | Table salt, not coarse |
| Sugar | 1 tsp | Helps yeast activate |
| Warm water | 1⅓ cups (315ml) | 105-115°F |
| Olive oil | 2 tbsp plus extra | Extra for coating bowl |
| All-purpose flour | ¼ cup | For dusting surfaces |
Kitchen Tools
| Essential Tools | Optional Tools |
|---|---|
| Large mixing bowl | Stand mixer with dough hook |
| Measuring cups/spoons | Kitchen thermometer |
| Clean kitchen towel | Pizza peel |
| Pizza pan or sheet | Pizza cutter |
| Rolling pin | Pastry brush |
Substitutions
- All-purpose flour can replace bread flour (texture will be slightly less chewy)
- Instant yeast can replace active dry (skip activation, use same amount)
- Honey can replace sugar (same amount)
- Vegetable oil can replace olive oil
- Gluten-free flour blend with xanthan gum (texture will differ)
Step-by-Step Pizza Crust Instructions for Beginners
Phase 1: Preparation (10 minutes)
- Set Up Your Workspace:
- Clear and clean a large counter space (at least 2 feet by 2 feet)
- Remove rings and watches, roll up sleeves
- Wash hands with warm soapy water for 20 seconds
- Dry hands completely with clean towel
- Place all ingredients on counter in order of use
- Check that measuring tools are clean and dry
- Check Water Temperature:
- Run tap water until it feels warm but not hot
- Fill measuring cup with exactly 1⅓ cups water
- Test with clean pinky finger – should feel warm like bath water
- If using thermometer, temperature should read 105-115°F
- If water feels hot, let it cool 2-3 minutes before using
- If water feels cool, microwave 10 seconds and recheck
- Measure Dry Ingredients:
- Set out three small bowls
- For flour: spoon flour into measuring cup, don’t scoop directly
- Level with knife edge, avoiding packing
- Place 3½ cups flour in first bowl
- Place yeast in second small bowl
- Place salt and sugar in third small bowl
- Keep ingredients separate until ready to mix
Phase 2: Making the Pizza Crust Dough (20 minutes)
- Activate the Yeast:
- Pour warm water into large mixing bowl
- Add 1 teaspoon sugar and stir with spoon until dissolved
- Gently sprinkle 2¼ teaspoons yeast over water surface
- Do not stir yet
- Wait 5 minutes until surface becomes foamy and smells yeasty
- If not foamy after 5 minutes, discard and start over with fresh yeast
- Combine Wet Ingredients:
- Measure exactly 2 tablespoons olive oil
- Add to foamy yeast mixture
- Stir gently 5-10 times with wooden spoon
- Mixture should look cloudy with small bubbles throughout
- Tiny oil droplets will be visible on surface
- Mix Dry Ingredients:
- In separate large bowl, add measured flour
- Add 1½ teaspoons salt to flour (not directly to yeast)
- Whisk dry ingredients together for 10 seconds
- This ensures salt is evenly distributed
- Form Initial Dough:
- Create well in center of flour mixture (like a volcano)
- Pour wet ingredients into well
- Using wooden spoon, stir from center outward in circular motion
- Continue stirring until no dry flour patches remain
- Mixture will look shaggy and rough – this is normal
- When spoon becomes difficult to use, switch to hands
- Prepare for Kneading:
- Sprinkle ¼ cup flour onto clean counter surface
- Spread flour into 12-inch circle
- Scrape dough onto floured surface using rubber spatula
- Dust hands with 1 tablespoon flour
- Have extra flour nearby for sticky spots
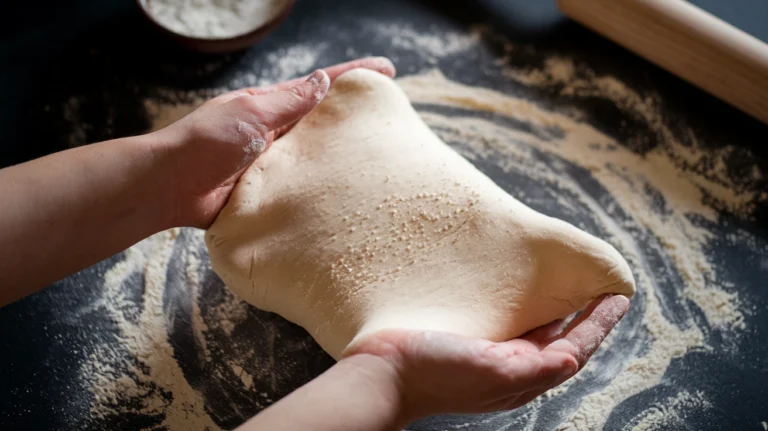
- Knead the Pizza Crust Dough:
- Fold far edge of dough toward you
- Push down and away with palm heels (not fingertips)
- Turn dough quarter turn clockwise
- Repeat fold-push-turn pattern for 8-10 minutes
- Add only 1 teaspoon flour at a time if dough sticks
- Too much flour makes tough Pizza Crust
- Dough is ready when:
- Surface looks smooth, not rough
- Feels slightly tacky but not sticky
- Springs back when poked
- Can stretch 2-3 inches without tearing
Phase 3: First Rise (90 minutes)
- Prepare Rising Bowl:
- Choose bowl at least twice the size of dough ball
- Pour 1 tablespoon olive oil into clean bowl
- Use paper towel or fingers to spread oil all around inside
- Make sure entire interior surface is coated
- Shape Dough for Rising:
- Gather dough into tight ball by pulling edges underneath
- Place dough in oiled bowl smooth side down first
- Then flip over so entire surface gets oiled
- Dough should now be smooth side up
- Cover Dough Properly:
- Lay clean kitchen towel over bowl
- Make sure it’s not touching dough surface
- If kitchen is drafty, add second towel
- Find Optimal Rising Spot:
- Temperature should be 75-85°F
- Good locations: near (not on) warm oven, on top of refrigerator
- Avoid cold windows or drafty areas
- For cold kitchens: preheat oven to lowest setting for 1 minute, turn off, then place bowl inside with door cracked
- Monitor the Rise:
- Set timer for 60 minutes
- Check dough – should be nearly doubled
- If not doubled, wait additional 30 minutes
- Perform poke test: poke with floured finger 1/2 inch deep
- If indentation remains, dough is ready
- If dough springs back completely, let rise longer
Phase 4: Shaping the Pizza Crust (10 minutes per pizza)
- Prepare Baking Surface:
- Preheat oven to 450°F (do this 30 minutes before baking)
- For pizza pan: spread 1 teaspoon olive oil evenly
- For baking sheet: line with parchment paper
- Sprinkle prepared surface with cornmeal if available
- Prepare Dough for Shaping:
- Sprinkle fresh flour onto clean work surface
- Gently remove dough from bowl without tearing
- Place dough on floured surface
- Use closed fist to firmly press once in center (this “punches down” the dough)
- If making two pizzas, use sharp knife to cut dough in half
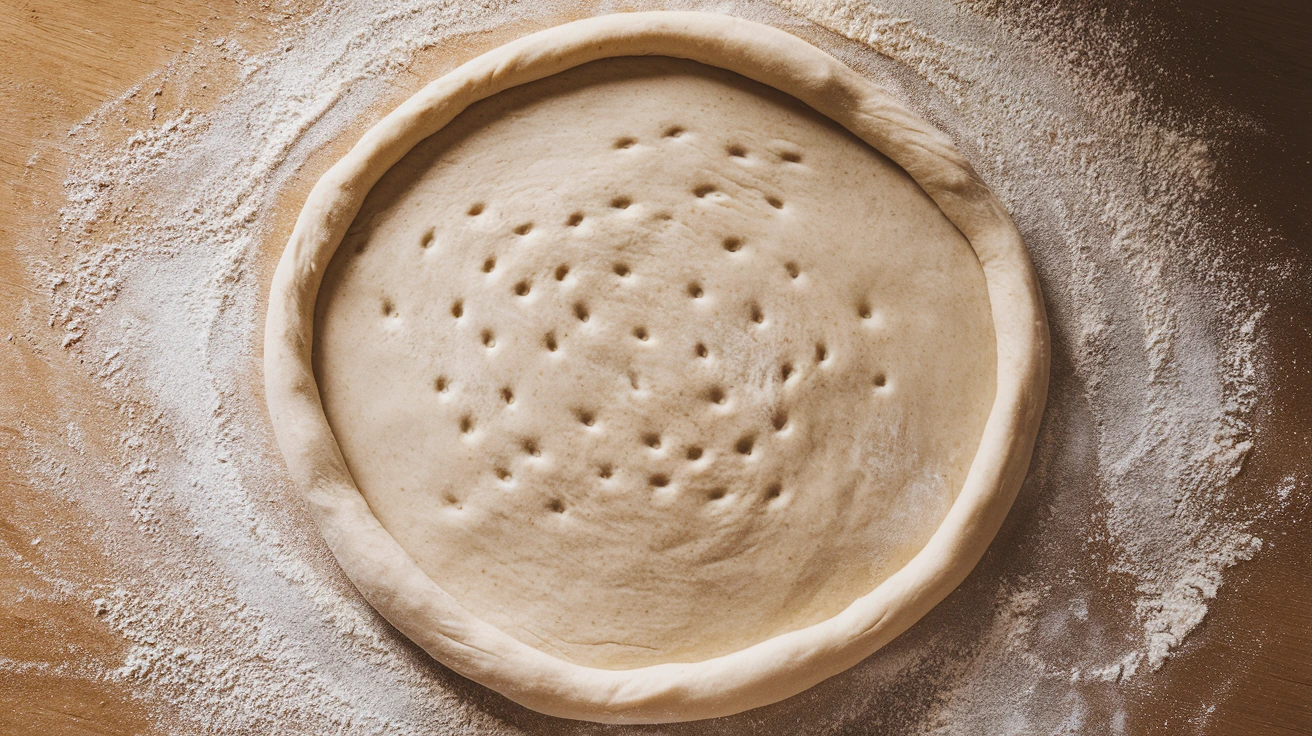
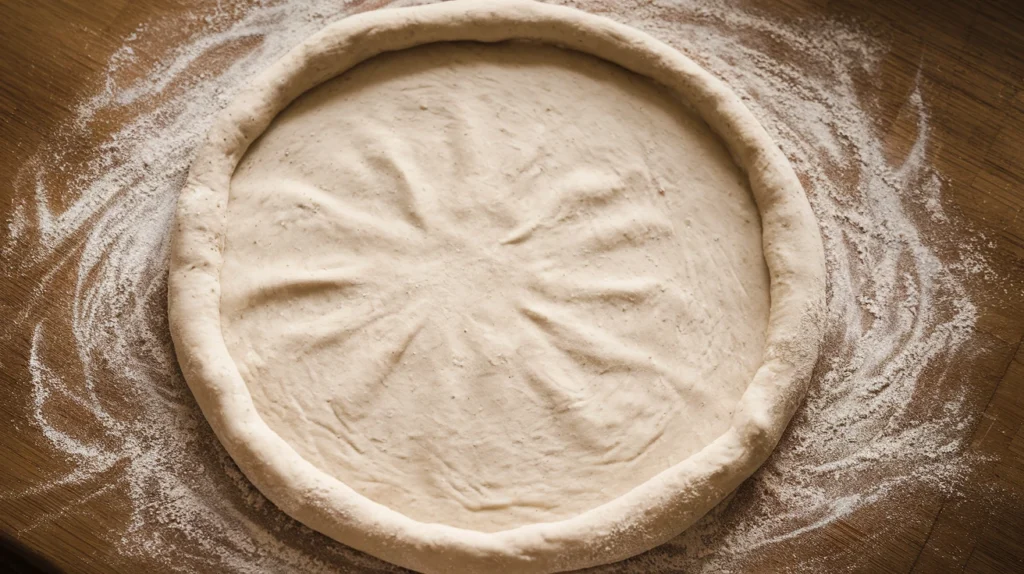
- Shape the Pizza Crust:
- Begin by forming dough into rough circle
- Press outward from center using flat fingertips
- Leave 1/2-inch border unpressed for outer crust
- Lift dough by edge and rotate slowly, letting gravity stretch it
- If dough resists stretching, let it rest 2 minutes
- For stubborn dough, use rolling pin gently
- Aim for 12-inch circle about 1/4-inch thick
- Crust edge should be slightly thicker
- Transfer to Baking Surface:
- Dust hands with flour
- Gently lift Pizza Crust by sliding hands underneath
- Transfer to prepared pan
- Quickly adjust shape if needed
- If dough tears, pinch edges together
- Create Perfect Crust Edge:
- Pinch outer edge between thumb and forefinger
- Work around entire circle to create raised rim
- For stuffed crust: place cheese sticks around edge and fold dough over
- Final Rest Before Topping:
- Let shaped dough rest 10 minutes uncovered
- This prevents dough from shrinking back
- Pizza Crust will puff slightly during rest
- Poke any large air bubbles with fork
Phase 5: Baking Your Pizza Crust (15-20 minutes)
- Final Oven Check:
- Verify oven has reached full 450°F temperature
- Place oven rack in middle position
- Remove any unused racks to make pizza insertion easier
- Pre-bake Option for Crispy Bottom:
- For extra-crispy Pizza Crust, pre-bake 5 minutes
- Remove from oven, then add toppings
- This prevents soggy centers with heavy toppings
- Add Toppings Properly:
- Brush Pizza Crust with thin layer of olive oil
- Start with thin layer of sauce (1/4 cup per 12-inch pizza)
- Leave 1/2-inch border around edge sauce-free
- Add cheese and other toppings
- Keep toppings lightweight – less is more
- Heavy toppings make soggy Pizza Crust
- Bake the Pizza:
- Carefully slide pizza pan onto middle rack
- Close oven door quickly to maintain temperature
- Set timer for 12 minutes
- Do not open oven during first 10 minutes
- Check at 12 minutes – Pizza Crust should be golden brown
- Cheese should be melted and slightly bubbling
- If needed, bake 3-5 minutes more
- Check for Doneness:
- Bottom of Pizza Crust should be golden brown
- Lift edge with spatula to check bottom
- Crust should be firm, not doughy
- Toppings should be hot throughout
- Remove and Cool Briefly:
- Use oven mitts to remove pizza
- Place on heat-resistant surface
- Let rest 2-3 minutes before cutting
- This allows cheese to set and Pizza Crust to firm up
- Slice and Serve:
- Transfer to cutting board
- Use sharp pizza cutter or large chef’s knife
- Cut into 8 equal slices
- Serve immediately while hot
Troubleshooting Common Pizza Crust Problems
When Dough Won’t Rise:
- Problem: Yeast is old or expired Solution: Always check expiration date, store yeast in freezer
- Problem: Water too hot killed yeast Solution: Use thermometer or test with finger
- Problem: Kitchen too cold Solution: Find warmer spot or create warm oven environment
- Problem: Salt mixed directly with yeast Solution: Always mix salt with flour first
For Tough or Dense Pizza Crust:
- Problem: Too much flour added during kneading Solution: Add minimal flour, only when absolutely necessary
- Problem: Overworked dough Solution: Knead only until smooth and elastic (8-10 minutes)
- Problem: Not enough water in recipe Solution: Measure liquids precisely, adjust for humidity
Fixing Soggy Pizza Crust:
- Problem: Oven not hot enough Solution: Preheat fully, use oven thermometer to verify
- Problem: Too many wet toppings Solution: Pre-cook wet vegetables, use less sauce
- Problem: Pan not allowing air circulation Solution: Use perforated pizza pan or pre-bake crust
When Crust Shrinks During Baking:
- Problem: Dough not rested after shaping Solution: Rest shaped dough 10 minutes before topping
- Problem: Gluten too tight from overworking Solution: Handle dough gently, allow rest periods
Variations & Substitutions for Your Pizza Crust
Whole Wheat Pizza Crust:
- Replace half the bread flour with whole wheat flour
- Add extra 2 tablespoons water
- Kneading time increases to 10-12 minutes
- Expect slightly denser texture
Garlic Herb Pizza Crust:
- Add 2 minced garlic cloves to flour mixture
- Mix in 1 tablespoon Italian herbs
- Add 1/4 cup grated parmesan
- Brush edge with garlic butter after baking
Thin Crust Pizza Version:
- Reduce yeast to 1 teaspoon
- Cut first rise to 30 minutes
- Roll extra thin with rolling pin
- Bake at 475°F instead of 450°F
Thick Crust Pizza Version:
- Add 1/4 teaspoon more yeast
- Increase first rise to 2 hours
- Shape into thicker round
- Bake at 425°F for 20-25 minutes
Quick No-Rise Pizza Crust Option:
- Double the yeast to 4 1/2 teaspoons
- Skip the long rise
- Rest shaped dough 20 minutes before topping
- Texture will be less complex
For a super quick option, try my Air Fryer Tortilla Pizza which takes just minutes to make!
Storage & Reheating Your Pizza Crust
Fresh Dough Storage:
- Wrap tightly in plastic wrap
- Place in airtight container
- Refrigerate up to 3 days
- Let come to room temperature (30 minutes) before shaping
- May need to re-knead briefly to restore elasticity
Freezing Instructions:
- Freeze after first rise and punch down
- Divide, form into balls
- Wrap each ball in plastic wrap, then aluminum foil
- Label with date
- Use within 3 months
- Thaw overnight in refrigerator
- Allow to come to room temperature before shaping
Make-Ahead Pizza Crust:
- Shape Pizza Crust on pan
- Cover tightly with plastic wrap
- Refrigerate up to 24 hours
- Allow to come to room temperature 20 minutes before baking
Reheating Baked Pizza:
- Reheat at 350°F for 5-8 minutes
- For crispy bottom, use preheated pizza stone or skillet
- Air fryer: 3-4 minutes at 350°F for crispy results
- Avoid microwave (makes Pizza Crust tough)
Safety Notes & Tips for Perfect Pizza Crust
Food Safety:
- Wash hands before and after handling dough
- Never consume raw dough (contains raw flour)
- Keep work surfaces clean
- Use separate cutting boards for dough and toppings
- Refrigerate leftover pizza within 2 hours
Temperature Safety:
- Always check yeast expiration date
- Water should be warm, not hot (kills yeast)
- Test oven temperature with thermometer
- Use oven mitts when handling hot pans
- Allow pizza to cool slightly before eating
Common Pizza Crust Mistakes to Avoid:
- Using cold ingredients (slows yeast activity)
- Adding too much flour during kneading (makes tough crust)
- Not letting dough rest between shaping steps
- Not preheating oven fully (causes underbaking)
- Overloading with heavy toppings (causes soggy center)
- Opening oven door during baking (causes temperature drop)
- Cutting pizza immediately (causes cheese and toppings to slide)
Pro Pizza Crust Tips:
- For extra flavor, add 1 tablespoon olive oil to dough
- Let ingredients come to room temperature before starting
- Use bread flour for chewier texture
- Cold fermentation (24 hours in refrigerator) develops flavor
- Brush crust edge with olive oil before baking for golden color
- Preheat pizza stone if available for extra-crispy bottom
Prep Time: 30 minutes
Rise Time: 90 minutes
Bake Time: 15-20 minutes
Total Time: 2 hours 15 minutes
Servings: 4
Dietary Notes: Vegetarian, Dairy-free (without cheese toppings), Can be made vegan by using sugar instead of honey