Ready in 15 minutes or less!
- No oven needed – perfect for hot summer days
- Only 7 ingredients – most already in your pantry
- Kid-approved – combines two family favorites
- Customizable – works with any pizza toppings you love
Why Pizza Quesadillas Will Save Your Weeknight
Ever found yourself staring into the fridge at 5 PM with hungry kids and zero dinner plans? We’ve all been there.
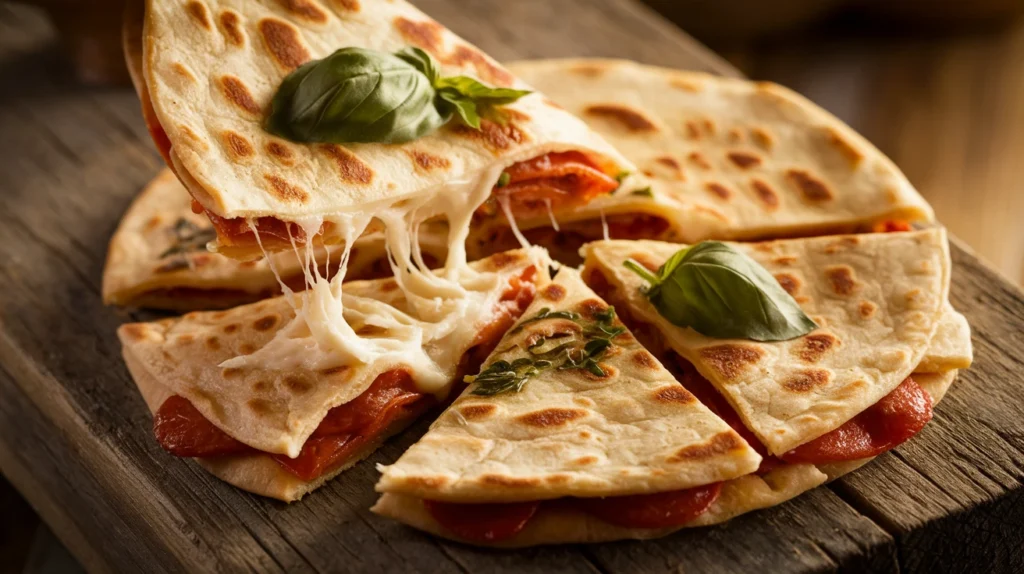
Enter the Pizza Quesadilla – the perfect mash-up of two family favorites that comes together in minutes.
This Pizza Quesadilla recipe delivers all the flavors your family craves in a fraction of the time. No waiting for dough to rise or oven to preheat. Just quick, satisfying dinner magic that serves four hungry people perfectly.
Kids love it because it tastes like their favorite pizza. Parents love it because it’s ready before anyone can ask “when’s dinner?” for the tenth time.
Nutrition At A Glance
| Nutrient | Amount Per Serving | % Daily Value |
|---|---|---|
| Calories | 410 | |
| Fat | 22g | 28% |
| Carbs | 32g | 11% |
| Protein | 18g | 36% |
| Fiber | 2g | 7% |
| Sodium | 890mg | 39% |
Values based on using standard ingredients. Actual values may vary with substitutions.
What You’ll Need For Your Pizza Quesadillas
Ingredients (Serves 4)
| Ingredient | Amount | Notes |
|---|---|---|
| Large flour tortillas | 8 (8-inch) | Room temperature works best |
| Shredded mozzarella | 2 cups | Pre-shredded or freshly grated |
| Pizza sauce | 1 cup | Homemade or store-bought |
| Pepperoni slices | 4 oz (about 32 slices) | Mini or regular size |
| Italian seasoning | 2 teaspoons | Optional but recommended |
| Garlic powder | 1 teaspoon | For authentic pizza flavor |
| Butter or olive oil | 2 tablespoons | For crisping the tortillas |
Kitchen Tools
| Tool | Purpose |
|---|---|
| Large skillet or griddle | For cooking the quesadillas |
| Spatula | For flipping |
| Knife | For cutting into wedges |
| Measuring cups/spoons | For accurate measurements |
Possible Substitutions
- Cheese options: Try cheddar, pepper jack, or an Italian blend
- Protein alternatives: Cooked Italian sausage, ham, or bacon
- Vegetarian version: Replace meat with sautéed mushrooms, bell peppers, or olives
- Gluten-free: Use gluten-free tortillas (note: they may be less pliable)
Pizza Quesadillas: Beginner-Friendly Instructions
Prep Time: 5 minutes
Cook Time: 10 minutes
Total Time: 15 minutes
Servings: 4 (2 quesadilla wedges per person)
Preparation Phase
- Gather all ingredients and bring them to room temperature for best results.
- Take tortillas out of the refrigerator 15-20 minutes before starting
- If using block cheese, grate it now while it’s still cold (it’s easier)
- Measure out all ingredients and place in separate bowls
- BEGINNER TIP: Room temperature tortillas are much less likely to crack when folded
- Prepare your workspace by setting up an assembly station with all ingredients within reach:
- Clear a clean, flat surface for assembling the quesadillas
- Put pizza sauce in a small bowl with a spoon for easy spreading
- Place shredded cheese in a bowl you can easily grab pinches from
- Arrange pepperoni on a plate for easy access
- Have measuring spoons ready for seasonings
- Keep a cutting board near your stove for the finished Pizza Quesadillas
- BEGINNER TIP: Having everything ready before you start cooking makes the process smooth and stress-free
- Preheat your skillet or griddle over medium heat.
- Place your pan on the stove and turn heat to medium
- Let it heat for 3-5 minutes before cooking
- Check if it’s ready by sprinkling a few drops of water on the surface – they should sizzle and evaporate quickly
- If the water immediately disappears with an aggressive sizzle, the pan is too hot – turn down the heat
- BEGINNER TIP: Finding the right temperature is crucial – too hot and your tortillas will burn before the cheese melts; too cool and they’ll become soggy
Assembly Steps
- Start the assembly by laying out 4 tortillas on your clean work surface.
- Place them side by side with space in between
- Only work with one Pizza Quesadilla at a time once you begin cooking
- Keep remaining tortillas covered with a clean kitchen towel to prevent them from drying out
- BEGINNER TIP: If your tortillas feel stiff or dry, place them between damp paper towels and microwave for 10 seconds to soften
- Spread exactly 2 tablespoons of pizza sauce on each tortilla, using the back of the spoon.
- Start at the center and spread outward in a circular motion
- Leave a ½-inch border around the edge completely sauce-free
- Spread the sauce as thinly and evenly as possible
- BEGINNER TIP: Using too much sauce will make your Pizza Quesadilla soggy – less is more here!
- BEGINNER TIP: The sauce-free border helps prevent messy leakage during cooking
- Sprinkle ¼ cup of shredded mozzarella over the sauce on each tortilla.
- Use your fingers to distribute the cheese evenly over the sauce
- Make sure to cover all sauce-covered areas
- Pay special attention to the edges where the tortillas will seal
- BEGINNER TIP: This first layer of cheese acts as a barrier between the sauce and the toppings, preventing sogginess
- Add exactly 8 pepperoni slices (or your chosen toppings) evenly over the cheese layer on each tortilla.
- Arrange in a single layer, not overlapping
- Space them evenly so every bite gets some pepperoni
- If using other toppings, make sure they’re pre-cooked and patted dry
- BEGINNER TIP: For vegetables, pre-cook and drain well to remove excess moisture that could make your quesadilla soggy
- BEGINNER TIP: Limit toppings to about ½ cup total per quesadilla – overloading will prevent proper sealing
- Sprinkle each pizza base with ½ teaspoon Italian seasoning and ¼ teaspoon garlic powder.
- Hold your hand about 8 inches above the quesadilla for even distribution
- Make sure seasonings reach all the way to the edges
- BEGINNER TIP: Rub the seasoning between your fingers as you sprinkle to break up any clumps
- Add another ¼ cup of mozzarella cheese on top of the seasonings and toppings.
- This second layer is crucial – it works as “glue” to hold everything together
- Make sure cheese reaches all the way to where the sauce begins (but not onto the clean border)
- BEGINNER TIP: This top layer of cheese is what makes your Pizza Quesadilla hold together, so don’t skip it!
- Top each with a second tortilla to create 4 complete Pizza Quesadillas.
- Align the second tortilla directly on top of the first
- Gently press down with flat palms to seal, working from the center outward
- BEGINNER TIP: Don’t press too hard or the fillings will squeeze out the sides
Cooking Phase
- Add ½ tablespoon of butter or oil to the preheated skillet for each quesadilla.
- If using butter, let it melt completely
- Tilt the pan to coat the entire cooking surface evenly
- BEGINNER TIP: Butter gives a richer flavor while olive oil is a healthier option – both work well!
- Cook one Pizza Quesadilla at a time unless using a very large griddle:
- Use both hands to transfer the quesadilla to the pan
- Position it in the center of the pan where the heat is most even
- Set a timer for 2 minutes
- Watch for the edges to start turning golden brown
- Press down gently with a spatula occasionally to ensure good contact with the pan
- BEGINNER TIP: Resist the urge to peek underneath too often – each time you lift it, you reduce contact with the heat
- BEGINNER TIP: You’ll know it’s ready to flip when the bottom is golden brown and the cheese at the edges starts to melt
- Flip the Pizza Quesadilla carefully using a large spatula:
- Slide the spatula completely under the quesadilla
- Place your other hand gently on top (be careful not to touch the hot pan!)
- In one smooth motion, flip the entire quesadilla over
- If any filling escapes, use the edge of your spatula to tuck it back in
- BEGINNER TIP: If you’re nervous about flipping, you can slide the quesadilla onto a plate, then invert the plate over the pan and flip
- BEGINNER TIP: If the quesadilla feels too floppy when trying to flip, it needs more time to cook and firm up
- Cook for another 2-3 minutes until the second side is golden brown and crispy.
- Set your timer again for 2 minutes
- Check for even browning across the surface
- The quesadilla is done when both sides are golden and crispy, and the cheese inside is completely melted
- Test by pressing gently in the center – it should feel firm, not soft
- BEGINNER TIP: If the outside is browning too quickly but the cheese isn’t fully melted, lower the heat and cook a bit longer
- BEGINNER TIP: A properly cooked Pizza Quesadilla should be crispy outside and gooey inside
- Transfer the finished Pizza Quesadilla to a cutting board and repeat the process with the remaining three:
- Add fresh butter/oil to the pan for each new quesadilla
- Wipe out any burned bits from the pan with a paper towel if necessary
- BEGINNER TIP: If making multiple quesadillas, you can keep the finished ones warm in a 200°F oven until all are ready
Finishing Steps
- Let each Pizza Quesadilla rest for exactly 1 minute before cutting.
- This brief resting period is crucial – it allows the cheese to set slightly
- Skipping this step can result in all the cheese and fillings running out when cut
- BEGINNER TIP: Use this minute to prepare your serving plates or dipping sauces
- Cut each Pizza Quesadilla into 4 equal wedges using a sharp knife or pizza cutter.
- Place the quesadilla flat on a cutting board
- Cut in half, then cut each half in half again to create 4 triangular wedges
- Use a sharp knife and cut with decisive, firm pressure
- BEGINNER TIP: A pizza cutter works best, but if using a knife, start from the center and cut outward for cleaner cuts
- Serve immediately with optional dipping sauces.
- Arrange wedges on plates with the points facing outward for an appealing presentation
- Offer additional pizza sauce, ranch dressing, or garlic butter for dipping
- BEGINNER TIP: For kids, let the quesadillas cool for an extra minute to prevent burnt mouths
Troubleshooting Your Pizza Quesadillas
Common Problems and Solutions
Problem: Tortilla is burning before cheese melts
- Solution: Your heat is too high. Remove the quesadilla, lower the heat to medium-low, wait 30 seconds, then continue cooking with a fresh tortilla.
- Prevention: Start with medium-low heat next time and increase only if needed.
Problem: Filling falls out during flipping
- Solution: Quickly scoop up any escaped filling with your spatula and tuck it back in. Press down gently after flipping.
- Prevention: Use less filling, ensure your ½-inch border is sauce-free, and use the “support and flip” method (one hand on top while flipping with spatula).
Problem: Pizza Quesadilla is soggy
- Solution: Unfortunately, once soggy, it’s hard to fix. Transfer to a 400°F oven for 3-5 minutes to crisp up.
- Prevention: Use less sauce, drain wet toppings thoroughly, and ensure both layers of cheese create a barrier.
Problem: Cheese isn’t melting completely
- Solution: Lower the heat, cover the pan with a lid for 30-60 seconds to trap heat and help melt the cheese.
- Prevention: Make sure cheese is at room temperature and evenly distributed.
Creative Pizza Quesadilla Variations
Want to mix things up? Try these exciting Pizza Quesadilla variations:
- BBQ Chicken Pizza Quesadilla: Replace pizza sauce with BBQ sauce and add shredded rotisserie chicken and thinly sliced red onions. Check out more unique pizza recipes for inspiration.
- Breakfast Pizza Quesadilla: Add scrambled eggs and breakfast sausage for a morning twist.
- Veggie Supreme Pizza Quesadilla: Load it with bell peppers, olives, mushrooms, and onions (pre-cook veggies to remove excess moisture).
- Dessert Pizza Quesadilla: Spread Nutella, add sliced strawberries, bananas, and a sprinkle of mini chocolate chips.
- Mexican Pizza Quesadilla Fusion: Mix salsa with the pizza sauce and add jalapeños and Mexican cheese blend.
Storing & Reheating Your Pizza Quesadillas
Refrigerator Storage:
- Allow Pizza Quesadillas to cool completely (about 10 minutes)
- Wrap individual wedges in aluminum foil or place in airtight container
- Refrigerate for up to 3 days
- Label with date for food safety
Freezer Storage:
- Wrap cooled Pizza Quesadilla wedges tightly in plastic wrap, then aluminum foil
- Label with date and contents
- Freeze for up to 1 month
- Similar to pizza pockets, these freeze beautifully for quick meals later
Best Reheating Methods:
- Skillet Method (Best for Crispy Results):
- Heat a dry skillet over medium-low heat
- Place Pizza Quesadilla in pan and heat for 2 minutes per side
- Press down gently with spatula
- This restores the crispy exterior perfectly
- Oven/Toaster Oven Method (Good for Multiple Servings):
- Preheat to 350°F
- Place Pizza Quesadillas on baking sheet
- Heat for 5-7 minutes until warmed through
- Add an extra minute if reheating from frozen
- Microwave Method (Quickest but Less Crispy):
- Place on microwave-safe plate
- Cover with a slightly damp paper towel
- Heat for 30-45 seconds
- Let stand for 30 seconds before eating (caution: filling will be very hot)
- Note: Tortilla will not be crispy with this method
Safety Notes & Pro Tips for Pizza Quesadillas
- Temperature Warning: The filling gets extremely hot! Let cool slightly (1-2 minutes) before serving to children to prevent burns.
- Food Safety: Any Pizza Quesadilla left at room temperature for more than 2 hours should be discarded.
- Allergy Note: This recipe contains dairy and wheat. Substitute accordingly for allergies (dairy-free cheese, gluten-free tortillas).
- Time-Saving Tip: Prep all ingredients ahead of time and store in refrigerator for even faster assembly when you’re ready to cook.
- Serving Suggestion: These pair perfectly with a simple side salad for a complete meal, similar to how you might serve a pizza casserole.
- Kid-Friendly Cooking: Let kids help assemble their own Pizza Quesadillas with their favorite toppings for a fun cooking activity – they can add toppings while you handle the hot cooking.
- Party Idea: Make a Pizza Quesadilla bar with various toppings for a creative gathering. Cook them to order or prepare in advance and keep warm in a 200°F oven.