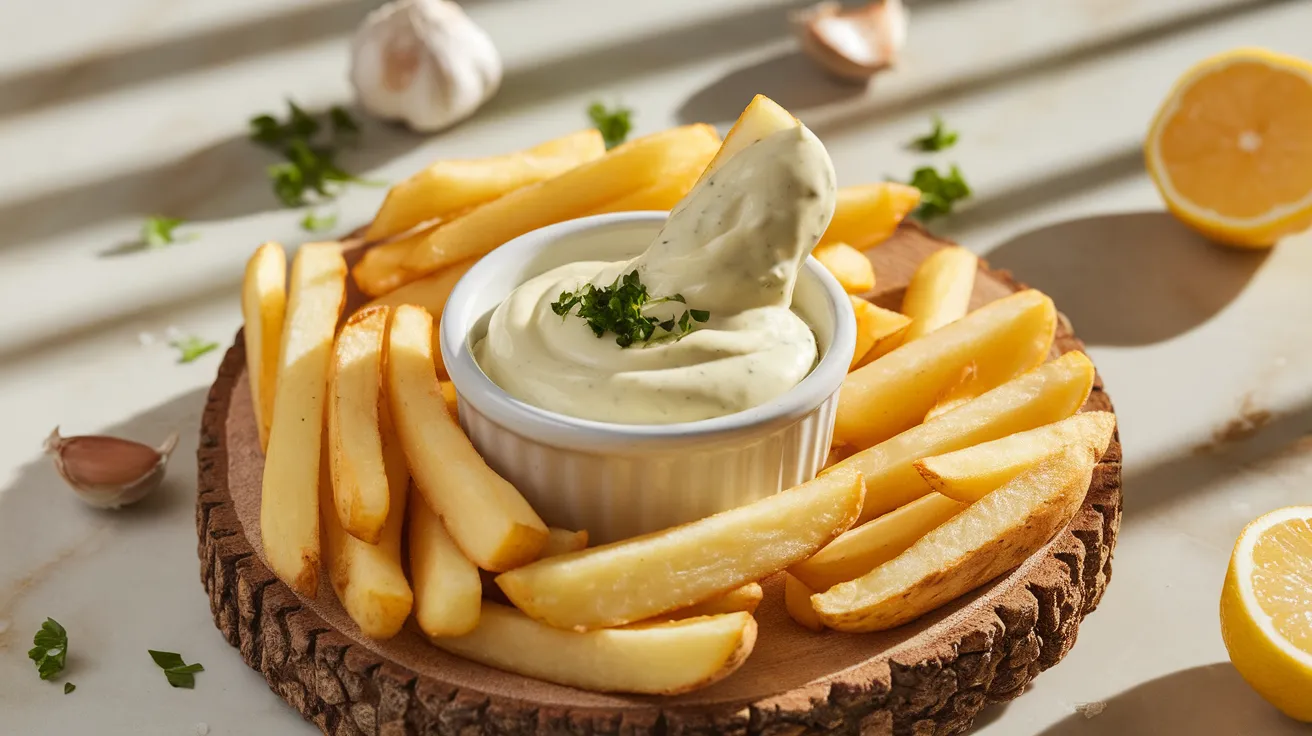
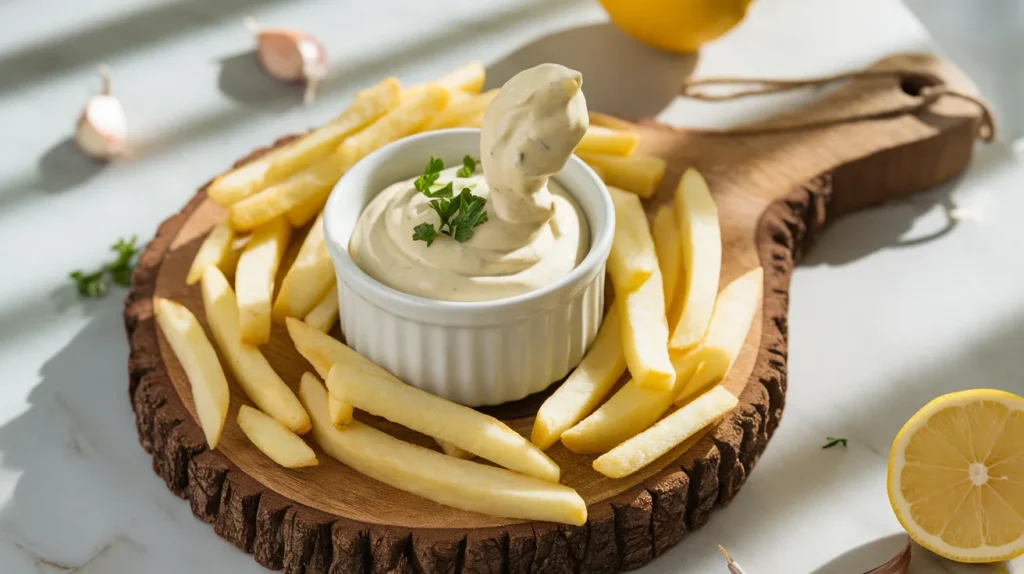
This homemade aioli sauce for fries creates the ultimate creamy garlic dip that transforms ordinary potato wedges into restaurant-quality appetizers. Our easy aioli sauce for fries recipe combines rich mayonnaise with fresh garlic and bright lemon juice, delivering professional results that will impress your family and guests. This foolproof method ensures perfect texture every time, making it the ideal companion for crispy homemade fries.
SERVES: 4 | PREP: 15 MIN | COOK: 0 MIN | TOTAL: 15 MIN
Essential Ingredients for Aioli Sauce for Fries
Base Components
| Ingredient | Amount | Notes |
|---|---|---|
| Mayonnaise | 1 cup | Use full-fat for best texture |
| Fresh garlic cloves | 4 large | Minced finely |
| Fresh lemon juice | 2 tablespoons | About 1 medium lemon |
| Extra virgin olive oil | 2 tablespoons | Cold-pressed preferred |
Flavor Enhancers
| Ingredient | Amount | Notes |
|---|---|---|
| Dijon mustard | 1 teaspoon | Adds depth |
| Sea salt | 1/2 teaspoon | To taste |
| Black pepper | 1/4 teaspoon | Freshly ground |
| Fresh parsley | 2 tablespoons | Chopped fine |
Detailed Step-by-Step Instructions for Beginners
Phase 1: Workspace and Ingredient Preparation (7 minutes)
Step 1: Set Up Your Workspace Clear a clean section of your counter and gather all ingredients. Place them in the order you’ll use them: garlic first, then mayonnaise, lemon, olive oil, and seasonings. This preparation prevents rushing and ensures your aioli sauce for fries turns out perfectly smooth. Wash your hands thoroughly before beginning.
Step 2: Prepare Your Mixing Bowl Choose a medium-sized mixing bowl (about 2-quart capacity) made of glass or stainless steel. Avoid plastic bowls as they can retain odors from previous use. Place the bowl on a damp kitchen towel to prevent it from sliding around while you whisk. This stability is crucial for achieving the right texture.
Step 3: Test Your Lemon for Freshness Roll your lemon on the counter while pressing down firmly. This breaks down the internal membranes and releases more juice. Cut the lemon in half and squeeze it over a small bowl, catching any seeds with your fingers. Fresh lemon juice should smell bright and citrusy, not dull or fermented.
Step 4: Measure Your Mayonnaise Correctly Use a dry measuring cup for the mayonnaise, not a liquid measuring cup. Level the top with a knife for accuracy. Room temperature mayonnaise blends more easily, so remove it from the refrigerator 20-30 minutes before starting. Cold mayonnaise can cause your aioli sauce for fries to separate.
Phase 2: Garlic Preparation Mastery (5 minutes)
Step 5: Peel Garlic Properly Place each garlic clove on your cutting board and lay the flat side of your knife over it. Press down firmly with your palm until you hear a slight crack. The skin will loosen and peel away easily. Remove any green sprouts from the center of older cloves, as these can taste bitter in your finished aioli.
Step 6: Master the Mincing Technique Slice each peeled clove lengthwise into thin strips, then turn and cut crosswise into tiny pieces. Rock your knife back and forth over the minced garlic until the pieces are uniform and very small. Properly minced garlic should be no larger than coarse breadcrumbs for smooth integration.
Step 7: Create Garlic Paste for Better Flavor Sprinkle a pinch of salt over your minced garlic. Using the flat side of your knife, drag and press the garlic against the cutting board. This creates a smooth paste that distributes more evenly throughout your aioli sauce for fries. The salt helps break down the garlic cells, releasing more flavor compounds.
Step 8: Let Garlic Develop Its Flavor Allow your garlic paste to rest for 3-4 minutes after preparation. This resting period activates enzymes that create the characteristic sharp, pungent flavor that makes aioli special. Cover with a small bowl to prevent the garlic from drying out while you prepare other ingredients.
Phase 3: Building the Perfect Aioli Base (8 minutes)
Step 9: Start with Mayonnaise Foundation Place your measured mayonnaise in the prepared mixing bowl. Using a whisk, stir it gently to loosen the texture. This initial stirring makes it easier to incorporate other ingredients smoothly. The mayonnaise should look creamy and uniform before adding anything else.
Step 10: Add Lemon Juice Gradually Pour half the lemon juice into the mayonnaise while whisking constantly in a circular motion. The mixture will thin slightly and become more fluid. Add the remaining lemon juice and continue whisking until completely smooth. This gradual addition prevents the mixture from becoming too thin too quickly.
Step 11: Incorporate Garlic Paste Slowly Add your prepared garlic paste one spoonful at a time while whisking vigorously. Each addition should be completely blended before adding more. This method ensures even distribution and prevents clumps of garlic from forming in your aioli sauce for fries. The mixture should remain smooth throughout this process.
Step 12: Master the Olive Oil Emulsion Begin adding olive oil drop by drop while whisking continuously. This is the most critical step for texture. After adding about half the oil and the mixture thickens slightly, you can add the remaining oil in a thin, steady stream while whisking. Stop immediately if you notice any separation or curdling.
Step 13: Add Dijon Mustard for Stability Whisk in the Dijon mustard until completely incorporated. The mustard acts as an emulsifier, helping bind all ingredients together while adding a subtle tangy depth. Your aioli should now have a pale yellow color and creamy consistency that coats the whisk nicely.
Phase 4: Seasoning and Final Adjustments (5 minutes)
Step 14: Season with Salt Carefully Start with just 1/4 teaspoon of salt, whisking it in completely before tasting. Salt enhances all the other flavors in your aioli sauce for fries, but too much can overpower the delicate garlic and lemon balance. Add more gradually if needed, remembering that fries will add some saltiness when served.
Step 15: Add Black Pepper for Warmth Use freshly ground black pepper for the best flavor impact. Add it gradually while whisking, then taste. The pepper should provide a gentle warmth that complements the garlic without overwhelming it. Pre-ground pepper works but won’t deliver the same aromatic punch.
Step 16: Fold in Fresh Herbs Add chopped parsley using a folding motion rather than vigorous whisking. This gentle incorporation preserves the herb’s bright green color and prevents bruising. The parsley adds freshness and visual appeal that makes your finished aioli more appetizing.
Step 17: Perform Final Taste Test Taste your aioli using a clean spoon and evaluate the flavor balance. It should taste creamy and rich with prominent garlic flavor, bright acidity from lemon, and subtle herb notes. Remember that the flavors will meld and intensify as the aioli rests.
Step 18: Adjust Consistency for Perfect Dipping Your finished aioli sauce for fries should coat a spoon but drip off slowly when lifted. If too thick, whisk in lemon juice or warm water one teaspoon at a time. If too thin, whisk in additional mayonnaise until you achieve the perfect dipping consistency.
Step 19: Final Quality Check Look for a smooth, uniform texture without any lumps or separation. The color should be pale cream with flecks of green herbs and tiny bits of garlic. The aroma should be fresh and garlicky without being overwhelming.
Step 20: Proper Storage Preparation Transfer your completed aioli to a clean container with a tight-fitting lid. Press plastic wrap directly onto the surface to prevent air exposure, which can cause darkening. This aioli sauce for fries will keep refrigerated for up to 5 days and actually improves in flavor after a few hours of resting.
Chef’s Professional Notes for Perfect Aioli
Temperature Control: Room temperature ingredients are crucial for success. Cold mayonnaise can cause separation, while warm ingredients can break the emulsion. Plan ahead and remove ingredients from the refrigerator 30 minutes before starting your aioli sauce for fries.
Garlic Preparation Secrets: For milder garlic flavor, blanch whole cloves in boiling water for 2 minutes before mincing. For stronger flavor, let the minced garlic sit with salt for 10 minutes before adding to create a more intense paste.
Emulsion Recovery: If your aioli breaks or separates, don’t panic. Start fresh with 1 tablespoon of mayonnaise in a clean bowl and slowly whisk in the broken mixture until it comes back together.
Flavor Development: This aioli sauce for fries tastes better after resting for 2-4 hours. The flavors marry and develop complexity that fresh aioli cannot match, making patience a key ingredient in this recipe.
Nutrition Information (Per Serving)
- Calories: 185
- Protein: 1g
- Carbohydrates: 2g
- Fat: 20g
- Sodium: 320mg
- Fiber: 0g
Creative Variations for Your Aioli Sauce
Spicy Chipotle Aioli for Fries
Transform your basic recipe by adding 1-2 minced chipotle peppers in adobo sauce. This smoky, spicy variation pairs perfectly with sweet potato fries and adds exciting heat that complements the creamy base.
Mediterranean Herb Version
Enhance your aioli sauce for fries with 1 tablespoon each of fresh oregano, basil, and thyme. This herb-packed variation works beautifully with our cheese sauce for broccoli when creating an appetizer platter.
Lemon-Dill Aioli
Double the lemon juice and add 2 tablespoons of fresh chopped dill for a bright, tangy version that’s perfect for fish and chips or roasted vegetable fries.
Roasted Garlic Luxury Version
Replace raw garlic with 6 cloves of roasted garlic for a sweeter, mellower flavor. This elegant variation pairs wonderfully with gourmet dishes and even complements fruity sauces like our rhubarb sauce in diverse appetizer spreads.
Storage & Serving Guidelines
Proper Refrigeration: Store your aioli sauce for fries in an airtight glass container for up to 5 days. Glass doesn’t absorb flavors like plastic can, keeping your aioli tasting fresh longer.
Optimal Serving Temperature: Remove from refrigerator 15-20 minutes before serving. Room temperature aioli has better flavor and consistency than cold aioli straight from the fridge.
Portion Control: Divide into smaller containers to avoid repeatedly exposing the entire batch to air and potential contamination from double-dipping.
Make-Ahead Strategy: Prepare this aioli sauce up to 2 days in advance for best flavor development. The garlic mellows slightly while other flavors intensify, creating perfect balance.
Troubleshooting Your Aioli Sauce for Fries
Problem: Mixture Separates During Preparation
Detailed Solution: Stop adding oil immediately. Start over with 1 tablespoon fresh mayonnaise in a clean bowl. Slowly whisk the separated mixture back in, drop by drop at first, then in a thin stream. The emulsion should rebuild gradually.
Problem: Aioli Too Thick for Dipping
Step-by-Step Fix: Add liquid gradually – start with 1 teaspoon of lemon juice, whisking thoroughly. If still too thick, add warm water 1/2 teaspoon at a time until you achieve proper dipping consistency.
Problem: Overwhelming Garlic Flavor
Recovery Method: Balance with additional mayonnaise (2-3 tablespoons) and extra lemon juice (1 teaspoon). Taste between additions. You can also add a pinch of sugar to mellow harsh garlic notes.
Problem: Bland or Flat Tasting Aioli
Enhancement Technique: Your aioli needs more acid. Add lemon juice gradually, 1/2 teaspoon at a time, whisking and tasting. Sometimes a pinch of salt is all that’s needed to brighten all flavors.
Problem: Lumpy Texture from Garlic Pieces
Smooth Solution: Strain the aioli through a fine-mesh sieve, pressing solids with a spoon. This removes large garlic pieces while keeping the flavor. For future batches, mince garlic more finely or use a garlic press.
Essential Equipment for Success
- Medium mixing bowl (2-quart capacity, glass or stainless steel)
- Wire whisk or electric hand mixer for emulsification
- Sharp chef’s knife (8-inch preferred for garlic work)
- Stable cutting board (wood or plastic, designated for garlic)
- Measuring cups and spoons (both dry and liquid measures)
- Fine-mesh strainer (for lemon juice and troubleshooting)
- Airtight storage containers with tight-fitting lids
Complete Shopping List by Store Section
Refrigerated Section
- Mayonnaise (32 oz jar, full-fat variety for best results)
Fresh Produce Department
- Fresh garlic (1 whole head, choose firm bulbs)
- Fresh lemons (3 medium for juice plus backup)
- Fresh parsley (1 bunch, flat-leaf preferred)
Pantry/Condiment Aisle
- Extra virgin olive oil (small bottle, cold-pressed quality)
- Dijon mustard (smooth variety, not whole grain)
- Sea salt (fine grain for easy dissolution)
- Whole black peppercorns (for fresh grinding)
Professional Success Secrets
- Temperature Timing: All ingredients should reach room temperature naturally. Avoid microwaving cold mayonnaise as this can change its texture and make emulsification more difficult for your aioli sauce for fries.
- Garlic Processing: Create the smoothest garlic paste by mashing with salt using your knife’s flat side. This technique releases more oils than simple mincing, creating deeper flavor integration throughout the aioli.
- Oil Addition Mastery: The key to perfect emulsification is patience. Add oil slower than you think necessary – the mixture should never lose its creamy appearance during oil incorporation.
- Flavor Timing: Make your aioli sauce for fries at least 2 hours before serving. This resting period allows harsh garlic notes to mellow while other flavors intensify and marry together.
- Quality Control: Always taste with a clean utensil to avoid contamination. Your finished aioli should taste slightly more intense than desired since the fries will dilute the flavor when dipped.