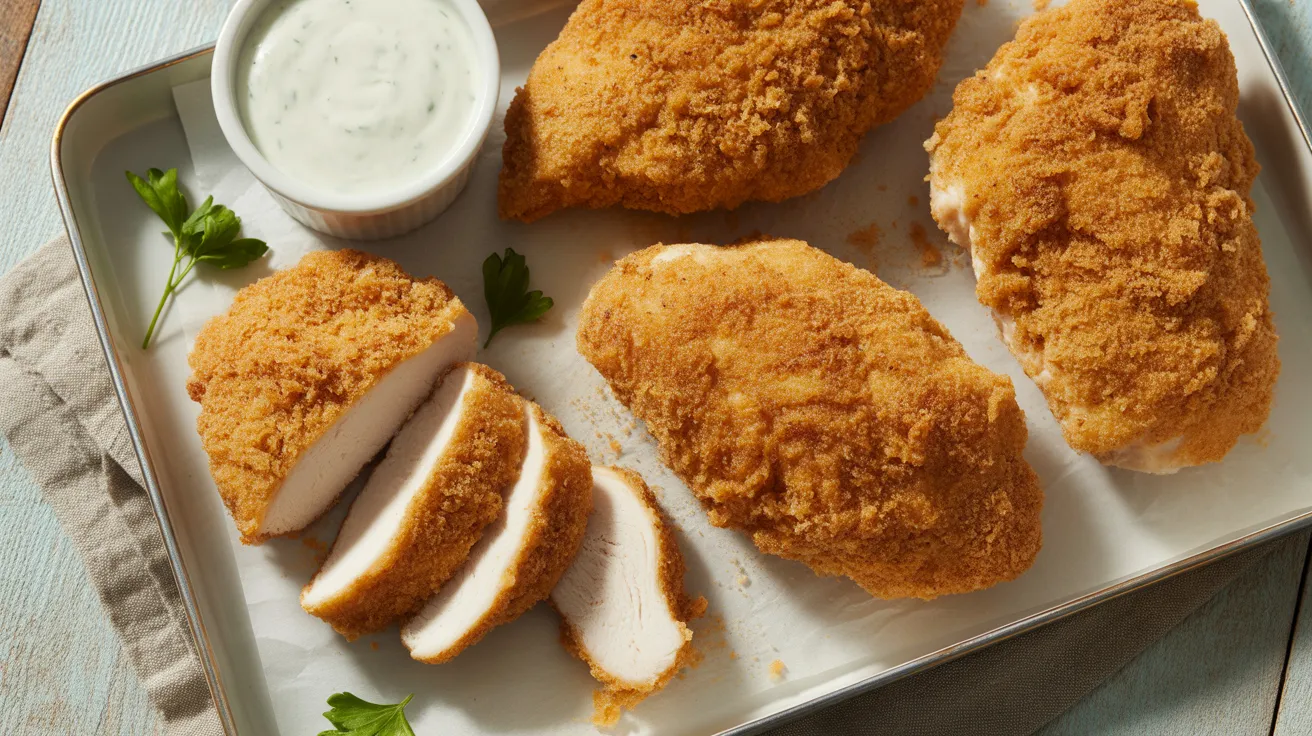
This air fryer breaded chicken breast recipe delivers golden, crunchy chicken every single time. If you’ve been searching for the perfect air fryer breaded chicken breast, you just found it — juicy inside, crispy outside, and ready in under 30 minutes.
SERVES: 4 | PREP: 15 MIN | COOK: 18 MIN | TOTAL: 33 MIN
What You Need for Air Fryer Breaded Chicken Breast
Chicken
| Ingredient | Amount |
|---|---|
| Boneless, skinless chicken breasts | 4 medium (about 6 oz each) |
Breading Station
| Ingredient | Amount |
|---|---|
| All-purpose flour | ½ cup |
| Eggs, large | 2 |
| Milk | 2 tablespoons |
| Plain breadcrumbs | 1 cup |
| Parmesan cheese, finely grated | ¼ cup |
| Garlic powder | 1 teaspoon |
| Onion powder | 1 teaspoon |
| Smoked paprika | 1 teaspoon |
| Salt | 1 teaspoon |
| Black pepper | ½ teaspoon |
For Cooking
| Ingredient | Amount |
|---|---|
| Olive oil spray | As needed |
Step-by-Step Instructions
Phase 1: Prepare Your Chicken
Step 1: Pound the Chicken to Even Thickness
Place one chicken breast inside a zip-lock bag or between two sheets of plastic wrap. Use a meat mallet or the bottom of a heavy pan to pound the thick end down until the breast is an even ¾-inch thickness throughout.
This step matters a lot. Uneven chicken means the thin parts overcook and dry out before the thick parts are done. Even thickness = perfectly cooked chicken every time. Repeat with all four breasts.
Step 2: Pat the Chicken Completely Dry
Use paper towels to pat all surfaces of each chicken breast until they feel dry to the touch. Press firmly on both sides and along the edges.
Wet chicken is the enemy of crispy breading. Moisture creates steam in the air fryer, and steam makes breading soggy. Dry chicken lets the flour grip the surface and starts the crisping process.
Step 3: Season the Chicken Directly
Sprinkle a light pinch of salt and black pepper directly on both sides of each chicken breast. Set them aside on a plate while you set up your breading station.
Phase 2: Set Up the Breading Station
Step 4: Arrange Three Shallow Dishes
Grab three wide, shallow bowls or plates. Line them up in order from left to right. This assembly line approach keeps your hands cleaner and the breading process moving smoothly.
Step 5: Fill Dish 1 — The Flour
Pour ½ cup of all-purpose flour into the first dish. Season it with a small pinch of salt and pepper. Stir with a fork to combine. The flour creates the sticky base that helps everything else stick to the chicken.
Step 6: Fill Dish 2 — The Egg Wash
Crack 2 large eggs into the second dish. Add 2 tablespoons of milk. Beat with a fork until the yolk and white are fully combined and no streaks remain. The egg wash acts like glue between the flour and the breadcrumbs.
Step 7: Fill Dish 3 — The Seasoned Breadcrumbs
Add 1 cup of plain breadcrumbs to the third dish. Pour in ¼ cup of finely grated Parmesan cheese, 1 teaspoon each of garlic powder, onion powder, and smoked paprika. Add ½ teaspoon of black pepper. Stir everything together until the spices are evenly distributed throughout the breadcrumbs.
The Parmesan adds a salty, nutty flavor and helps the coating turn deeply golden. Don’t skip it.
Phase 3: Bread the Chicken
Step 8: Coat in Flour First
Pick up one chicken breast and lay it in the flour dish. Press it down firmly so flour coats the entire bottom surface. Flip it and press again on the other side. Lift it up and gently shake off any excess flour — you want a thin, even coat, not a thick clump.
⚠️ Safety Tip: Use one hand for the dry dishes (flour and breadcrumbs) and the other hand for the wet dish (egg). This prevents your fingers from getting clumped with breading.
Step 9: Dip in the Egg Wash
Move the floured chicken breast into the egg wash. Turn it over slowly, making sure the egg covers every part of the surface — including the sides and edges. Lift it out and let the excess egg drip back into the bowl for about 5 seconds.
Step 10: Press into the Breadcrumbs
Lay the egg-coated breast into the breadcrumb dish. Press down firmly with your fingers. Flip it over and press again on the other side. Use your fingers to press crumbs onto any bare spots on the edges.
Good pressure here is important. The harder you press, the better the crumbs stick and the crispier your crust will be. Set the coated breast on a clean plate. Repeat Steps 8–10 with the remaining three chicken breasts.
Step 11: Let the Breading Rest (Optional But Helpful)
Set the breaded chicken breasts aside for 5 minutes before air frying. This rest time lets the coating bond to the chicken, which helps it stay intact during cooking instead of flaking off.
Phase 4: Air Fry the Chicken
Step 12: Preheat Your Air Fryer
Set your air fryer to 400°F (200°C). Let it preheat for 3 minutes before adding any food. A hot air fryer creates an immediate sear on the breading that locks in the crunch.
Step 13: Spray the Basket and Chicken
Lightly spray the air fryer basket with olive oil spray. Place the breaded chicken breasts in a single layer inside the basket. Make sure they are not touching each other — air needs to circulate all the way around each piece.
Spray the tops of the chicken breasts generously with olive oil spray. This oil helps the breadcrumbs brown and crisp properly. Without it, the crumbs can come out pale and powdery.
Step 14: Air Fry the First Side
Cook at 400°F for 9 minutes without opening the basket. Resist the urge to peek — every time you open the air fryer, heat escapes and slows down the cooking.
Step 15: Flip and Spray Again
At the 9-minute mark, open the basket and use tongs to carefully flip each chicken breast. Spray the newly exposed tops with another coat of olive oil spray. Return the basket and cook for another 7–9 minutes.
Step 16: Check for Doneness
The breaded chicken breast is done when the coating is deep golden brown and an instant-read thermometer inserted into the thickest part of the breast reads 165°F (74°C). This is the USDA safe internal temperature for poultry — never skip this check.
If your chicken is golden on the outside but hasn’t reached 165°F yet, cook in 2-minute increments and check again each time.
Step 17: Rest Before Cutting
Transfer the cooked chicken to a clean cutting board or plate. Let it rest for 3–5 minutes before slicing or serving. Resting allows the juices to redistribute through the meat. Cut it too soon and all those delicious juices run out onto the plate instead of staying in the chicken.
Chef’s Notes
Tip 1 — Breadcrumb Choice Matters Plain breadcrumbs give the most control over seasoning. If you use Italian-seasoned breadcrumbs, skip the garlic powder and onion powder in the recipe or your air fryer breaded chicken breast will taste overly salty.
Tip 2 — Don’t Crowd the Basket If your air fryer is on the smaller side, cook two breasts at a time rather than squeezing all four in. Overcrowding blocks airflow and you’ll end up with steamed, not crispy, chicken.
Tip 3 — Panko for Extra Crunch Swap plain breadcrumbs for panko breadcrumbs if you want an even crunchier crust. Panko is coarser and creates a more dramatic, shaggy texture that’s absolutely satisfying to bite into.
Tip 4 — Flatten Thicker Breasts More If your chicken breasts are very large (8 oz or more), pound them thinner — closer to ½ inch. Larger breasts need more time to cook through, and the breading can burn before the inside reaches 165°F.
Nutrition Information (Per Serving)
| Nutrient | Amount |
|---|---|
| Calories | 385 |
| Protein | 42g |
| Carbohydrates | 24g |
| Fat | 12g |
| Saturated Fat | 3g |
| Fiber | 1g |
| Sodium | 620mg |
Nutrition estimates are based on one chicken breast with standard breading. Actual values may vary based on the exact size of your chicken and brands used.
Recipe Variations
1. Spicy Breaded Chicken
Add 1 teaspoon of cayenne pepper and 1 teaspoon of chili powder to the breadcrumb mixture. The heat level builds slowly with every bite. Serve with a cooling ranch dip on the side.
2. Herb-Crusted Version
Stir 1 tablespoon of dried Italian herbs (basil, oregano, thyme) and an extra 2 tablespoons of Parmesan into the breadcrumbs. This version pairs beautifully over pasta with marinara sauce. If you love bold-flavored air fryer chicken, you’ll also enjoy this Air Fryer Chicken 65 that packs incredible spice.
3. Lemon Pepper Breaded Chicken
Replace the smoked paprika with 1 teaspoon of lemon pepper seasoning and add the zest of one lemon to the breadcrumb mixture. Bright, fresh, and perfect with a light salad.
4. Buttermilk-Soaked Version
Soak the pounded chicken breasts in 1 cup of buttermilk for 30 minutes before breading. The buttermilk breaks down the proteins slightly, resulting in the most tender, juicy chicken imaginable. This technique is especially helpful if you’re cooking larger, thicker breasts. For another crowd-pleasing option, check out this Air Fryer Bang Bang Chicken with its irresistible sweet-heat sauce.
Storage and Reheating
Refrigerator Storage Let the cooked chicken cool completely to room temperature — about 20 minutes. Store in an airtight container in the refrigerator for up to 4 days.
Freezer Storage Wrap each cooled chicken breast individually in plastic wrap, then place all of them in a zip-lock freezer bag. Freeze for up to 3 months. Label the bag with the date so you know when to use them by.
Reheating in the Air Fryer (Best Method) Place refrigerated chicken in the air fryer basket at 375°F for 4–5 minutes, flipping once halfway through. This restores the crunch far better than a microwave.
Reheating from Frozen Add frozen breaded chicken directly to the air fryer at 375°F for 10–12 minutes, flipping at the halfway point. No need to thaw first.
Microwave (Last Resort) The microwave works in a pinch but softens the breading. Heat on medium power for 1–2 minutes. Place the chicken on a paper towel to absorb steam while it heats.
Troubleshooting
Problem 1: The Breading Falls Off During Cooking This almost always happens because the chicken was wet before breading, or the breading didn’t get enough resting time before cooking. Next time, pat the chicken completely dry (Step 2), and rest the breaded chicken for 5 minutes before air frying (Step 11). Also make sure you’re pressing the breadcrumbs firmly into every surface.
Problem 2: The Chicken Is Pale and Not Crispy You likely didn’t spray enough olive oil on the breading before cooking, or your air fryer wasn’t preheated. Oil is essential for browning. Spray generously on both the basket and the tops of the chicken, and always preheat your air fryer for at least 3 minutes first.
Problem 3: The Outside Is Browned But the Inside Is Raw This means your chicken breasts were too thick and didn’t cook all the way through before the coating darkened. Pound your chicken to an even ¾-inch thickness next time. For this batch, lower the air fryer temperature to 350°F and cook in 3-minute increments until the internal temperature reaches 165°F.
Problem 4: The Breading Is Too Thick and Clumpy You’re probably using too much flour in Step 8. Shake off excess flour aggressively before dipping in the egg. Clumpy flour leads to uneven, thick coating that doesn’t cook properly and can taste doughy.
Problem 5: The Chicken Turned Out Dry Overcooking is the main culprit. Always check the internal temperature at the minimum cook time (16 minutes total). Pull the chicken the moment it hits 165°F — even one or two minutes over that mark can dry out leaner chicken breasts. Pounding to even thickness (Step 1) also prevents the thinner parts from drying out while waiting for the thick parts to cook through.
Equipment Essentials

- Air fryer (basket-style or oven-style both work)
- Meat mallet or heavy skillet (for pounding chicken)
- Three shallow bowls or plates (for the breading station)
- Tongs (for flipping chicken safely)
- Instant-read meat thermometer (non-negotiable for food safety)
- Olive oil spray bottle (pump-style or aerosol)
- Cutting board
- Zip-lock bags or plastic wrap (for pounding)
Shopping List
Meat & Dairy
- 4 boneless, skinless chicken breasts (about 6 oz each)
- 2 large eggs
- Parmesan cheese (block or pre-grated)
- Milk
Pantry
- All-purpose flour
- Plain breadcrumbs (or panko)
- Olive oil spray
- Garlic powder
- Onion powder
- Smoked paprika
- Salt
- Black pepper
5 Success Secrets for Perfect Air Fryer Breaded Chicken Breast
1. Pound Every Time, No Exceptions Skipping this step is the single biggest mistake home cooks make. Uneven thickness is the root cause of dry chicken, undercooked centers, and uneven browning. Two minutes of pounding saves the entire dish.
2. Use the Three-Bowl System and Keep Hands Separated Keep one hand for dry dishes and one for wet. This sounds like a small thing, but it prevents clumped, messy fingers and produces far cleaner, more even breading results.
3. Press Hard When Breading Light patting won’t cut it. Use firm, deliberate pressure when pressing the chicken into the breadcrumbs. Work the crumbs into every edge and corner. The more surface contact, the crispier the crust.
4. Never Skip the Oil Spray An air fryer uses hot circulating air — not oil — to cook. But the breading still needs oil to achieve that golden, crunchy crust. A generous spray of olive oil on both sides is what separates great air fryer breaded chicken breast from mediocre results.
5. Always Verify with a Thermometer Every air fryer runs slightly differently. Cook times in recipes are guidelines, not guarantees. An instant-read thermometer takes 3 seconds and is the only reliable way to know your chicken is safely cooked and still juicy at exactly 165°F.
Happy cooking! Share your results — there’s nothing better than hearing about a perfectly crispy air fryer breaded chicken breast coming out of someone’s kitchen for the first time.